
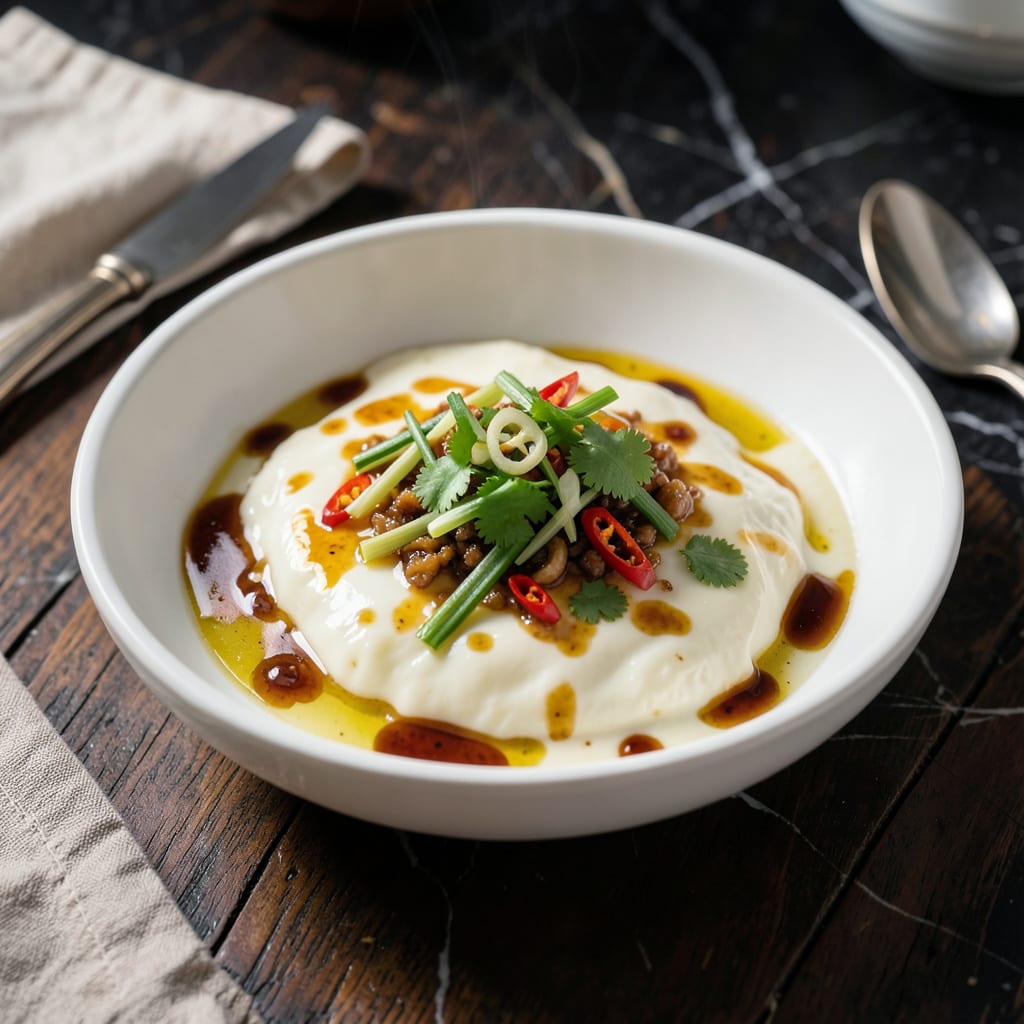
This Thai steamed egg dish delivers a silky custard texture infused with aromatic herbs. A traditional method transforms simple ingredients into something extraordinary.
The gentle steaming process creates a velvety finish, while fresh herbs add layers of authentic flavor. Perfect as a light main course or elegant side.
Ingredients for Thai Steamed Egg
Simple, authentic ingredients create a silky, aromatic Thai custard dish with ease.
| Ingredient | Amount | Notes |
|---|---|---|
| Large Eggs 🥚 | 6 whole | Room temperature preferred |
| Water 💧 | 2 cups | For steaming base |
| Fish Sauce 🐟 | 2 tbsp | Thai variety preferred |
| Soy Sauce 🥢 | 1 tbsp | Light or all-purpose |
| Fresh Cilantro 🌿 | ½ cup | Chopped, stems removed |
| Green Onions 🧅 | 4 whole | Thinly sliced, white and green parts |
| Garlic Cloves 🧄 | 3 cloves | Minced finely |
| Fresh Thai Chili Peppers 🌶️ | 2 whole | Sliced thin, seeds optional |
| Vegetable Oil 🫒 | 1 tsp | For greasing ramekins |
| Lime Leaves 🍃 | 4 whole | Kaffir lime if available |
| Ground White Pepper 🧂 | ½ tsp | Freshly ground preferred |
| Granulated Sugar 🍚 | ½ tsp | Balances saltiness |
| Chicken Stock 🍲 | ½ cup | Low-sodium preferred |
The eggs are the foundation here. Room temperature eggs whip to a smoother consistency, which is critical for that signature velvety texture. For fish sauce, Red Boat or Thai Kitchen brands offer authentic flavor without additives. Fresh herbs are non-negotiable—cilantro and Thai chilies should be vibrant, not wilted. Most Asian markets stock kaffir lime leaves, but regular lime zest works in a pinch.
No fish sauce? Extra soy sauce plus a dash of lime juice gets you 80% there. Green onions can be swapped for chives (use double the amount). If Thai chilies are too spicy, serrano or jalapeño peppers work well—adjust seeds for heat. The chicken stock can be vegetable stock for a lighter version. For a richer custard, some cooks add a splash of coconut milk to the egg mixture.
Steamed egg custard keeps in the fridge for 2-3 days, though it’s best served fresh. Reheat gently in a steamer to maintain the silky texture. The aroma intensifies after 24 hours, so don’t be afraid of leftovers. Freezing isn’t recommended—it alters the delicate texture.
Why You’ll Love This Recipe
- One-Bowl Wonder: I just crack eggs, add water and sauces, then steam—no fancy prep or multiple dishes to wash.
- Umami Bomb: The fish sauce and soy sauce mix creates a savory depth that makes every bite ridiculously good.
- Breakfast or Dinner: Honestly, I serve this for breakfast with toast or as a light dinner with rice and veggies.
- Pennies Per Serving: Between us, four eggs and a handful of pantry staples feed my family for less than a fiver.
Step-by-Step Instructions for Thai Steamed Egg
Master this technique for a custard so smooth it quivers like silk on the spoon.
Step 1: Prepare the Aromatic Base
Finely mince the 3 cloves garlic cloves and thinly slice the 4 whole green onions and 2 whole fresh Thai chili peppers. I prefer to keep the chili seeds for heat, but remove them if you want a milder dish.
Chop the 0.5 cup fresh cilantro, removing any tough stems. In a small bowl, combine the 2 tbsp fish sauce, 1 tbsp soy sauce, 0.5 tsp granulated sugar, and 0.5 tsp ground white pepper. This sauce will infuse the custard with deep umami flavor.
Step 2: Blend and Strain the Egg Mixture
Crack all 6 whole large eggs into a blender. Add the 0.5 cup chicken stock and the prepared sauce mixture. Blend on high for 30 seconds until completely smooth and frothy.
Strain the mixture through a fine-mesh sieve into a pitcher. This step removes any lumps and aerates the eggs, which is crucial for achieving that ultra-silky texture. The strained liquid should look like thin cream.
Step 3: Prepare Steamer and Ramekins
Pour the 2 cups water into a wide pot with a steamer basket. Bring to a boil, then reduce to a gentle simmer. While heating, lightly grease four ramekins with the 1 tsp vegetable oil to prevent sticking.
Place 1 lime leaf at the bottom of each ramekin. This will infuse the custard with a subtle citrus aroma as it steams. Divide the egg mixture evenly among the ramekins, filling each about three-quarters full.
Step 4: Steam to Perfection
Carefully place the ramekins in the steamer basket, ensuring they’re level. Cover with a tight-fitting lid and steam over medium-low heat for 15-18 minutes. The custard is done when the edges are set but the center still has a slight wobble.
Avoid lifting the lid during steaming, as the sudden temperature change can cause the custards to deflate. The surface should look glossy with no visible liquid egg when properly cooked.
Step 5: Garnish and Serve
Remove the ramekins from the steamer and let them rest for 2 minutes. This brief rest allows the custard to fully set. Top each with a sprinkle of the sliced green onions, chili peppers, and cilantro.
Serve immediately while warm. The texture should be tender enough to tremble with each spoonful, yet hold its shape. The aromatic herbs and lime leaves create a fragrant contrast to the rich, savory custard.
Pro Tips For Making Thai Steamed Egg
- Steam on Low Heat: I learned this the hard way—boiling water ruins the texture. Keep the heat low and steady for silky, custard-like eggs.
- Whisk the Eggs Well: Beat the eggs and water vigorously for at least 2 minutes until fully combined and frothy. This prevents layering and gives a uniform, smooth finish.
- Skip Over-Salting: Fish sauce and soy sauce are already salty, so go easy. Start with 1 teaspoon of each, then adjust after steaming.
- Add Cilantro Last: Fresh cilantro loses its brightness if cooked too long. Sprinkle it on top just before serving for a pop of color and freshness.
Troubleshooting Perfect Results
Overcooked Custard
If your custard turns rubbery, it likely steamed too long. Check at 15 minutes—the center should still jiggle slightly. Remove immediately when edges are set but the middle remains soft. Overcooking causes proteins to tighten, ruining that silky texture. 💡
Watery Texture
Watery results usually mean under-mixing or insufficient blending. Ensure you blend the egg mixture for 30 seconds until completely smooth and frothy. Straining through a fine-mesh sieve also removes lumps and air bubbles that can cause separation.
Deflated Custard
Avoid opening the steamer lid during cooking. The sudden temperature drop causes the air bubbles to collapse, making your custard sink. Keep the lid on until the full 15-18 minutes have passed. Steady heat is key to maintaining that perfect rise.
Sticking to Ramekins
Even with oil, custards can stick. Use 1 tsp vegetable oil to thoroughly grease each ramekin, including the sides. Let them sit for 2 minutes before serving—this helps the custard release cleanly. Non-stick ramekins work even better.
Uneven Cooking
If some ramekins cook faster than others, rotate them halfway through steaming. Ensure your steamer basket is level and the water maintains a gentle simmer. A wide pot with a tight-fitting lid distributes heat more evenly.
Bland Flavor
If your custard lacks depth, check your fish sauce quality. I recommend Red Boat or Thai Kitchen brands. Also, don’t skip the 0.5 tsp sugar—it balances the saltiness and enhances the aromatic herbs. Fresh lime leaves add a citrus note that brightens the dish. 🌟
Nutrition Facts
Frequently Asked Questions
Why do my eggs turn rubbery?
Overcooking is the main culprit. Steam for only 15-18 minutes until edges set but center still jiggles. Remove immediately to prevent proteins from tightening.
Can I make this without a steamer basket?
Yes! Use a heatproof plate elevated above 2 cups simmering water in a deep pot. Ensure the plate is stable and water doesn’t touch the ramekins.
What can I substitute for fish sauce?
Use 1 extra tbsp soy sauce plus 1 tsp lime juice for similar umami depth. For less sodium, coconut aminos work but add a pinch of salt.
How do I prevent sticking?
Grease ramekins thoroughly with 1 tsp oil, including sides. Let custards rest 2 minutes before unmolding. Non-stick ramekins help too.

- 6 Egg Cake Recipe with Oil: Light as Air With Buttery Moisture - October 4, 2026
- 4 Bean Casserole Recipe: One-Pan Heartiness With Smoky Paprika Depth - October 4, 2026
- 3-Ingredient Keto Mug Cake Recipe: Microwave Magic in 2 Minutes - October 4, 2026