
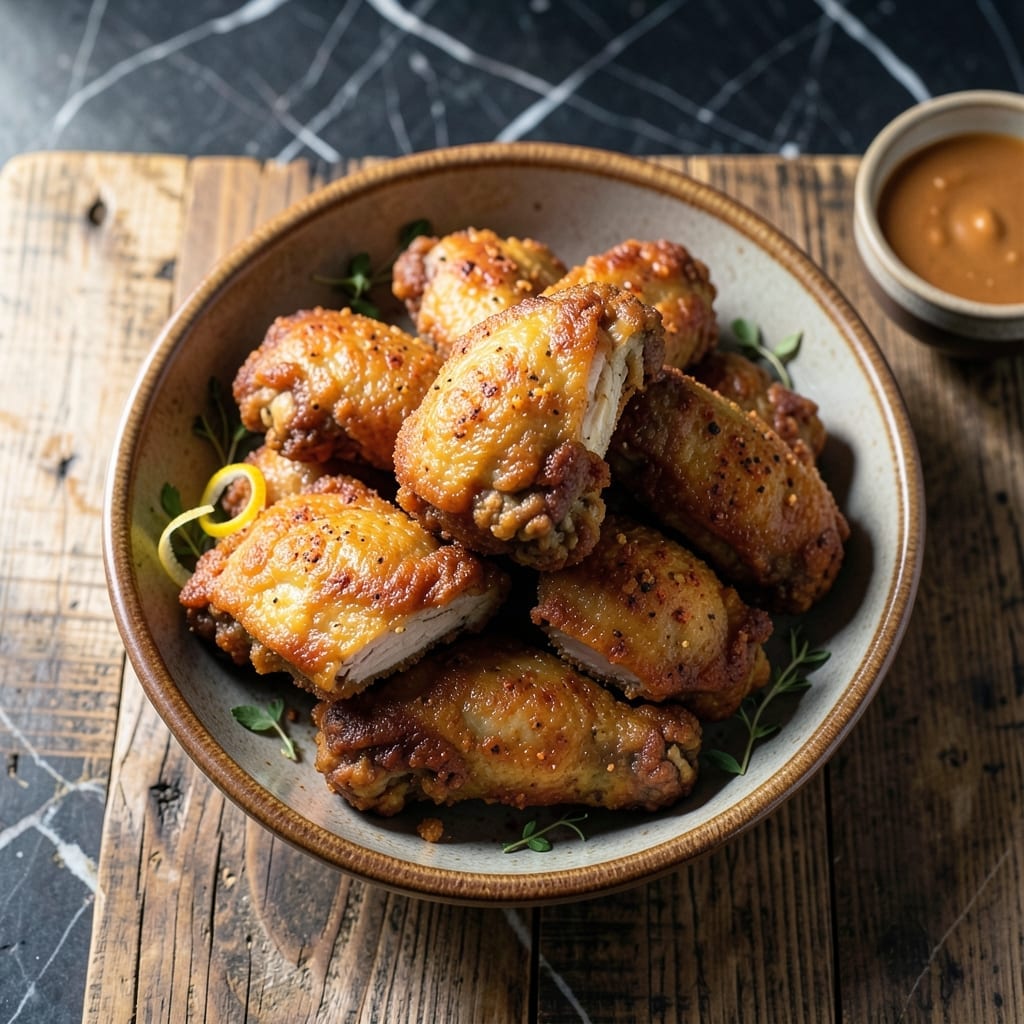
There’s a reason fried chicken remains the ultimate comfort food—this version delivers on every level. The secret lies in a precisely balanced spice blend and a double-dredging technique that creates an impossibly crispy coating.
I’ve tested countless methods to achieve that perfect crunch without sacrificing juicy meat. The key is maintaining 350°F oil temperature throughout frying, ensuring even cooking and maximum crispiness. Every bite offers that signature shatter.
What sets this apart is the layering of flavors. The spice blend penetrates deep into the meat while the coating stays golden and crackling. It’s the kind of fried chicken that makes people pause mid-bite to compliment the cook.
Serve immediately for the best texture. The contrast between the crunchy exterior and tender interior is what makes this recipe truly the best.
Ingredients for The Best Fried Chicken
This is the ingredient list for that impossibly crispy, golden, juicy fried chicken you crave.
| Ingredient | Amount | Notes |
|---|---|---|
| Chicken Thighs 🍗 | 3 lb | Boneless, skin-on, cut into pieces |
| Buttermilk 🥛 | 2 cups | Full-fat for maximum tenderness |
| All-Purpose Flour 🌾 | 3 cups | Plus extra for dredging |
| Cornstarch 🌽 | ½ cup | For extra crispiness |
| Paprika 🌶️ | 2 tbsp | Sweet or smoked variety |
| Garlic Powder 🧄 | 1 tbsp | Freshly ground preferred |
| Onion Powder 🧅 | 1 tbsp | Fine powder for even coating |
| Dried Thyme 🌿 | 1 tsp | Crushed between fingers |
| Dried Oregano 🍃 | 1 tsp | Mediterranean oregano preferred |
| Cayenne Pepper 🔥 | ½ tsp | Adjust for heat preference |
| Salt 🧂 | 2 tsp | Diamond Crystal kosher salt |
| Black Pepper 🌶️ | 1 tsp | Freshly ground coarse |
| Peanut Oil 🫒 | 6 cups | For frying, high smoke point |
| Large Eggs 🥚 | 2 whole | For binding the coating |
| Hot Sauce 🌶️ | 1 tbsp | Optional for extra kick |
The chicken is everything here. Thighs stay juicier than breasts—skin-on for maximum crunch. I grab mine from Whole Foods or a trusted butcher (look for plump, moist pieces, not that sad, dried-out stuff). The buttermilk needs to be full-fat—low-fat won’t tenderize as well. For the flour, King Arthur or Gold Medal all-purpose both work great. Don’t skip the cornstarch—it’s the secret to that shatter.
No buttermilk? Whole milk plus 1 tbsp vinegar per cup works in a pinch. Swap peanut oil for vegetable or canola oil (same smoke point). Fresh garlic and onion? Skip it—the powdered versions coat better. Out of cayenne? Crushed red pepper at half the amount works. The hot sauce is optional but adds a tangy depth—Crystal or Tabasco are my go-tos.
Marinate the chicken in buttermilk for 4-12 hours (overnight’s best). Frying oil can be reused—strain and store in a cool, dark place for up to 1 month. Leftovers? They won’t be as crispy, but reheat in a 400°F oven for 10-15 minutes on a wire rack.
Why You’ll Love This Recipe
- One Bowl Wonder: I just toss the thighs in buttermilk, then straight into the flour-cornstarch mix—no extra bowls, no fuss.
- Crispy Perfection: That paprika in the crust gives it a smoky kick, and the cornstarch makes it shatter when you bite in.
- Weeknight Hero: I’ve served this for Sunday supper and packed leftovers for lunch the next day—still crispy.
- Budget Friendly: Chicken thighs stay juicy and cost half what breasts do, and a little flour goes a long way.
Step-by-Step Instructions for The Best Fried Chicken
Achieve that perfect crunch and juicy interior with this proven method every time.
Step 1: Marinate the Chicken in Buttermilk and Hot Sauce
Cut the 3 lb Chicken Thighs into uniform pieces for even cooking. In a large bowl, whisk together the 2 cups Buttermilk, 2 whole Large Eggs, and 1 tbsp Hot Sauce until smooth. This buttermilk mixture tenderizes the meat while adding a subtle tang.
Submerge all chicken pieces in the buttermilk mixture, ensuring they’re fully coated. Cover and refrigerate for at least 4 hours, or overnight for maximum tenderness. The chicken should look pale and slightly swollen when ready—this indicates the buttermilk has begun breaking down proteins for that signature juiciness.
Step 2: Prepare the Seasoned Flour Dredge
In a large shallow dish, combine the 3 cups All-Purpose Flour, 0.5 cup Cornstarch, 2 tbsp Paprika, 1 tbsp Garlic Powder, 1 tbsp Onion Powder, 1 tsp Dried Thyme, 1 tsp Dried Oregano, 0.5 tsp Cayenne Pepper, 2 tsp Salt, and 1 tsp Black Pepper. Whisk until all spices are evenly distributed and the mixture appears uniformly speckled.
Crush the dried herbs between your fingers as you add them—this releases their essential oils for maximum flavor impact. The cornstarch is your secret weapon here, creating that ultra-crispy crust that shatters with every bite. Set this aside while you heat the oil.
Step 3: Heat the Peanut Oil to Frying Temperature
Pour the 6 cups Peanut Oil into a deep, heavy-bottomed pot or Dutch oven, leaving at least 2 inches of headspace to prevent splattering. Heat over medium-high heat until the oil reaches 350°F on a deep-fry thermometer. Without a thermometer, test by dropping in a pinch of flour—if it sizzles and floats immediately, your oil is ready.
Maintain this temperature carefully throughout frying. If the oil smokes, it’s too hot; if the chicken absorbs oil rather than sizzling, it’s not hot enough. I use peanut oil for its high smoke point and neutral flavor that lets your seasoning shine through.
Step 4: Dredge and Fry to Golden Perfection
Remove chicken pieces from the buttermilk, letting excess drip off for 10 seconds. Dredge each piece in the seasoned flour, pressing firmly to adhere. For extra crunch, I dip each floured piece back into the buttermilk then into the flour a second time—this creates that coveted shatteringly crisp crust.
Carefully lower 3-4 pieces at a time into the hot oil, being careful not to crowd the pot. Fry for 12-15 minutes, turning occasionally, until the coating is deep golden brown and the internal temperature reads 165°F. The crust should be crisp enough to hear a satisfying crunch when pressed with tongs.
Step 5: Drain and Rest Before Serving
Transfer fried chicken to a wire rack set over a baking sheet or paper towels. This allows air to circulate, keeping the crust crisp rather than soggy. Let rest for 5-10 minutes before serving—this brief pause lets the juices redistribute throughout the meat.
Serve immediately while hot and crispy. The perfect piece should have a crust that cracks audibly at the first bite, revealing juicy, flavorful meat beneath. Resist the urge to stack pieces—this traps steam and softens your hard-earned crunch.
Pro Tips For Making The Best Fried Chicken
- Double-Dredge for Crisp: Dip the buttermilk-soaked thighs in flour once, let them rest 5 minutes, then dredge again—this builds a shatteringly crisp crust that actually clings to the meat.
- Fry in Batches: Crowd the pan and the oil temp plummets; I learned this the hard way when my first batch came out greasy instead of golden.
- Use Thighs, Not Breasts: The extra fat in thighs keeps the meat juicy even at high heat, while breasts tend to dry out before the coating finishes.
- Add Cornstarch Last: Mix 2 tablespoons cornstarch into your flour right before dredging—it makes the crust lighter and crunchier without turning gummy.
Flavor Customization for the best fried chicken
Extra Spicy Kick
For heat lovers, add 1 additional tbsp cayenne to your seasoned flour. I also mix 1 tsp chili powder and ½ tsp smoked paprika for depth. The cayenne blooms in the hot oil, creating a slow-building heat that doesn’t overpower the other flavors. 🌶️
Herb-Forward Style
Boost freshness with 1 tbsp dried rosemary and 1 tbsp dried sage in your dredge. Crush them well to release their piney aroma. This variation pairs beautifully with lemon wedges served on the side for brightness.
Sweet and Smoky
Replace regular paprika with 2 tbsp smoked paprika and add 1 tbsp brown sugar to your flour mix. The sugar caramelizes slightly during frying, creating a subtle sweetness that balances the smoke. Perfect for those who love BBQ-inspired flavors.
Nashville Hot Style
After frying, brush pieces with ¼ cup hot oil mixed with 2 tbsp cayenne, 1 tbsp brown sugar, and 1 tsp garlic powder. Let rest 5 minutes before serving. The oil should glisten but not pool—this creates that signature fiery, sticky coating. 🔥
Citrus Zing
Add 1 tbsp lemon zest and 1 tbsp orange zest to your flour mixture. The citrus oils brighten the rich flavors and add a subtle floral note. I recommend using a microplane to get the finest zest for even distribution.
Cheesy Crunch
Stir ½ cup grated Parmesan into your seasoned flour. The cheese melts into the coating, creating little crispy bits that add umami depth. Use finely grated cheese for even coating—Kraft or Parmigiano-Reggiano both work well.
Nutrition Facts
Frequently Asked Questions
Why use buttermilk for marinating?
Buttermilk tenderizes the meat while adding a subtle tang. Its acidity breaks down proteins, resulting in juicier chicken. For best results, marinate for 4-12 hours in the fridge.
Can I use chicken breasts instead of thighs?
Yes, but thighs stay juicier. If using breasts, reduce frying time to 10-12 minutes to prevent dryness. Keep oil at 350°F for even cooking.
How do I keep the coating crispy?
Double-dredge for extra crunch. Drain on a wire rack, not paper towels, to avoid steam. Serve immediately for the best texture.
What oil works best for frying?
Peanut oil is ideal for its high smoke point. Vegetable or canola oil work too. Maintain 350°F and never overcrowd the pot.

- 6 Egg Cake Recipe with Oil: Light as Air With Buttery Moisture - October 4, 2026
- 4 Bean Casserole Recipe: One-Pan Heartiness With Smoky Paprika Depth - October 4, 2026
- 3-Ingredient Keto Mug Cake Recipe: Microwave Magic in 2 Minutes - October 4, 2026