
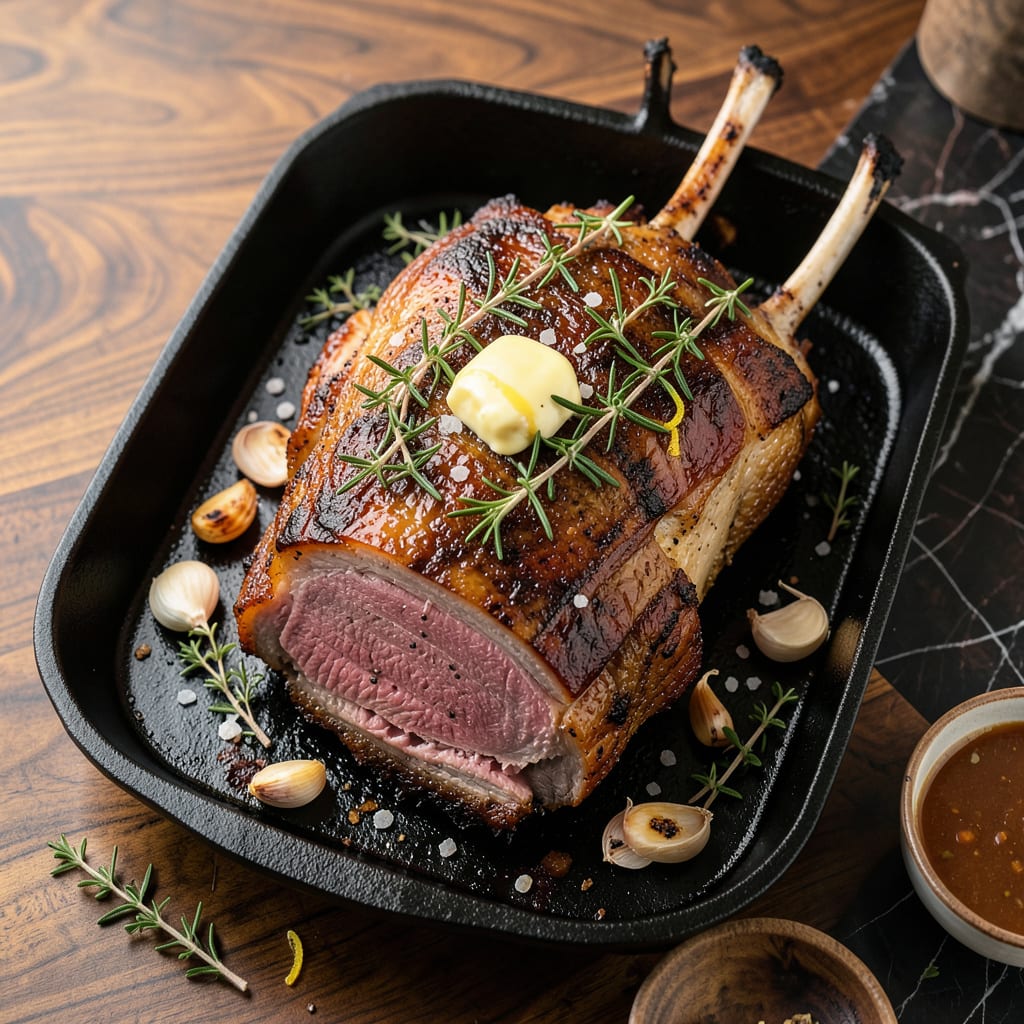
A perfectly cooked standing rib roast is the centerpiece of any special meal, delivering a tender, juicy interior with a flavorful crust every time. This method eliminates guesswork by focusing on precise temperature control and proper resting—key factors that separate good results from extraordinary ones.
What sets this recipe apart is the combination of a high-heat sear followed by gentle roasting at 250°F until reaching the ideal internal temperature. Whether you prefer rare or medium-rare, the technique ensures even cooking and a rosy pink center that’s worth the effort. No special equipment required—just a reliable meat thermometer and patience.
Ingredients for The Best Standing Rib Roast
Prime-grade beef and aromatic herbs form the foundation of this showstopping roast, ensuring exceptional flavor and texture.
| Ingredient | Amount | Notes |
|---|---|---|
| Bone-in Standing Rib Roast 🥩 | 7 lb | Prime grade preferred, 3-4 ribs |
| Kosher Salt 🧂 | 2 tbsp | Diamond Crystal preferred for even distribution |
| Coarsely Ground Black Pepper 🌶️ | 1 ½ tbsp | Freshly ground Tellicherry preferred |
| Fresh Rosemary Sprigs 🌿 | 4 whole | 6-inch lengths, woody stems removed |
| Fresh Thyme Sprigs 🍃 | 6 whole | French thyme preferred for delicate flavor |
| Garlic Cloves 🧄 | 6 cloves | Smashed but intact for infusion |
| Unsalted Butter 🧈 | 4 tbsp | European-style 82% fat preferred |
| Extra-Virgin Olive Oil 🫒 | 2 tbsp | High smoke point variety for searing |
| Dijon Mustard 🟡 | 2 tbsp | Whole grain for texture if preferred |
| Red Wine 🍷 | ½ cup | Dry Cabernet Sauvignon recommended |
| Beef Stock 🥩 | 1 cup | Low-sodium, high-quality preferred |
| Yellow Onion 🧅 | 1 whole | Quartered for aromatic base |
| Carrots 🥕 | 2 whole | Cut into 3-inch chunks |
| Celery Stalks 🌿 | 2 whole | Cut into 3-inch chunks |
The rib roast quality is paramount. Prime grade from a reputable butcher ensures optimal marbling and tenderness—Costco and Whole Foods offer excellent options. For the herbs, fresh rosemary and thyme (preferably organic) provide superior aroma compared to dried. The butter should be European-style with 82% fat content (such as Plugrá or Kerrygold) for proper crust formation. Kosher salt selection matters: Diamond Crystal is preferred by professional kitchens for its clean flavor and even distribution during dry-brining.
For the wine reduction, any dry red wine (Cabernet Sauvignon, Merlot, or Pinot Noir) will suffice—avoid overly oaky varieties. Low-sodium beef stock (such as Better Than Bouillon prepared at half strength) prevents oversalting. If fresh herbs are unavailable, dried herbs at one-third volume may substitute, though with diminished aromatic impact. The Dijon mustard can be whole grain for texture or smooth for uniform coating; Grey Poupon offers consistent quality.
Proper dry-brining requires 24-48 hours uncovered in the refrigerator. Post-cooking, the roast should rest at least 30 minutes before carving to redistribute juices. Leftovers maintain quality for 4-5 days refrigerated or 3 months vacuum-sealed and frozen. The rendered fat from the roast pan creates exceptional Yorkshire pudding or roasted potatoes when repurposed.
Why You’ll Love This Recipe
- Five-Ingredient Magic: Honestly, the hardest part is tying your apron. Salt, pepper, rosemary, thyme, and the roast—that’s your whole shopping list. No marinades, no fancy techniques, just straightforward flavor that lets the beef shine.
- That Crust Though: When the salt and pepper form that crackly, golden-brown shell against the juicy pink inside? I’ve had people ask if I seared it separately. (Spoiler: I didn’t. Just the oven’s magic with those fresh herb sprigs tucked underneath.)
- Leftovers You’ll Fight Over: Between us, the second-day French dips might be better than the original meal. Thin-sliced on crusty bread with au jus from the pan drippings? My kids request “roast night” just for the sandwiches the next day.
Step-by-Step Instructions for Standing Rib Roast
This method ensures a perfectly pink center and crispy crust every time with precise temperature control.
Step 1: Prepare and Season the Roast
Remove the bone-in standing rib roast from refrigeration and let it sit at room temperature for 2 hours. This ensures even cooking throughout the thick cut. Pat the surface completely dry with paper towels—moisture prevents proper browning.
Combine the kosher salt and coarsely ground black pepper in a small bowl. Rub the mixture evenly over all surfaces of the roast, including the fat cap and bone side. The salt will penetrate during the resting period, enhancing flavor and moisture retention.
Position the roast bone-side down in a roasting pan. This orientation protects the meat from direct heat while allowing the fat cap to render gradually. The bones will also act as a natural rack, promoting air circulation.
Step 2: Create the Aromatic Base
In a small bowl, combine the unsalted butter, extra-virgin olive oil, and Dijon mustard. Smear this mixture evenly over the entire surface of the roast. The mustard’s acidity helps tenderize the exterior while the fat promotes even browning.
Arrange the fresh rosemary sprigs, fresh thyme sprigs, and smashed garlic cloves around the roast in the pan. Quarter the yellow onion and add it to the pan along with the carrot and celery chunks. These vegetables will form a flavorful bed that infuses the meat during cooking.
Pour the red wine and beef stock into the bottom of the pan. The liquid will create steam that keeps the roast moist while the alcohol in the wine helps break down connective tissues. Don’t pour it over the roast—this would wash away your carefully applied seasoning.
Step 3: Execute the Reverse Sear Method
Preheat your oven to 250°F. Place the roast in the center of the oven and cook for approximately 3-4 hours, or until the internal temperature reaches 110°F in the thickest part. This low-and-slow approach ensures even cooking from edge to center.
Monitor the temperature using an instant-read thermometer, checking every 30 minutes after the first 2 hours. The roast is ready for searing when it reaches the target temperature and the exterior appears dry to the touch. The aromatic vegetables should be deeply caramelized by this point.
Remove the roast from the oven and increase the temperature to 450°F. Transfer the roast to a cutting board and pour the pan juices through a fine-mesh strainer into a saucepan. Discard the spent vegetables and herbs, reserving the flavorful liquid for sauce.
Step 4: Develop the Crust and Finish
Return the roast to the hot pan and place it in the 450°F oven for 15-20 minutes, or until the external temperature reaches 125°F for medium-rare. Watch carefully during this phase—the sugar in the mustard glaze will caramelize quickly, creating a deep mahogany crust.
The roast is properly seared when the crust is uniformly browned and crackles when pressed lightly with tongs. Remove it from the oven and transfer to a carving board. Tent loosely with foil and let rest for 30 minutes—this allows the juices to redistribute throughout the meat.
While the roast rests, skim the fat from the reserved pan juices. Reduce the liquid over medium-high heat until it coats the back of a spoon, about 5-7 minutes. This concentrated jus will complement the rich beef flavor without overpowering it.
Step 5: Carve and Serve
Remove the bones from the roast by cutting along the rib bones with a sharp knife. Slice the meat between the bones to create individual rib portions. For the boneless end, cut across the grain into 1-inch thick slices. The interior should reveal a consistent pink center from edge to edge.
Arrange the slices on a warmed platter and drizzle with the reduced pan juices. The crust should provide textural contrast to the tender interior, with each bite offering the balanced flavors of the herb-infused exterior and perfectly cooked beef. Serve immediately while the crust remains crisp.
Accompany with simple sides that complement rather than compete with the roast’s rich flavor. Roasted potatoes or a crisp green salad with vinaigrette provide ideal contrast to the meat’s richness.
Troubleshooting Great the best standing rib roast
Uneven Cooking Issues
If you notice one end of your roast is cooking faster than the other, it’s likely because the thick end requires more time. I solve this by folding a double layer of aluminum foil over the thinner end during the first 2 hours of cooking. This protects it from direct heat while the thicker portion catches up. 🔥
Crust Not Browning
When your roast lacks that beautiful mahogany crust after searing, the mustard-butter mixture may have been too thinly applied. Next time, use 3 tbsp Dijon mustard instead of 2 for better adhesion. Also ensure your oven reaches full 450°F before returning the roast—this high heat is crucial for proper caramelization.
Dry or Overcooked
This usually happens when the roast exceeds 130°F internal temperature. Remember that carryover cooking adds 5-10°F during resting. I pull mine at 120°F for perfect medium-rare. If it’s already overdone, serve with extra jus and consider slicing thinner to minimize dryness.
Weak Herb Flavor
If your roast tastes bland despite the herbs, they likely dried out during cooking. For more impact, create herb bundles by tying rosemary and thyme with kitchen twine, then tuck them under the roast. I also add 2 extra garlic cloves to the pan for deeper aromatic infusion.
Pan Juices Too Thin
When your jus resembles broth rather than rich sauce, you need to reduce it further. After straining, simmer the liquid in a wide saucepan over medium-high heat until it coats a spoon—this can take up to 10 minutes. For extra body, whisk in 1 tsp cornstarch mixed with cold water. ✨
Temperature Stalling
If your roast’s internal temperature plateaus below 110°F, you’ve hit the “stall.” This occurs as moisture evaporates from the surface. Don’t increase heat—instead, be patient. The temperature will climb again after 30-60 minutes. I use this time to prepare side dishes.
Nutrition Facts

- 6 Egg Cake Recipe with Oil: Light as Air With Buttery Moisture - October 4, 2026
- 4 Bean Casserole Recipe: One-Pan Heartiness With Smoky Paprika Depth - October 4, 2026
- 3-Ingredient Keto Mug Cake Recipe: Microwave Magic in 2 Minutes - October 4, 2026