
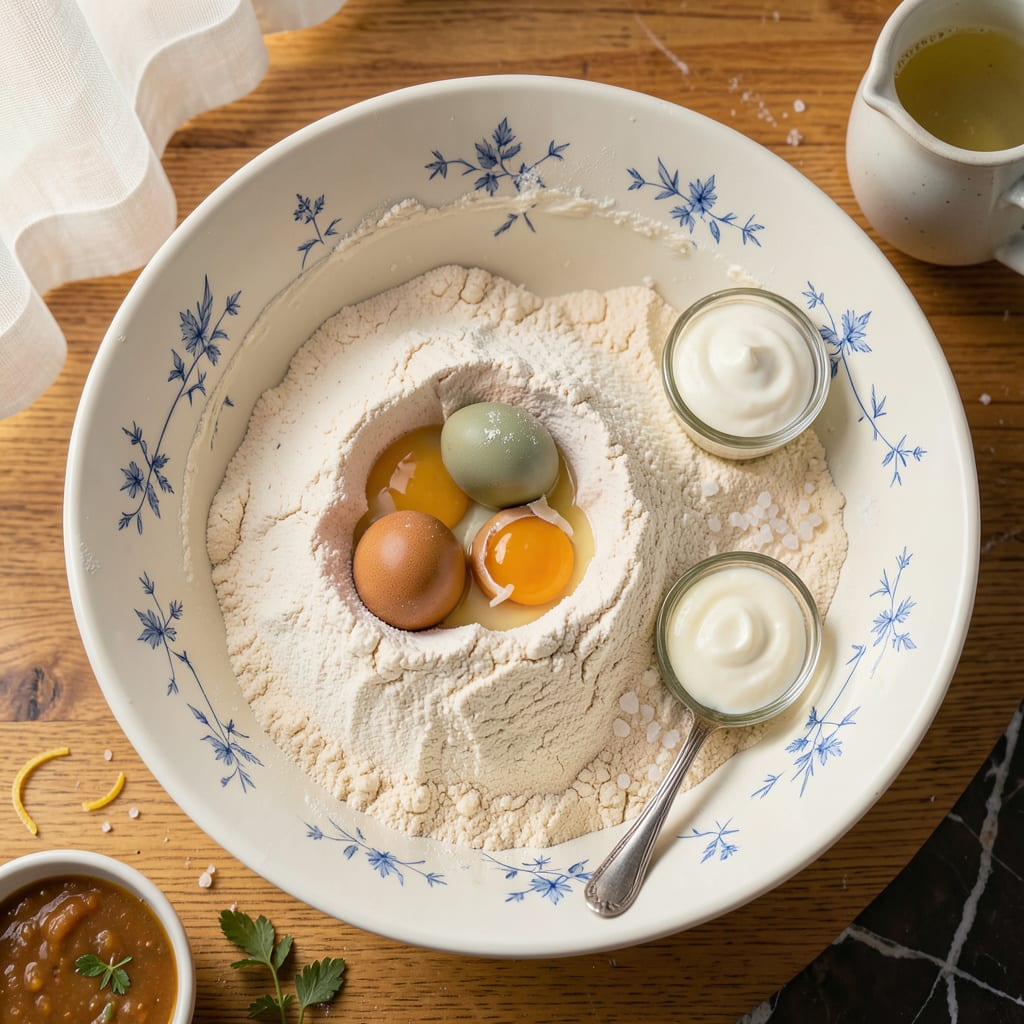
Creating the perfect pierogi starts with mastering the dough—a simple yet precise combination of flour, eggs, and sour cream that yields a tender, elastic foundation. This traditional recipe delivers the ideal texture: sturdy enough to hold fillings like potato-cheese or sauerkraut-mushroom, yet delicate enough to melt in your mouth. The secret lies in proper kneading and resting time, ensuring the dough rolls out smoothly without tearing.
Once prepared, this dough transforms into the heart of classic Polish pierogi, whether boiled for a soft finish or pan-fried for crispy edges. The recipe remains true to tradition while offering flexibility for dietary needs, with straightforward substitutions for vegan versions. Every bite captures the comforting essence of homemade dumplings, making it worth the effort.
Ingredients for Traditional Pierogi Dough
Seven foundational ingredients create this authentic pierogi dough—traditional ratios for perfect texture every time.
| Ingredient | Amount | Notes |
|---|---|---|
| All-Purpose Flour 🌾 | 3 ½ cups | Unbleached, sifted for accuracy |
| Large Eggs 🥚 | 2 whole | Room temperature, size large |
| Full-Fat Sour Cream 🥛 | ¾ cup | Standard 16% milkfat minimum |
| Unsalted Butter 🧈 | 4 tbsp | Melted and slightly cooled |
| Fine Sea Salt 🧂 | 1 tsp | Diamond Crystal preferred for consistency |
| Warm Water 💧 | ¼ cup | Approximately 110°F for activation |
| Neutral-Flavored Vegetable Oil 🫒 | 1 tsp | For dough elasticity and handling |
The flour quality is paramount for this recipe. King Arthur Unbleached All-Purpose delivers consistent protein content (11.7%), ensuring the ideal balance between tenderness and structure. For sour cream, Daisy brand or any full-fat variety with 16-18% milkfat provides the necessary richness without compromising dough integrity. European-style butter with 82% fat content (such as Plugrá) yields superior plasticity, though standard unsalted butter works adequately. Precise salt measurement is critical—Diamond Crystal kosher salt dissolves evenly without overpowering the delicate flavor profile of the finished dumplings.
For dietary adaptations, replace eggs with ½ cup unsweetened applesauce blended with 1 tsp baking powder for binding. Vegan butter substitutes (like Miyoko’s) work at a 1:1 ratio, though the dough may require additional kneading. Full-fat coconut yogurt can replace sour cream, though the flavor profile will shift slightly. When substituting, maintain the 3:2:1 ratio of flour to wet ingredients to preserve the dough’s structural integrity. Water temperature must remain between 105-115°F to properly activate the gluten without premature cooking.
Prepared dough keeps refrigerated for 48 hours when wrapped tightly in plastic. For longer storage, divide into portions, flatten into discs, and freeze between parchment layers for up to 3 months. Thaw overnight in the refrigerator before rolling. Resting the dough for 30-60 minutes at room temperature is essential before shaping—this relaxes the gluten strands, preventing shrinkage during cooking and ensuring even rolling to ⅛-inch thickness.
Why You’ll Love This Recipe
- No Fancy Tools: I’ve made this dough with just a fork, a bowl, and my hands—no stand mixer, no food processor. The butter cuts into the flour so easily with just your fingertips, and the sour cream binds everything without fuss.
- That Sour Cream Magic: Here’s what sold me—the full-fat sour cream doesn’t just add richness; it gives the dough this subtle tang that makes the filling (whatever it is) taste even better. And the butter? It crisps up the edges when you pan-fry them later.
- Freezer’s Best Friend: Honestly, I double the batch every time because these freeze like a dream. Roll, cut, fill, then stash uncooked pierogi on a tray—once frozen, they go into bags for up to three months. Dinner in 10 minutes on a Tuesday? Done.
- Five Ingredients, Endless Meals: Five pantry staples, and suddenly you’ve got a dish that works for meatless Mondays (mushroom filling), kid-friendly dinners (cheese and potato), or even dessert (sweet cherry and farmer’s cheese). I’ve served these at potlucks and weeknight dinners—same dough, zero complaints.
Step-by-Step Instructions for Traditional Pierogi Dough
Follow this precise method for achieving the ideal balance of tenderness and elasticity in your homemade pierogi dough.
Step 1: Combine Dry Ingredients and Prepare Wet Mixture
In a large mixing bowl, whisk together the 3.5 cups All-Purpose Flour and 1 tsp Fine Sea Salt until thoroughly combined. This ensures even distribution of salt throughout the dough, which is crucial for consistent flavor in every bite.
In a separate bowl, whisk the 2 whole Large Eggs, 0.75 cup Full-Fat Sour Cream, 4 tbsp Unsalted Butter, 0.25 cup Warm Water, and 1 tsp Neutral-Flavored Vegetable Oil until the mixture is smooth and emulsified. The warm water should feel like bathwater to the touch—approximately 110°F—to properly activate the gluten without killing it.
Step 2: Create the Dough and Develop Gluten
Make a well in the center of the flour mixture and pour in the wet ingredients. Using a wooden spoon or silicone spatula, gradually incorporate the flour from the edges into the wet mixture until a shaggy dough forms. This initial mixing should take about 2 minutes.
Once the dough comes together, turn it out onto a lightly floured surface. Knead by hand for 8-10 minutes until the dough becomes smooth and elastic. You’ll know it’s properly developed when it springs back immediately after pressing with your finger and the surface has a slight sheen. Avoid adding extra flour during kneading, as this can make the dough tough.
Step 3: Rest the Dough for Optimal Texture
Shape the dough into a ball and place it in a lightly oiled bowl, turning to coat all sides. Cover with plastic wrap or a damp kitchen towel. Let the dough rest at room temperature for 30 minutes. This resting period allows the gluten to relax, making the dough easier to roll out.
After resting, the dough should feel noticeably softer and more pliable. If you press your finger into it, the indentation should remain but the dough shouldn’t stick to your finger. This is the perfect consistency for rolling and cutting pierogi circles.
Step 4: Roll and Cut the Dough
Divide the rested dough into two equal portions. On a lightly floured surface, roll one portion at a time to a uniform thickness of 1/8 inch. Use a 3-inch round cutter to cut circles, pressing straight down without twisting to maintain clean edges. Re-roll the scraps once to cut additional circles, but avoid overworking the dough.
The ideal thickness creates pierogi that are sturdy enough to hold fillings without tearing, yet thin enough to cook through properly. You should be able to see slight translucency when holding a circle up to the light, but it shouldn’t be paper-thin.
Step 5: Prepare for Filling and Cooking
Cover the cut dough circles with a clean kitchen towel to prevent drying while you prepare your filling. When ready to assemble, place about 1 tablespoon of filling in the center of each circle. Fold in half, pressing the edges firmly to seal. The dough should stretch slightly without tearing as you form the half-moon shape.
For best results, cook the pierogi immediately or freeze them on a parchment-lined tray before transferring to bags for storage. Fresh dough yields the most tender results when cooked within 2 hours of preparation, though properly stored dough can be refrigerated for up to 24 hours before use.
Storing and Reheating Leftovers
Short-Term Refrigeration
After kneading and resting, wrap your dough tightly in plastic wrap or place it in an airtight container before refrigerating. It will keep beautifully for 24-48 hours—any longer and the texture starts to dry out. I like to flatten the dough into a disc first so it chills evenly and rolls out easier later. 💡
Freezing Uncooked Dough
For longer storage, divide the dough into portions and flatten into ½-inch thick discs. Wrap each disc in plastic, then place in a freezer-safe bag with parchment between layers. It freezes well for up to 3 months. Thaw overnight in the fridge before using—never microwave, as this can activate the gluten unevenly.
Storing Cooked Pierogi
Boiled or fried pierogi keep in the fridge for 3-4 days when stored in a single layer on a tray covered with plastic. For meal prep, I arrange them on parchment-lined containers so they don’t stick. Reheat gently to maintain texture—more on that below. ❄️
Reheating Boiled Pierogi
The best method is steaming: place pierogi in a steamer basket over 1 inch of boiling water for 3-4 minutes until heated through. Alternatively, microwave on 50% power for 1-2 minutes with a damp paper towel to prevent drying. Avoid high heat, which makes them rubbery.
Reviving Fried Pierogi
For crispy results, reheat in a nonstick skillet over medium heat with 1 tbsp butter for 2-3 minutes per side. Cover the pan for the first minute to steam the filling, then uncover to crisp the edges. This brings them back to just-fried perfection.
Freezing Cooked Pierogi
Freeze cooked pierogi on a tray first, then transfer to bags. They’ll keep for 2 months. To reheat, boil from frozen for 5-6 minutes (no thawing needed), or pan-fry with butter over medium-low heat for 8-10 minutes, turning occasionally. The texture stays remarkably close to fresh! ✨
Nutrition Facts
Frequently Asked Questions
Why does my dough keep springing back when rolling?
This happens when the gluten hasn’t relaxed enough. After kneading, let the dough rest for the full 30 minutes at room temperature. If it’s still resistant, cover and rest another 15 minutes. Cold dough also resists rolling—work at room temperature for best results.
Can I make the dough without sour cream?
Yes, but the texture will differ. Replace the 0.75 cup sour cream with plain Greek yogurt or buttermilk for similar tang. For a richer version, use 0.5 cup heavy cream + 0.25 cup water. The dough may need slightly more flour to reach the right consistency.
How thin should I roll the dough for pierogi?
Aim for 1/8-inch thickness—thin enough to see slight translucency when held to light, but sturdy enough to hold fillings. Use a ruler or stack two quarters as a guide. Too thick and they’ll be doughy; too thin and they may tear during boiling.
Why did my pierogi burst while boiling?
Overfilling or sealing improperly is usually the culprit. Use only 1 tablespoon filling per circle and press edges firmly with your fingers or a fork. Boil in gently simmering (not rolling) water—this prevents sudden pressure buildup inside the dumplings.
Can I use bread flour instead of all-purpose?
Bread flour’s higher protein makes the dough tougher. If substituting, reduce by 2 tablespoons per cup and add 1 extra tablespoon water. The texture won’t be as tender, but it’ll still work in a pinch. All-purpose is ideal for authentic results.

- 6 Egg Cake Recipe with Oil: Light as Air With Buttery Moisture - October 4, 2026
- 4 Bean Casserole Recipe: One-Pan Heartiness With Smoky Paprika Depth - October 4, 2026
- 3-Ingredient Keto Mug Cake Recipe: Microwave Magic in 2 Minutes - October 4, 2026