
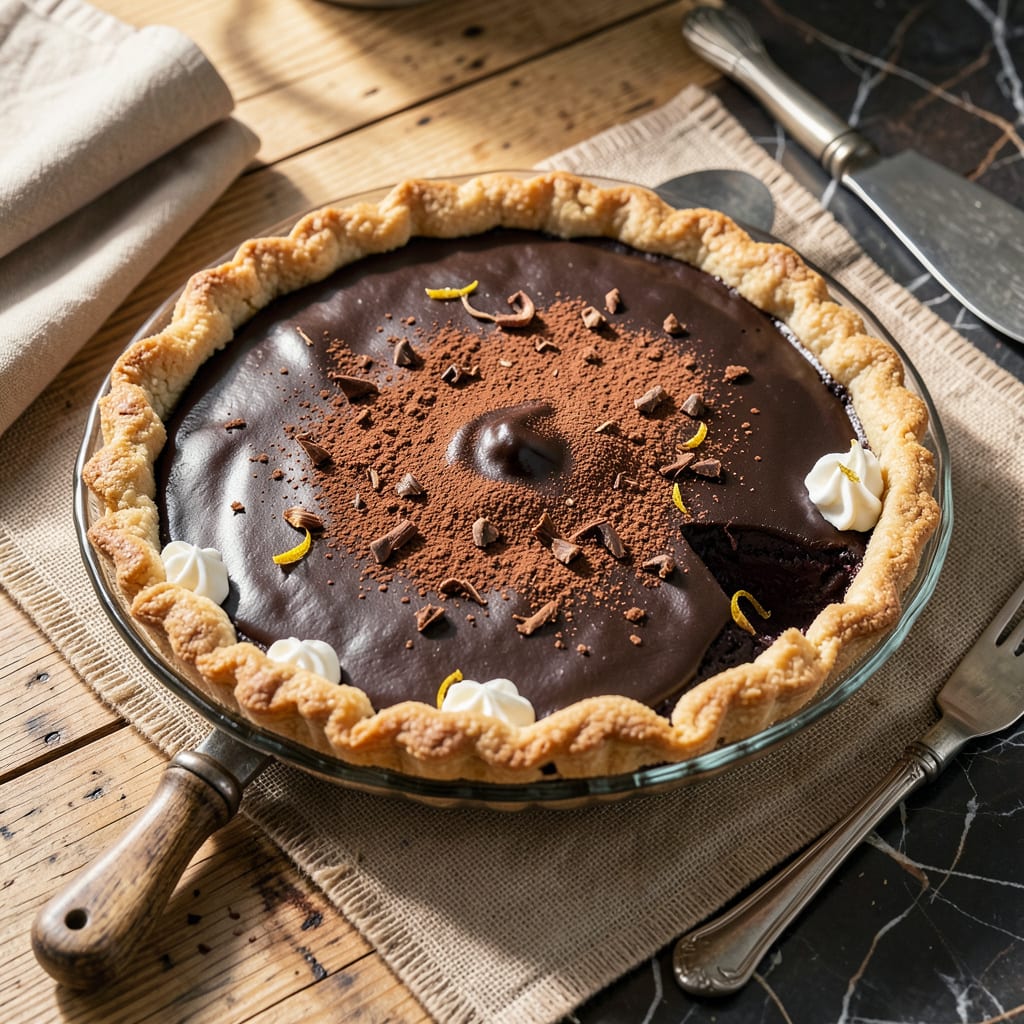
Few desserts capture Southern charm quite like a classic chocolate pie, and this version draws inspiration from the beloved Virginia tradition made famous by Ukrop’s. The secret lies in achieving that signature silky filling—rich enough to satisfy chocolate cravings yet light enough to melt on the tongue. This recipe transforms simple ingredients into something extraordinary through precise technique and careful chilling.
What sets this pie apart is the balance between decadence and elegance. A crisp, buttery crust provides the perfect foundation for the velvety chocolate filling, while a cloud of whipped cream adds the finishing touch. The result is a dessert that feels both nostalgic and sophisticated, proving that sometimes the most memorable treats come from mastering the basics. Perfect for holidays or anytime you need a showstopping finish to a meal.
Ingredients for Ukrops Chocolate Pie
This elegant dessert begins with quality ingredients: a buttery crust, velvety chocolate filling, and airy whipped cream topping.
| Ingredient | Amount | Notes |
|---|---|---|
| All-purpose flour 🌾 | 1 ½ cups | Plus extra for dusting |
| Granulated sugar 🍚 | 1 ½ cups | Divided for crust and filling |
| Unsalted butter 🧈 | 12 tbsp | Cold, cubed for crust |
| Salt 🧂 | ½ tsp | Fine sea salt preferred |
| Ice water 💧 | 4 tbsp | Plus more as needed |
| Semi-sweet chocolate 🍫 | 8 oz | High-quality bars, chopped |
| Large eggs 🥚 | 4 whole | Room temperature |
| Whole milk 🥛 | 1 ½ cups | Full-fat for richness |
| Vanilla extract 🌿 | 1 tsp | Pure extract recommended |
| Heavy whipping cream 🥛 | 1 cup | Cold, for topping |
| Powdered sugar 🍚 | 2 tbsp | For sweetening whipped cream |
| Vanilla wafer cookies 🍪 | 12 whole | Crushed for garnish |
The chocolate quality determines the pie’s sophistication. Ghirardelli or Guittard semi-sweet bars provide optimal melt and flavor profile. For the crust, European-style butter (like Plugrá) yields superior flakiness due to higher fat content. The eggs must be room temperature to properly emulsify with the chocolate—place them in warm water for 10 minutes if forgotten. Whole milk is non-negotiable; lower-fat versions compromise the filling’s signature silkiness.
For dietary adaptations, vegan butter (like Miyoko’s) and almond milk can substitute, though texture may vary slightly. Dark chocolate (70% cacao) intensifies flavor while reducing sugar content. The vanilla wafers can be replaced with graham crackers or shortbread cookies for textural variation. In a pinch, store-bought pie crust saves time, though homemade provides superior buttery layers essential to this recipe’s character.
The assembled pie requires 4 hours minimum chilling to achieve proper set. Store covered in refrigerator for up to 3 days—the flavors deepen over time. Whipped cream is best added just before serving; stabilize with 1/4 tsp cream of tartar if preparing ahead. Crust dough can be made 2 days in advance and refrigerated, or frozen for 1 month.
Why You’ll Love This Recipe
- I’ll be real: this pie crust comes together with just flour, butter, salt, and ice water—no fancy techniques, no food processor required. The butter stays cold (thanks to that ice water trick), so it bakes up flaky every single time, even if your rolling skills are… questionable.
- No-Fuss Crust: I’ll be real: this pie crust comes together with just flour, butter, salt, and ice water—no fancy techniques, no food processor required. The butter stays cold (thanks to that ice water trick), so it bakes up flaky every single time, even if your rolling skills are… questionable.
- Deep Chocolate Fix: That filling is ridiculously rich—like, hide-a-slice-for-yourself rich—but the sugar and butter balance it so it’s not cloying. Honestly, the first time I made it, I burned my tongue sneaking a bite straight from the oven. Worth it.
- Potluck MVP: Between us, this pie disappears faster than deviled eggs at a church social. It’s just as at home at a holiday dinner as it is on a random Tuesday when you need to bribe your neighbors for borrowing their ladder.
Step-by-Step Instructions for Ukrops Chocolate Pie
This method ensures a perfectly balanced pie with a flaky crust and velvety chocolate filling every time.
Step 1: Prepare the Pie Crust
In a food processor, combine the 1.5 cups all-purpose flour and 0.5 tsp salt. Add the 12 tbsp unsalted butter (cold and cubed) and pulse until the mixture resembles coarse crumbs with pea-sized butter pieces visible. This texture ensures a flaky crust rather than a dense one.
With the processor running, slowly drizzle in the 4 tbsp ice water through the feed tube. Process just until the dough begins to come together—about 10-15 seconds. The dough should hold when pinched but not be sticky. Overworking develops gluten, which makes the crust tough.
Turn the dough onto a lightly floured surface and gently shape into a disk. Wrap in plastic and refrigerate for at least 1 hour (or up to 2 days). This resting period allows the gluten to relax and the butter to firm up, preventing shrinkage during baking.
Step 2: Blind-Bake the Crust
Preheat your oven to 375°F. On a lightly floured surface, roll the chilled dough into a 12-inch circle, about 1/8-inch thick. Transfer to a 9-inch pie dish, trim the edges to leave a ½-inch overhang, then crimp decoratively. Freeze the crust for 15 minutes to prevent slumping.
Line the frozen crust with parchment paper, filling it completely with pie weights or dried beans. Bake on the lower oven rack for 15 minutes, then carefully remove the parchment and weights. Return to the oven and bake for another 8-10 minutes until the bottom appears dry and the edges are light golden brown.
If any bubbles form, gently press them down with the back of a spoon. Let the crust cool completely on a wire rack before filling—this prevents the chocolate from melting prematurely and compromising the texture.
Step 3: Create the Chocolate Filling
In a medium saucepan, combine 1 cup of the granulated sugar, 1.5 cups whole milk, and the remaining ½ cup granulated sugar. Cook over medium heat, stirring constantly with a wooden spoon, until the mixture reaches 180°F on a candy thermometer—this ensures the sugar fully dissolves without scorching.
In a separate bowl, whisk the 4 large eggs until frothy, then gradually temper them by whisking in ½ cup of the hot milk mixture. Pour this tempered egg mixture back into the saucepan and cook over low heat, stirring constantly, until the custard thickens enough to coat the back of a spoon—about 5-7 minutes.
Remove from heat and immediately add the 8 oz chopped semi-sweet chocolate and 1 tsp vanilla extract. Let sit for 2 minutes, then whisk until completely smooth. The residual heat will melt the chocolate perfectly without seizing. Pour the filling into the cooled crust.
Step 4: Chill and Set the Pie
Press plastic wrap directly onto the surface of the filling to prevent a skin from forming. Refrigerate for at least 4 hours, but ideally overnight. This extended chilling time allows the filling to set properly and the flavors to meld. The pie should be firm to the touch with no jiggle in the center when properly set.
During chilling, the filling will transform from a liquid to a silky, sliceable consistency. Avoid the temptation to rush this step—under-chilled pie will be soupy when sliced. The crust will also soften slightly as it absorbs moisture from the filling, creating the perfect textural contrast.
Step 5: Add Whipped Cream and Garnish
Just before serving, whip the 1 cup heavy whipping cream with the 2 tbsp powdered sugar until soft peaks form—about 2-3 minutes with an electric mixer. Be careful not to overwhip, as the cream will become grainy. The peaks should hold their shape but still have a slight curl at the tip.
Spread or pipe the whipped cream over the chilled pie. Crush the 12 vanilla wafer cookies into coarse crumbs (either by hand or in a food processor with a few pulses) and sprinkle evenly over the whipped cream. The cookies add a delightful crunch and vanilla accent that complements the rich chocolate.
Slice with a sharp, thin-bladed knife dipped in hot water and wiped clean between cuts. Serve immediately, as the whipped cream is best enjoyed fresh. Each slice should reveal distinct layers: the crisp cookie crumb topping, cloud-like whipped cream, silky chocolate filling, and flaky crust.
Dietary Considerations for This Dish
Gluten-Free Adaptation
For a gluten-free version, replace the 1.5 cups all-purpose flour with a 1:1 gluten-free baking flour like King Arthur Measure for Measure. I’ve found this blend works beautifully without altering the crust’s texture. Add ½ tsp xanthan gum to improve elasticity and prevent crumbling. 🌾
Dairy-Free Options
Swap the 12 tbsp unsalted butter with Miyoko’s vegan butter for the crust, and use full-fat coconut milk instead of whole milk in the filling. For the whipped topping, coconut cream whipped with 1 tbsp maple syrup creates a luscious dairy-free alternative.
Lower Sugar Version
Reduce the 1.5 cups granulated sugar to 1 cup and use dark chocolate (70% cacao) for the filling. The deeper chocolate flavor compensates for less sweetness. For the whipped cream, skip the 2 tbsp powdered sugar entirely—the vanilla wafers will add enough sweetness.
Nut Allergy Note
While this recipe is naturally nut-free, always check your chocolate bars and vanilla wafers for processing warnings. I recommend Enjoy Life chocolate chips and Nabisco Nilla Wafers as safe options. The crust and filling contain no nuts, making this pie generally safe for nut allergies. 🧂
Egg Substitutions
For an egg-free version, use ½ cup silken tofu blended with 2 tbsp cornstarch to replace the 4 large eggs. The texture will be slightly denser but still creamy. Alternatively, Bob’s Red Mill Egg Replacer (prepared for 4 eggs) works well in custard-style fillings.
Make-Ahead Tips
The crust can be baked and cooled 2 days ahead, stored at room temperature in an airtight container. Prepare the filling separately, pour into the crust, then refrigerate overnight. Add whipped cream and cookie crumbs just before serving. This approach actually improves flavor as the filling fully sets. ⏰
Nutrition Facts

- 6 Egg Cake Recipe with Oil: Light as Air With Buttery Moisture - October 4, 2026
- 4 Bean Casserole Recipe: One-Pan Heartiness With Smoky Paprika Depth - October 4, 2026
- 3-Ingredient Keto Mug Cake Recipe: Microwave Magic in 2 Minutes - October 4, 2026