
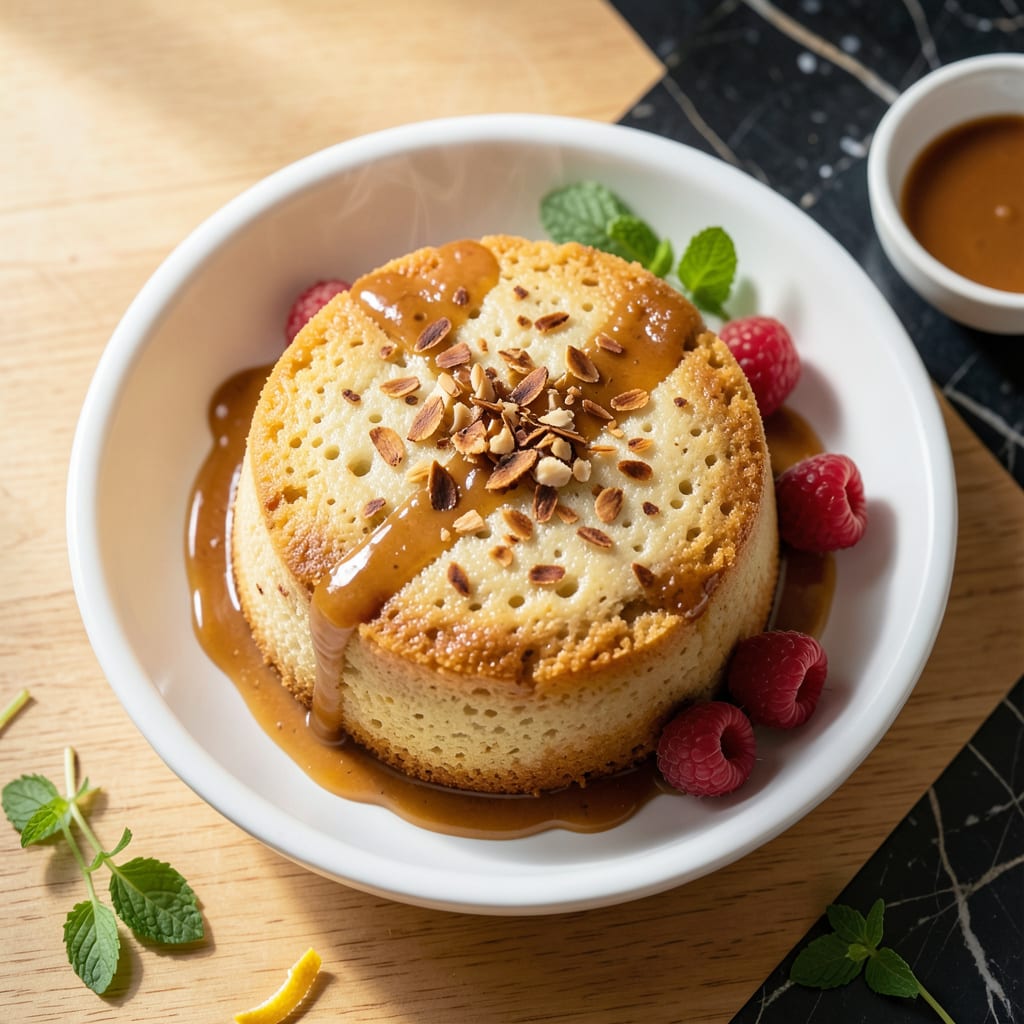
This vegan steamed cake delivers a fluffy, cloud-like texture through a simple steaming method that locks in moisture.
The coconut sweetness shines without dairy or eggs, proving plant-based desserts can rival traditional favorites. Ready in 45 minutes with basic ingredients.
Ingredients for Vegan Steamed Cake
Pantry staples and coconut do the heavy lifting here. Simple, plant-based, and impressive.
| Ingredient | Amount | Notes |
|---|---|---|
| All-Purpose Flour 🌾 | 1 ½ cups | Sifted for light texture |
| Coconut Sugar 🥥 | ¾ cup | Or substitute granulated sugar |
| Coconut Milk 🥛 | 1 cup | Full-fat canned for richness |
| Coconut Oil 🫒 | ¼ cup | Melted, or neutral oil |
| Baking Powder 🧂 | 2 tsp | Ensures proper rise |
| Baking Soda 🧂 | ½ tsp | Balances acidity |
| Vanilla Extract 🌿 | 1 tsp | Pure for best flavor |
| Apple Cider Vinegar 🍏 | 1 tbsp | Activates baking soda |
| Salt 🧂 | ½ tsp | Fine sea salt preferred |
| Shredded Coconut 🥥 | ½ cup | Unsweetened, for texture |
| Water 💧 | ½ cup | For steam and batter consistency |
The coconut milk is non-negotiable for that signature richness. Full-fat canned from Thai Kitchen or Native Forest gives the best texture—light versions won’t deliver the same moisture. The coconut oil should be unrefined, virgin for maximum coconut flavor (refined works but tastes neutral). Look for organic coconut sugar at Whole Foods or natural grocers—it’s less processed and has a caramel-like depth.
No coconut milk? Coconut cream thinned with water (equal parts) works in a pinch. Swap coconut sugar for maple syrup at three-quarters the amount—just reduce other liquids slightly. Out of apple cider vinegar? White vinegar or lemon juice will activate the baking soda just fine. For gluten-free, use a 1:1 all-purpose GF blend with xanthan gum already included.
Store cooled cake in an airtight container at room temp for up to 3 days, or refrigerate for 5 days. Freezes beautifully for 3 months—thaw overnight before serving. The texture actually improves after a day as flavors meld (worth the wait).
Why You’ll Love This Recipe
- One Bowl Wonder: I mix everything right in the steamer basket—flour, coconut sugar, milk, oil—no extra bowls to wash.
- Coconut Cloud: The coconut milk and sugar make it moist and subtly sweet, like a fluffy tropical hug in cake form.
- Breakfast or Dessert: Honestly, I’ve served it warm with coffee in the morning or dusted with powdered sugar after dinner.
- Pantry Staples: All-purpose flour and baking powder mean I can make this anytime, no special shopping required.
Step-by-Step Instructions for Vegan Steamed Cake
This method ensures a light, airy texture with the perfect coconut flavor balance.
Step 1: Prepare the Batter Base
In a large mixing bowl, whisk together the 1.5 cups All-Purpose Flour, 0.75 cup Coconut Sugar, 2 tsp Baking Powder, 0.5 tsp Baking Soda, and 0.5 tsp Salt. Sift the dry ingredients first if you want an extra-light crumb.
This step ensures even distribution of leavening agents, which is critical for the cake’s rise. The coconut sugar adds a caramel-like depth that pairs beautifully with the other ingredients.
Step 2: Combine Wet Ingredients
In a separate bowl, mix the 1 cup Coconut Milk, 0.25 cup Coconut Oil (melted and slightly cooled), 1 tsp Vanilla Extract, 1 tbsp Apple Cider Vinegar, and 0.5 cup Water. The vinegar reacts with the baking soda to create lift, so don’t skip it.
Whisk until the mixture is smooth and fully emulsified. The coconut milk provides richness, while the coconut oil ensures moisture without overpowering the delicate flavor profile.
Step 3: Fold in Dry Ingredients and Shredded Coconut
Gradually add the dry mixture to the wet ingredients, folding gently with a spatula until just combined. Overmixing will develop gluten, leading to a dense cake. Stop as soon as no dry streaks remain.
Fold in the 0.5 cup Shredded Coconut last. This adds texture and reinforces the tropical flavor. The batter should be thick but pourable, with visible flecks of shredded coconut throughout.
Step 4: Steam to Perfection
Pour the batter into a greased cake pan that fits inside your steamer. Cover the pan loosely with foil to prevent water droplets from falling onto the cake. Steam over medium heat for 40-45 minutes, or until a toothpick inserted into the center comes out clean.
Check the water level in your steamer halfway through and top up with hot water if needed. The cake is done when it springs back lightly to the touch and has a faintly golden top.
Step 5: Cool and Serve
Remove the cake from the steamer and let it cool in the pan for 10 minutes. This allows it to set without collapsing. Then, transfer it to a wire rack to cool completely.
Slice and serve at room temperature. The texture should be tender and moist, with a subtle coconut aroma. This cake keeps well covered at room temperature for up to 2 days.
Pro Tips For Making Vegan Steamed Cake
- Preheat the Steamer: Always bring your steamer to a rolling boil before adding the cake—cold steam gives you a dense, gummy texture instead of that light, fluffy rise.
- Whisk the Oil: Mix the coconut oil into the coconut milk while it’s still slightly warm so it emulsifies smoothly, no clumps left behind.
- Skip Overmixing: I learned this the hard way—stir the batter just until the flour disappears, or your cake will turn out tough and chewy.
- Use Room-Temp Ingredients: Pull your coconut milk and oil out 30 minutes early—cold fats can seize up and leave streaks in the batter.
Essential Equipment for Great vegan steamed cake
Steamer Setup
Invest in a bamboo steamer with at least 10-inch diameter—I use a two-tier EcoNest brand from Amazon. It fits most cake pans and distributes heat evenly. Avoid metal steamers as they can create hot spots.
Cake Pan Choice
A 9-inch round cake pan works perfectly for this recipe. I prefer nonstick with a removable bottom for easy release. Grease it thoroughly with coconut oil or line with parchment paper to prevent sticking.
Essential Tools
You’ll need a large pot with lid that accommodates your steamer. A 5-quart Dutch oven works well. Also, have tongs ready for safely handling hot steamer tiers. 💡
Mixing Bowls
Use two medium mixing bowls—one for dry ingredients, one for wet. I like Pyrex glass bowls because they’re heat-resistant and easy to clean. A whisk and spatula are essential for proper mixing.
Cooling Equipment
A wire cooling rack is crucial for air circulation to prevent soggy bottoms. I also keep clean kitchen towels nearby to handle hot steamer lids safely. The cake needs proper cooling to set completely.
Optional Upgrades
For perfect results every time, consider a digital kitchen scale for precise measurements and an instant-read thermometer to check water temperature. These small investments make a big difference. ✨
Nutrition Facts
Frequently Asked Questions
Why does the batter need apple cider vinegar?
The vinegar reacts with baking soda to create lift. Without it, your cake may turn out dense rather than fluffy and airy.
Can I use a different flour?
Yes, a 1:1 gluten-free blend with xanthan gum works well. Avoid almond flour as it changes the texture significantly.
How do I prevent a soggy bottom?
Use a wire rack for cooling and cover the pan loosely with foil during steaming. This keeps condensation away from the cake.
Can I make this without a steamer?
A large pot with a rack and tight lid works as an alternative. Just ensure water doesn’t touch the cake pan.

- 6 Egg Cake Recipe with Oil: Light as Air With Buttery Moisture - October 4, 2026
- 4 Bean Casserole Recipe: One-Pan Heartiness With Smoky Paprika Depth - October 4, 2026
- 3-Ingredient Keto Mug Cake Recipe: Microwave Magic in 2 Minutes - October 4, 2026