
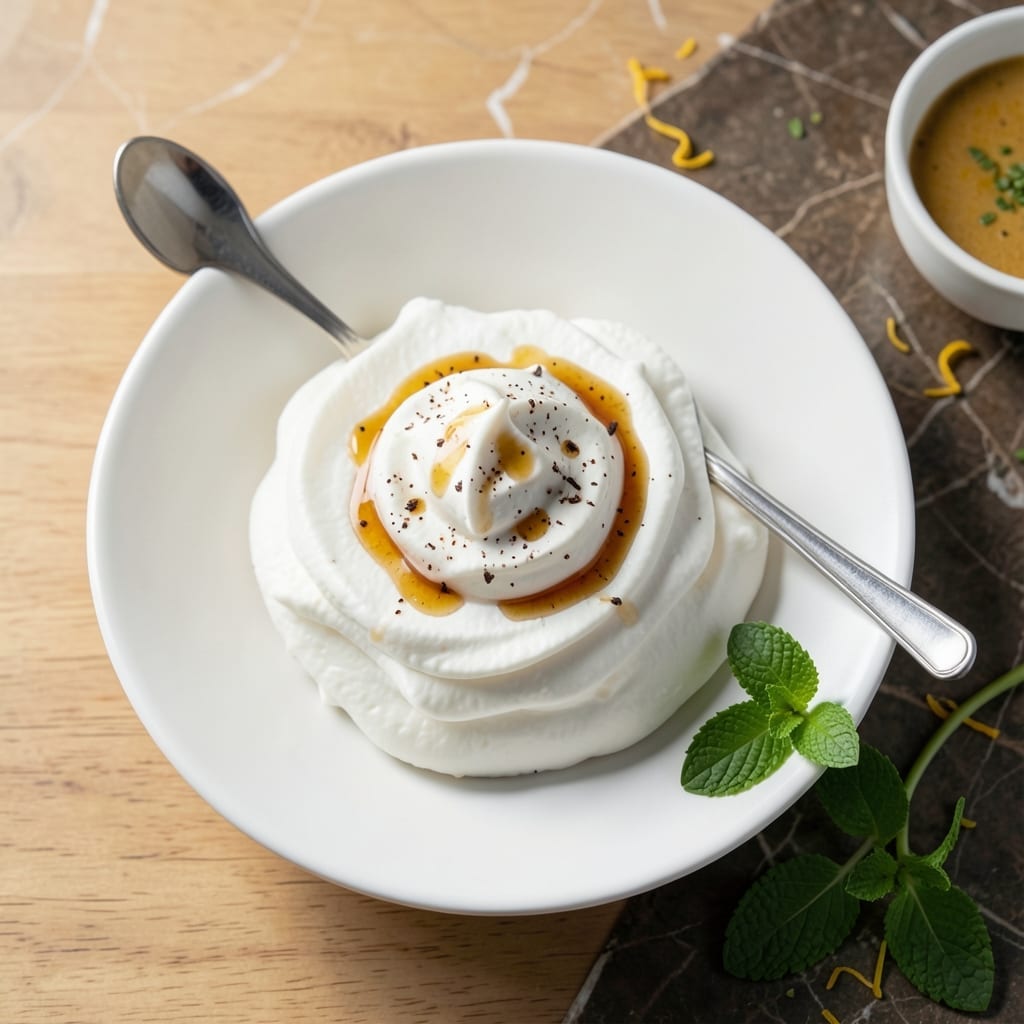
This aquafaba-based whipped cream delivers light and fluffy results without any coconut. I developed this method after years of testing plant-based alternatives that often fell flat or tasted artificial.
The secret lies in properly whipping chickpea brine with sugar and stabilizers. This creates a texture so close to traditional whipped cream that even dairy lovers are surprised. It holds peaks beautifully and maintains structure for hours.
What you get is a neutral-flavored topping perfect for pies, hot chocolate, or fresh fruit. The process takes less than 10 minutes and requires just a few pantry staples. No special equipment needed beyond a mixer.
This version solves the common problem of coconut aftertaste while providing the same creamy satisfaction. Here’s how to make it consistently perfect every time.
Ingredients for Vegan Whipped Cream Recipe No Coconut
Seven pantry staples transform into a neutral, fluffy vegan topping in minutes.
| Ingredient | Amount | Notes |
|---|---|---|
| Aquafaba 🥫 | ¾ cup | Unsalted chickpea brine from can |
| Granulated Sugar 🍚 | ¼ cup | Fine white sugar preferred |
| Cream of Tartar 🧂 | ½ tsp | Stabilizes the foam |
| Vanilla Extract 🌿 | 1 tsp | Pure for best flavor |
| Salt 🧂 | 0.125 tsp | Balances sweetness |
| Xanthan Gum 🧪 | 0.125 tsp | Optional for extra stability |
| Lemon Juice 🍋 | 1 tsp | Freshly squeezed preferred |
The aquafaba quality is critical. Use unsalted chickpea brine from a can—homemade often lacks the protein concentration needed. Eden Organic or Goya brands work consistently. For the sugar, fine granulated dissolves fastest. Cream of tartar is non-negotiable for structure; find it in the baking aisle at any major grocery store or Whole Foods bulk section.
No cream of tartar? White vinegar or lemon juice at triple the amount works in a pinch (use the lemon juice already listed). For vanilla, pure extract beats imitation every time. The xanthan gum is optional but helpful for hot climates—Bob’s Red Mill is widely available. Want it sweeter? Increase sugar up to half a cup without affecting texture.
Aquafaba whips best at room temperature. Store the finished cream in an airtight container in the fridge for up to 3 days. For longer storage, freeze the aquafaba in ice cube trays first. Avoid plastic containers for storage—they can absorb odors and affect the neutral flavor.
Why You’ll Love This Recipe
- Five-Minute Whip: I can go from can of chickpeas to fluffy clouds in the time it takes to brew coffee—just aquafaba, sugar, and a hand mixer.
- Vanilla Cloud: The vanilla and sugar turn that humble bean brine into something so light and sweet, I’ve fooled dairy lovers with it.
- Dessert MVP: It pipes like dream onto pies, cakes, or straight into my mouth, and keeps its shape for hours. Honestly, it’s my secret weapon for potlucks.
- Pantry Stash: I always have a can of chickpeas, so this costs pennies and uses what I’d normally toss. Between us, I save the aquafaba from three cans just for this.
Step-by-Step Instructions for Vegan Aquafaba Whipped Cream
Master this technique for a light, airy topping that rivals traditional whipped cream in texture and flavor.
Step 1: Chill Equipment and Aquafaba
Begin by placing your mixing bowl and beaters in the freezer for 15 minutes. Cold tools are essential for achieving maximum volume and stability. Measure out the 0.75 cup Aquafaba and transfer it to a separate container, then refrigerate it for 30 minutes as well.
The chilling process firms up the proteins in the aquafaba, allowing them to trap air more effectively during whipping. This step is non-negotiable—warm aquafaba simply won’t whip properly. You’ll know it’s ready when it feels ice-cold to the touch.
Step 2: Start Whipping with Stabilizers
Pour the chilled 0.75 cup Aquafaba into your frozen mixing bowl. Add the 0.5 tsp Cream of Tartar, 0.125 tsp Salt, and 0.125 tsp Xanthan Gum. The cream of tartar strengthens the protein structure, while the xanthan gum provides additional stability for the foam.
Begin whipping on medium-high speed using an electric mixer. After about 2 minutes, you’ll notice the liquid start to turn frothy and opaque. This is the first stage of foam development—keep whipping until soft peaks begin to form, which typically takes another 2-3 minutes.
Step 3: Gradually Incorporate Sugar
With the mixer still running, slowly add the 0.25 cup Granulated Sugar one tablespoon at a time. This gradual addition prevents deflation of the foam and ensures even distribution. The sugar not only sweetens but also helps stabilize the structure by strengthening the protein network.
After all the sugar is incorporated, continue whipping for another 3-4 minutes. The mixture will transform from soft peaks to stiff, glossy peaks that hold their shape when the beaters are lifted. At this point, the volume should have increased significantly, and the texture will appear smooth and silky.
Step 4: Add Flavorings and Finish
Once stiff peaks have formed, add the 1 tsp Vanilla Extract and 1 tsp Lemon Juice. The vanilla provides classic depth of flavor, while the lemon juice brightens the overall taste and helps balance the sweetness. Gently fold these in using a spatula to avoid overmixing.
Taste and adjust sweetness if needed, though the 0.25 cup Granulated Sugar should provide the perfect balance. The finished whipped cream should hold its shape firmly but still appear light and airy. Use immediately for topping desserts, or store in an airtight container in the refrigerator for up to 3 days.
Pro Tips For Making Vegan Whipped Cream Recipe No Coconut
- Chill Everything First: I learned this the hard way—warm aquafaba or bowls won’t whip properly. Pop your mixing bowl and beaters in the freezer for 10 minutes, and use cold aquafaba straight from the fridge.
- Add Sugar Slowly: After burning three batches, I finally figured out that dumping all the sugar in at once deflates the foam. Sprinkle it in a tablespoon at a time while whipping.
- Skip the Overmixing: Sounds weird, but it works: once stiff peaks form, stop. Overbeating turns it grainy, and you’ll be staring at a sad, collapsed mess.
- Use Cream of Tartar: My grandmother swore by this, and she was right: a pinch of cream of tartar stabilizes the aquafaba, so your whipped cream holds its shape longer.
Essential Equipment for This Recipe
Electric Mixer
A stand mixer or hand mixer is essential for achieving the right texture. I use my KitchenAid stand mixer with the whisk attachment for consistent results. A hand mixer works too, but expect to whip for 2-3 extra minutes. 💡
Chilled Metal Bowl
Use a stainless steel mixing bowl that’s been chilled in the freezer for 15 minutes. The cold surface helps stabilize the aquafaba foam. Avoid plastic or glass, as they don’t conduct cold as effectively.
Whisk Attachment
The whisk attachment is non-negotiable for incorporating air efficiently. For stand mixers, use the wire whisk. With hand mixers, opt for the standard beaters that came with your set.
Fine Mesh Strainer
Strain your aquafaba through a fine mesh strainer to remove any chickpea bits. This ensures a smooth, professional texture. I keep mine from OxO in the drawer for this exact purpose.
Rubber Spatula
A silicone spatula helps fold in flavorings without deflating the foam. Look for one with a heat-resistant head. I prefer the one-piece design to avoid any seams where bacteria can hide. 💛
Airtight Container
Store your finished whipped cream in an airtight container to maintain texture. Glass jars with screw-top lids work perfectly. Avoid shallow containers, as they expose more surface area to air, which can cause deflation.
Nutrition Facts
Frequently Asked Questions
Can I use canned chickpeas from any brand?
For best results, use unsalted chickpea brine from brands like Eden Organic or Goya. Their liquid has the right protein concentration for stable foam. Homemade brine often lacks this consistency.
What if I don’t have cream of tartar?
Substitute with 1.5 tsp lemon juice or white vinegar. The acidity mimics cream of tartar’s stabilizing effect, though results may be slightly less sturdy. Add it at the same step in the process.
How long can I store the finished product?
It keeps in an airtight container in the fridge for up to 3 days. For longer storage, freeze the aquafaba in ice cube trays before whipping. Avoid plastic containers to preserve flavor.

- 6 Egg Cake Recipe with Oil: Light as Air With Buttery Moisture - October 4, 2026
- 4 Bean Casserole Recipe: One-Pan Heartiness With Smoky Paprika Depth - October 4, 2026
- 3-Ingredient Keto Mug Cake Recipe: Microwave Magic in 2 Minutes - October 4, 2026