
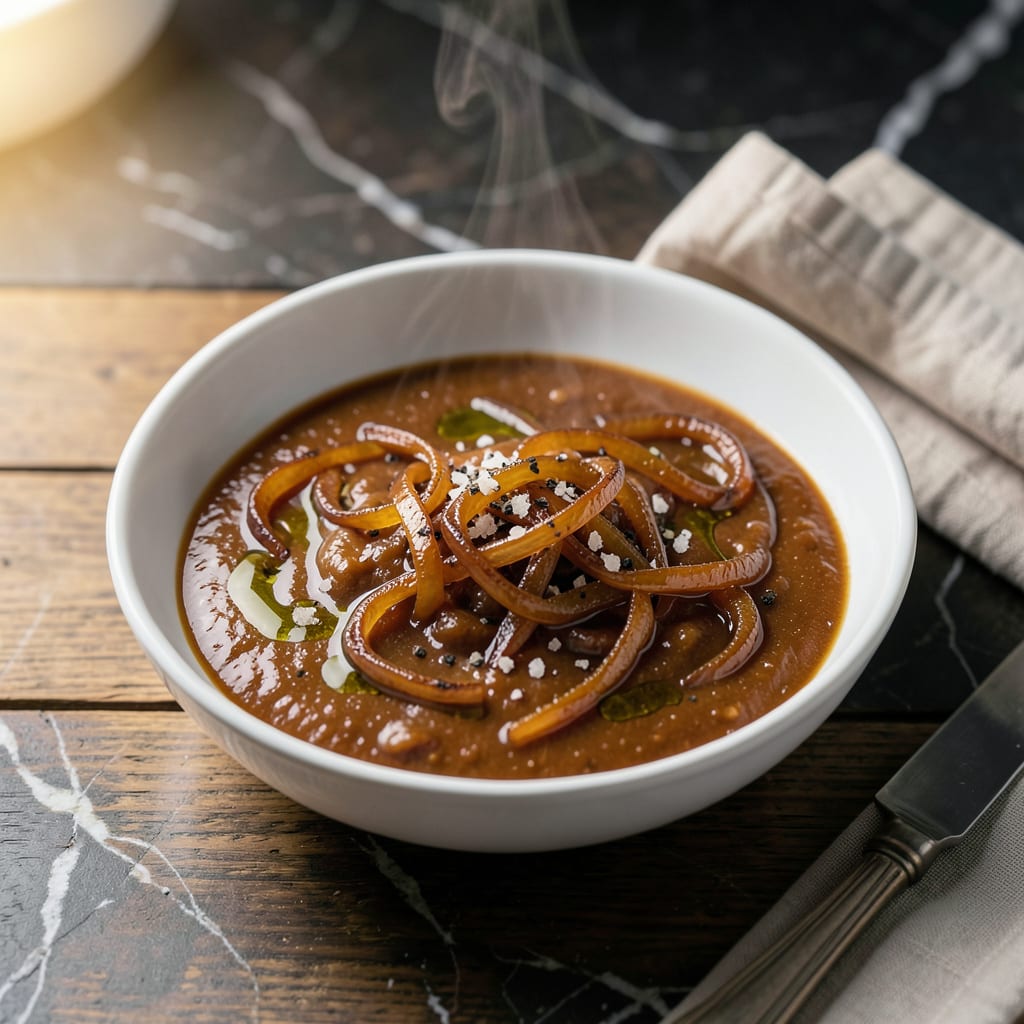
This sauce transforms ordinary dishes with its rich, caramelized sweetness. Vidalia onions slowly cook down into a velvety, golden paste that drizzles beautifully over any dish.
With just 5 ingredients and 30 minutes, you’ll have a versatile condiment that elevates meats, sandwiches, or grilled vegetables. Store it in the fridge for up to a week.
Ingredients for Vidalia Onion Sauce
Five simple ingredients transform into a rich, caramelized sauce with velvety depth and golden color.
| Ingredient | Amount | Notes |
|---|---|---|
| Vidalia Onions 🧅 | 2 lb | Thinly sliced, about 4 large |
| Extra-Virgin Olive Oil 🫒 | 3 tbsp | Divided for cooking and finishing |
| Balsamic Vinegar 🍷 | ¼ cup | Aged for depth of flavor |
| Coconut Sugar 🥥 | 2 tbsp | Vegan-friendly sweetener option |
| Sea Salt 🧂 | ½ tsp | Fine grain preferred |
| Black Pepper 🌶️ | ¼ tsp | Freshly ground for best flavor |
The onions are the soul of this sauce. Vidalia onions are essential—they caramelize beautifully thanks to their high sugar content and mild flavor. Look for firm, dry bulbs with vibrant golden skins. Most grocery stores carry them seasonally, but Whole Foods often has them year-round. Avoid any with green sprouts or soft spots, as they’ll turn bitter during the long cook.
No coconut sugar? Maple syrup or agave nectar work as 1:1 substitutes. For a more complex flavor, try date syrup—it adds a subtle molasses note. The balsamic vinegar can be swapped for apple cider vinegar, though the flavor will be slightly fruitier. If you’re out of olive oil, avocado oil is a neutral alternative that holds up to heat.
This sauce keeps beautifully. Store in an airtight container in the fridge for up to 1 week. For longer storage, freeze in ice cube trays for up to 3 months. Reheat gently on the stove with a splash of water to restore its silky texture.
Why You’ll Love This Recipe
- 5 Ingredient Magic: Honestly, it’s just chop, simmer, and stir—Vidalia onions caramelize in olive oil while balsamic and coconut sugar do the rest.
- Sweet & Tangy: That balance of coconut sugar’s depth with balsamic’s sharpness? I’ll be real: it’s the reason I make this weekly.
- Drizzle on Everything: From grilled chicken to roasted veggies or even a spoonful over vanilla ice cream, this sauce never sits unused.
- Keeps Like a Dream: Between us, it tastes even better the next day, and a batch lasts me a full week in the fridge.
Step-by-Step Instructions for Vidalia Onion Sauce
Master the caramelization process and you’ll create a rich, glossy sauce with complex sweet and tangy notes.
Step 1: Sauté the Onions to Deep Caramelization
Heat 2 tbsp Extra-Virgin Olive Oil in a large, heavy-bottomed skillet over medium-low heat. Add all 2 lb Vidalia Onions and stir to coat evenly. The low and slow approach is crucial here—rushing with high heat will burn the onions before they caramelize.
Cook for 30-40 minutes, stirring every 5 minutes, until the onions transform from translucent to a deep amber color. You’ll notice them reducing significantly in volume and developing a rich, sweet aroma. If they start to stick, add a splash of water and scrape up any browned bits.
Step 2: Deglaze and Build the Sauce Base
Once the onions are deeply caramelized, pour in the 0.25 cup Balsamic Vinegar. The vinegar will sizzle and bubble as it deglazes the pan, lifting all those flavorful browned bits. Use a wooden spoon to scrape the bottom of the skillet thoroughly.
Add the 2 tbsp Coconut Sugar, 0.5 tsp Sea Salt, and 0.25 tsp Black Pepper. Stir well to combine, then reduce the heat to low. The sugar will dissolve into the vinegar, creating a glossy, syrup-like consistency that coats the onions beautifully.
Step 3: Simmer to Thicken the Sauce
Continue cooking over low heat for an additional 10-15 minutes, stirring occasionally. The sauce will gradually thicken as the liquid reduces. Watch for the mixture to reach a jam-like consistency—it should coat the back of a spoon and leave a clear trail when you drag your finger through it.
The onions will become tender and nearly melt into the sauce, while the flavors deepen and meld together. If the sauce thickens too quickly or starts to catch, add a tablespoon of water and stir to loosen it.
Step 4: Finish with Olive Oil for Gloss and Depth
Remove the skillet from heat and stir in the remaining 1 tbsp Extra-Virgin Olive Oil. This final touch adds a silky finish and enhances the sauce’s richness. The oil will glisten on the surface, giving the sauce a professional, restaurant-quality appearance.
Let the sauce cool slightly before using. It will continue to thicken as it cools, so if you plan to serve it warm, add a splash of hot water to loosen it to your desired consistency. Taste and adjust seasoning if needed, though the caramelization process typically concentrates the flavors perfectly.
Pro Tips For Making Vidalia Onion Sauce
- Caramelize Low and Slow: Cook the Vidalias on medium-low heat for at least 30-40 minutes, stirring occasionally—rushing this with high heat just gives you burnt bits instead of sweet, jammy onions.
- Slice Evenly: Cut the onions into uniform 1/4-inch slices so they cook at the same rate; I learned this the hard way after ending up with half charred, half raw strands.
- Deglaze with Vinegar: After the onions are golden, pour in the balsamic vinegar to lift all those browned bits from the pan—they pack serious flavor into the sauce.
- Skip the Substitutes: Use real coconut sugar, not brown sugar—its deeper caramel notes actually change the outcome in a way that’s worth the extra minute to grab it.
Troubleshooting This Recipe
Sauce Too Thin
If your sauce hasn’t thickened after the full cooking time, continue simmering over low heat for 5-10 additional minutes. The key is patience—rushing with high heat will burn the Vidalia Onions. Stir frequently to prevent sticking. 🔥
Sauce Too Thick
If it thickens too much, simply stir in 1-2 tbsp hot water or vegetable broth to reach your desired consistency. This sauce should coat the back of a spoon but still drizzle easily. I often do this right before serving.
Bitter Flavor
Bitterness usually means the onions burned during caramelization. Unfortunately, there’s no fixing this—start over with medium-low heat and stir more frequently. The natural sweetness of Vidalia Onions should shine through without any harsh notes.
Sauce Separating
If the oil separates after cooling, just give it a good stir before using. For a more stable emulsion, you can blend the sauce briefly with an immersion blender. This creates a smoother, more uniform texture.
Uneven Caramelization
If your onions aren’t caramelizing evenly, it’s likely because the pan wasn’t hot enough at the start. Next time, ensure the Extra-Virgin Olive Oil is shimmering before adding the onions. Also, use a heavy-bottomed skillet to prevent hot spots. 💡
Storage Texture Changes
After refrigeration, the sauce may thicken significantly. Simply warm it gently in a saucepan with 1-2 tbsp water to restore its silky consistency. The flavors often deepen after a day in the fridge.
Nutrition Facts
Frequently Asked Questions
Can I use regular yellow onions instead?
Vidalia’s sweetness is key, but yellow onions work in a pinch. Add 1 extra tbsp sugar to compensate. The flavor will be sharper but still delicious.
How do I make this sauce thicker?
Simmer uncovered on low heat for 5-10 minutes past the recipe time. Stir often to prevent burning. The sauce will thicken as moisture evaporates.
What dishes pair best with this sauce?
It’s fantastic on grilled burgers, as a dip for fries, or drizzled over roasted veggies. Also try it with seared portobello mushrooms or as a sandwich spread.
Can I make this sauce ahead of time?
Yes! It keeps for 1 week refrigerated in an airtight container. The flavors actually improve after 24 hours as they meld together.

- 6 Egg Cake Recipe with Oil: Light as Air With Buttery Moisture - October 4, 2026
- 4 Bean Casserole Recipe: One-Pan Heartiness With Smoky Paprika Depth - October 4, 2026
- 3-Ingredient Keto Mug Cake Recipe: Microwave Magic in 2 Minutes - October 4, 2026