
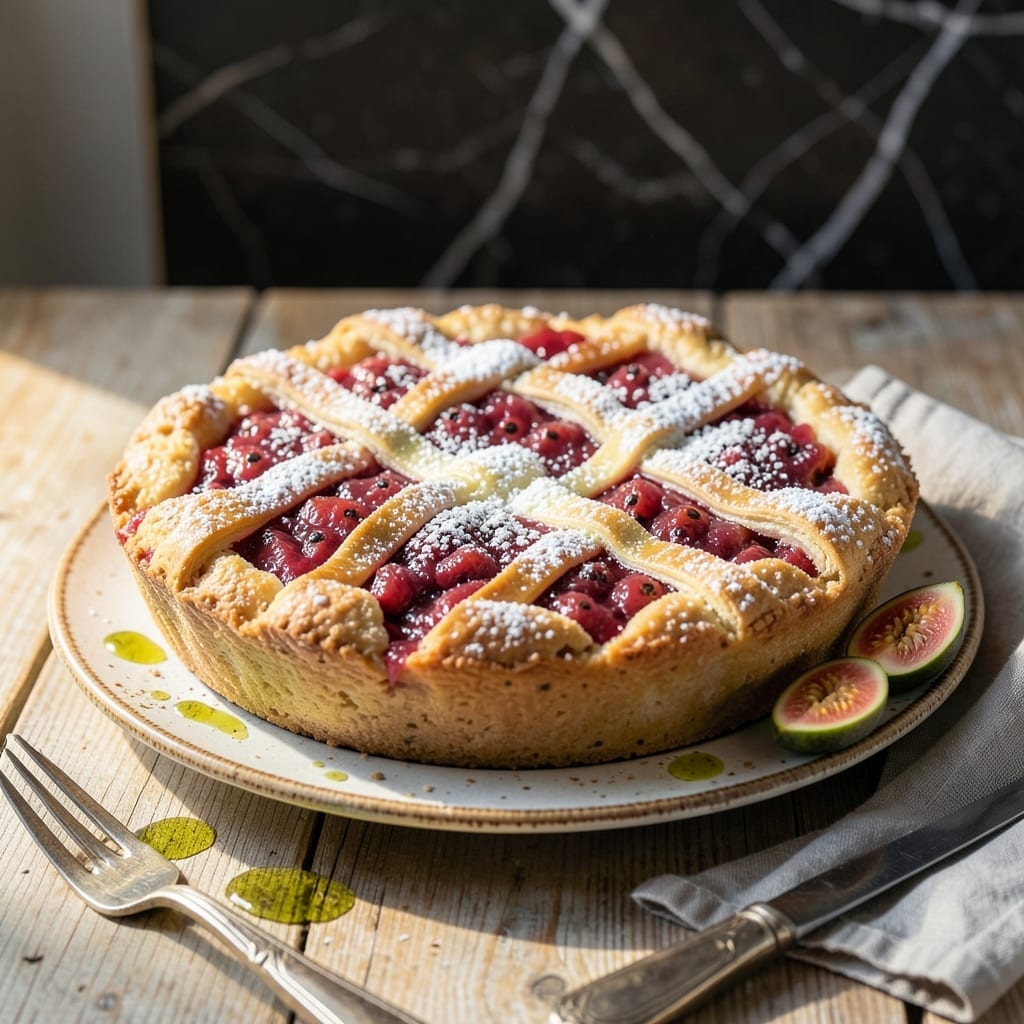
This Virgin Islands-inspired tart captures the essence of tropical baking with its golden crust and vibrant filling. The buttery pastry provides a perfectly flaky base for the sweet, aromatic guava center that defines Caribbean desserts.
I developed this version after testing multiple crust techniques to achieve the right balance between crisp and tender. The guava filling uses ripe fruit for an authentic taste that’s neither too tart nor overly sweet.
What makes this tart special is how the filling sets—firm enough to hold its shape but still smooth and spreadable. The crust stays crisp even after baking, creating a delightful contrast in every bite.
Serve it warm or at room temperature for a taste of island tradition. The process is straightforward, with satisfying results that impress every time.
Ingredients for Virgin Islands Guava Tart
Golden crust plus vibrant guava filling. Nothing says Caribbean summer better than this.
| Ingredient | Amount | Notes |
|---|---|---|
| All-Purpose Flour 🌾 | 2 cups | Plus extra for dusting |
| Granulated Sugar 🍚 | ¼ cup | Divided for crust and filling |
| Salt 🧂 | ½ tsp | Fine sea salt preferred |
| Unsalted Butter 🧈 | 1 cup | Cold, cubed for flaky crust |
| Ice Water 💧 | ¼ cup | Plus 1 tbsp as needed |
| Ripe Guava 🍈 | 2 cups | Peeled, seeded, diced |
| Brown Sugar 🍯 | ⅓ cup | Light or dark variety |
| Lemon Juice 🍋 | 1 tbsp | Freshly squeezed |
| Ground Cinnamon 🌿 | ½ tsp | For warmth in filling |
| Vanilla Extract 🌿 | 1 tsp | Pure extract preferred |
| Cornstarch 🌾 | 1 ½ tbsp | Thickens the filling |
| Heavy Cream 🥛 | 2 tbsp | Optional for glossy finish |
The butter is everything for that flaky crust. Land O’Lakes or Plugrá are my go-tos—high fat content means better layers. Guava can be tricky to find fresh outside tropical markets, but Latin grocery stores often carry it. Look for fruit that’s fragrant and slightly soft (like a ripe avocado). If you’re buying frozen, Goya makes a solid guava pulp that works in a pinch.
No guava? Mango or passion fruit give similar tropical vibes—adjust sugar to taste since mango tends to be sweeter. Out of cornstarch? Instant tapioca at the same amount works too. For the crust, if you’re gluten-free, King Arthur’s 1:1 flour blend swap is seamless. The cinnamon can be reduced to a quarter teaspoon if you prefer the guava flavor to really shine.
Tart keeps 3 days at room temperature (covered) or 1 week in the fridge. Freeze the crust dough for up to 3 months if you want to prep ahead. Baked tart freezes well too—just thaw overnight before serving.
Why You’ll Love This Recipe
- One Bowl Wonder: I just dump the flour, sugar, and butter in a bowl—no fancy gadgets, and the ice water pulls it all together in seconds.
- Tropical Sweetness: That buttery crust with the guava filling? It’s like sunshine on a plate, sweet but not cloying.
- Brunch Showstopper: I serve it at Sunday brunch, and everyone thinks I slaved for hours—little do they know it’s my lazy-day secret.
- Stays Fresh: Honestly, it tastes even better the next day, and the crust stays crisp if I hide it in an airtight container.
Step-by-Step Instructions for Virgin Islands Guava Tart
Here’s the method I use to get that perfect flaky crust and luscious guava filling every time.
Step 1: Make the Buttery Tart Crust
In a food processor, pulse the 2 cups All-Purpose Flour, 0.25 cup Granulated Sugar, and 0.5 tsp Salt until combined. Add the 1 cup Unsalted Butter (cold and cubed) and pulse until the mixture resembles coarse crumbs with pea-sized butter pieces visible.
With the processor running, drizzle in the 0.25 cup Ice Water through the feed tube. Stop when the dough just starts to come together—it should look shaggy but hold when pressed. Don’t overmix or the crust will be tough. Turn the dough out onto a floured surface and shape into a disk. Wrap in plastic and chill for 1 hour.
Step 2: Prepare the Guava Filling
While the dough chills, combine the 2 cups Ripe Guava (peeled, seeded, and diced) with the 0.33 cup Brown Sugar, 1 tbsp Lemon Juice, 0.5 tsp Ground Cinnamon, and 1 tsp Vanilla Extract in a saucepan. Cook over medium heat for 5-7 minutes until the guava softens and releases its juices.
In a small bowl, whisk the 1.5 tbsp Cornstarch with 2 tbsp Heavy Cream until smooth. Stir this slurry into the guava mixture and cook for another 2-3 minutes until the filling thickens and becomes glossy. Remove from heat and let cool completely—it should coat the back of a spoon.
Step 3: Assemble and Blind Bake the Crust
On a floured surface, roll out the chilled dough to a 12-inch circle about ⅛-inch thick. Transfer it to a 9-inch tart pan, pressing gently into the bottom and up the sides. Trim any excess dough and crimp the edges. Freeze the crust in the pan for 15 minutes to prevent shrinking.
Preheat your oven to 375°F. Line the crust with parchment paper and fill with pie weights or dried beans. Blind bake for 15 minutes, then remove the weights and parchment. Bake for another 5-7 minutes until the crust is light golden brown.
Step 4: Fill and Finish the Tart
Once the crust is cooled slightly, pour in the guava filling, spreading it evenly. Bake at 375°F for 20-25 minutes until the filling is set and slightly puffed at the edges. You’ll know it’s done when the center no longer jiggles when gently shaken.
Let the tart cool completely in the pan on a wire rack—this takes about 2 hours. The filling will firm up as it cools. For a glossy finish, brush the top with a little extra heavy cream while still warm. Serve at room temperature for the best texture.
Pro Tips For Making Virgin Islands Guava Tart
- Chill the Dough: After mixing the flour, butter, and ice water, refrigerate the dough for at least 30 minutes—this prevents shrinking when baked and makes rolling easier. I learned this the hard way after my first tart shell collapsed in the pan.
- Use Cold Butter: Cut the unsalted butter into small cubes and keep it ice-cold until mixing. Sounds fussy, but it creates flaky layers in the crust that melt perfectly around the guava filling.
- Skip Warm Water: Only use ice water for the dough; warm water softens the butter and makes the crust tough. My grandmother swore by this, and she was right: the colder, the better.
- Pre-Bake the Crust: Blind-bake the tart shell for 8-10 minutes before adding the guava filling to avoid a soggy bottom. I was skeptical until I tried it—now it’s non-negotiable.
Make-Ahead Tips for virgin islands guava tart
Prep the Crust Ahead
The dough can be made 2 days in advance and stored wrapped in plastic in the fridge. Let it sit at room temperature for 15 minutes before rolling to prevent cracking. I always make extra dough to have on hand for spontaneous baking. 💡
Blind Bake Early
You can blind bake the crust 1 day ahead and store it at room temperature in an airtight container. This is perfect for busy schedules. Just ensure it’s completely cooled before sealing to avoid condensation.
Filling Preparation
The guava filling can be prepared 3 days ahead and refrigerated in a sealed container. When ready to use, give it a good stir and warm slightly to make spreading easier. This also allows flavors to meld beautifully.
Fully Assemble Ahead
Assemble the tart 1 day before serving, but don’t bake it yet. Cover with plastic wrap and refrigerate. Bake as directed, adding 5-10 minutes if the filling is cold from the fridge.
Freeze for Later
Baked tarts freeze well for up to 3 months. Wrap tightly in plastic and aluminum foil. Thaw overnight in the fridge before serving. I love having one ready for unexpected guests. ❄️
Room Temperature Serving
If making ahead, let the tart come to room temperature before serving. This takes about 2 hours and ensures the filling has the perfect creamy texture that defines this dish.
Nutrition Facts
Frequently Asked Questions
Can I use canned guava paste instead of fresh?
Yes, substitute 1 1/2 cups paste for fresh guava. Thin with 2-3 tbsp water and add 1 tbsp lemon juice to balance sweetness.
Why did my crust shrink during baking?
This happens when the dough isn’t chilled enough. Freeze the crust in the pan for 15 minutes before blind baking, and use pie weights to maintain shape.
How do I know when the filling is properly thickened?
It should coat the back of a spoon and leave a clear path when you draw a finger through it. Cook for 2-3 minutes after adding cornstarch.
Can I make this gluten-free?
Use a 1:1 gluten-free flour blend for the crust. Add 1/2 tsp xanthan gum if your blend doesn’t contain it. The filling is naturally gluten-free.

- 6 Egg Cake Recipe with Oil: Light as Air With Buttery Moisture - October 4, 2026
- 4 Bean Casserole Recipe: One-Pan Heartiness With Smoky Paprika Depth - October 4, 2026
- 3-Ingredient Keto Mug Cake Recipe: Microwave Magic in 2 Minutes - October 4, 2026