
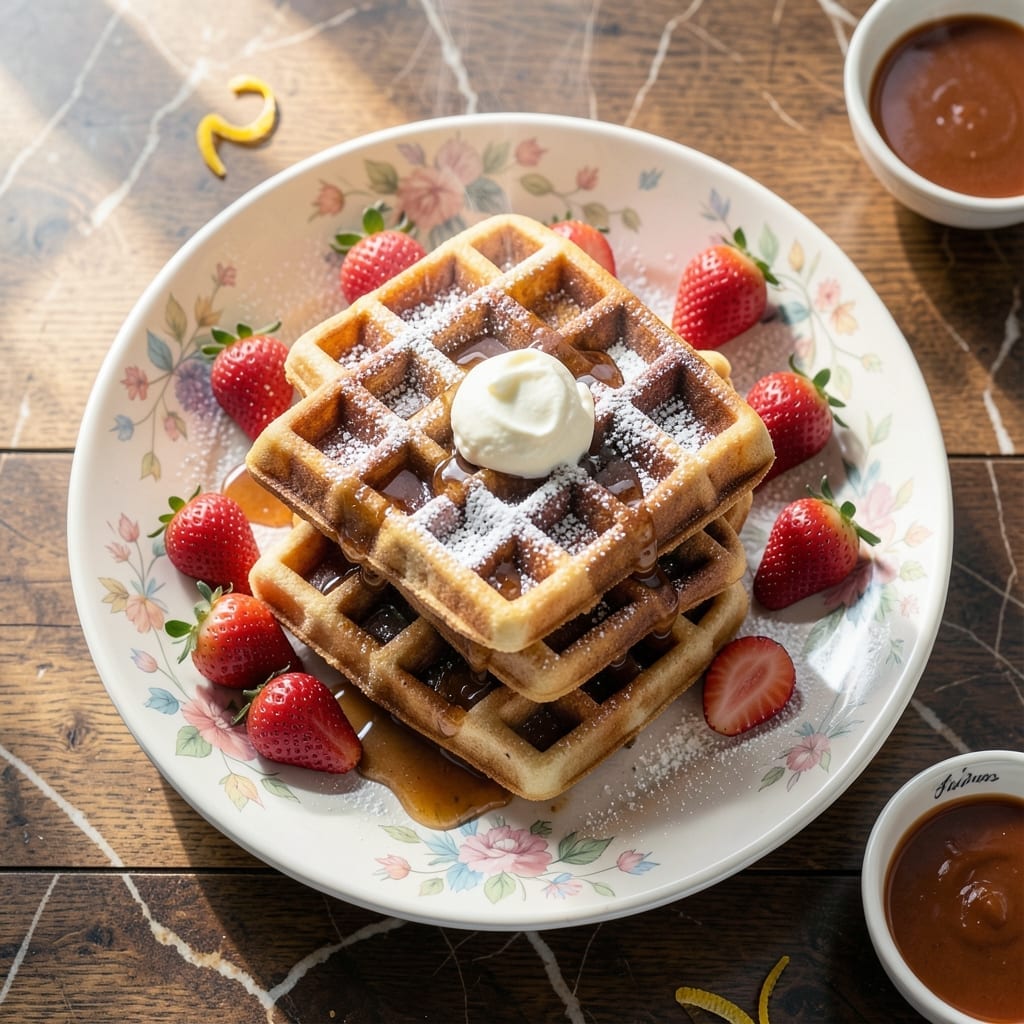
This Bisquick waffle recipe delivers fluffy, golden results with minimal effort. The secret lies in the perfect ratio of Bisquick mix to liquid, creating a batter that crisps beautifully on the outside while staying light inside.
You’ll need just a few pantry staples beyond the mix, and the batter comes together in minutes. Cooking at the right temperature ensures even browning and that signature crisp texture that holds syrup perfectly.
Each waffle emerges with deep, crisp grids ready to be topped with butter, fruit, or whipped cream. The process is streamlined without sacrificing quality, making it ideal for busy mornings.
Serve warm for the best texture and flavor. This method guarantees consistent results every time.
Ingredients for Waffle Recipe Bisquick
Pantry staples plus Bisquick make this breakfast come together in minutes.
| Ingredient | Amount | Notes |
|---|---|---|
| Bisquick Baking Mix 🥣 | 2 cups | Original variety preferred |
| Large Eggs 🥚 | 2 whole | Beaten until frothy |
| Whole Milk 🥛 | 1 ⅓ cup | 2% or whole for richness |
| Vegetable Oil 🫒 | 2 tbsp | Or melted butter alternative |
| Vanilla Extract 🌿 | 1 tsp | Pure extract for best flavor |
| Granulated Sugar 🧂 | 1 tbsp | Optional for sweetness |
| Salt 🧂 | ¼ tsp | Balances sweetness |
| Ground Cinnamon 🌿 | ½ tsp | Optional for warm spice |
| Unsalted Butter 🧈 | 4 tbsp | For serving and greasing |
| Maple Syrup 🍁 | ¾ cup | For serving |
The Bisquick is doing the heavy lifting here. General Mills original formula gives the best rise and texture—avoid the heart-smart or gluten-free versions unless necessary. Milk adds richness, but buttermilk works too (reduce by 2 tbsp). The eggs need to be beaten well—this is what creates those airy, golden grids. Most grocery stores carry Bisquick in the baking aisle.
No milk? Any dairy-free alternative at a 1:1 ratio. Out of eggs? Flax eggs work in a pinch (1 tbsp ground flax + 3 tbsp water per egg). Skip the cinnamon if you prefer plain waffles. The oil can be replaced with melted butter for extra richness. Coconut oil adds a subtle flavor that pairs well with the vanilla.
Batter keeps in the fridge for 1 day—give it a good stir before cooking. Cooked waffles freeze beautifully for 3 months. Reheat in a toaster or oven to restore crispness. Always preheat your waffle iron for even cooking.
Why You’ll Love This Recipe
- One Bowl Wonder: I just dump the Bisquick, eggs, milk, oil, and vanilla in a bowl and stir—no sifting, no fuss.
- Vanilla Clouds: The vanilla extract gives these waffles that warm, sweet aroma that makes my kitchen smell like a diner.
- Breakfast for Dinner: We’ve had these for lazy Sunday mornings and frantic Tuesday dinners—honestly, they work anytime.
- Freezer Friendly: I double the batch, freeze the extras, and pop them in the toaster on busy mornings.
Step-by-Step Instructions for Waffle Recipe Bisquick
Here’s the method. Straightforward, tested, works every time.
Step 1: Combine Wet Ingredients
In a large mixing bowl, whisk together the 2 whole Large Eggs until frothy. Add the 1.33 cup Whole Milk, 2 tbsp Vegetable Oil, and 1 tsp Vanilla Extract. Mix until fully combined and smooth.
I use a fork for this—it gives you better control than a spoon and ensures the eggs are fully broken up. The mixture should look slightly pale and well blended, with no visible oil separation. This forms the liquid base that will hydrate the Bisquick.
Step 2: Incorporate Dry Ingredients
Gradually add the 2 cups Bisquick Baking Mix to the wet ingredients, stirring just until combined. Don’t overmix—it’s okay if a few lumps remain. Overworking the batter develops gluten, which makes waffles tough instead of tender.
Now stir in the 1 tbsp Granulated Sugar, 0.25 tsp Salt, and 0.5 tsp Ground Cinnamon. The batter will be thick but pourable. Let it rest for 2-3 minutes while you preheat your waffle iron—this allows the Bisquick to fully absorb the liquid.
Step 3: Preheat and Grease the Waffle Iron
Turn your waffle iron to its highest setting and let it preheat completely. Most irons have an indicator light that signals when it’s ready. I’ve found that a properly preheated iron is essential for that crispy exterior and fluffy interior.
Using a pastry brush or folded paper towel, lightly coat the hot plates with some of the 4 tbsp Unsalted Butter. Be careful—the iron is hot. This prevents sticking and adds a subtle richness to the waffles. Even nonstick irons benefit from a light coating of butter.
Step 4: Cook Until Golden Brown
Pour about ½ cup of batter onto the center of the preheated waffle iron. The exact amount depends on your iron’s size, but ½ cup works for most standard models. Spread the batter slightly with a spatula if needed, but don’t overwork it.
Close the lid and cook for 3-5 minutes until the waffle is golden brown and crisp. Don’t open the iron too early—waffles need time to develop that perfect texture. You’ll know it’s ready when steam stops escaping from the sides and the iron’s indicator light signals completion.
Carefully remove the waffle and transfer it to a wire rack. Avoid stacking them directly on a plate, as this can make the bottoms soggy. Repeat with the remaining batter.
Step 5: Serve Warm with Toppings
Serve the waffles immediately while still hot and crisp. Top each with a generous drizzle of maple syrup and a pat of the remaining unsalted butter. The heat of the waffle will melt the butter beautifully.
For best results, keep cooked waffles warm in a 200°F oven while you finish the batch. This maintains their crispness without overcooking. The combination of fluffy interior, crispy exterior, and sweet maple syrup makes every bite perfect.
Pro Tips For Making Waffle Recipe Bisquick
- Preheat the Iron: I learned this the hard way—always let your waffle iron heat up fully for at least 5 minutes before adding batter. Cold iron means uneven cooking and pale, soggy edges.
- Whisk the Batter: After burning three batches, I finally figured out that a few extra seconds of vigorous whisking removes lumps and gives you a lighter, airier texture.
- Skip Overmixing: Stir just until the dry spots disappear—overworking the Bisquick batter makes waffles tough, not tender.
- Use Room Temp Eggs: Sounds weird, but it works: letting the eggs sit out for 10-15 minutes before mixing helps them blend smoothly and rise better in the batter.
Storing and Reheating waffle recipe bisquick
Refrigerator Storage
Let your waffles cool completely before storing—I place them on a wire rack for 10-15 minutes. Transfer to an airtight container or resealable bag, separating layers with parchment paper. They’ll stay fresh in the fridge for up to 3 days. ❄️
Freezer Storage
For longer storage, freeze cooled waffles in a single layer on a baking sheet first. Once solid, transfer to a freezer bag, squeezing out excess air. This prevents freezer burn and keeps them tasting fresh for up to 2 months. Label with the date for easy tracking.
Toaster Method
This is my go-to for quick reheating. Pop frozen waffles directly into the toaster on medium-high for 2-3 minutes. No need to thaw first. The toaster restores crispness beautifully, almost like fresh off the iron.
Oven Reheating
Preheat your oven to 350°F and place waffles on a wire rack over a baking sheet. Heat for 8-10 minutes until warmed through and crisp. This works best for larger batches and keeps them from getting soggy.
Microwave Option
For speed, microwave single waffles on a microwave-safe plate for 30-45 seconds. Place a damp paper towel over them to retain moisture. Note this method softens the texture, so I reserve it for quick breakfasts when crispness isn’t critical.
Nutrition Facts
Frequently Asked Questions
Can I use water instead of milk?
Yes, but milk adds richness and tenderness. Water works in a pinch, though the texture may be slightly less fluffy. Stick to the same 1 ⅓ cups measurement.
Why are my waffles dense instead of fluffy?
Overmixing the batter develops gluten, which makes waffles tough. Stir just until combined—small lumps are fine. Also ensure your waffle iron is fully preheated before adding batter.
Can I make the batter the night before?
Yes! Mix the batter, cover, and refrigerate overnight. Stir briefly before using, as it will thicken slightly. This can actually improve flavor development.
How do I prevent waffles from sticking?
Always preheat the iron and use a light coating of oil or melted butter, even on nonstick surfaces. Let waffles cook fully before attempting to remove them.

- 6 Egg Cake Recipe with Oil: Light as Air With Buttery Moisture - October 4, 2026
- 4 Bean Casserole Recipe: One-Pan Heartiness With Smoky Paprika Depth - October 4, 2026
- 3-Ingredient Keto Mug Cake Recipe: Microwave Magic in 2 Minutes - October 4, 2026