
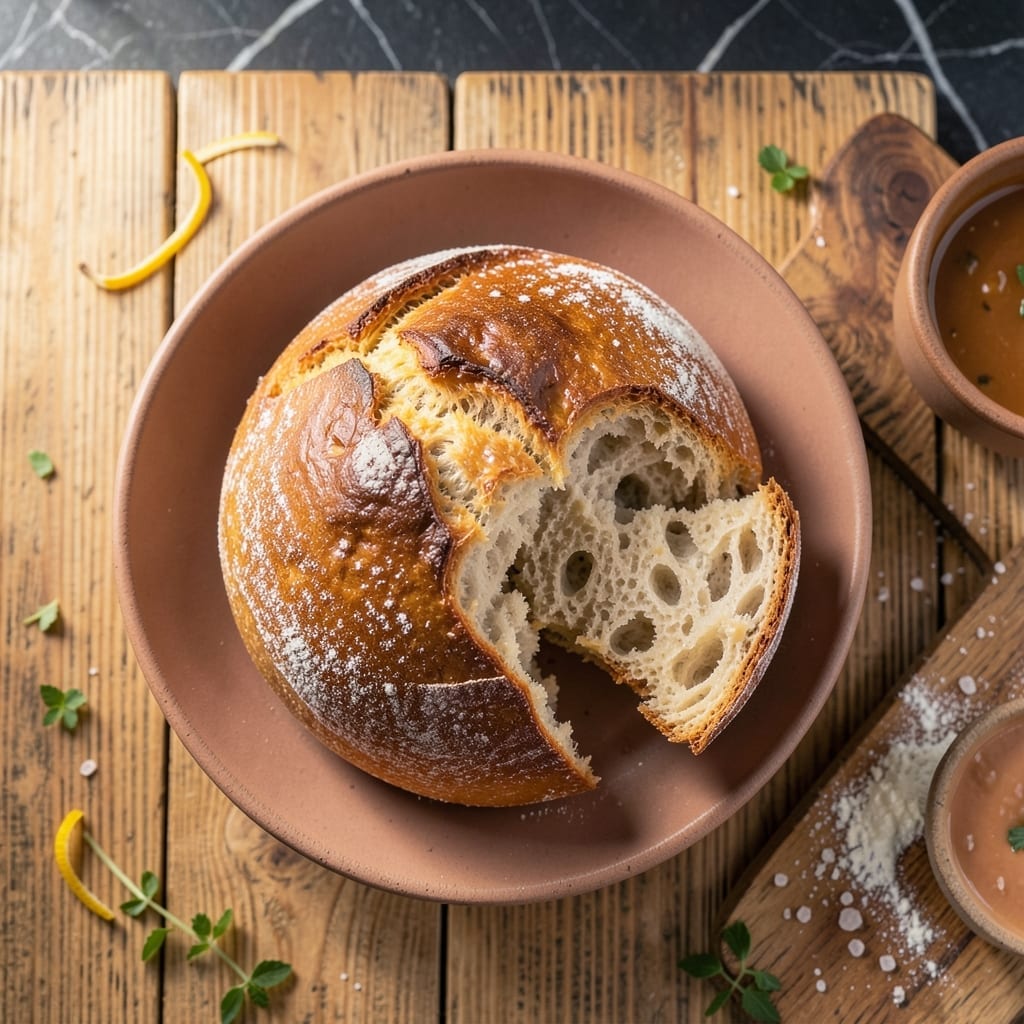
This no-knead bread proves that incredible results don’t require complicated techniques. The method relies on time rather than effort, allowing the dough to develop naturally for a light, airy texture.
With just 4 ingredients and 5 minutes of active prep, you’ll create a loaf that bakes to a golden crust with a soft, open crumb. The hydration from water ensures a tender interior without density.
The process is foolproof—mix, rest, shape, and bake. No special equipment or prior experience needed. The long fermentation does the work, yielding bread that rivals artisanal bakery loaves.
Perfect for beginners or anyone short on time. Here’s how to make it.
Ingredients for Water Bread Recipe Easy
Four simple ingredients transform into artisanal bread with minimal effort required.
| Ingredient | Amount | Notes |
|---|---|---|
| Bread Flour 🌾 | 3 ½ cups | All-purpose works in a pinch |
| Water 💧 | 1 ¾ cups | Warm, about 100°F |
| Active Dry Yeast 🍞 | ¾ tsp | Or instant yeast |
| Salt 🧂 | 1 ½ tsp | Fine sea salt preferred |
The flour is the foundation here. King Arthur Bread Flour gives the best rise and structure, but Gold Medal All-Purpose works fine in a pinch (the protein difference is negligible for this method). Yeast matters—check the expiration date. Old yeast is the #1 reason no-knead bread fails to rise. I buy mine from Whole Foods bulk section where turnover is high.
No bread flour? All-purpose at a 1:1 ratio is acceptable—texture will be slightly denser. Substituting instant for active dry? Use the same amount, no need to proof first. Water temperature is flexible (100-110°F), but too hot kills the yeast. Salt can be table salt if needed—use 1 tsp instead of 1.5 to account for density differences.
Store flour in an airtight container for up to 6 months. Yeast keeps 1 year unopened, 3 months once opened—refrigerate after opening. The dough can rest in the fridge for up to 3 days before baking (develops more flavor).
Why You’ll Love This Recipe
- Minimal Ingredients: I love that it only needs flour, water, yeast, and salt—no fancy additions or last-minute store runs.
- Crispy Yet Chewy: The crust gets this perfect golden crunch while staying soft inside, just from the simple hydration of the dough.
- Weeknight Hero: Honestly, I throw this together after work and it’s ready by the time the table’s set.
- Pennies Per Loaf: Between us, this costs less than a dollar per loaf and tastes better than most bakery breads I’ve bought.
Step-by-Step Instructions for Water Bread
Here’s the method. Straightforward, tested, works every time.
Step 1: Activate the Yeast and Combine Wet Ingredients
Begin by dissolving the 0.75 tsp Active Dry Yeast in the 1.75 cups Water that’s warmed to about 100°F. I always use a kitchen thermometer to ensure the water isn’t too hot—anything above 110°F can kill the yeast, while too cool won’t activate it properly.
Let the mixture sit for 5-10 minutes until it becomes frothy and bubbly. This visual confirmation means the yeast is alive and active. If you don’t see bubbles, your yeast may be expired, and you’ll need to start over with fresh yeast.
Step 2: Incorporate Dry Ingredients to Form the Dough
In a large mixing bowl, combine the 3.5 cups Bread Flour and 1.5 tsp Salt. I prefer fine sea salt for its consistent texture and clean flavor. Using bread flour ensures a higher protein content, which develops the gluten structure needed for that perfect fluffy texture.
Pour the activated yeast mixture into the dry ingredients and stir with a wooden spoon or silicone spatula until just combined. The dough will be sticky and shaggy—that’s exactly what you want. Don’t be tempted to add more flour; the high hydration is key to this recipe’s light, airy result.
Step 3: First Rise for Optimal Fermentation
Cover the bowl with a damp kitchen towel or plastic wrap and let it rise at room temperature for 1.5-2 hours. I place mine near a warm spot in the kitchen, like on top of the fridge, to encourage rising. You’re looking for the dough to roughly double in size and develop a bubbly surface.
This first rise allows the yeast to ferment the sugars in the flour, creating air pockets that give the bread its signature fluffiness. If your kitchen is cooler, the rise might take a bit longer—just be patient and wait for that visual cue of doubled volume.
Step 4: Shape and Second Rise for Structure
Once the dough has risen, gently deflate it by pressing down with your fingers to release some air. Turn it out onto a lightly floured surface and shape it into a round loaf. I like to cup my hands around the dough and drag it toward me to build surface tension, which helps it hold its shape.
Place the shaped dough on a parchment-lined baking sheet, cover it again, and let it rise for another 30-45 minutes. During this second rise, the dough should spring back slowly when gently pressed with a finger. If it springs back quickly, it needs more time.
Step 5: Bake to Golden Perfection
Preheat your oven to 425°F with a Dutch oven or heavy pot inside for at least 30 minutes. This preheating step is crucial for creating the steam needed to achieve a crisp crust and proper oven spring.
Carefully transfer the dough into the preheated pot, using the parchment paper to lift it. Score the top with a sharp knife or razor blade to allow controlled expansion. Bake covered for 30 minutes, then uncover and bake for another 15-20 minutes until the crust is deep golden brown and the internal temperature reaches 200°F.
Remove the bread from the pot and let it cool on a wire rack for at least 20 minutes before slicing. This cooling period allows the crumb to set, ensuring clean slices and the best possible texture.
Pro Tips For Making Water Bread Recipe Easy
- Warm Your Water: Use water around 110°F—hot enough to activate the yeast but not so hot it kills it. I learned this the hard way after a few sad, flat loaves.
- Measure Flour Right: Spoon bread flour into your measuring cup and level it off—don’t scoop directly from the bag. Packed flour makes dense, tough bread.
- Skip Cold Proofing: Let the dough rise in a warm spot, like near the oven with the light on. Cold drafts slow fermentation and can leave you with underproofed dough.
- Salt Last: Add salt after the yeast has foamed in the water—about 5 minutes in. Salt too early can inhibit yeast activation, and nobody wants a brick.
Troubleshooting Great water bread recipe easy
Dense or Flat Bread
If your loaf turns out dense, the yeast likely wasn’t active enough. Always use a thermometer to confirm water is between 100-110°F. I learned this the hard way after killing yeast with 130°F water. Also, check your yeast’s expiration date—old yeast loses potency. 💡
Bread Won’t Rise
No rise usually means a temperature issue. Dough needs warmth to ferment—place it near a warm spot like on top of the fridge. If your kitchen is cold, extend the first rise to 3-4 hours. I use my oven with the light on for consistent warmth.
Tough Crust
Over-baking causes a hard crust. Pull your loaf when it reaches deep golden brown and hits 200°F internal temperature. If already overdone, brush the crust with 1 tbsp melted butter while warm to soften it slightly.
Dough Too Sticky
This is normal for high-hydration bread! Resist adding more flour. Instead, wet your hands with cold water when handling the dough—it prevents sticking without altering the texture. I keep a bowl of water nearby for this exact purpose.
Uneven Bake
If the top browns too fast, tent loosely with aluminum foil during the final 15 minutes. For even heat distribution, ensure your Dutch oven is properly preheated for at least 30 minutes before baking. 🔥
Gummy Interior
Under-baking often leaves the center gummy. Always check internal temperature with a probe thermometer—200°F is non-negotiable. If unsure, return to the oven for 5-10 more minutes covered.
Nutrition Facts
Frequently Asked Questions
Can I use all-purpose flour instead of bread flour?
Yes! Substitute at a 1:1 ratio. Bread flour has more protein for better rise, but all-purpose works fine. Expect a slightly denser crumb.
Why is my dough so sticky?
High hydration is normal for this recipe. Don’t add more flour—wet your hands with cold water when handling. The stickiness creates air pockets for fluffiness.
How do I know when it’s done baking?
The crust should be deep golden brown, and internal temp must hit 200°F. Use a probe thermometer for accuracy. Under-baking causes a gummy center.
Can I make this without a Dutch oven?
Yes, use a heavy oven-safe pot with a lid. Preheat it for 30 minutes to mimic steam. A baking stone with a metal bowl over the loaf works too.

- 6 Egg Cake Recipe with Oil: Light as Air With Buttery Moisture - October 4, 2026
- 4 Bean Casserole Recipe: One-Pan Heartiness With Smoky Paprika Depth - October 4, 2026
- 3-Ingredient Keto Mug Cake Recipe: Microwave Magic in 2 Minutes - October 4, 2026