
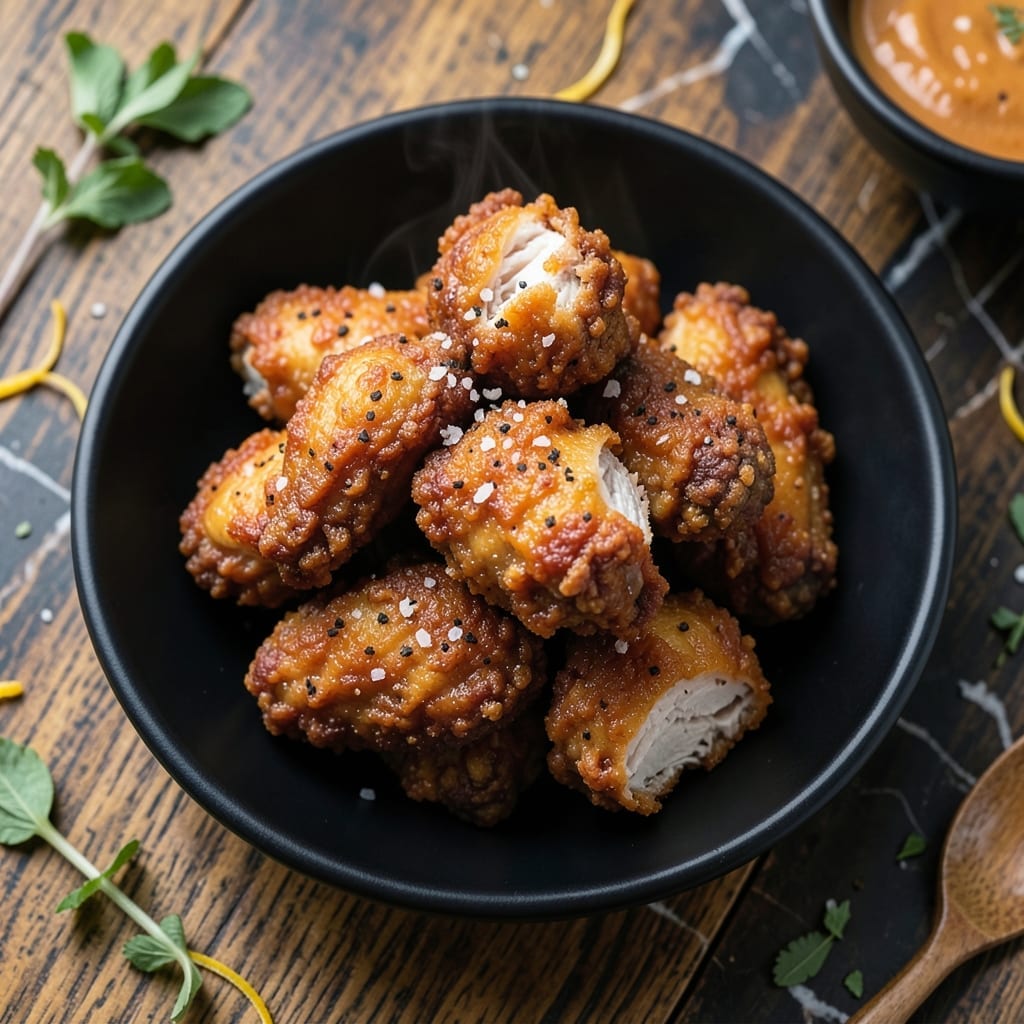
This wet batter method delivers a crispy exterior that shatters with every bite, sealing in the juicy tenderness of the chicken inside. I’ve refined this technique through countless tests to ensure perfect results every time.
The secret lies in the batter’s consistency—thick enough to cling but thin enough to create those delicate, lacy edges. A hot oil temperature of 350°F ensures the coating sets quickly without absorbing excess grease.
What emerges from the fryer is golden, crackling chicken with a moist interior that stays succulent long after cooking. The contrast between the shatteringly crispy shell and the juicy meat is what makes this dish unforgettable.
Serve it hot for the best texture, with your favorite dipping sauces or as the centerpiece of a hearty meal. This method guarantees restaurant-quality results at home.
Ingredients for Wet Batter Fried Chicken
These ingredients create that shatteringly crispy, juicy fried chicken you’ve been craving.
| Ingredient | Amount | Notes |
|---|---|---|
| Chicken Thighs 🍗 | 2 lb | Boneless, skinless, cut into strips |
| All-Purpose Flour 🌾 | 2 cups | For crispy coating texture |
| Cornstarch 🌾 | ½ cup | Extra crispiness booster |
| Baking Powder 🧂 | 1 tbsp | Creates lacy batter edges |
| Salt 🧂 | 1 ½ tsp | Diamond Crystal preferred |
| Black Pepper 🌶️ | 1 tsp | Freshly ground for best flavor |
| Garlic Powder 🧄 | 1 tsp | Enhances savory depth |
| Onion Powder 🧅 | 1 tsp | Balances seasoning profile |
| Paprika 🌶️ | 1 tsp | Sweet variety for color |
| Cayenne Pepper 🔥 | ¼ tsp | Optional for subtle heat |
| Buttermilk 🥛 | 1 ½ cups | Cold, for tenderizing chicken |
| Large Egg 🥚 | 1 whole | Binds batter components |
| Vegetable Oil 🫒 | 8 cups | For deep frying at 350°F |
| Hot Sauce 🌶️ | 2 tbsp | Adds tangy kick to batter |
The chicken thighs are non-negotiable for juiciness—bone-in works too but takes longer to cook. King Arthur Flour is my go-to for consistent results, and the cornstarch is what gives that extra crunch. Baking powder (the aluminum-free kind) creates those delicate, lacy edges that make this coating so special. Don’t skip the buttermilk—its acidity tenderizes the meat while adding richness to the batter.
No buttermilk? Whole milk plus 1 tbsp vinegar works in a pinch. For gluten-free, swap the all-purpose flour for 1:1 gluten-free blend (add 1 extra tbsp xanthan gum). The cayenne can be omitted or doubled depending on heat preference. Peanut oil (higher smoke point) is an excellent alternative to vegetable oil if you’re frying at higher temps.
The battered chicken can rest 10-15 minutes before frying for maximum crispiness. Store raw chicken in the fridge for up to 2 days before cooking. Leftovers keep 3-4 days in the fridge but are best reheated in the oven to maintain texture.
Why You’ll Love This Recipe
- No Fuss Mix: I just toss chicken thighs in a wet batter of flour, cornstarch, and baking powder—no resting, no complicated steps.
- Crispy Magic: The cornstarch and baking powder create a shatteringly crisp crust that stays golden even after sitting.
- Weeknight Hero: Honestly, it’s my go-to for those nights when I need something fast but still want that satisfying crunch.
- Budget Stretcher: Chicken thighs are cheap, and this batter uses pantry staples—so I can feed the whole family without breaking the bank.
Step-by-Step Instructions for Wet Batter Fried Chicken
Here’s the method. Straightforward, tested, works every time.
Step 1: Prepare the Seasoned Dry Coating
In a large bowl, whisk together the 2 cups all-purpose flour, 0.5 cup cornstarch, 1 tbsp baking powder, 1.5 tsp salt, 1 tsp black pepper, 1 tsp garlic powder, 1 tsp onion powder, 1 tsp paprika, and 0.25 tsp cayenne pepper until evenly combined.
The cornstarch and baking powder are crucial here—they create that signature lacy, ultra-crispy coating. Make sure there are no lumps in the mixture, as this ensures every piece of chicken gets an even, uniform coating that fries up perfectly golden.
Step 2: Create the Wet Batter
In a separate large bowl, whisk together the 1.5 cups buttermilk, 1 whole large egg, and 2 tbsp hot sauce until fully combined and slightly frothy. The buttermilk’s acidity tenderizes the chicken while the hot sauce adds a subtle tang.
This wet batter is what gives your chicken that extra juicy interior—the buttermilk not only seasons the meat but also helps the dry coating adhere better. The mixture should be smooth and well-incorporated, with no visible streaks of egg.
Step 3: Coat and Rest the Chicken
Pat the 2 lb chicken thighs dry with paper towels to remove excess moisture. This step is critical—wet chicken won’t adhere properly to the batter. Cut the chicken into even strips for consistent cooking.
Dip each piece into the wet batter, letting excess drip off, then immediately dredge it in the dry coating. Press gently to adhere the coating evenly. Place the coated pieces on a wire rack set over a baking sheet and let them rest for 10 minutes. This resting period helps the coating set, preventing it from sliding off during frying.
Step 4: Fry to Golden Perfection
In a large, heavy-bottomed pot or Dutch oven, heat the 8 cups vegetable oil to 350°F. Use a deep-fry or candy thermometer to monitor the temperature—this is non-negotiable for achieving that perfect crisp.
Working in batches to avoid overcrowding, carefully lower the coated chicken into the hot oil. Fry for 6-8 minutes per side until the coating is deep golden brown and the internal temperature reaches 165°F. The oil temperature will drop when you add the chicken, so allow it to return to 350°F between batches. Drain on a wire rack or paper towels to maintain crispiness.
Real talk: Overcrowding the pot lowers the oil temperature, leading to greasy, soggy chicken. Patience is key here—fry in small batches for the best results.
Step 5: Rest and Serve
Let the fried chicken rest for 5 minutes before serving. This brief pause allows the juices to redistribute, ensuring each bite is as moist as it is crispy.
Serve immediately while still hot. The exterior should have a shatteringly crisp, lacy coating that gives way to tender, juicy chicken inside. If you need to keep it warm, place it on a wire rack in a 200°F oven—but don’t cover it, or the steam will make the coating soggy.
Pro Tips For Making Wet Batter Fried Chicken
- Heat the Oil First: I learned this the hard way—cold oil makes the batter absorb grease instead of crisping up. Get it to 350°F before the chicken goes in, or you’ll end up with a soggy mess.
- Dry the Chicken: Pat those thighs bone-dry with paper towels before dredging. Sounds tedious, but it’s the only way the wet batter sticks properly instead of sliding off in the pan.
- Skip Overcrowding: After burning three batches, I finally figured out that too many pieces in the pan drops the oil temp fast. Fry in batches—yes, even if you’re impatient like me.
- Add Cornstarch: My grandmother swore by this, and she was right: a 1:1 ratio of cornstarch to flour in the wet batter gives that extra-crispy crust that all-purpose flour alone just can’t deliver.
Wine and Beer Pairings for This Dish
Crisp White Wines
A dry Riesling from Germany or Washington State cuts through the richness beautifully. Its high acidity and citrus notes balance the crispy coating. I love Chateau Ste. Michelle for its consistent quality and affordable price. 🍷
Light Beers
A crisp pilsner like Samuel Adams Noble Pils cleanses your palate between bites. The light body and subtle bitterness complement the savory seasoning without overwhelming it. Avoid heavy, malty beers that clash with the chicken’s delicate flavors.
Sparkling Options
Prosecco or Cava works surprisingly well with fried chicken. The effervescence scrubs your palate clean, while the subtle fruit notes harmonize with the dish’s savory-spicy profile. I recommend La Marca Prosecco for its approachable taste.
Dark Beer Pairings
For beer lovers who prefer darker styles, try a dry stout like Guinness. Its roasted malt flavors contrast nicely with the chicken’s crispiness. The carbonation also helps cut through the oiliness. 🍺
Rosés and Blush Wines
A dry rosé from Provence offers red fruit flavors with a crisp finish. The Whispering Angel is my go-to for its versatility. The wine’s acidity and subtle berry notes won’t compete with the chicken’s seasoning.
Non-Alcoholic Choices
Sparkling lemonade or ginger beer provides a refreshing contrast. The acidity and sweetness mirror the wine pairings while keeping the meal family-friendly. I like Fever-Tree Ginger Beer for its bold flavor.
Nutrition Facts
Frequently Asked Questions
What’s the ideal oil temperature for frying?
Maintain 350°F throughout frying for perfect crispiness. Use a thermometer to monitor as temperature drops when adding chicken.
Can I use chicken breasts instead of thighs?
Yes, but thighs stay juicier. If using breasts, reduce cooking time to 5-6 minutes per side to prevent dryness.
Why did my coating fall off during frying?
Likely the batter was too thin or the chicken wasn’t rested after coating. Let it rest 10 minutes before frying.
How do I keep it crispy if serving later?
Place on a wire rack in a 200°F oven. Never cover, as steam will make it soggy.

- 6 Egg Cake Recipe with Oil: Light as Air With Buttery Moisture - October 4, 2026
- 4 Bean Casserole Recipe: One-Pan Heartiness With Smoky Paprika Depth - October 4, 2026
- 3-Ingredient Keto Mug Cake Recipe: Microwave Magic in 2 Minutes - October 4, 2026