
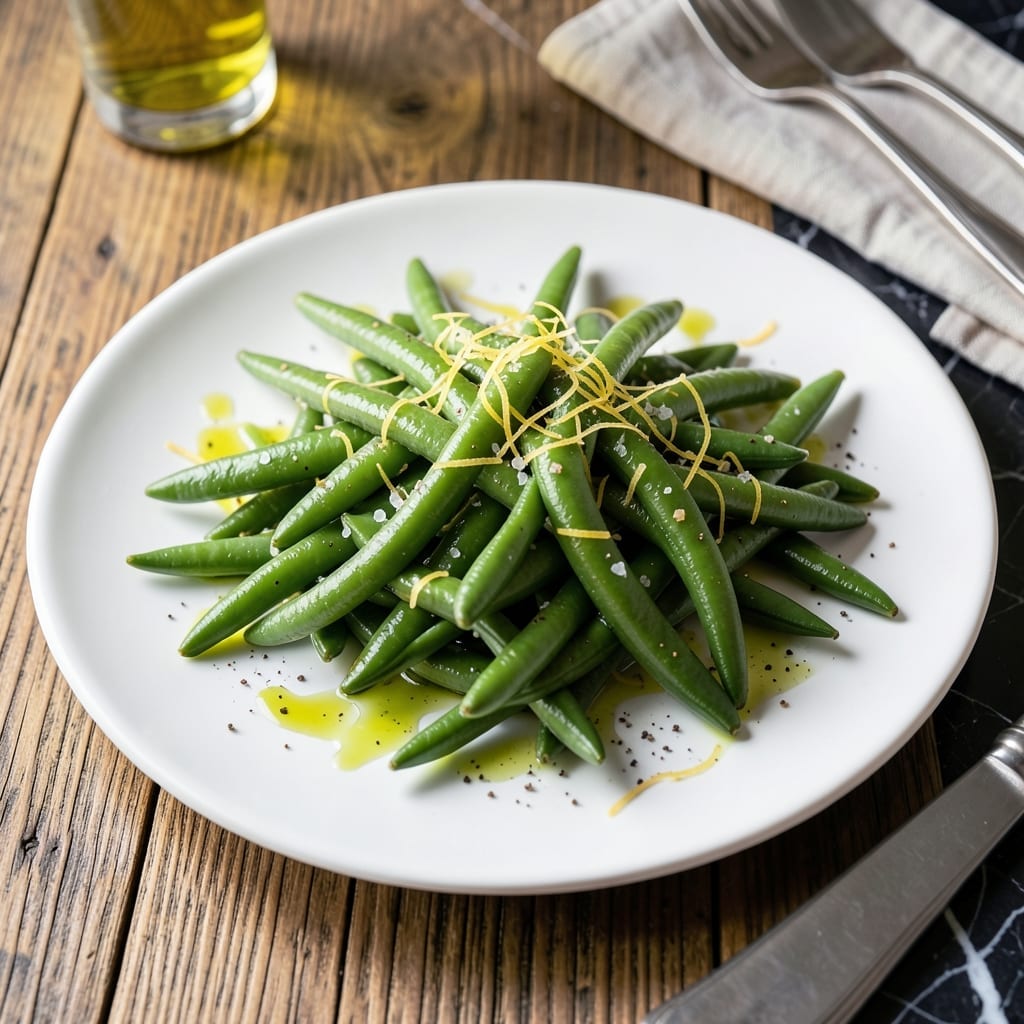
This simple green bean recipe transforms fresh produce into a vibrant side dish with minimal effort. The key is blanch and shock—the method that preserves both color and crunchy texture.
I’ve tested countless variations and found that a quick boil followed by an ice bath creates perfectly tender-crisp beans every time. A final toss with olive oil, salt, and lemon zest enhances their natural sweetness.
What you get is a dish that’s as healthy as it is delicious, with bright green pods that snap satisfyingly between your teeth. The entire process takes less than 15 minutes from start to finish.
Serve these as a light accompaniment to any meal or enjoy them on their own for a fresh, no-fuss snack.
Ingredients for Whole Foods Green Beans
Fresh green beans plus a few pantry staples for bright, crunchy perfection in minutes.
| Ingredient | Amount | Notes |
|---|---|---|
| Fresh Green Beans 🌿 | 1 ½ lb | Trimmed, ends removed |
| Kosher Salt 🧂 | 1 tbsp | For blanching water |
| Ice Cubes ❄️ | 4 cups | For ice bath |
| Extra-Virgin Olive Oil 🫒 | 2 tbsp | High quality for dressing |
| Lemon Zest 🍋 | 1 tbsp | Freshly grated from 1 lemon |
| Freshly Ground Black Pepper 🌶️ | ½ tsp | For finishing |
| Garlic Cloves 🧄 | 2 cloves | Minced (optional enhancement) |
| Red Pepper Flakes 🔥 | ¼ tsp | Optional for heat |
| Fresh Lemon Juice 🍋 | 1 tbsp | For brightness |
| Water 💧 | 8 cups | For blanching |
The green beans are everything here. Whole Foods has the best selection—look for slender, firm pods with vibrant color (no wilted or yellowing ones). Organic if possible, but conventional works fine too. The ice is non-negotiable for that shock step—it stops the cooking instantly and locks in the color. For the olive oil, California Olive Ranch or 365 by Whole Foods are solid choices.
No fresh lemon? Bottled lemon juice at half the amount works in a pinch, but fresh zest is worth it. Skip the garlic if you’re keeping it ultra-simple. For extra flavor, toasted almonds or slivered walnuts add a nice crunch (toss them in at the end). The salt for blanching should be kosher or sea salt—iodized table salt can taste harsh. Prefer a different oil? Avocado or grapeseed work too.
Blanched beans keep 3-4 days in the fridge, stored in a sealed container with a damp paper towel. They’re best served fresh but reheat okay—just don’t overcook them again. Leftovers make great salad toppers (toss with greens and vinegar).
Why You’ll Love This Recipe
- 5-Minute Prep: I just trim the beans and boil—no chopping, no fuss, and the ice bath stops the cooking fast.
- Bright and Zesty: That pop of lemon zest with the olive oil makes them taste fresh and vivid, not bland like steamed veggies often do.
- Pairs with Anything: Honestly, they work beside grilled chicken, in grain bowls, or even as a snack straight from the fridge.
- Budget Stretcher: A pound of green beans costs pennies, and this method keeps them crisp for days—no waste, no sad leftovers.
Step-by-Step Instructions for Bright and Crunchy Green Beans
Here’s my go-to method for vibrant, crisp-tender green beans that never disappoint.
Step 1: Prep and Blanch the Green Beans
First, trim the ends from the 1.5 lb Fresh Green Beans and cut them into uniform lengths if desired. While you work, bring the 8 cups Water to a rolling boil in a large pot. Add the 1 tbsp Kosher Salt—it should taste like the sea, which ensures the beans are perfectly seasoned.
Once boiling, add the green beans and blanch for 2-3 minutes until they turn bright green and are just tender-crisp. Watch closely; overcooking here turns them mushy. Immediately drain them in a colander to stop the cooking process.
Step 2: Shock in an Ice Bath
Transfer the blanched green beans directly into a large bowl filled with the 4 cups Ice Cubes and enough cold water to cover them completely. This ice bath halts cooking instantly and locks in that vibrant color and crisp texture.
Let them chill for 3-4 minutes, stirring occasionally to ensure even cooling. Once fully cold, drain them again and pat dry with a clean towel. This step is non-negotiable—it’s what keeps your beans bright and snappy, not dull and limp.
Step 3: Sauté with Aromatics
Heat the 2 tbsp Extra-Virgin Olive Oil in a large skillet over medium heat. If using, add the 2 cloves Garlic Cloves (minced) and 0.25 tsp Red Pepper Flakes, and sauté for 30 seconds until the garlic is fragrant but not browned. Garlic burns easily, so keep it moving.
Add the drained green beans to the skillet and toss to coat evenly in the oil and aromatics. Sauté for 1-2 minutes just to warm them through—you’re not cooking them further, just infusing flavor. The beans should glisten but retain their crisp bite.
Step 4: Finish with Lemon and Pepper
Remove the skillet from heat. Sprinkle the 1 tbsp Lemon Zest and 0.5 tsp Freshly Ground Black Pepper over the green beans, then drizzle with the 1 tbsp Fresh Lemon Juice. Toss gently to distribute everything evenly.
The lemon zest adds a bright, citrusy aroma, while the juice gives a tangy kick that balances the richness of the olive oil. Taste and adjust seasoning if needed, though the blanching salt should have done most of the work. Serve immediately while warm—the flavors are at their peak.
Pro Tips For Making Whole Foods Green Beans
- Blanch First: Drop the green beans into salted boiling water for 2-3 minutes, then shock in ice water—this keeps them crisp and bright green. I learned this the hard way after serving sad, limp beans.
- Salt the Water Well: Use about 1 tablespoon of kosher salt per quart of water. Sounds like a lot, but it actually changes the outcome by seasoning the beans from the start.
- Skip the Overcooking: Resist the urge to leave them in the boiling water too long—past 3 minutes, they lose that perfect snap. My grandmother swore by this, and she was right.
- Zest Last: Add the lemon zest right before serving to preserve its fresh, bright flavor. I was skeptical until I tried it—now I wouldn’t do it any other way.
Health Benefits of This whole foods green beans
Nutrient-Rich Powerhouse
These beans pack a serious nutritional punch with just 31 calories per cup. They’re loaded with fiber—about 2.7 grams per serving—which supports digestion and keeps you feeling full. I love that they deliver so much goodness with minimal calories. 💪
Vitamin and Mineral Boost
Green beans are an excellent source of vitamin C, providing about 12% of your daily needs in a single cup. They also deliver vitamin K, folate, and silicon, which supports bone health and skin elasticity. A simple side dish that doubles as a multivitamin!
Heart Health Benefits
The fiber and antioxidants in green beans help lower cholesterol levels and reduce the risk of heart disease. They’re also naturally low in sodium, making them a heart-smart choice. I always feel good serving this dish to my family. 💛
Blood Sugar Support
With a low glycemic index, green beans help regulate blood sugar levels, making them ideal for those managing diabetes. The fiber slows digestion, preventing spikes in blood sugar after meals. This is one side dish that’s as smart as it is delicious.
Hydration and Detox
Green beans are about 90% water, contributing to your daily hydration needs. They also contain chlorophyll, which may help detoxify the body. A refreshing, cleansing addition to any meal.
Antioxidant Protection
Rich in flavonoids and carotenoids, green beans help combat oxidative stress and inflammation. These compounds support overall health and may reduce the risk of chronic diseases. Simple, flavorful, and packed with protective benefits.
Nutrition Facts
Frequently Asked Questions
Can I use frozen green beans instead?
Yes, but texture differs. Thaw first, then blanch for 1-2 minutes only. Frozen beans soften faster and may not stay as crisp.
Why do I need the ice bath?
It stops cooking immediately, preserving that vibrant green color and crisp texture. Skip it and your beans may turn dull and mushy.
How do I keep them crisp for meal prep?
Store in an airtight container with a damp paper towel. They’ll stay fresh for 3-4 days in the fridge.
Can I add other seasonings?
Try toasted almonds, balsamic vinegar, or fresh herbs like dill or parsley for extra flavor.

- 6 Egg Cake Recipe with Oil: Light as Air With Buttery Moisture - October 4, 2026
- 4 Bean Casserole Recipe: One-Pan Heartiness With Smoky Paprika Depth - October 4, 2026
- 3-Ingredient Keto Mug Cake Recipe: Microwave Magic in 2 Minutes - October 4, 2026