
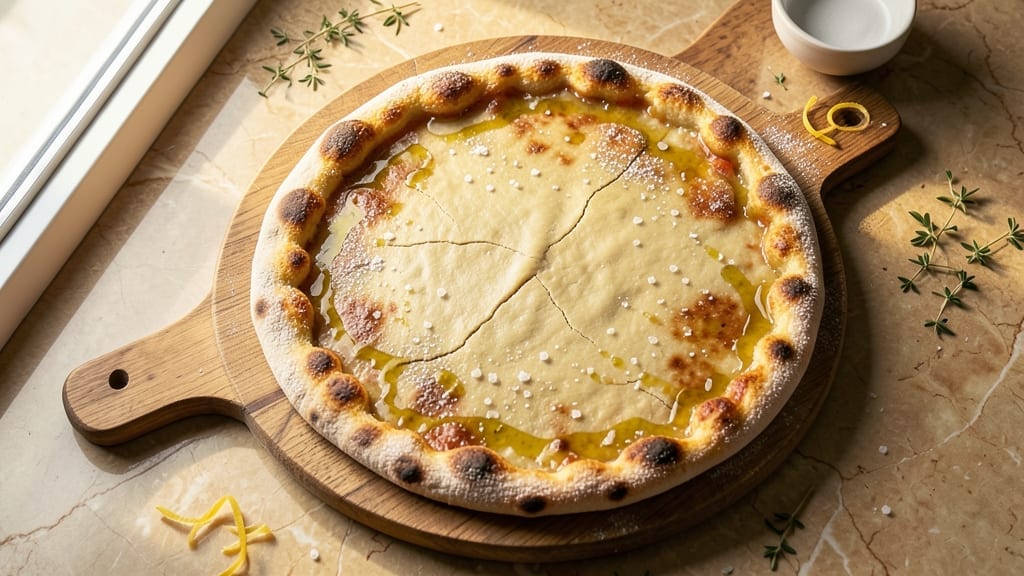
This 00 flour pizza dough recipe by weight delivers the precision and texture of authentic Neapolitan-style pizza—perfect slices every time.
My nonna always swore by measuring by weight, and after years of testing, I’ve perfected the ratios for a dough that’s tender yet sturdy enough to hold toppings without tearing.
The key lies in the 100% hydration (equal parts flour and water by weight) and a slow fermentation that develops deep flavor and an open crumb structure.
What sets this recipe apart is the professional-level consistency you’ll achieve with precise gram measurements—no more guessing with cups or spoons.
We’re using 00 flour, the finest Italian flour, which gives that signature tender yet airy texture, while a small amount of diastatic malt powder boosts gluten development for a better rise.
The dough ferments at room temperature for 24 hours, allowing flavors to meld and creating that coveted chewy-yet-light interior.
By the time you shape and bake, you’ll have a pizza crust that’s golden brown at the edges, with a soft, airy center and just enough chew to satisfy purists.
The long fermentation also means you can prep the dough a day ahead—ideal for busy weeknights when you still want restaurant-quality results. This isn’t just a recipe; it’s the foundation for perfect pizza, whether you’re making a classic Margherita or a loaded deep-dish.
The beauty of this method is its versatility—adjust hydration slightly for your preferred texture, or add a touch of olive oil for extra richness. Once you master this dough, you’ll never settle for anything less than authentic, handmade quality.
Let’s get started on creating crusts that taste like they came straight from a pizzeria in Naples.
Ingredients for 00 flour pizza dough recipe by weight
Precision-measured ingredients for restaurant-quality Neapolitan pizza crust—no guesswork, just perfect slices every time.
| Ingredient | Amount | Notes |
|---|---|---|
| 00 Flour 🌾 | 500 g | Finest Italian type for authentic texture |
| Diastatic Malt Powder 🌾 | 5 g | Enhances gluten development and rise |
| Active Dry Yeast 🍞 | 1 g | Freshly opened for best activity |
| Granulated Sugar 🍚 | 5 g | Feeds yeast for better fermentation |
| Fine Sea Salt 🧂 | 10 g | Diamond Crystal preferred for purity |
| Extra-Virgin Olive Oil 🫒 | 10 g | High-quality for richness and flavor |
| Water 💧 | 500 g | Room temperature for ideal hydration |
| Semolina Flour 🌾 | 50 g | For dusting and authentic texture |
The 00 flour is non-negotiable here—it’s the finest Italian flour, giving you that signature tender yet sturdy texture. Caputo or Mulino Bianco are the gold standards, but any high-quality 00 flour will work. Grab it from World Market or Italian specialty stores if you’re near one, or order online if your local grocery doesn’t carry it. The diastatic malt powder might be tricky to find, but Amazon or baking supply stores stock it. It’s worth the hunt—it boosts gluten development for a better rise. If you’re short on time, you can use a pinch of extra yeast (about 0.5g), but the malt powder gives that authentic, open crumb structure that sets this dough apart.
No diastatic malt? Add 1 extra gram of yeast—it won’t be identical, but it’ll still rise. Running low on 00 flour? All-purpose flour in a pinch, but expect a denser crust. The olive oil should be extra-virgin—none of that cheap stuff. California Olive Ranch or Colavita are my go-tos. For the water, tap is fine, but if yours is super chlorinated, let it sit out for 20 minutes to off-gas. The semolina flour? Bob’s Red Mill is reliable, but any fine semolina will do. Pro tip: if you’re making this for the first time, invest in a kitchen scale—it’s a game-changer for baking precision.
Once mixed, the dough is best fermented at room temperature (70-75°F) for 24 hours. If your kitchen runs cooler, a proofing box or warm oven with a bowl of hot water will help. The dough will nearly double in size—that’s a good sign. For storage, wrap it tightly in plastic and refrigerate for up to 5 days, or freeze portions for 3 months. When ready to use, let it sit at room temp for 1-2 hours to relax the gluten before shaping. Trust me, the wait is worth it for that golden, chewy crust you’ll get.
Why You’ll Love This Recipe
- No-Knead, No-Guilt Dough: I swear by this method—just mix, wait, and roll. The diastatic malt powder does all the heavy lifting, so no overworking or waiting for gluten to develop. My lazy Sundays now include pizza night.
- Crispy-Chewy Magic: That perfect balance? The 00 flour’s fine grind and diastatic malt create a thin, blistered crust with a pillowy center. Honestly, it’s the closest I’ve gotten to Neapolitan without a wood-fired oven.
- Weeknight to Party Fix: Same dough, endless uses—slice it for lunch, stretch it for dinner, or double it for a crowd. I’ve used it for breakfast flatbreads (yes, really) and even a quick calzone when friends dropped by unannounced.
- Budget-Friendly Staple: A single batch costs pennies and keeps for days in the fridge. Between us, I’ve fed my family for a week with leftovers—freezer-friendly, too. No wasted ingredients, just pure, stretchy satisfaction.
Step-by-step instructions for precision-measured 00 flour pizza dough
Here’s how to craft a perfectly balanced dough using exact measurements for restaurant-quality slices every time.
Combine Dry Ingredients with Precision
In a large mixing bowl, weigh out the 500 g 00 flour and create a well in the center. Add the 5 g diastatic malt powder, 1 g active dry yeast, 5 g granulated sugar, and 10 g fine sea salt directly into the well. This precise distribution ensures even gluten development and proper fermentation.
Using a silicone spatula, gently fold the dry ingredients together, being careful not to overmix at this stage. The malt powder will enhance gluten structure while the yeast and sugar create the ideal environment for fermentation. Keep the bowl covered with a damp kitchen towel to maintain moisture.
Hydrate with Room-Temperature Water and Olive Oil
In a separate measuring cup, combine the 500 g water (room temperature is crucial) with the 10 g extra-virgin olive oil. The water should be between 20-22°C—too cold and the yeast won’t activate properly; too warm and it will kill the yeast. Gently pour this mixture into the dry ingredients while stirring with a wooden spoon.
Begin mixing from the center, gradually incorporating the outer flour into the wet ingredients. You’ll notice the dough come together as the gluten starts to form. After about 2-3 minutes of mixing, the dough should form a shaggy mass that pulls away from the sides of the bowl. This is your signal that hydration is complete.
Develop Gluten Through Kneading
Turn the dough out onto a lightly floured surface and begin kneading using the “windowpane test” method. Push the dough forward with the heels of your hands, then fold it back over itself. After about 8-10 minutes of kneading, the dough should be smooth, elastic, and spring back when poked.
To test for proper gluten development, take a small piece of dough and stretch it between your fingers. If it forms a thin, translucent membrane without tearing (the “windowpane” effect), you’ve achieved perfect gluten structure. This step is critical for achieving that signature chewy-yet-tender texture in your pizza crust.
First Rise for Optimal Flavor Development
Lightly oil a large mixing bowl and place the dough inside. Cover with a damp towel or plastic wrap and let it rise at room temperature (22-24°C) for 1.5-2 hours. The dough should nearly double in size, becoming light and airy. You’ll notice small bubbles forming on the surface and along the sides of the bowl.
This first rise allows the yeast to ferment and develop flavor. The diastatic malt powder will begin breaking down starches into sugars, creating a more complex flavor profile. Gently press your finger into the dough—if it springs back slowly (not immediately), it’s ready for the next step. If it springs back quickly, give it another 30 minutes of rising time.
Shape and Final Rest for Perfect Texture
Divide the risen dough into 4 equal portions (about 125 g each) and gently shape each into a ball. Place them on a floured surface and let them rest for 15 minutes. This brief rest prevents the gluten from tightening during shaping, making it easier to stretch later.
After resting, dust your work surface with 50 g semolina flour and begin stretching each ball into your desired pizza shape. The semolina creates a perfect barrier between the dough and surface, preventing sticking. For authentic Neapolitan-style pizzas, aim for a 12-inch diameter with a slightly thicker crust at the edges. The dough should be thin in the center but still pliable—about 2-3 mm thick.
Pro Tips For Making 00 Flour Pizza Dough Recipe By Weight
- Weigh Malt Powder Precisely: Diastatic malt powder isn’t just flavor—it’s the thing that makes your crust crisp. Use a digital scale for the full 1-2% by weight (about 5-10g per 500g flour) and sift it directly into the flour. I learned this the hard way when I eyeballed it and ended up with a dough that was chewy instead of perfectly balanced.
- Autolyse First, Always: Mix just the flour and water (no yeast, salt, or malt yet) and let it sit for 30-60 minutes. This step develops gluten more evenly and makes stretching the dough later feel like working with butter instead of rubber. Skip it, and you’ll fight the dough the whole time—trust me, your hands will thank you.
- Hydrate Yeast Properly: Active dry yeast needs warm water (around 105°F/40°C) and 5 minutes to bloom before mixing into the dough. Cold water kills it; hot water cooks it. I was skeptical until I tried it—now my dough rises reliably every time, even on cooler days.
- Rest Dough Overnight: After the initial bulk fermentation, transfer the dough to the fridge for 12-24 hours. The cold slows fermentation, intensifies flavor, and makes the gluten relax so it stretches like silk. I skip this when I’m lazy, but the dough is noticeably better when I don’t—crispier crust, chewier bite.
Storing and reheating this recipe
Refrigerator Storage
After your dough has completed its 24-hour room-temperature fermentation, store it in an airtight container wrapped tightly in plastic wrap. Place it in the fridge for up to 5 days, though I find the flavor peaks at 3-4 days when the fermentation continues slowly.
The cold temperature preserves the yeast activity, so when you’re ready to use it, simply remove the dough and let it sit at room temperature for 1-2 hours—this relaxes the gluten and makes shaping a breeze. 💫
Freezer Preservation
For long-term storage, divide your dough into 125-gram portions (per pizza) and place them in quart-sized freezer bags. Squeeze out all the air before sealing to prevent freezer burn. These dough portions keep for up to 3 months in the freezer.
When ready to use, thaw overnight in the fridge, then let sit at room temperature for 2 hours before shaping. I’ve found that frozen dough develops even more complex flavors during the slow thaw.
Reviving Frozen Dough
Never thaw frozen dough directly on the counter—this creates condensation that can make the dough gummy. Instead, transfer the frozen dough to the fridge and let it thaw slowly overnight. In the morning, remove it from the fridge and let it sit at room temperature for 1-2 hours before shaping.
The dough will be slightly sticky, so dust generously with semolina flour while stretching. This method preserves the delicate gluten structure you worked so hard to develop. ✨
Reheating Shaped Dough
If you’ve shaped your dough but need to delay baking, place it on a floured pizza peel or parchment paper and cover loosely with plastic wrap. Let it rest at room temperature for 30-60 minutes before baking—this allows the gluten to relax and prevents a tough crust.
For best results, bake within 4 hours of shaping to maintain optimal texture. I’ve even shaped dough the night before and baked it the next morning with perfect results. 🍕
Storing Shaped Pizzas
Assembled pizzas (with sauce and cheese) can be refrigerated for up to 24 hours before baking. Store them on a floured pizza peel or parchment paper, covered loosely with plastic wrap. When ready to bake, let them sit at room temperature for 15-20 minutes to prevent moisture buildup.
This is my go-to method for weekend pizza nights—I prep everything ahead and bake fresh on Sunday morning. The flavors are even better after a night’s rest! 💛
Reheating Baked Pizza
Leftover pizza should be stored in an airtight container at room temperature for up to 2 days, or refrigerated for 3-4 days. To reheat, place slices on a baking sheet and warm in a 375°F oven for 5-7 minutes until the cheese is melted and bubbly.
For extra crispiness, I like to broil for 1-2 minutes at the end. Avoid the microwave—it makes the crust soggy and ruins that perfect texture we worked so hard to achieve. 🔥
Nutrition facts
Frequently asked questions about 00 flour pizza dough
Why does this recipe use 100% hydration (equal parts flour and water)?
This ratio creates the perfect balance of tenderness and chewiness for authentic Neapolitan-style crust. The high hydration develops a light, airy interior while the gluten structure gives it enough strength to hold toppings. For a slightly stiffer dough, reduce water by 10-20 g—ideal if you prefer a thicker crust.
Can I substitute all-purpose flour for 00 flour?
Yes, but expect a denser texture with less tenderness. Replace 500 g 00 flour with 480 g all-purpose flour plus 20 g bread flour to improve gluten development. The dough will still work, but it won’t have that signature fine crumb structure of authentic 00 flour pizza.
What’s the best way to test if my dough is properly kneaded?
Perform the “windowpane test”: stretch a small piece of dough between your fingers until it’s paper-thin. If it forms a translucent membrane without tearing (like a windowpane), your gluten is perfectly developed. This takes about 8-10 minutes of kneading by hand or 5-6 minutes with a stand mixer on medium speed.
Why does the recipe call for a 24-hour cold fermentation?
The long fermentation at room temperature (then cold) develops complex flavors through slow yeast activity and natural enzymes in the flour. This creates that signature “Neapolitan taste” with a light, airy crumb. For faster results, you can do a 4-hour room temp rise followed by 12-16 hours in the fridge, but the flavor won’t be as developed.
How do I fix dough that’s too sticky after mixing?
Add flour 5 g at a time to the dough ball while kneading, but don’t overdo it—stickiness is normal with high hydration. If it’s extremely sticky, let it rest 10-15 minutes covered with a damp towel before handling. The gluten will relax and become more manageable. Semolina flour works better than all-purpose for dusting sticky dough.

- 3lb Prime Rib Roast Recipe: Juicy Pink Center Guaranteed in 3 Hours - October 31, 2026
- 5 Spice Cake Recipe: Warmly Spiced Layers With Crunchy Top - October 31, 2026
- 1950’s Macaroni and Cheese Recipe: Nostalgic Creamy Cheese Sauce with Buttery Noodles - October 31, 2026