
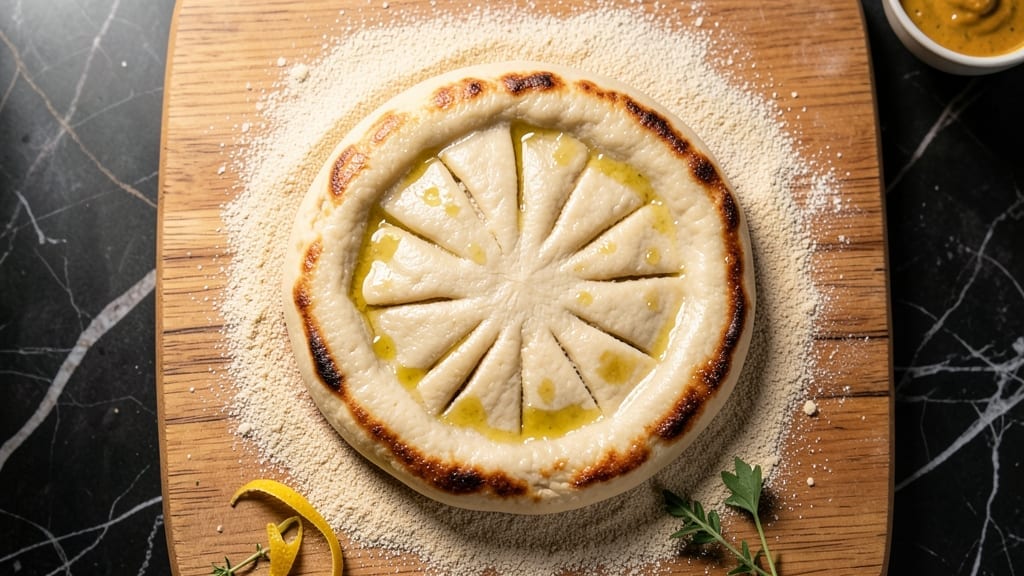
This 000 pizza dough recipe delivers the crispy-chewy perfection of authentic Neapolitan pizza without the fuss of traditional kneading.
The secret lies in 000 flour—its fine texture and low protein content create that signature tender yet airy crust, while a precise hydration ratio ensures a light, airy interior with a crackly exterior.
I’ve perfected this method over years of trial and error, and it’s now my go-to for restaurant-quality pizza at home.
What sets this dough apart is the no-knead technique, which relies on time and patience rather than arm strength. You’ll mix the dough, let it rest, then shape it by hand—no stand mixer required.
The key steps include a cold proof in the fridge, which develops flavor and improves texture, and a hot baking surface to achieve that coveted char. This method is foolproof for beginners but refined enough to impress seasoned home cooks.
By the time you pull that pizza from the oven, you’ll have a golden-brown crust with those coveted air pockets and a crispy yet tender bite. The dough’s versatility means you can use it for classic Margherita, loaded meat lovers, or even breakfast-style pizzas.
The best part? It’s ready in just 24 hours, with minimal effort.
For those who love customization, you can adjust the hydration slightly for a thicker or thinner crust, or swap in whole wheat flour for a nuttier flavor.
But stick to the 000 flour for that authentic Italian texture—it’s worth seeking out. Let’s get started on making dough that rivals your favorite pizzeria.
Ingredients for 000 pizza dough
Four simple ingredients create restaurant-quality pizza dough with no kneading required.
| Ingredient | Amount | Notes |
|---|---|---|
| 000 Flour 🌾 | 3 ½ cups | Italian 000 flour, low protein |
| Warm Water 💧 | 1 ¼ cups | Around 90°F for ideal hydration |
| Active Dry Yeast 🍞 | ¼ tsp | Or 1 packet instant yeast |
| Fine Sea Salt 🧂 | 1 ½ tsp | Diamond Crystal preferred |
| Extra-Virgin Olive Oil 🫒 | 1 tbsp | High-quality, fruity variety |
| Semolina Flour 🌾 | ¼ cup | For dusting and finishing |
| Cornmeal 🌽 | ¼ cup | For baking surface |
| All-Purpose Flour 🌾 | ½ cup | Optional for thicker crust |
The 000 flour is non-negotiable here—its fine texture and low protein content (around 8-10%) create that signature Neapolitan tenderness. Caputo is the gold standard, but King Arthur 00 flour works well too. If you can’t find 000, all-purpose flour plus 1 tbsp extra water gets you close, though the texture won’t be quite as delicate. The yeast should be fresh—test it by sprinkling in warm water; it should foam within 5 minutes. For the olive oil, California Early Harvest or Colavita brands give that fruity depth without overpowering. And don’t skimp on the salt; it balances the yeast and enhances flavor throughout.
No instant yeast? Active dry yeast needs 5 minutes in warm water first. Short on olive oil? Avocado oil works identically, but don’t substitute vegetable oil—it lacks the fruity notes. Want a thicker crust? Add the half cup all-purpose flour and increase water by 1 tbsp. For a whole wheat version, replace half the 000 flour with whole wheat, but expect a denser texture. The dough should be slightly tacky but not sticky—if it’s too dry, add 1 tsp water; if too wet, add 1 tbsp flour. And trust me on the warm water—room temp water won’t activate the yeast properly.
This dough is all about patience. After mixing, cover and let it rest at room temp for 1 hour, then refrigerate for 12-24 hours—the longer it rests, the better the flavor. Store wrapped in plastic in the fridge for up to 3 days or freeze shaped portions for 3 months. When ready to use, let it sit at room temp for 1-2 hours to relax the gluten. The proofing stage is where the magic happens—don’t rush it. And if you’re prepping ahead, shape and freeze the dough balls before proofing; they’ll thaw beautifully when you’re ready to bake.
Why You’ll Love This Recipe
- Five-Ingredient Magic: The pantry staples you already own—just flour, yeast, water, salt, and olive oil—come together like a dream. No weird substitutions or hard-to-find ingredients here, just pure, reliable pizza magic.
- Crispy-Chewy Perfection: That 000 flour makes the dough light as air, while the olive oil keeps it tender. Stretch it thin, bake it hot, and you get that perfect balance—crisp at the edges, pillowy in the middle. Honestly, it’s the kind of texture that makes you pause mid-bite.
- Weeknight to Party Fix: Same dough, endless possibilities. Toss it with marinara for a quick dinner or load it up with prosciutto and arugula for a fancy weekend meal. Between us, I’ve even used leftover dough as a crust for breakfast frittatas—no waste, all flavor.
- Budget-Friendly Leftovers: A single batch stretches for two pizzas, and the rest? Freeze it for another night. No sad, dried-out scraps—just dough that’s ready to roll out whenever the craving hits. (Yes, even on a Tuesday night.)
Step-by-step instructions for 000 pizza dough
Here’s how to create the perfect no-knead dough that delivers crispy edges and a chewy center every time.
Bloom the Yeast in Warm Water
In a large mixing bowl, combine the 1.25 cups warm water (around 90°F) with the 0.25 tsp active dry yeast. Let it sit for 5-10 minutes until the mixture becomes foamy and bubbly. This indicates the yeast is active and ready to work its magic.
I always use warm water because it creates the ideal environment for yeast activation. If the water is too hot, you’ll kill the yeast; too cold, and it won’t activate properly. The foamy bubbles tell you everything’s ready to proceed—no need to guess.
Mix the Dough Ingredients
Add the 3.5 cups 000 flour, 1.5 tsp fine sea salt, and 1 tbsp extra-virgin olive oil to the yeast mixture. Using a wooden spoon or dough whisk, stir until a shaggy dough forms. The dough will look rough and uneven at this stage, but that’s completely normal.
Once combined, let the dough rest for 10 minutes. This brief pause allows the flour to fully hydrate and the gluten to begin developing. You’ll notice the dough slowly comes together and pulls away from the sides of the bowl.
Develop the Dough Without Kneading
After the rest, wet your hands slightly with water and stretch the dough by pressing it down and folding it back on itself. This technique, called “dimpling,” helps develop gluten without traditional kneading. Repeat this process for 5-8 minutes until the dough becomes smooth and elastic.
The goal is to create a dough with good structure but minimal gluten development—this ensures that crispy, chewy texture we’re after. If the dough feels too sticky, add 1-2 tablespoons of the 3.5 cups 000 flour as needed, but don’t overdo it.
First Rise for Flavor Development
Cover the dough bowl tightly with plastic wrap or a damp kitchen towel. Let it rise at room temperature for 2-4 hours until it has nearly doubled in size. The dough should feel light and airy, with visible bubbles throughout.
This long, slow rise at room temperature allows the dough to develop complex flavors. I’ve found that patience here makes all the difference—rushing this step can lead to a dough that’s too dense and lacks that authentic Italian taste.
Shape and Final Rest
Turn the risen dough onto a lightly floured surface. Gently shape it into a round ball, using the 0.5 cup all-purpose flour if needed to prevent sticking. Place the dough seam-side up in a lightly oiled bowl, cover, and let it rest for 30 minutes at room temperature.
This final rest relaxes the gluten structure, making the dough easier to stretch later. The dough should feel more pliable and responsive to your touch. Here’s where the magic happens—this brief rest ensures that perfect balance of crispy edges and chewy interior when baked.
Prepare for Baking
Before shaping your pizza, dust a clean surface with 0.25 cup semolina flour and roll out the dough to your desired thickness. For a classic Neapolitan-style pizza, aim for about 1/8-inch thickness. Sprinkle 0.25 cup cornmeal on your pizza peel or baking tray to prevent sticking.
The semolina flour adds a nice texture contrast, while the cornmeal creates that perfect golden-brown crust. This is where you’ll see all your hard work pay off—the dough should be smooth, elastic, and ready to transform into a perfect pizza base.
Pro Tips For Making 000 Pizza Dough
- Weigh Your Flour: Skip the scooping—000 flour packs tightly, and volume measurements lie. Use a kitchen scale for 500g (or your recipe’s weight) for consistent dough texture every time. I learned this after three batches where the first was too stiff and the second too slack.
- Bloom Yeast in Oil: Mix the yeast with olive oil first, then add water. This keeps the yeast happy longer and prevents a gummy dough. (Yes, it sounds odd, but your dough will thank you—no more overproofing or dense crusts.)
- Stretch, Don’t Roll: Resist the urge to roll this dough—it releases gluten and makes the crust tough. Instead, stretch it by hand from the center outward, using your knuckles to gently press resistance. It’ll be silky and elastic, not chewy.
- Salt the Water Hard: Dissolve all the sea salt in the warm water before adding yeast. This ensures even distribution and prevents dry, salty pockets in the dough. (I used to sprinkle it in later—big mistake.)
Pro cooking tips for this recipe
Cold Proof Secrets
After your dough completes its initial rise, transfer it to the fridge for a 12-24 hour cold proof—this is where the real flavor magic happens. The cold slows yeast activity, allowing enzymes to break down gluten and starches for deeper flavor development.
I like to shape the dough into balls first, then refrigerate them in an airtight container with parchment between layers. This prevents sticking and makes them easier to handle later. 🥶
Dough Ball Technique
When dividing your dough, aim for 12-16 ounce portions (about 3.5-4 inches in diameter) for perfect-sized pizzas. Cup your hand, gently press a portion of dough into it, then roll it between your palms to create surface tension.
This creates those beautiful air pockets when baked. For extra insurance against sticking, lightly dust the dough balls with 000 flour before refrigerating. The colder dough will be easier to stretch later—trust the process!
Room Temp Revival
Before shaping, let your cold dough sit at room temperature for 1-2 hours—this relaxes the gluten and makes stretching much easier. I place the dough balls in a basket lined with a clean kitchen towel to prevent drying.
The dough should feel slightly puffy and springy when you press it gently. If it’s still cold or firm, give it another 30 minutes. Pro tip: Use a pizza saver (a metal ring) to help stretch the dough evenly without tearing. 💪
Stretching Like a Pro
Start stretching your dough from the center, using your fingertips to gently press outward. Rotate the dough 90 degrees after each stretch to maintain even thickness. For stubborn spots, use a wooden pizza peel to help guide the dough.
The goal is 1/8-inch thickness—thicker areas will bake longer and may become gummy. If the dough resists, let it rest another 10 minutes and try again. Remember: patience prevents tears!
Pre-Bake Prep
Preheat your pizza stone or baking sheet in the oven for 30-60 minutes at the highest temperature (usually 500°F+). Right before baking, sprinkle cornmeal on your peel or tray—this creates that perfect crispy crust.
For extra authenticity, I like to use a pizza steel (like the Ooni Steel) for even heat distribution. The hot surface is key to achieving that Neapolitan-style char in just 60-90 seconds of baking. 🔥
Troubleshooting Tough Dough
If your dough feels dense or tough after proofing, it likely didn’t rest long enough. Give it another 1-2 hours at room temp before stretching. For extra tenderness, add 1 tbsp olive oil to the dough or stretch it slightly thinner (but not too thin—1/8-inch is ideal).
Overworked dough? Let it rest 10 minutes before stretching to relax the gluten. And if your crust turns out too thick, next time reduce the dough portion size by 1-2 ounces. Every oven behaves differently—adjust as needed! ⚡
Nutrition facts
Frequently asked questions
Why does this recipe use 000 flour instead of all-purpose?
The 000 flour creates that signature Italian pizza texture—fine, tender, and low-protein (8-10%) for a crispy-chewy crust. All-purpose has higher protein (11-13%) which develops more gluten, making the dough tougher. For a closer match, mix 3 cups 000 flour + 0.5 cup all-purpose flour if needed, but the texture won’t be identical.
Can I make this dough ahead of time?
The dough improves with time. After the initial rise, refrigerate it for 12-24 hours (cold proof) for deeper flavor. Shape into balls, store in an airtight container with parchment between layers, and freeze for up to 3 months. Thaw overnight in the fridge before using. The longer it rests, the better the texture and taste!
What if my dough doesn’t rise properly?
Check these first: Yeast is expired? Test it in warm water—it should foam in 5 minutes. Water too hot (110°F+) kills yeast, too cold (70°F-) slows it. If dough rises but collapses, it may be overproofed. For future batches, reduce rise time by 30 minutes or refrigerate after first rise to slow fermentation.
How do I stretch the dough without tearing?
Start with dough at room temp (not cold from fridge) and use semolina flour on your surface. Gently press from the center outward, rotating 90 degrees after each stretch. If it resists, let it rest 10 minutes—overworking causes tears. A pizza saver ring helps maintain shape. Aim for 1/8-inch thickness for perfect baking.
Can I use this dough for other recipes?
Yes! This versatile dough works for calzones, focaccia, or even garlic knots. For thicker crusts (like focaccia), shape into a rectangle and bake with olive oil. For calzones, fold dough over fillings and seal edges. The no-knead method keeps prep simple while delivering professional results.

- 3lb Prime Rib Roast Recipe: Juicy Pink Center Guaranteed in 3 Hours - October 31, 2026
- 5 Spice Cake Recipe: Warmly Spiced Layers With Crunchy Top - October 31, 2026
- 1950’s Macaroni and Cheese Recipe: Nostalgic Creamy Cheese Sauce with Buttery Noodles - October 31, 2026