
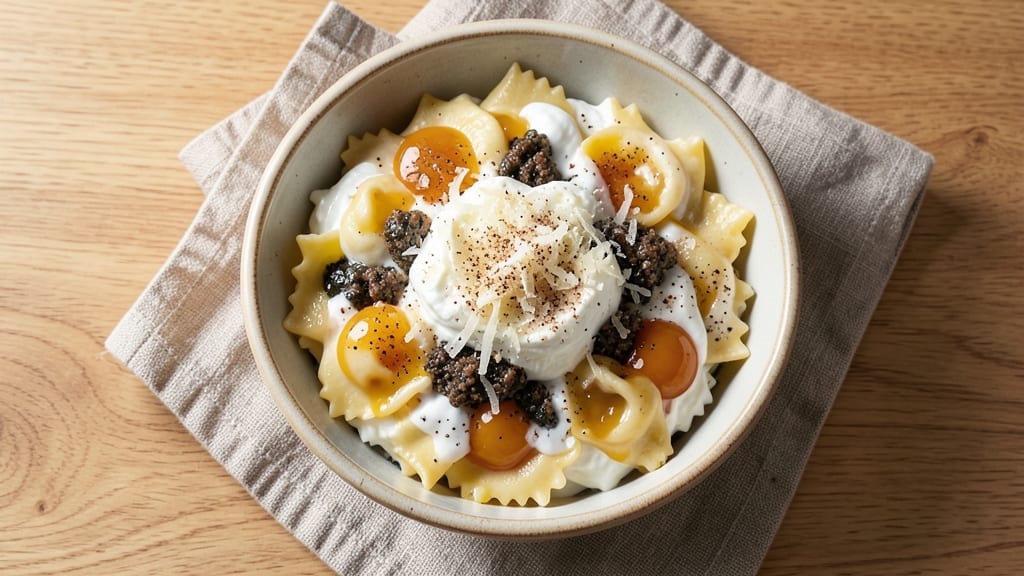
This 4 cheese ravioli filling recipe delivers the velvety stretch and nutty depth that makes homemade ravioli worth the effort. The secret lies in balancing creamy ricotta with sharp parmesan, rich fontina, and delicate gorgonzola—each cheese playing its part to create a filling that’s both tender and complex.
I’ve perfected this blend over years of testing, ensuring it stays cohesive when rolled and baked, never dry or crumbly.
The foundation begins with room-temperature ricotta, which forms the base for the filling’s signature stretch. Adding finely grated parmesan and fontina contributes that signature cheesy richness, while crumbled gorgonzola introduces subtle tang and depth.
A touch of nutmeg and egg yolks binds everything together, creating a filling that’s smooth yet substantial enough to hold its shape through boiling or baking.
What you’ll achieve is a ravioli filling that’s creamy yet firm, with a texture that stretches beautifully when rolled and maintains its shape when cooked. The cheese combination delivers layers of flavor—creamy, sharp, tangy, and nutty—all while remaining cohesive enough for delicate ravioli wrappers.
This is the kind of filling that transforms simple pasta into a restaurant-worthy dish.
The beauty of this recipe extends beyond the filling itself. It pairs perfectly with classic brown butter sage sauce or a light lemon-garlic oil, and the leftovers keep beautifully in the refrigerator for up to 3 days or can be frozen for longer storage.
Whether you’re making traditional square ravioli or modern half-moon shapes, this filling will elevate your pasta game to new heights.
Ingredients for 4 cheese ravioli filling
Four cheeses, two eggs, and a pinch of spice—this is the core of restaurant-quality ravioli filling.
| Ingredient | Amount | Notes |
|---|---|---|
| Whole Milk Ricotta Cheese 🧀 | 16 oz | Room temperature for blending |
| Parmesan Cheese 🧀 | 1 cup | Freshly grated from block |
| Fontina Cheese 🧀 | 8 oz | Shredded, mild variety |
| Gorgonzola Cheese 🧀 | 4 oz | Crumbled, mild type |
| Large Egg Yolks 🥚 | 2 whole | Room temperature for binding |
| Ground Nutmeg 🌿 | ¼ tsp | Freshly grated preferred |
| Freshly Ground Black Pepper 🌶️ | ½ tsp | For subtle seasoning |
| Diamond Crystal Kosher Salt 🧂 | ½ tsp | Adjust to taste |
| Unsalted Butter 🧈 | 1 tbsp | Cold, for texture |
| All-Purpose Flour 🌾 | 2 tbsp | For cohesion if needed |
The ricotta is your base, so Whole Milk Ricotta is non-negotiable—it’s creamier than part-skim and blends beautifully. Grab a 16-ounce tub from Whole Foods or your local specialty cheese shop; avoid the pre-shredded stuff in plastic containers. For the Parmesan, Parmigiano-Reggiano is ideal—grate it yourself for maximum flavor. Fontina should be mild and smooth, not crumbly; President Fontina from the cheese aisle works well. Gorgonzola? Go for the mild variety—it adds depth without overpowering. All cheeses should be at room temperature when you start blending.
No room-temperature ricotta? Microwave it 40 seconds to just melt it, then let it cool. Substituting cheeses? Gruyère replaces fontina (1:1), and blue cheese crumbles can swap gorgonzola (use half the amount). Running short on egg yolks? Add 1 tbsp cornstarch per yolk to help bind. The nutmeg is key—if you don’t have it, a pinch of cinnamon adds warmth (but it won’t be the same). For the butter, European-style has more flavor, but any unsalted works. The flour is a last-resort fix—only add it if the filling feels too loose after blending.
This filling keeps for 3 days in the fridge, wrapped tightly in plastic. For longer storage, portion into 1-ounce balls, freeze on a tray, then transfer to a bag. Thaw overnight in the fridge before using. If you’re making ravioli ahead, freeze the filled wrappers (uncooked) for up to 2 months. The filling reheats beautifully—just warm it gently in a bowl over simmering water. Never microwave directly; it’ll turn rubbery.
Why You’ll Love This Recipe
- No-Fuss Mixing: I swear by this combo—just fold the ricotta, grated cheeses, and yolks until just combined. No overworking, no lumps, no stress. That Gorgonzola melts into the ricotta like butter on toast, and the Fontina adds that creamy pull you’ll crave.
- Umami Bomb: The Parmesan gives it that sharp, salty punch, while the Gorgonzola brings the funky, tangy depth. Honestly, the first bite is like a hug for your taste buds—rich, nutty, and just a little bold. (Yes, even on a Tuesday night.)
- Freezer-Friendly Filling: Make a double batch, shape the ravioli, and freeze them flat on a tray. Pop them in a bag, and boom—homemade pasta for your next lazy Sunday. The cheeses hold up perfectly, so no sad, soggy leftovers here.
- Budget Cheese Hack: I buy block Fontina and Parmesan to grate myself—way cheaper than pre-shredded. The ricotta’s the star, but the Gorgonzola stretches the filling further than you’d think. A little goes a long way, and every bite feels like a splurge.
Step-by-step instructions for 4 cheese ravioli filling
This velvety, nutty filling comes together with simple technique but delivers restaurant-quality results.
Combine the Cheeses and Create a Smooth Base
In a large mixing bowl, add the 16 oz whole milk ricotta cheese. Using a wooden spoon, break it up gently until it reaches a smooth, lump-free consistency. The ricotta should be completely room temperature—if it’s cold from the fridge, let it sit at room temperature for 30-45 minutes first. Cold ricotta creates dense, grainy filling instead of that silky stretch you want.
Next, fold in the 1 cup freshly grated Parmesan cheese and 8 oz shredded Fontina cheese using your spoon. Be patient here—work the cheeses together until they’re fully integrated and the mixture becomes thick but still spreadable. The Fontina adds a delicate sweetness that balances the richness of the ricotta, while the Parmesan contributes umami depth and structure.
Incorporate the Gorgonzola and Seasonings
Add the 4 oz crumbled Gorgonzola cheese to the mixture. The Gorgonzola should be mild—not too sharp—to complement rather than overpower the other cheeses. Using your spoon, gently fold it in until completely distributed. You’ll notice the mixture darken slightly and develop a marbled appearance.
In a small bowl, whisk together the 2 whole large egg yolks, 0.25 tsp ground nutmeg, 0.5 tsp freshly ground black pepper, and 0.5 tsp Diamond Crystal kosher salt. The nutmeg adds warmth that cuts through the richness, while the pepper provides subtle seasoning. Gradually add this mixture to the cheese, folding gently until fully combined. You should have a thick, cohesive paste that holds together when pressed between your fingers.
Add Butter and Flour for Texture and Stability
Cut the 1 tbsp unsalted butter into small pieces and fold them into the cheese mixture. The cold butter creates pockets of fat that contribute to the filling’s velvety texture and prevent it from becoming too dense. Work quickly but thoroughly—you want the butter to be fully incorporated but still maintain some texture.
Finally, sprinkle in the 2 tbsp all-purpose flour and fold it in using a rubber spatula. The flour acts as a binder, helping the filling hold its shape when rolled out. It also prevents the filling from becoming too wet, which could make your ravioli difficult to handle. The mixture should now be smooth, cohesive, and ready for rolling.
Test the Filling and Adjust Consistency
This is where you’ll determine if your filling is perfect. Take a small spoonful of the mixture and roll it between your palms. It should hold together without sticking to your hands but still be pliable enough to stretch slightly. If it’s too wet and sticky, add 1 additional tablespoon of flour and mix well. If it’s too dry and crumbly, add 1 teaspoon of whole milk (not in the ingredients list—you’ll need to have this on hand) and fold until smooth.
The ideal filling should have a velvety stretch when pulled gently—this ensures your ravioli will have that signature melt-in-your-mouth texture. Cover the bowl with plastic wrap and let the filling rest at room temperature for 15-20 minutes before using. This resting period allows the flavors to meld and the mixture to relax, making it easier to work with when you’re ready to roll and cut your ravioli.
Pro Tips For Making 4 Cheese Ravioli Filling
- Drain That Ricotta: Skip the watery filling by pressing ricotta in a clean kitchen towel for 10 minutes—wrap it, squeeze gently, and let it sit. I learned this the hard way after making ravioli that leaked like a sieve.
- Grate, Don’t Chop Fontina: Use a box grater for fontina instead of cutting it—it melts faster and blends smoother into the filling. Chunky bits turn to rubbery pockets when cooked.
- Temper Those Yolks: Mix egg yolks last, folding them into the cheese mixture gently with a spatula. Dumping them in hot cheese scrambles them—no one wants curdled ravioli.
- Chill Before Rolling: Let the filling rest 30 minutes in the fridge before shaping—it firms up just enough to hold together without sticking. Sounds boring, but it’s the thing that matters most for clean edges.
Essential equipment for perfect results
Essential Mixing Tools
Start with a large mixing bowl—I recommend a stainless steel bowl like the OXO Good Grips 5-cup—to handle the ricotta’s weight and prevent warping. For blending, use a wooden spoon (like Lodge’s 12-inch model) to gently fold cheeses without breaking them down too much.
The wooden spoon also helps distribute heat evenly if your ricotta needs warming. 🌶️
A rubber spatula (I love the Kitchy 12-inch) is essential for scraping every last bit from the bowl edges, especially when incorporating the egg yolks and flour. The flexible edge ensures you don’t leave any unincorporated cheese behind.
For precise measuring, a small digital scale (like the OXO Good Grips 11-pound) guarantees accuracy with the cheeses—especially the gorgonzola, where even small variations affect flavor balance.
Cheese Prep Gear
Invest in a microplane (I use the Barbagiano Classic) for grating the Parmesan—it yields finer, more flavorful shavings than a box grater. For the Fontina, a sharp chef’s knife and cutting board work best for shredding.
Store-bought shredded cheese contains anti-caking agents that ruin texture, so always shred your own. A small bowl (like Pyrex 8-ounce) is perfect for whisking the egg yolks and seasonings before folding into the cheese.
Temperature Control
A food thermometer (I swear by the Thermoworks Thermapen ONE) ensures your ricotta reaches the ideal room temperature of 68-72°F before mixing. Cold ricotta creates dense, grainy filling instead of that signature velvety stretch.
If you’re in a hurry, a microwave-safe bowl (like Pyrex 2-quart) works for warming—just heat for 40 seconds on medium-high, then let it cool completely before using.
Storage Containers
For short-term storage, use airtight containers (I prefer Glasslock 2-quart) to keep the filling fresh in the fridge for up to 3 days. The glass won’t absorb odors like plastic.
For freezing, silicone ice cube trays (like OXO Good Grips) are perfect for portioning the filling into 1-ounce balls—just pop them onto a tray, freeze, then transfer to a freezer bag for up to 3 months. Label everything with the date to track freshness.
Optional Pro Tools
For extra precision, a stand mixer (like KitchenAid Artisan) with the paddle attachment can blend the filling more evenly—great if you’re making a large batch.
If you’re rolling out ravioli by hand, a rolling pin (I use Lodge’s 12-inch) with a marble base gives you better control over thickness.
For shaping, a ravioli cutter (like OXO Good Grips) saves time, but a sharp paring knife works just as well for cutting by hand. 💡
Nutrition facts
Frequently asked questions
Can I substitute any of the cheeses in this recipe?
For the Fontina, swap in Gruyère (1:1 ratio) for a nutty depth. Replace Gorgonzola with blue cheese crumbles (use half the amount) for a sharper tang. If you’re avoiding dairy, try vegan ricotta and nutritional yeast for a cheesy flavor, though texture will differ slightly.
Why does my filling feel too wet or sticky?
This usually happens when the ricotta isn’t fully room temperature or you’ve added too much liquid. Fix it by sprinkling in 1 additional tablespoon of flour and folding gently. If it’s still too wet, let it rest 10 minutes longer—the filling often thickens as it sits. Never skip the 15-20 minute rest before using!
How do I prevent the filling from leaking when boiling ravioli?
Undercooked filling leaks! Always boil your ravioli in salted water for just 2-3 minutes (they’ll finish cooking on the plate). For extra insurance, chill the filling 30 minutes before using—this firms it up. Avoid overfilling your ravioli wrappers (use 1 tsp per ravioli max).
Can I make this filling ahead of time?
Yes! Store it in an airtight container in the fridge for up to 3 days or freeze in 1-ounce portions for 3 months. Thaw overnight in the fridge—never at room temperature. For best texture, let it sit at room temperature 30 minutes before using after refrigeration.
What’s the best way to reheat leftover filling?
Gently warm in a bowl over simmering water (double boiler) for 2-3 minutes, stirring constantly. Microwaving makes it rubbery! For ravioli, boil again in fresh water for 1-2 minutes. Pro tip: Add a splash of heavy cream while reheating to restore creaminess.

- 3lb Prime Rib Roast Recipe: Juicy Pink Center Guaranteed in 3 Hours - October 31, 2026
- 5 Spice Cake Recipe: Warmly Spiced Layers With Crunchy Top - October 31, 2026
- 1950’s Macaroni and Cheese Recipe: Nostalgic Creamy Cheese Sauce with Buttery Noodles - October 31, 2026