
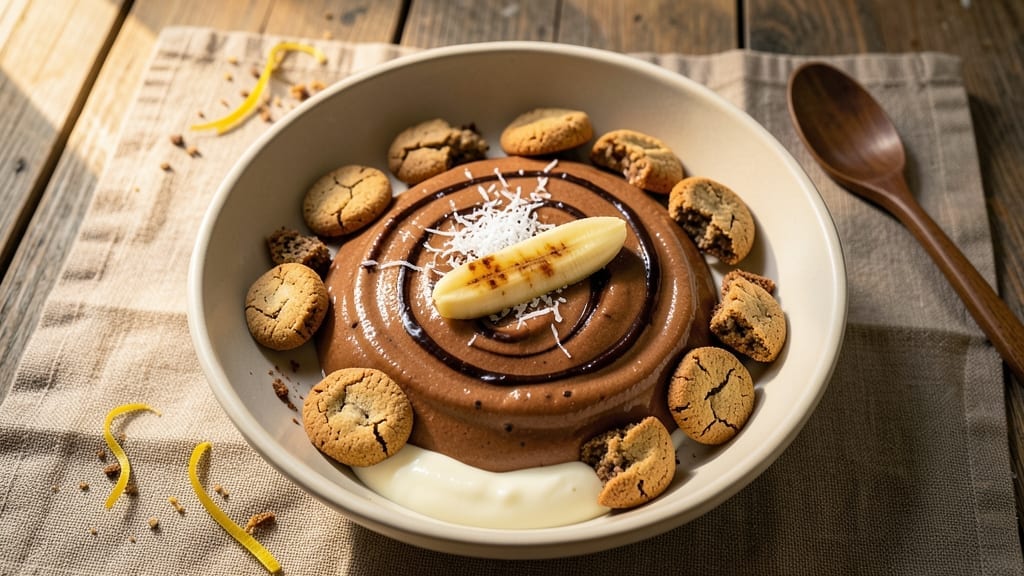
Here’s a simple 1 banana dessert recipe that turns one ripe banana into a rich, no-bake chocolate treat—vegan, effortless, and ready in minutes.
The secret lies in blending ripe banana with cocoa powder and coconut milk, then layering it with crushed cookies for a texture that’s creamy, rich, and irresistibly fudgy. I developed this after realizing how often bananas go to waste—now, every last bite gets used, and no one misses traditional baking.
The beauty of this dessert is its simplicity: just five ingredients, no baking required, and a preparation time of under 10 minutes. The ripe banana provides natural sweetness, while cocoa powder and coconut milk create a velvety, chocolatey base.
Layering in crushed cookies adds crunch and depth, making each bite a perfect balance of textures. It’s the kind of dessert that feels indulgent but is actually healthy—no guilt, just satisfaction.
What you’ll end up with is a silky, chocolatey pot that’s cool, creamy, and ready in minutes—ideal for a quick treat or a last-minute dessert. The no-bake method means no oven heating, no waiting, and no mess.
Plus, it’s naturally vegan, gluten-free, and packed with nutrients from the banana. Serve it chilled for the best texture, or top with extra cocoa powder for a restaurant-worthy finish.
This recipe is perfect for using up overripe bananas, making it both practical and delicious. Store leftovers in the fridge for up to 3 days, or freeze for longer shelf life.
Whether you’re feeding a crowd or treating yourself, these chocolate banana pots deliver rich, satisfying flavor without the fuss. Let’s get started!
Ingredients for 1 banana dessert
Five simple ingredients transform one banana into a decadent, no-bake chocolate treat.
| Ingredient | Amount | Notes |
|---|---|---|
| Ripe Banana 🍌 | 1 whole | Overripe for maximum sweetness |
| Unsweetened Cocoa Powder 🍫 | ¼ cup | Natural or Dutch-processed |
| Coconut Milk (Full-Fat, Canned) 🥥 | ½ cup | Well-shaken before using |
| Vanilla Extract 🌿 | 1 tsp | Pure alcohol-free preferred |
| Pinch Salt 🧂 | ⅛ tsp | Enhances chocolate flavor |
| Vegan Chocolate Cookies 🍪 | 1 cup | Crushed into crumbs |
| Maple Syrup 🍁 | 1 tbsp | Optional for extra sweetness |
The banana is the star—pick ones with brown spots (they’re sweeter!). Trader Joe’s or Whole Foods usually have ripe ones ready to go. Cocoa powder matters too: Natural cocoa gives a richer flavor, while Dutch-processed is smoother. For cookies, grab vegan chocolate chips from Enjoy Life or make your own with oats, cocoa, and coconut oil. The coconut milk should be full-fat for that creamy texture—Thai Kitchen brand is my go-to. Store-bought vegan cookies work, but homemade always tastes better (and you control the ingredients).
No vanilla? Vanilla bean paste or even a pinch of cinnamon works in a pinch. Short on cookies? Crushed graham crackers or granola add crunch too. The maple syrup is optional, but if you’re using very tart bananas, it balances the flavors. For extra richness, stir in 1 tbsp coconut oil with the cocoa powder. And if you can’t find full-fat coconut milk, light coconut milk plus 1 tbsp coconut cream mimics the texture. The key is blending until silky—no lumps allowed!
These pots keep beautifully in the fridge for 3-4 days, but they actually taste better after chilling overnight. For longer storage, freeze for up to 2 months. I like to portion them into small jars or ramekins before freezing—just thaw at room temp for 10 minutes. Top with extra crushed cookies or a sprinkle of cocoa powder right before serving. They’re perfect for meal prep: grab one on your way out the door for a sweet, satisfying treat.
Why You’ll Love This Recipe
- No Blender Needed: I swear by this—just mash those bananas with a fork until they’re smooth enough to blend themselves. The cocoa and coconut milk do the heavy lifting, so you’re not stuck scrubbing a blender afterward.
- Rich Without Sugar: That first bite? Pure chocolatey bliss, but the ripe bananas keep it naturally sweet—no refined sugar crash here. The coconut milk adds this velvety depth that makes it taste like a decadent treat, not a health hack.
- Freezer-Friendly Magic: Make a double batch, portion it into little ramekins, and freeze. When cravings hit, pop one in the microwave for 30 seconds. It’s my go-to for late-night snacks or a quick breakfast when I’m running late.
- Pantry Staple Power: Honestly, if you’ve got bananas, cocoa, and coconut milk, you’re golden. No weird ingredients or last-minute grocery runs—just pull what you’ve got and go. It’s the kind of recipe that never lets me down.
Step-by-step instructions for no-bake chocolate banana pots
Here’s how to create these rich, creamy pots with minimal effort and maximum flavor.
Mash the Banana Until Silky
Peel the 1 whole ripe banana and transfer it to a medium bowl. Using a fork or potato masher, mash it until completely smooth with no visible lumps. The banana should be the consistency of thick pudding. If you prefer extra smoothness, push it through a fine-mesh sieve to remove any fibers.
This is your base flavor—overripe bananas add natural sweetness and a velvety texture. If you didn’t use overripe bananas, you might want to add the 1 tablespoon maple syrup now for extra sweetness. Give it a taste and adjust if needed, but remember these pots will gain sweetness from the other ingredients.
Whisk in Cocoa and Coconut Milk
To the mashed banana, add the 0.25 cup unsweetened cocoa powder and the 0.5 cup full-fat coconut milk. Using a whisk or small spatula, stir vigorously until the cocoa powder dissolves completely and the mixture becomes smooth and glossy. The coconut milk should blend seamlessly, creating a thick chocolate ganache-like consistency.
If the mixture looks too thick after whisking, add 1 teaspoon water at a time until it reaches a pudding-like texture that coats the back of a spoon. The goal is a thick but pourable batter that will set properly in the glasses. This step is crucial for achieving that perfect creamy texture without any graininess.
Add Vanilla, Salt, and Cookie Crumbs
Stir in the 1 teaspoon vanilla extract and 0.125 teaspoon pinch salt to the chocolate mixture. The salt might seem like a small amount, but it’s essential for balancing the sweetness and enhancing the chocolate flavor. Next, crumble the 1 cup vegan chocolate cookies into fine crumbs using your hands or a food processor. Fold these crumbs into the mixture until evenly distributed.
Here’s the thing—don’t worry if the crumbs seem uneven at first. As you layer them in the glasses, they’ll distribute more naturally. The cookie crumbs add a delightful textural contrast to the creamy filling, making each bite interesting. Give the mixture one final stir to ensure everything is well incorporated before moving to the next step.
Assemble and Chill the Pots
Divide the chocolate mixture evenly among four 6-ounce serving glasses or small ramekins. Using a spoon, layer about half of the mixture in each glass, then sprinkle a thin layer of cookie crumbs on top. Add the remaining chocolate mixture, followed by another layer of cookie crumbs. This layering creates beautiful visual appeal and ensures each bite has that perfect crunchy-creamy combination.
Cover each glass with plastic wrap and press it directly on the surface to prevent a skin from forming. Refrigerate for at least 4 hours, or until completely set. The longer they chill, the thicker and more stable the texture becomes. Pro tip: If you’re short on time, place the glasses in the freezer for 2 hours—just be sure to let them sit at room temperature for 10 minutes before serving to soften slightly.
Serve and Enjoy Your No-Bake Creation
Remove the pots from the refrigerator and let them sit at room temperature for 5-10 minutes before serving. This brief resting period makes them easier to scoop and adds a slight softness to the texture. Use a spoon to gently loosen the edges if needed, then serve directly from the glasses for that restaurant-style presentation.
Each bite should deliver a perfect balance of creamy chocolate ganache, sweet banana flavor, and crunchy cookie bits. These pots are best enjoyed chilled but can be served at room temperature for a slightly softer texture. Store any leftovers in the refrigerator for up to 3 days, though I doubt they’ll last that long!
Pro Tips For Making 1 Banana Dessert
- MASH THE BANANAS WELL: Skip the blender—use a fork and really dig in. Those little chunks turn into a gritty mess when heated, and you’ll taste them. I learned this the hard way after serving a dessert with visible banana specks. Aim for a smooth, thick purée, like hummus but sweeter.
- WHISK THE COCOA FIRST: Mix the cocoa powder into the coconut milk before adding banana. This prevents clumping and ensures a velvety texture. I used to add it last and ended up with a lumpy batter—now I stir it in like I’m making a smoothie.
- DON’T OVERMIX THE BATTER: Stir just until combined—overworking it makes the dessert dense and gluey. Think “marble swirl” consistency, not pancake batter. I’ve ruined batches by whipping it like I was angry at the bowl.
- USE COLD COCONUT MILK: Chill the canned coconut milk for 10 minutes before opening. The cooler fat solidifies just enough to scoop out the thick cream, giving you a richer, less watery dessert. (Yes, even if you’re impatient like me.) The leftover watery part? Save it for smoothies.
Wine and beer pairings for this dish
Chocolate Pairings
This dessert’s rich cocoa base pairs beautifully with dark chocolate—drizzle 70% cacao dark chocolate over the top for a luxurious finish. I like Hu Kitchen or Lindt Excellence bars for their smooth, velvety texture.
For extra decadence, add chocolate shavings from a microplane right before serving. The bittersweet contrast enhances the banana’s natural sweetness. 🍫
Creamy Coffee Twist
If you love coffee, try adding 1 teaspoon instant espresso powder to the cocoa mixture for a mocha-inspired flavor. Pair with a cold brew or flat white—the coffee’s acidity cuts through the dessert’s richness.
I recommend Stumptown Cold Brew Concentrate for its smooth, low-acid profile. Serve with a sprinkle of cocoa nibs for crunch. ☕
Tropical Fruit Contrast
Balance the chocolate with bright, tropical flavors like mango or pineapple. Serve with fresh slices on the side or blend into a coconut milk smoothie for a refreshing contrast. I love Chobani Greek Yogurt (non-dairy) mixed with mango for a creamy topping. The acidity brightens the dessert’s sweetness. 🥭
Spiced Wine Pairing
For an adult touch, pair with mulled wine or spiced red wine like Cabernet Sauvignon. The wine’s tannins complement the chocolate, while spices like cinnamon and clove echo the dessert’s warmth. If you prefer white, a Gewürztraminer with its lychee notes adds an unexpected but delightful contrast. 🍷
Light Beer Balance
A crisp Belgian witbier or pilsner balances the dessert’s richness without overpowering it. The citrusy notes in Allagash White or Sierra Nevada Pale Ale cleanse your palate between bites. For a sweeter option, try a honey wheat ale—the caramel flavors harmonize with the banana. 🍺
Nutrition facts
Frequently asked questions
Can I make this dessert with underripe bananas?
While you can use underripe bananas, they’ll be less sweet and more starchy, which can make the texture grainier. For best results, choose bananas with brown spots—they’re sweeter and creamier. If you must use underripe ones, add an extra 1 tablespoon maple syrup to compensate for the lack of natural sweetness.
What if I don’t have vegan chocolate cookies?
No problem! Use any sturdy cookies—graham crackers, digestive biscuits, or even crushed granola work perfectly. For extra crunch, toast your cookies lightly before crushing. If you’re making this gluten-free, opt for almond flour cookies or gluten-free chocolate chips mixed with oats and coconut oil.
How do I fix if my mixture is too runny?
If your chocolate-banana blend is too thin, it likely needs more cocoa powder or less coconut milk. Stir in an extra 1 tablespoon cocoa powder and let it sit for 5 minutes to thicken. For an instant fix, chill the mixture in the fridge for 15 minutes before assembling—it’ll firm up as it cools.
Can I make this dessert ahead of time?
These pots actually taste better after chilling overnight. Assemble them up to 2 days in advance and store covered in the fridge. For longer storage, freeze the unmixed batter (without cookies) for up to 1 month
What’s the best way to serve these?
Serve them straight from the glasses for an elegant presentation, or scoop into bowls for a casual vibe. For extra flair, top with whipped coconut cream, toasted coconut flakes, or a sprinkle of cinnamon. They’re perfect for brunch, potlucks, or a cozy dessert after dinner—just let them sit at room temperature for 5 minutes before serving.

- 3lb Prime Rib Roast Recipe: Juicy Pink Center Guaranteed in 3 Hours - October 31, 2026
- 5 Spice Cake Recipe: Warmly Spiced Layers With Crunchy Top - October 31, 2026
- 1950’s Macaroni and Cheese Recipe: Nostalgic Creamy Cheese Sauce with Buttery Noodles - October 31, 2026