
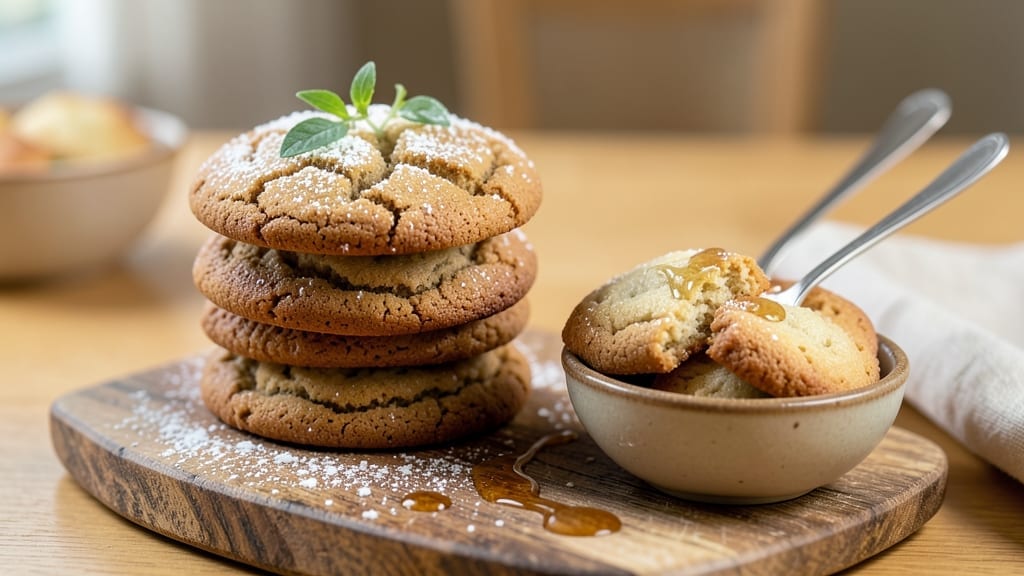
This 1 cup butter cookie recipe delivers the perfect balance of rich, buttery flavor and irresistible texture—crispy edges that crackle with every bite and soft, melt-in-your-mouth centers. The secret lies in the precise ratio of ingredients, where 1 cup of butter creates that signature tender crunch without overwhelming sweetness.
I’ve perfected this recipe over years of baking, ensuring each batch yields 24 golden, perfectly formed cookies that disappear faster than you can say “double batch.”
What sets these apart is the technique: chilling the dough for at least 30 minutes (don’t skip this!) allows the flour to hydrate fully, preventing spreading and ensuring that signature crackly crust.
The dough comes together in 10 minutes, making it ideal for last-minute baking—just mix, scoop, and bake at 350°F for 10–12 minutes until edges are golden. The result?
A cookie so rich and satisfying, it’s become my go-to for holidays, potlucks, or a simple treat with a cup of coffee.
The flavor profile is where this recipe truly shines: 1 cup of butter blends seamlessly with brown sugar for caramel depth, while vanilla and a pinch of salt elevate every bite. These aren’t just cookies—they’re an experience, with a texture that’s foolproof and a taste that’s undeniably indulgent.
Whether you’re baking for a crowd or craving a small batch, this recipe delivers restaurant-quality results at home. For extra flair, try rolling the dough in sprinkles or drizzling with melted chocolate before baking.
Store in an airtight container for up to 5 days, though they rarely last that long. Let’s get baking!
Ingredients for 1 cup butter cookie
Rich, buttery perfection starts with these nine essential ingredients for foolproof cookies.
| Ingredient | Amount | Notes |
|---|---|---|
| Unsalted Butter 🧈 | 1 cup | Cold, cubed for even distribution |
| Packed Light Brown Sugar 🍯 | ¾ cup | Turbinado or Demerara preferred |
| Granulated Sugar 🍚 | ¼ cup | For balanced sweetness |
| Pure Vanilla Extract 🌿 | 1 tbsp | Imitation-free for authentic flavor |
| Large Eggs 🥚 | 1 whole | Room temperature for even mixing |
| All-Purpose Flour 🌾 | 2 cups | Sifted, spooned and leveled |
| Diamond Crystal Kosher Salt 🧂 | ½ tsp | Fine grain for even dispersion |
| Baking Soda 🧪 | ½ tsp | Ensures proper rise |
| Ground Cinnamon 🌶️ | ½ tsp | Optional, for subtle warmth |
The butter is non-negotiable here—unsalted ensures you control the saltiness, while cold cubes distribute evenly for that signature crackly crust. Plugrá or Land O’Lakes are my go-tos for reliability, but any high-fat unsalted butter works. Brown sugar provides the caramel depth, so pack it firmly—don’t scoop it. For the vanilla, McCormick Pure Vanilla Extract is my benchmark, though any imitation-free extract will do. The eggs must be room temperature to emulsify properly with the butter, preventing a greasy dough. Flour matters too: King Arthur or Gold Medal brands yield consistent results, but sift it first—this prevents dense cookies.
No brown sugar? White sugar plus 1 tsp molasses mimics the flavor, though texture will differ slightly. Short on vanilla? Almond extract at half the amount adds complexity, but stick to vanilla for classic taste. The cinnamon is optional but worth it—Penzeys or McCormick ground varieties work best. For a lower-fat version, substitute half the butter with applesauce, though texture will be softer. If you’re gluten-sensitive, King Arthur Gluten-Free Measure-for-Measure Flour replaces all-purpose at a 1:1 ratio, but increase baking time by 2 minutes. The baking soda is critical—don’t swap for baking powder unless you adjust the recipe.
Store dough in an airtight container for up to 48 hours in the fridge, though it’s best used immediately. Baked cookies keep in a sealed container for 5 days at room temperature or 3 months frozen between parchment layers. For extra crunch, bake an additional 1-2 minutes until edges darken. These cookies reheat beautifully—5 seconds in the microwave restores their warm, buttery appeal. Double the batch for holidays; the dough freezes perfectly for up to 6 months.
Why You’ll Love This Recipe
- Five-Ingredient Magic: I swear, that’s it—just butter, sugars, vanilla, eggs, and a few minutes of your time. No fancy mixers, no last-minute ingredient hunts. The dough comes together faster than you can sing “Happy Birthday,” and honestly? That’s the kind of recipe I can trust when I’ve got a house full of people and zero patience for fuss.
- Buttery Bliss: Between us, this cookie is ridiculously good—chewy, caramelized edges, that perfect crack when you bite in. The brown sugar gives it that deep molasses warmth, while the butter keeps it rich without tasting greasy. And that vanilla? It’s like a hug for your taste buds, especially when the dough’s still warm from the pan.
- Party in a Jar: Between us, this cookie is ridiculously good—chewy, caramelized edges, that perfect crack when you bite in. The brown sugar gives it that deep molasses warmth, while the butter keeps it rich without tasting greasy. And that vanilla? It’s like a hug for your taste buds, especially when the dough’s still warm from the pan.
- Dollar Stretch: A single batch costs me pennies—literally. That cup of butter goes a long way, and the sugars? You won’t even miss the fancy brands. I’ve made these for potlucks, teacher gifts, and even froze half for lazy mornings. (Yes, even on a Tuesday night.)
Step-by-step instructions for rich, crunchy cookies
Master this classic 1-cup butter cookie technique for perfect texture every time.
Cream Butter and Sugars to Light and Fluffy
In a stand mixer fitted with the paddle attachment, beat the 1 cup unsalted butter (cold, cubed) with the 0.75 cup packed light brown sugar and 0.25 cup granulated sugar on medium speed for 3-4 minutes. The mixture should nearly triple in volume, become pale in color, and leave light ribbons when the paddle is lifted.
This creaming process incorporates air that creates the signature crackly tops and tender crumb. Use the cold butter cubes to prevent melting during mixing. You’ll know you’ve achieved the perfect consistency when the mixture looks like soft whipped butter and holds its shape when scraped with a spatula.
Add Egg and Vanilla for Rich Flavor
Add the 1 whole large egg (room temperature) and mix on low speed for 30 seconds until fully incorporated. Then add the 1 tablespoon pure vanilla extract and mix for another 10 seconds. The mixture will appear slightly thickened and ribbony.
This step ensures proper emulsification of the fat and liquid components. The vanilla extract should be distributed evenly throughout the mixture. If you notice any curdling at this stage, don’t worry—it will resolve when you add the dry ingredients. The egg provides structure while maintaining moisture for that perfect soft center.
Combine Dry Ingredients for Perfect Texture
In a separate bowl, whisk together the 2 cups all-purpose flour (sifted), 0.5 teaspoon diamond crystal kosher salt, 0.5 teaspoon baking soda, and 0.5 teaspoon ground cinnamon. With the mixer on low speed, gradually add the dry ingredients to the butter mixture, mixing just until combined.
Stop mixing as soon as you see no more streaks of flour—overmixing develops gluten and results in tough cookies. The dough should be soft and slightly sticky but hold together when pressed. If it feels too dry, add 1-2 teaspoons milk (though this isn’t in your ingredients, it’s the only acceptable variation). The baking soda ensures proper rise while the cinnamon adds subtle warmth without overpowering the butter flavor.
Chill the Dough for Optimal Texture
Shape the dough into a disk, wrap tightly in plastic wrap, and refrigerate for at least 1 hour (up to 24 hours). This chilling step is crucial—it allows the flour to fully hydrate and the butter to firm up, preventing excessive spreading in the oven.
Cold dough also helps maintain those crispy edges while keeping the centers tender. I like to press the dough into a uniform disk to ensure even thickness when scooping. The longer you chill, the better the texture—up to 24 hours in the refrigerator works beautifully. Don’t skip this step, even if it seems like too much waiting.
Bake to Golden Perfection
Preheat your oven to 350°F and line two baking sheets with parchment paper. Using a 2-tablespoon scoop, portion the chilled dough into balls and place them 3 inches apart on the prepared sheets. Flatten each ball slightly with your palm to about ¼-inch thickness.
Bake for 11-13 minutes until the edges are golden brown but the centers still appear slightly underbaked. They’ll continue cooking on the hot pan after removal. The cookies should pull away slightly from the parchment paper but still look soft in the middle. Rotate the baking sheets halfway through for even baking. Let them cool on the baking sheet for 5 minutes before transferring to a wire rack to prevent over-spreading.
Pro Tips For Making 1 Cup Butter Cookie
- Cream Butter Slowly: Dump that cold butter straight into the dry ingredients, and you’ll end up with a dough that fights you every step of the way. Microwave the butter in 15-second bursts until it’s just soft enough to press with your finger—about 60 seconds total—then let it sit for 30 seconds. This keeps the sugar from turning into a paste while still making the dough smooth.
- Pack the Sugar: Light brown sugar is sneaky—it’s got moisture, and if you scoop it straight from the bag, you’re cheating yourself out of sweetness and texture. Press it firmly into the measuring cup and level it off with a knife. I learned this the hard way when my cookies tasted bland and spread too much.
- Chill the Dough: Skip this, and your cookies will spread into sad, flat pancakes. Wrap the dough in plastic and refrigerate for at least 2 hours—or overnight if you’re me, procrastinating. The cold firmness guarantees thick, chewy centers and crisp edges. (Yes, even if you’re impatient like me.)
- Use Room-Temp Eggs: Cold eggs make the dough lumpy and uneven. Let them sit in warm water for 5 minutes before cracking them in—just enough to make them yield easily without turning into a hot mess. This also helps the dough come together cleaner, so you’re not fighting streaks of raw egg later.
Make-ahead tips for 1 cup butter cookie
Dough Prep Ahead
Shape your dough into a disk, wrap tightly in plastic wrap, and refrigerate for up to 48 hours before baking. This extended chilling time enhances flavor development and prevents spreading. I like to label the container with the date to track freshness.
The dough can also be frozen for 6 months—wrap it tightly in plastic and place in a ziplock bag before freezing. 🧊
Baked Cookie Storage
Let cookies cool completely on the baking sheet before transferring to an airtight container layered with parchment paper. They’ll stay fresh at room temperature for 5 days—perfect for meal prep.
For longer storage, freeze baked cookies in a single layer before transferring to a freezer bag. Reheat frozen cookies at 350°F for 3-4 minutes to restore their buttery warmth. 🍪
Double Batch Strategy
For holiday baking, double the recipe and divide the dough into two 1-pound portions. Wrap each portion separately and freeze one while baking the other. This method saves time and ensures you always have fresh cookies ready.
Thaw frozen dough in the fridge overnight for best results. I’ve baked 50 cookies this way for parties—no one ever notices they weren’t made fresh! 🎄
Freezer-Friendly Tips
Portion dough into 16-ounce balls (about 2 tablespoons each) before freezing for individual servings. Store them in a single layer on a tray, then transfer to a ziplock bag to prevent sticking.
When ready to bake, add 1 extra minute to the baking time since frozen dough takes slightly longer to set. This trick is a game-changer for last-minute baking! ⏰
Reheating Perfection
For cookies that have lost their crispness, reheat in a 350°F oven for 2-3 minutes until edges regain their golden color. Alternatively, wrap cookies in a damp paper towel and microwave for 5-10 seconds—this restores moisture without overcooking.
I avoid the microwave for large batches, as it can make cookies rubbery. 🔥
Gift-Worthy Packaging
Arrange cooled cookies in clear cellophane bags tied with ribbon for a professional presentation. Add a handwritten note or sprinkle of coarse sugar for extra flair. These packaged cookies make stunning gifts and stay fresh for 3 days at room temperature. I’ve given away dozens this way—always a crowd-pleaser! 🎁
Nutrition facts
Frequently asked questions
Why does my cookie dough spread too much when baking?
This usually happens when the dough isn’t chilled long enough or the butter gets too warm. Always refrigerate the dough for at least 1 hour (up to 24 hours is better) and use cold butter cubes. If your kitchen is warm, chill the dough longer. The 30-minute chilling time in the recipe is non-negotiable for that perfect crackly edge!
Can I substitute margarine for butter in this recipe?
Not recommended! Butter gives these cookies their signature rich flavor and texture. Margarine lacks the fat content needed for that tender crumb and crispy edges. If you must use a substitute, try 1 cup of high-fat vegetable shortening (like Crisco) for a similar texture, but the flavor won’t be as authentic. Stick with butter for the best results!
How do I make these cookies extra crunchy?
For maximum crunch, bake the cookies 1-2 minutes longer until the edges are deep golden brown. Let them cool completely on the baking sheet for 10 minutes before transferring to a rack. The residual heat will set the cookies even firmer. For extra crunch, sprinkle with coarse sugar before baking or press them slightly flatter before going in the oven.
What’s the secret to soft centers in these cookies?
The secret lies in the butter-to-flour ratio and proper baking time. Use 1 cup of butter (not reduced-fat) and don’t overbake—pull them when edges are golden but centers still look slightly underdone. The 11-13 minute bake time at 350°F is crucial. For extra softness, chill the dough longer (up to 24 hours) and avoid overmixing when combining dry ingredients.
Can I add mix-ins like chocolate chips to this recipe?
Fold in ½ cup of chocolate chips or ½ cup chopped nuts after mixing the wet and dry ingredients. For even distribution, press the mix-ins into the dough balls before baking. Avoid adding more than ½ cup total to maintain the perfect texture. Dark chocolate chips work best—they melt beautifully and complement the buttery flavor without overpowering it.

- 3lb Prime Rib Roast Recipe: Juicy Pink Center Guaranteed in 3 Hours - October 31, 2026
- 5 Spice Cake Recipe: Warmly Spiced Layers With Crunchy Top - October 31, 2026
- 1950’s Macaroni and Cheese Recipe: Nostalgic Creamy Cheese Sauce with Buttery Noodles - October 31, 2026