
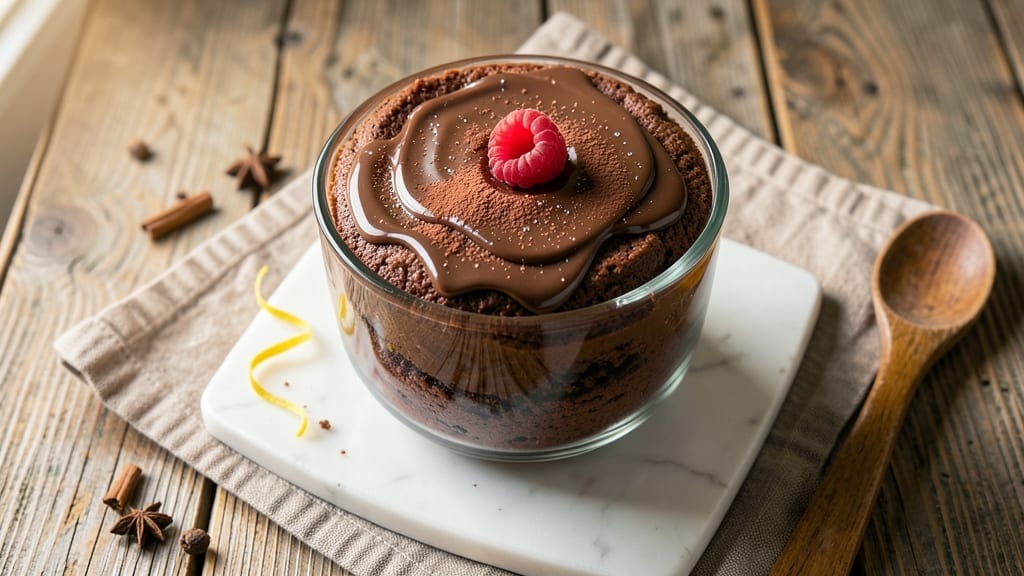
A 1 bowl chocolate cake recipe that delivers rich, fudgy perfection in just 10 minutes of active time—no mixer, no fuss, no fail. This single-serve masterpiece proves you don’t need elaborate techniques to bake a cake that tastes like it came from a bakery.
The secret lies in the precise ratio of cocoa powder to flour and the proper creaming method, which creates a moist, tender crumb with deep chocolate flavor in every bite.
What makes this recipe truly remarkable is its simplicity: one bowl, minimal ingredients, and no special equipment beyond what you already have. The cake bakes in a standard mug or ramekin, making it perfect for last-minute cravings or when you only need to satisfy one person’s sweet tooth.
The mixing process is straightforward—cream butter and sugar first, then alternate between dry ingredients and milk to avoid lumps, and finally fold in the melted chocolate for that extra decadence.
By the time it emerges from the oven, you’ll have a golden-domed, crack-free cake with a tender yet slightly dense texture that’s impossible to resist. The aroma alone will have everyone in the house asking what’s for dessert.
This isn’t just a cake; it’s a foolproof way to indulge without the guilt or the effort.
Top it with whipped cream, a drizzle of chocolate ganache, or a sprinkle of sea salt for the ultimate single-serving experience. Ready in just 10 minutes of prep and 10-12 minutes of baking, this recipe is your new go-to for quick, satisfying desserts. Let’s get baking!
Ingredients for 1 bowl chocolate cake
Nine essential ingredients transform into decadent single-serving chocolate cake in minutes.
| Ingredient | Amount | Notes |
|---|---|---|
| Unsalted Butter 🧈 | ½ cup | Room temperature for creaming |
| Granulated Sugar 🍚 | ¾ cup | Superfine preferred for smooth texture |
| All-Purpose Flour 🌾 | ½ cup | Sifted for lightness |
| Dutch-Processed Cocoa Powder 🍫 | ⅓ cup | High-quality for rich flavor |
| Baking Powder 🧂 | 1 tsp | Diamond Crystal preferred |
| Salt 🧂 | ¼ tsp | Fine sea salt preferred |
| Whole Milk 🥛 | ½ cup | Room temperature |
| Vanilla Extract 🌿 | 1 tsp | Pure Madagascar preferred |
| Semisweet Chocolate Chips 🍫 | ⅓ cup | Enjoy Life brand for allergy-safe |
| Vegetable Oil 🫒 | 1 tbsp | For greasing ramekin |
The cocoa powder is non-negotiable here—Dutch-processed delivers that deep, velvety chocolate flavor without bitterness. Hershey’s Special Dark or Valrhona are ideal if you want to splurge, but the store-brand Dutch-processed works perfectly for everyday baking. For the butter, Plugrá or Land O’Lakes are reliable choices, but any unsalted butter will do as long as it’s room temperature when measured. The chocolate chips add richness, so don’t skip them—Enjoy Life brand is a great option if you need allergy-friendly, but any high-quality semisweet chips will work. Sift your flour and baking powder together to avoid lumps in your delicate batter.
No cocoa powder? Melted dark chocolate at half the amount works in a pinch, though the texture will be slightly denser. Running short on butter? Coconut oil can substitute, but it adds a subtle coconut flavor. The vanilla extract can be swapped for vanilla bean paste if you’re feeling fancy, or even 1 tsp vanilla sugar in a bind. For the milk, almond milk or oat milk work fine, though whole milk creates the most tender crumb. If you can’t find semisweet chocolate chips, chopped chocolate bars will do—just make sure they’re at least 60% cocoa for that rich chocolate taste. The vegetable oil is just for greasing; any neutral oil will work.
Store your cocoa powder and flour in airtight containers away from heat to preserve freshness—both keep for 6-12 months. Butter can be refrigerated for up to 3 months or frozen for 6 months. Once mixed, this batter keeps in the fridge for 2 days if stored in an airtight container, though it’s best used fresh. For the chocolate chips, keep them sealed in their original bag to prevent drying out—they’ll last up to 1 year this way. The ramekin you bake in can be reused; just wash it thoroughly after each use to avoid any lingering flavors.
Why You’ll Love This Recipe
- No Mixer Needed: I swear by this one-bowl method—just melt the butter, toss in the sugar and cocoa, then fold in the dry stuff. No measuring cups flying everywhere, no sticky mixer cleanup. Honestly, my 10-year-old could handle this (and has, multiple times).
- Rich Without Fuss: That Dutch-processed cocoa? It’s the secret weapon—deep, velvety chocolate flavor without the bitterness. And the butter-sugar combo at the start? It creates this luscious, almost fudgy texture that’s way more impressive than it sounds.
- Birthday or Breakfast: Serve it warm with ice cream for a crowd, or cut into squares for a quick breakfast treat. I’ll be real: I’ve eaten slices straight from the fridge at 9 AM with no judgment. Works for celebrations or lazy mornings—same cake, endless uses.
- Pantry Staples Only: Five ingredients, zero specialty items. If you’ve got flour, sugar, and butter, you’ve got this. And because it’s a single bowl, it’s half the cleanup—perfect for when you’re too tired to wash dishes (or too excited to eat dessert immediately).
Step-by-step instructions for single-serve chocolate cake
Master this technique and you’ll achieve perfectly moist, rich chocolate cake with a crackly top every time.
Prepare the Ramekin and Cream Butter and Sugar
Lightly grease a 6-ounce ramekin with the 1 tablespoon vegetable oil, then dust with a pinch of flour to prevent sticking. Set aside. In a medium mixing bowl, combine the 0.5 cup unsalted butter and 0.75 cup granulated sugar. Using an electric mixer on medium speed, beat for 3-4 minutes until the mixture is light, fluffy, and nearly doubles in volume.
This creaming process incorporates air into the butter, creating that signature tender crumb. I like to scrape the bowl with a rubber spatula every 30 seconds to ensure even mixing. The butter should be completely smooth with no visible streaks of sugar remaining.
Add Dry Ingredients and Alternate with Milk
In a separate bowl, whisk together the 0.5 cup all-purpose flour, 0.33 cup Dutch-processed cocoa powder, 1 teaspoon baking powder, and 0.25 teaspoon salt. Gradually add this dry mixture to the butter-sugar combination, mixing on low speed just until combined. Add the 0.5 cup whole milk and mix until smooth.
Next, stir in the 1 teaspoon vanilla extract and 0.33 cup semisweet chocolate chips. Fold these in gently with a spatula to maintain the airiness we created earlier. The batter should be thick but pourable—similar to heavy pudding. If it looks too stiff, add 1-2 tablespoons milk to reach proper consistency.
Bake Until Golden and Springy
Preheat your oven to 350°F. Pour the batter into the prepared ramekin, smoothing the top with a spatula. Bake for 18-22 minutes until the top is golden brown and a toothpick inserted in the center comes out with moist crumbs (not wet batter). The edges should pull away slightly from the ramekin.
Here’s the thing—don’t overbake. The cake continues cooking as it rests, and overbaking leads to dryness. I’ve found that 20 minutes is the sweet spot for my oven, but watch for the visual cues: a slightly domed top with golden cracks and that irresistible chocolate aroma filling your kitchen.
Rest and Serve for Perfect Texture
Remove the cake from the oven and let it cool in the ramekin for 5 minutes. Then carefully invert it onto a serving plate. The cake should release cleanly if properly greased. Allow it to cool completely for 10-15 minutes before slicing—this resting period ensures clean cuts and prevents crumbling.
For serving, I like to dust with powdered sugar or add a dollop of whipped cream. The interior should be moist with just a hint of fudgy texture, while the exterior has that beautiful crackly crust. This single-serve cake delivers restaurant-quality decadence with minimal effort and cleanup.
Pro Tips For Making 1 Bowl Chocolate Cake
- Melt Butter Slowly: Mixing cold butter into the sugar first? Skip it. Melt the butter first—just until it’s liquid but not hot—then stir it into the sugar. This avoids lumps and makes the batter smoother, especially when you’re mixing everything in one bowl.
- Sift the Cocoa First: Dutch-processed cocoa powder is finicky. Sift it with the flour and baking powder before adding it to the wet ingredients. This prevents clumps and ensures your cake turns out rich and even, not streaky or dense.
- Don’t Overmix the Batter: Once you add the flour mixture, stop stirring the second everything comes together. Overmixing develops gluten, which makes your cake tough instead of tender. Two or three gentle folds are all you need.
- Use Room-Temp Ingredients: Cold butter or eggs straight from the fridge? Your cake will fight you. Let the butter sit out for 30 minutes and the eggs for 10. This guarantees a smoother batter and even baking, not a cake with a dense center or cracks.
Storing and reheating this 1 bowl chocolate cake
Fridge Storage Tips
Store your baked cake in an airtight container at room temperature for up to 2 hours before refrigerating—this prevents condensation that can make it soggy. Once cooled completely, wrap it tightly in plastic wrap or place it in a resealable container with a damp paper towel to maintain moisture.
In the fridge, it stays fresh for 3-4 days, though I find the texture is best within 24 hours of baking. 🧊
Freezer Preservation
For longer storage, freeze the cake wrapped in plastic wrap followed by aluminum foil to prevent freezer burn. It keeps for up to 3 months without losing moisture or flavor.
When ready to serve, thaw at room temperature for 1-2 hours or microwave for 15-20 seconds on 50% power—just enough to soften it slightly. The texture remains tender, though slightly denser than fresh.
Reheating Methods
For the best texture, reheat slices in a 350°F oven for 5-7 minutes until warmed through. This method preserves the cake’s moisture and crackly top. If using a microwave, heat on 30% power for 10-15 seconds—any longer risks drying it out.
A quick spritz of water before reheating helps restore moisture if the cake seems dry. 🔥
Make-Ahead Batter
Mix the batter up to 2 days ahead and store it in an airtight container in the fridge. When ready to bake, let it sit at room temperature for 30 minutes before proceeding with the recipe.
This shortcut works perfectly for last-minute cravings—just pop it in the oven while you’re making coffee or tea. The flavor develops beautifully overnight!
Reviving Dried Cake
If your cake loses moisture over time, brush the top with a light syrup (equal parts water and sugar, heated until dissolved) or a thin layer of chocolate ganache.
Let it absorb for 5 minutes before serving. This trick works wonders for restoring that tender, moist texture without making the cake soggy. A little goes a long way!
Serving Leftovers
Turn leftover cake into chocolate truffles by crumbling it, mixing with 2 tablespoons melted butter and 1 tablespoon chocolate chips, then rolling into balls and chilling. Alternatively, layer slices with whipped cream and fresh berries for a deconstructed dessert.
These creative uses keep your cake from going to waste while adding new flavors to enjoy. ✨
Nutrition facts
Frequently asked questions
Why does this recipe use only one bowl?
This recipe eliminates the need for multiple bowls by combining all ingredients in one mixing vessel. The key is alternating between dry and wet ingredients while mixing just until combined—this prevents lumps and keeps the process simple. Plus, it cuts cleanup time dramatically, making it perfect for busy days!
Can I make this cake in a mug instead of a ramekin?
A standard 12-ounce microwave-safe mug works perfectly. Reduce baking time to 8-10 minutes at 350°F and check for doneness with a toothpick. The texture will be slightly denser but still delicious—great for quick microwave baking too!
What if my cake comes out dry or crumbly?
Overbaking is the most common cause. Always check for doneness at 18 minutes—the cake continues cooking after removal. For extra moisture, brush the top with simple syrup (equal parts sugar and water) before serving. Using whole milk instead of alternatives also helps maintain tenderness.
How do I make this gluten-free?
Replace the 0.5 cup all-purpose flour with 0.5 cup gluten-free 1:1 baking flour (like Bob’s Red Mill). Add 0.5 tsp xanthan gum to help bind the cake. The texture will be slightly denser but still rich and moist. Always check your gluten-free flour blend’s instructions for best results.
Can I add nuts or other mix-ins?
Yes! Fold in 0.25 cup chopped walnuts or pecans with the chocolate chips, or try 1 tbsp freeze-dried raspberries for a fruity twist. Just be mindful of portion size—too many mix-ins can make the cake dense. For extra richness, add 1 oz chopped dark chocolate along with the chips.

- 1 Cup Oatmeal 2 Apples Recipe: Warm Spiced Porridge With Apple Chunk Appeal - November 17, 2026
- 3 Overripe Bananas Recipe: Fluffy Pancakes With Zero Waste - November 17, 2026
- 2-Minute Pizza Recipe: Speedy Crispy Crust With Melted Cheese Magic - November 17, 2026