
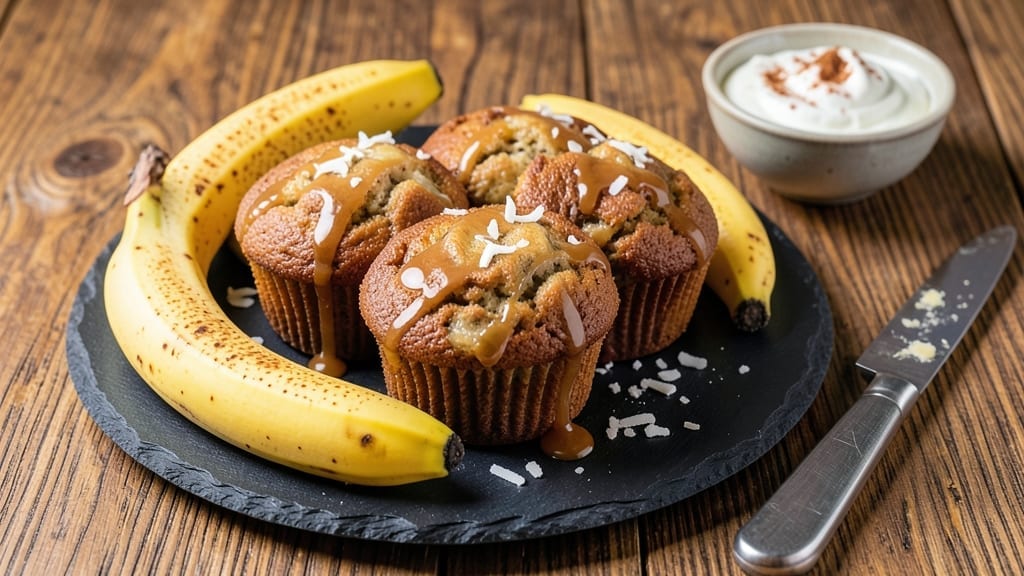
Transform your kitchen with this 3 overripe bananas recipe—fluffy, vegan pancakes so delicious, you’ll forget they’re made from overripe fruit, all while cutting waste. 🌱 The secret lies in blending them with simple pantry staples to create a naturally sweet batter that rises perfectly, yielding golden, tender pancakes with a subtle caramelized flavor.
I developed this recipe after realizing how often bananas went to waste in my kitchen, and now it’s my go-to for breakfast or brunch.
What makes these pancakes special is their foolproof texture—no flipping required, no lumps in the batter, and no need for special ingredients. The bananas add natural sweetness while keeping the batter light, and a touch of baking powder ensures they puff up beautifully.
Plus, they’re ready in just 15 minutes, making them perfect for busy mornings when you still want something homemade and delicious.
Each batch uses exactly 3 overripe bananas, transforming what would otherwise be compost into a stack of pancakes that’s rich, slightly dense, and packed with banana flavor.
Serve them warm with maple syrup, fresh berries, or a dollop of vegan yogurt for a meal that feels indulgent yet guilt-free. The best part? You’ll never toss another banana again.
These pancakes also freeze beautifully, so you can make a batch on Sunday and enjoy them all week. Whether you’re feeding a family or treating yourself to a special breakfast, this recipe proves that waste-free cooking can still deliver restaurant-quality results—without the fuss.
Ingredients for 3 overripe bananas
Pantry staples meet overripe bananas—simple ingredients for fluffy, waste-free pancakes.
| Ingredient | Amount | Notes |
|---|---|---|
| Overripe Bananas 🍌 | 3 whole | Dark-spotted, soft when squeezed |
| All-Purpose Flour 🌾 | 1 ½ cups | Spooned and leveled (not scooped) |
| Baking Powder 🧂 | 1 ½ tsp | Aluminum-free preferred |
| Salt 🧂 | ½ tsp | Fine sea salt |
| Plant-Based Milk 🥛 | 1 cup | Unsweetened almond or oat milk |
| Vegan Butter 🧈 | 2 tbsp | Melted, full-fat preferred |
| Pure Maple Syrup 🍯 | 1 tbsp | Grade A for sweetness |
| Vanilla Extract 🌿 | ½ tsp | Pure alcohol-free if preferred |
| Coconut Oil 🫒 | 1 tbsp | For cooking (refined, neutral flavor) |
| Fresh Blueberries 🫐 | ½ cup | Optional, for topping |
| Vegan Maple Syrup 🍯 | ¼ cup | For serving (optional) |
The bananas are the star, so pick the spottiest, softest ones—those you’d normally toss. Trader Joe’s often has them marked down, or check the back of the bunch at regular grocery stores. For flour, King Arthur or Bob’s Red Mill are my go-tos—they’re reliable and blend smoothly. The baking powder needs to be fresh: if it’s more than six months old, the pancakes won’t rise properly. Plant-based milk? Oat milk adds creaminess, but almond milk works too—just shake the carton well before measuring. And that maple syrup? Grade A is sweeter and perfect for these pancakes.
No baking powder? Baking soda plus an extra tbsp of vinegar works in a pinch, but the texture won’t be quite as light. Swapping the plant-based milk? Soy milk is the closest in protein and creaminess, but coconut milk makes them richer. Out of vanilla? Almond extract at half the amount adds a nice twist. The blueberries are totally optional, but if you use frozen ones, don’t thaw them first—toss them straight in while the batter’s still cold. For extra fluffiness, let the batter rest for 5 minutes before cooking, but don’t skip this if you’re in a rush.
These pancakes freeze like a dream—just stack them with parchment between layers and freeze for up to 3 months. Reheat in a toaster or microwave for 20 seconds**. The batter keeps in the fridge for 2 days, covered tightly. I always make a double batch on Sundays because they’re gone too fast. Store the dry ingredients (flour, baking powder, salt) in airtight containers, and the wet ones (milk, syrup) in the fridge. The bananas? Use them the same day—they’re the only thing that won’t wait.
Why You’ll Love This Recipe
- No Waste, All Win: Honestly, I save money every time I spot those spotted bananas in my fruit bowl. Mash them up with just flour, baking powder, and plant-based milk, and suddenly you’ve got a golden, cakey treat instead of sad compost.
- Secretly Sweet: That caramelized banana flavor? It’s like dessert hiding in plain sight. The baking powder gives it a light rise, while the overripe fruit adds natural sweetness—no sugar needed. (Yes, even on a Tuesday night.)
- Breakfast or Snack: Here’s what sold me—this batter works for pancakes, muffins, or even a quick bread. Use it for a lazy weekend brunch or pack it in a lunchbox. My kids grab these before school without complaint.
- Fridge Magic: Between us, this recipe turns into something even better the next day. The flavors deepen, and you’ve got a ready-to-go treat for when cravings hit. Plus, it’s cheaper than store-bought—just mix, bake, and enjoy.
Step-by-step instructions for fluffy pancakes using 3 overripe bananas
Here’s how to transform those brown-spotted bananas into light, fluffy pancakes that taste like dessert.
👨🍳 Step 1: Mash the Bananas Until Silky
Peel the 3 whole overripe bananas and place them in a medium bowl. Using a fork, mash them until completely smooth with no visible lumps. The bananas should look like thick, creamy pudding—this is your natural sweetener and moisture source. If you prefer extra smoothness, press through a fine-mesh sieve to remove any banana skins or large fibers.
Here’s the thing—overripe bananas are sweeter and creamier than firm ones, so you won’t need much extra sugar. The dark spots actually mean more natural sugars, which caramelize beautifully during cooking. Give the mashed bananas a taste—they should be noticeably sweet, almost like a ripe banana you’d eat straight from the bunch.
👨🍳 Step 2: Mix Wet Ingredients for a Smooth Batter
In the same bowl, add the 1 cup plant-based milk, 2 tablespoons melted vegan butter, 1 tablespoon pure maple syrup, and 0.5 teaspoon vanilla extract to the mashed bananas. Whisk everything together until fully combined and smooth. The batter should look like a thick, creamy custard with no streaks of butter or milk.
I like to warm the plant-based milk slightly (just until it’s comfortable to touch) before adding it to the bananas. This helps the batter come together more smoothly and prevents lumps from forming. The melted vegan butter should be just warm enough to blend easily—if it’s too hot, it might cook the bananas slightly and change the flavor. The mixture should smell like warm banana bread with a hint of vanilla.
👨🍳 Step 3: Combine Dry Ingredients Gently
In a separate bowl, whisk together the 1.5 cups all-purpose flour, 1.5 teaspoons baking powder, and 0.5 teaspoon salt. This is your dry ingredient mix, and it’s important to whisk it well to prevent lumps in your final batter. Once combined, gradually add this dry mixture to the wet ingredients in the first bowl.
Use a spatula to gently fold the dry ingredients into the wet mixture, being careful not to overmix. You want to combine them just until no dry spots remain, but stop mixing as soon as the batter comes together. Overmixing develops gluten and can make your pancakes tough. The ideal batter should be thick but pourable—like heavy cream. If it’s too thick, you can add 1-2 tablespoons more plant-based milk to reach the right consistency.
🔥 Step 4: Cook the Pancakes on Medium Heat
Heat a non-stick skillet or griddle over medium heat. Add 1 tablespoon coconut oil and let it spread evenly across the surface. When the oil is shimmering (about 30 seconds after adding), it’s ready for the pancakes. Pour about ¼ cup of batter onto the skillet for each pancake—you should get about 4 pancakes from this batch.
Cook each pancake until bubbles form on the surface and the edges look set (about 2-3 minutes). Here’s where it gets fun—flip carefully using a spatula and cook the other side for another 1-2 minutes, until golden brown. The pancakes are done when they’re lightly browned on both sides and feel firm to the touch. Don’t walk away—they cook quickly and can burn if you’re not paying attention. The secret to fluffy pancakes is medium heat and not overcooking.
🍽️ Step 5: Serve Warm with Fresh Toppings
Transfer the cooked pancakes to a plate and keep them warm in a 200°F oven while you finish the batch. For serving, I like to drizzle each stack with 1 tablespoon of vegan maple syrup and top with the 0.5 cup fresh blueberries. The blueberries add a nice pop of color and freshness that balances the sweetness of the pancakes.
Serve immediately while they’re warm and fluffy. These pancakes are best enjoyed fresh out of the pan—they’ll hold their shape for a little while but become denser as they cool. If you have any leftover batter, you can cook it right away or refrigerate it for up to 24 hours and cook later. The flavor actually improves slightly after resting overnight, as the ingredients have time to meld together. Enjoy your zero-waste, delicious breakfast!
Pro Tips For Making 3 Overripe Bananas
- Mash Bananas Thoroughly: No lumps allowed—overripe bananas are soft but can still hide stubborn chunks. Use a fork first, then a potato masher or wooden spoon to break everything down completely. I learned this the hard way when my first batch had weird texture pockets.
- Measure Flour Right: Spoon and level—that’s the rule. Dumping flour straight from the bag packs it too tightly, and your muffins or pancakes will turn out dense. Use a measuring cup, then scrape off the excess with a knife. Trust me, it makes a real difference.
- Don’t Overmix the Batter: Stir just until combined—gloppy is good. Overmixing develops gluten, and your bananas will turn out tough instead of tender. Fold in the plant-based milk gently, and stop when there’s a few streaks left. Your future self will thank you.
- Use Warm Milk: Cold milk makes the batter sluggish, and your recipe won’t rise as well. Heat it to about 100°F (just warm to the touch) before mixing—it blends faster and gives you a lighter texture. Sounds weird, but it works every time.
Pro cooking tips for this recipe
Banana Ripeness Test
Before you start, test your bananas by peeling one and pressing it gently—if it leaves a deep thumbprint, it’s perfect. Overripe bananas have more natural sugars and less starch, which means they’ll caramelize beautifully while adding a rich, custard-like texture to your pancakes.
I’ve found that Trader Joe’s or Whole Foods often have the spottiest bananas marked down, so check those first. The darker the spots, the sweeter and creamier they’ll be! 🍌
Batter Consistency Secrets
Your batter should be thick but pourable, like heavy cream. If it’s too thick after mixing, add 1-2 tablespoons of plant-based milk to loosen it up. Pro tip: Let the batter rest for 5 minutes before cooking—this allows the flour to fully hydrate, resulting in fluffier pancakes.
I’ve ruined a batch or two by skipping this step, so don’t overlook it! The batter should smell like warm banana bread with a hint of vanilla.
Medium Heat is Key
Too hot, and your pancakes will burn on the outside while staying raw inside. Too cool, and they’ll turn out dense and gummy. Medium heat is your sweet spot—look for small bubbles forming on the surface before flipping.
I use a non-stick skillet (like GreenPan) and heat it until a drop of water sizzles and dances across the surface. This ensures even cooking and a golden-brown crust every time. 🔥
Flip with Confidence
Use a wide spatula to flip your pancakes when you see bubbles popping on the surface and the edges looking set (about 2-3 minutes). A little trick I learned: Tap the spatula lightly on the pancake first to loosen it before flipping—this prevents them from sticking.
Cook the other side for 1-2 minutes until golden. Overcooking is the enemy here—pancakes should be lightly browned and firm to the touch.
Keep Them Warm
Transfer cooked pancakes to a plate and place them in a 200°F oven while you finish the batch. This keeps them warm and fluffy without drying out. If you’re serving a crowd, I like to stack them with parchment paper between layers to prevent sticking.
The secret to serving them at their best? Serve immediately—they’ll start to firm up as they cool, but the first bite is always the best! 💫
Freezer-Friendly Trick
Make a double batch and freeze extras for busy mornings! Stack pancakes with parchment paper between layers, wrap tightly in plastic wrap, and freeze for up to 3 months.
To reheat, pop them in a toaster for 1-2 minutes or microwave for 20 seconds—they’ll taste almost as good as fresh. I always keep a stash in my freezer because they’re too good to waste! ❄️
Nutrition facts
Frequently asked questions
Can I substitute ripe bananas for overripe ones in this recipe?
While you can use ripe bananas, they won’t be as sweet or creamy as overripe ones. The darker spots mean more natural sugars, which caramelize beautifully and give these pancakes their rich flavor. If you must use ripe bananas, add an extra 1 tablespoon of maple syrup to compensate for the lack of sweetness.
What if my batter is too thick or too thin?
If your batter is too thick, add 1-2 tablespoons of plant-based milk to loosen it up. If it’s too thin, you can add 1 tablespoon more flour to thicken it. The ideal consistency is like heavy cream—thick but pourable. Let the batter rest for 5 minutes before cooking for the best results.
Can I make these pancakes ahead of time?
Cooked pancakes can be stored in an airtight container in the fridge for 3 days or frozen for up to 3 months. To reheat, pop them in a toaster for 1-2 minutes or microwave for 20 seconds**. The batter itself can be refrigerated for 24 hours before cooking, and the flavor actually improves slightly after resting.
Why are my pancakes dense instead of fluffy?
Dense pancakes usually happen from overmixing the batter or using too much flour. Make sure to gently fold the dry ingredients into the wet ones just until combined, and don’t skip the 5-minute rest before cooking. Also, check that your baking powder is fresh—old baking powder loses its lift.
What other ways can I use 3 overripe bananas?
These bananas work perfectly in banana bread, smoothie bowls, or even vegan banana muffins. For a quick option, blend them with 1 cup yogurt, 1 tablespoon chia seeds, and a splash of milk for a nutrient-packed smoothie. You can also make banana ice cream by blending them with 1 cup coconut milk and freezing the mixture.

- 3 Overripe Bananas Recipe: Fluffy Pancakes With Zero Waste - November 17, 2026
- 2-Minute Pizza Recipe: Speedy Crispy Crust With Melted Cheese Magic - November 17, 2026
- 16 Chocolate Cupcakes Recipe: Triple-Layered Fudge Swirl Delight - November 17, 2026