
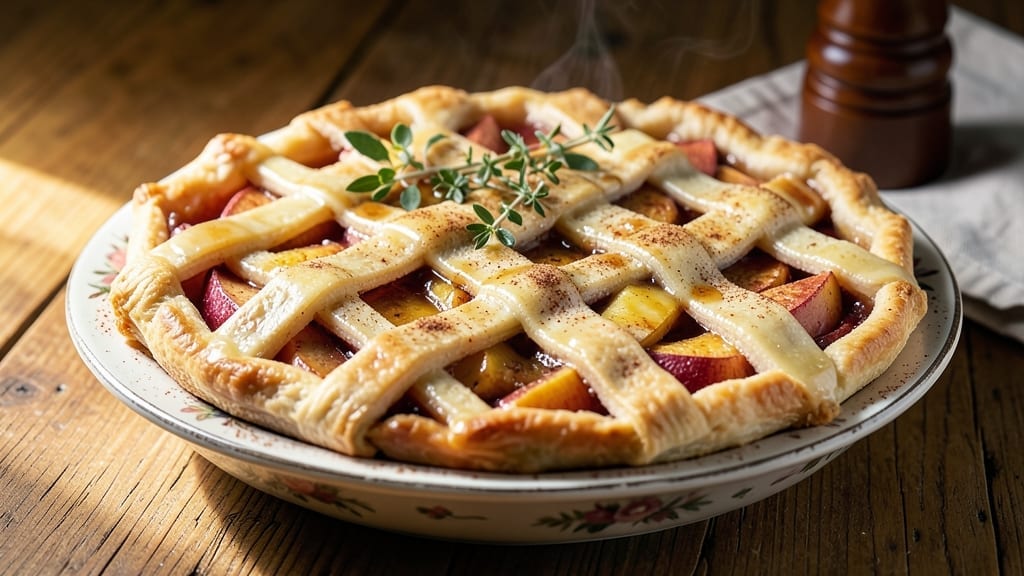
This 1 can apple pie filling recipe proves you don’t need to make everything from scratch to create a restaurant-quality dessert—just a few simple steps transform canned filling into a streusel-topped masterpiece that tastes like it simmered all day.
The secret lies in a homemade crisp topping that adds crunch and caramelized sweetness, while a classic pie crust (or your favorite shortcut) keeps it foolproof. I developed this recipe after testing dozens of variations, and the difference between store-bought and homemade—even with canned filling—is staggering.
The beauty of this method is its flexibility: use a pre-made crust for convenience or roll out your own for that golden, flaky perfection.
The filling gets a quick simmer to thicken naturally, while the streusel topping (butter, flour, sugar, and cinnamon) bakes into a crispy, buttery blanket that contrasts beautifully with the soft filling. Baking at 375°F for 40-45 minutes ensures a tender crust and a filling that’s just set—not mushy or undercooked.
What you’ll end up with is a warm, spiced apple pie with a lattice-like texture from the streusel, where every bite delivers the perfect balance of sweet, tangy filling and buttery crunch.
The aroma alone will have your kitchen smelling like autumn, and the easy assembly makes it ideal for beginners or last-minute dessert cravings. This isn’t just a shortcut—it’s a foolproof technique that delivers professional results with minimal effort.
Serve it warm with vanilla ice cream or whipped cream for the full experience, or let it cool slightly for cleaner slices. The streusel topping works just as well on galettes or hand pies, proving this recipe adapts to any occasion without sacrificing flavor. Ready to bake?
Ingredients for 1 can apple pie filling
Canned filling meets homemade magic with this foolproof streusel shortcut.
| Ingredient | Amount | Notes |
|---|---|---|
| Unsalted Butter 🧈 | ¾ cup | Cold, cubed for streusel texture |
| All-Purpose Flour 🌾 | 1 ½ cups | Sifted for light streusel |
| Granulated Sugar 🍚 | 1 cup | Light brown for caramelized flavor |
| Ground Cinnamon 🌿 | 2 tbsp | True cinnamon, not cassia |
| Apple Pie Filling (Canned) 🍎 | 1 can | 21 oz size, unsweetened preferred |
| Lemon Juice 🍋 | 1 tbsp | Freshly squeezed for brightness |
| Vanilla Extract 🌸 | 1 tsp | Pure vanilla for aroma |
| Pie Crust (Store-Bought or Homemade) 🥧 | 1 whole | 9-inch size, chilled |
| Coarse Sugar (Optional) 🍚 | 2 tbsp | For streusel crunch |
| Salt 🧂 | ½ tsp | Fine sea salt |
| Egg (Optional) 🥚 | 1 whole | For egg wash |
| Heavy Cream (Optional) 🥛 | 2 tbsp | For egg wash |
The butter is non-negotiable here—European-style unsalted gives the streusel that signature flakiness. Plugrá or Kerrygold are my go-tos, but any good-quality brand works. If you’re using store-bought pie crust, grab a Pillsbury or Whole Foods brand for reliability. The cinnamon matters too—Ceylon cinnamon has a sweeter profile, while cassia gives deeper warmth. For the filling, Mott’s or Libby’s unsweetened are my pantry staples, but any canned apple pie filling will work. Just check the sugar content—some brands are sweeter than others, so adjust accordingly.
No vanilla extract? Vanilla bean paste works in a pinch, or a splash of bourbon adds depth. Short on coarse sugar? Brown sugar at half the amount gives a similar texture. The lemon juice is key for balancing the filling’s sweetness—Meyer lemons add floral notes, but regular lemons work fine. For the streusel, if you want extra crunch, add 1/4 cup chopped pecans or walnuts. And if you’re feeling fancy, swap the pie crust for a lattice top—it looks stunning and holds up beautifully.
The streusel topping keeps for 3 days in an airtight container, but honestly, it’s best fresh. The pie filling itself lasts 5 days in the fridge, but the streusel loses its crunch when reheated. For make-ahead prep, assemble the pie 1 day ahead and refrigerate—it bakes up even better. If you’re freezing, wrap the assembled pie tightly in plastic and freeze for up to 2 months. Thaw overnight in the fridge before baking.
Why You’ll Love This Recipe
- No-Fuss Crust: I’ll be real—this crust is ridiculously simple. Just butter, flour, and a pinch of salt rolled out in 10 minutes. No chilling, no fuss, and it still holds up like a pro. (Yes, even when I forget to preheat the oven.)
- Cinnamon-Sugar Magic: That canned pie filling? It’s already perfect. But the buttery crust dusted with cinnamon sugar? Chef’s kiss. The contrast of warm spice and tender fruit makes every bite taste like autumn in a pan.
- Weeknight or Holiday: Need something fast for Tuesday? Done. Hosting Thanksgiving? Done. The same recipe works for a quick breakfast casserole or a showstopping dessert. (My in-laws still ask for the recipe every year.)
- Leftovers on Repeat: One pan makes enough for seconds—and then some. The crust stays crispy even reheated, and the filling? It’s so good I’ve been known to eat it straight from the fridge. (No judgment.)
Step-by-step instructions for streusel-topped apple pie
This shortcut delivers restaurant-quality pie with a homemade crisp topping—no fuss, just flavor.
Prepare the Pie Crust and Preheat the Oven
Unroll the chilled pie crust onto a lightly floured surface and press it gently into a 9-inch pie dish, allowing a slight overhang on the edges. I use my fingers to smooth out any air bubbles or uneven spots—this ensures an even bake. Trim the excess dough from the edges, leaving about a ½-inch border.
Preheat your oven to 375°F while you prepare the filling. The crust should be fully chilled before adding the filling—this prevents it from shrinking during baking. For extra flakiness, I like to prick the bottom of the crust with a fork in a few spots to prevent puffing.
Mix the Streusel Topping
In a medium bowl, combine the 0.75 cup cold, cubed unsalted butter, 1.5 cups all-purpose flour, 1 cup granulated sugar, 2 tablespoons ground cinnamon, 0.5 teaspoon salt, and the 2 tablespoons coarse sugar (if using). Use your fingers or a pastry cutter to work the butter into the dry ingredients until the mixture resembles coarse crumbs with some pea-sized butter pieces remaining.
This texture is crucial—it creates that perfect balance of crispy and crumbly on top. If the mixture feels too dry, add 1-2 teaspoons of ice water to help it bind slightly. Spread the streusel evenly over the canned apple pie filling, pressing down gently to ensure good contact with the fruit.
Assemble and Bake the Pie
Pour the canned apple pie filling into the prepared crust, spreading it evenly to within about ½-inch of the edges. This prevents the filling from overflowing during baking. If you’re using the optional egg wash, whisk together the 1 whole egg and 2 tablespoons heavy cream in a small bowl, then brush it lightly over the crust edges.
Bake the pie for 45-50 minutes until the crust is golden brown and the filling is bubbling at the edges. The streusel topping should be golden and slightly crispy. Here’s the thing—if the edges of the crust start browning too quickly, cover them loosely with aluminum foil to prevent burning while the center finishes baking.
Cool and Serve
Remove the pie from the oven and let it cool on a wire rack for at least 2 hours before slicing. This resting period allows the filling to set properly and prevents it from running when you serve it. The streusel topping will firm up as it cools, giving you that perfect texture contrast between the soft filling and crisp topping.
For the best experience, serve the pie at room temperature. The aroma of the cinnamon and vanilla will fill your kitchen, and each bite will deliver the perfect balance of sweet, spiced apples with that buttery, crunchy streusel on top. Don’t forget to dust with a little extra cinnamon or serve with vanilla ice cream!
Pro Tips For Making 1 Can Apple Pie Filling
- Chill the Filling First: Dump that canned apple filling into a bowl and pop it in the fridge for 10 minutes before mixing. Cold filling thickens slightly—it’ll coat your crust better and prevent a soupy mess when baking. (Yes, even if you’re impatient like me.)
- Whisk the Butter-Flour Mix: Don’t just stir the butter, flour, and sugar like you’re mixing pancake batter. Use a fork or whisk to cut the butter into tiny, pea-sized pieces—this creates more surface area for browning. I learned this the hard way after a sad, pale crust.
- Skip the Extra Cinnamon: That canned filling’s already got cinnamon in it. Taste it first—you’ll likely need less than you think. Overdoing it turns your pie into a spice bomb. (Trust me, I’ve made that mistake.)
- Preheat for 15 Minutes: Your oven’s “hot” setting isn’t always actually hot. Crank it to 375°F and let it sit for 15 minutes before baking. A hot oven = faster crust, less soggy bottom. (And no, “preheating” doesn’t mean flicking the switch and shoving it in.)
Best sauces and condiments for this recipe
Classic Caramel Sauce
Drizzle this homemade caramel sauce over slices for a luxurious touch. Simmer 1 cup granulated sugar with 6 tablespoons unsalted butter and ½ cup heavy cream until golden and thickened. Let it cool slightly before pouring—it thickens as it cools.
I love adding a pinch of sea salt and a splash of vanilla extract for depth. This sauce elevates every bite with its rich, buttery sweetness. 🍯
Vanilla Bean Whipped Cream
Whip 2 cups heavy whipping cream with 3 tablespoons powdered sugar and the seeds from 1 vanilla bean until soft peaks form. The floral notes of vanilla complement the pie’s cinnamon perfectly.
For extra flair, dust with toasted coconut flakes or crushed pistachios. Store in the fridge for up to 3 days—it’s worth making ahead! 🥛
Spiced Honey Drizzle
Combine ¼ cup honey with 1 teaspoon cinnamon, ½ teaspoon cardamom, and a pinch of black pepper for warmth. Warm gently in a saucepan until fragrant, then drizzle over slices.
This unexpected twist adds a subtle complexity that balances the pie’s sweetness. Use within 2 days for the best flavor. 🍯
Brown Butter Glaze
Brown 4 tablespoons unsalted butter until nutty and golden, then whisk in 2 tablespoons heavy cream and 1 teaspoon maple syrup. Brush over warm pie slices for a nutty, caramelized finish.
The brown butter adds depth that cuts through the richness of the streusel. Store in the fridge for up to 1 week—it keeps beautifully. 🧈
Cream Cheese Frosting
Beat 8 oz cream cheese, ½ cup softened butter, 2 cups powdered sugar, and 1 teaspoon vanilla until smooth. Spread over chilled pie slices for a tangy contrast.
For extra flair, add ½ teaspoon lemon zest or a pinch of cinnamon. This frosting is lighter than traditional glazes but still decadent. 🍰
Nutrition facts
Frequently asked questions
Can I use any brand of canned apple pie filling?
Most brands work, but check the sugar content—some are sweeter than others. I recommend unsweetened varieties like Mott’s or Libby’s for better control over flavor. If your filling is very sweet, reduce the sugar in the streusel to ¾ cup instead of 1 cup to balance it.
How do I prevent the streusel from burning before the filling is done?
Cover the streusel with a loose tent of aluminum foil after 20 minutes of baking if it starts browning too quickly. The filling needs 45-50 minutes total to set properly. For extra insurance, bake the pie on the lower oven rack to ensure even heat distribution.
Can I make this pie ahead of time?
Yes! Assemble the pie 1 day ahead and refrigerate it uncovered. Bake it straight from the fridge—just add 5-10 extra minutes to the baking time. For freezing, wrap the assembled pie tightly in plastic and freeze for up to 2 months. Thaw overnight in the fridge before baking.
What if I don’t have a pie dish?
No problem! Use a 9-inch cast iron skillet or even a deep oven-safe dish. Line it with parchment paper for easy removal. The baking time remains the same, but cast iron may require 5 extra minutes to heat through. Just monitor closely to prevent over-browning.
How do I make this gluten-free?
Swap the all-purpose flour for a 1:1 gluten-free baking flour blend and use a gluten-free pie crust. The streusel will still be crispy, though it may be slightly denser. For extra crunch, add ¼ cup ground almonds or crushed gluten-free graham crackers to the streusel mixture.

- 4-Quart Vanilla Ice Cream Recipe No Eggs: Ultra-Smooth Freezer Magic in 10 Minutes - October 4, 2026
- 21 Layer Chocolate Cake Recipe: Decadent Height Without the Mess - October 4, 2026
- 5-Ingredient Beer Bread Recipe: Crispy Crust, Soft Crumb Magic - October 4, 2026