
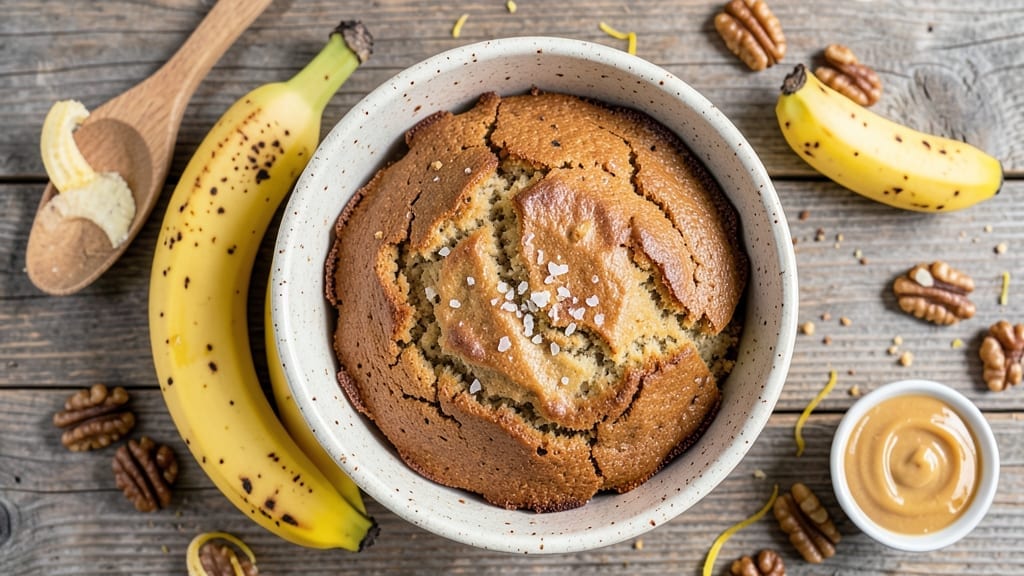
This 1 cup banana bread recipe delivers moist, tender loaves without the risk of overmixing or dry crumbs—using just ripe bananas, flour, and a few simple pantry staples. The secret lies in a single-bowl method that combines wet and dry ingredients gently, ensuring a perfect crumb every time.
I developed this version after years of burning banana bread (yes, it happens) and finally cracked the code for foolproof texture.
The beauty of this recipe is its versatility—it works for beginners and experienced bakers alike, with no special equipment needed beyond a mixing bowl and oven.
A splash of vanilla extract and a pinch of cinnamon elevate the classic banana flavor, while a touch of baking soda guarantees that tender, pull-apart moistness that keeps slices fresh for days.
No one will guess it’s made with just one cup of mashed banana—the texture is rich and satisfying.
By the time it emerges from the oven, you’ll have a golden-brown loaf with a crackly top and a crumb so soft it practically melts in your mouth. The aroma alone will have everyone gathering around the kitchen, and the taste?
That’s where the magic happens—sweet, spiced, and perfectly balanced. This isn’t your childhood banana bread; it’s a restaurant-quality loaf you’ll want to bake weekly.
Whether you’re prepping for breakfast, a snack, or dessert, this recipe scales effortlessly. For extra indulgence, add chocolate chips or walnuts, or swap the butter for coconut oil for a vegan twist. The instructions are straightforward, and the results are consistently perfect—no guesswork, no stress. Let’s get baking!
Ingredients for 1 cup banana bread
Here’s what you need to bake that perfect single-bowl banana bread with rich, moist crumb.
| Ingredient | Amount | Notes |
|---|---|---|
| Ripe Bananas 🍌 | 1 cup | Mashed, no lumps preferred |
| All-Purpose Flour 🌾 | 1 cup | Sifted for best texture |
| Granulated Sugar 🍚 | ½ cup | White or light brown |
| Unsalted Butter 🧈 | ½ cup | Softened, not melted |
| Pure Vanilla Extract 🍯 | 1 tbsp | Imitation-free for flavor |
| Baking Soda 🧂 | ½ tsp | Freshly opened for lift |
| Ground Cinnamon 🌿 | 1 tsp | Sweet, not spicy |
| Salt 🧂 | ¼ tsp | Fine sea salt preferred |
| Milk 🥛 | ¼ cup | Whole milk for richness |
| Vegetable Oil 🫒 | ¼ cup | Light, neutral flavor |
| Chocolate Chips 🍫 | ½ cup | Semi-sweet or dark |
| Walnut Pieces 🥜 | ¼ cup | Toasted for depth |
Bananas are the star—pick ones with black speckles for sweetness, not green ones. Trader Joe’s or Whole Foods usually have the ripest ones in the produce section. For the flour, King Arthur or Bob’s Red Mill brands are my go-to—they bake consistently. The baking soda needs to be fresh; if it’s been sitting in your pantry for months, toss it. Butter should be softened to room temperature, not melted, for that tender crumb. And trust me, the vanilla extract matters—McCormick Pure is my go-to for that authentic flavor.
No chocolate chips? Dried cranberries or chopped dates add moisture and sweetness. Skip the walnuts? Pecans or almonds work just as well. Running low on milk? Almond milk or coconut milk keeps it dairy-friendly while adding a subtle nutty flavor. The oil can be swapped for melted coconut oil if you prefer. And if you’re short on sugar, maple syrup or honey (for non-vegetarian versions) work in a pinch—just reduce the milk slightly to balance the moisture.
This loaf keeps beautifully in an airtight container for 3-4 days at room temperature, or 1 week in the fridge. For longer storage, slice and freeze portions—3 months is no problem. I always bake an extra loaf and freeze half; it’s perfect for quick breakfasts or snacks. The best part? It reheats in 10 seconds in the microwave—soft and warm every time.
Why You’ll Love This Recipe
- No Muddling Needed: I’ll be real—this recipe only needs a fork to mash those bananas. No food processor, no stress, just squishy sweetness straight from the bowl. The butter melts into the flour in seconds, and honestly? That’s half the battle won before you even preheat the oven.
- Sweet Without Guilt: That caramelized banana flavor? It’s like dessert sneaking into your breakfast. The sugar brings out the natural sweetness of the ripe fruit, but the vanilla extract—just a teaspoon—adds this warm, cozy depth that makes it feel like a hug in bread form. (Yes, even on a Tuesday morning.)
- Weeknight Magic: Slice it fresh for toast, pack it in lunchboxes, or freeze half for when you’re too tired to bake. Between us, I’ve sent this to work meetings as a “just in case” snack, and no one ever guessed it was made with just one cup of flour. It’s the kind of thing that disappears fast—so make two loaves.
- Pantry Hero: You already have the ingredients. Butter, sugar, flour—basic stuff that won’t break the bank. And because it bakes in under an hour, you’re not left with a fridge full of sad leftovers either. One loaf lasts me three days, or until my kids “accidentally” eat it all before dinner. (No judgment here.)
Step-by-step instructions for single-bowl banana bread
This method keeps everything simple while delivering that signature moist crumb—no overmixing required.
Mash the Bananas and Mix Wet Ingredients
Start by mashing the 1 cup ripe bananas in a large mixing bowl until completely smooth—no lumps allowed. I like to press them through a fine-mesh sieve to ensure a silky texture. Add the 0.5 cup softened unsalted butter, 0.5 cup granulated sugar, 0.25 cup vegetable oil, 0.25 cup milk, 1 tbsp pure vanilla extract, and 0.25 tsp salt. Mix with a sturdy spoon or electric mixer on low speed until everything is fully combined and the mixture looks uniform.
The butter should be softened but not melted—it should leave a slight indentation when pressed. If it’s too cold, microwave it for 10-15 seconds to help it blend smoothly. This step creates the foundation for that tender, moist crumb we’re after. Don’t rush it; let the ingredients meld together completely before moving on.
Fold in Dry Ingredients and Mix Just Until Combined
In a separate bowl, whisk together the 1 cup all-purpose flour, 0.5 tsp baking soda, and 1 tsp ground cinnamon. Sift the flour first if you have time—it prevents lumps and ensures even distribution. Gently fold the dry ingredients into the wet mixture using a spatula, mixing just until no flour streaks remain. This is critical: Overmixing develops gluten, which makes banana bread dense instead of tender.
Stop mixing as soon as the flour disappears—you should still see some wet spots in the batter. The goal is to combine without overworking the dough. Here’s the thing—this single-bowl method works because we’re not overdoing it. The batter will look slightly shaggy, but that’s perfect for that classic banana bread texture.
Fold in Chocolate Chips and Walnuts
Using the spatula, gently fold in the 0.5 cup chocolate chips and 0.25 cup walnut pieces until evenly distributed. Be careful not to break up the chocolate chips too much—you want them to stay in chunks for that satisfying bite. The walnuts add a nice crunch, but if you prefer a smoother texture, you can lightly toast them first in a dry skillet over medium heat for 2-3 minutes, stirring constantly, until fragrant.
This is where the magic happens—the chocolate and nuts become part of the batter without overmixing. Give it one final stir to ensure everything is incorporated. The batter will look thick and slightly uneven, but that’s exactly what we want for that perfect rise and moist interior. Don’t be tempted to smooth it out; that unevenness helps create the signature banana bread texture.
Bake to Golden Perfection
Preheat your oven to 350°F and grease a 9×5-inch loaf pan or line it with parchment paper for easy removal. Pour the batter into the prepared pan and smooth the top with a spatula. Bake for 50-60 minutes, or until a toothpick inserted into the center comes out clean with just a few moist crumbs clinging to it. The edges should be golden brown, and the top should spring back slightly when pressed gently.
I know it’s tempting to check early, but resist—the bread needs that full baking time to develop its structure. If the top browns too quickly, tent the pan with aluminum foil to prevent over-browning while allowing the center to cook through. The bread is done when the internal temperature reaches 205-210°F on an instant-read thermometer. Let it cool in the pan for 10 minutes before transferring to a wire rack to cool completely.
Pro Tips For Making 1 Cup Banana Bread
- MASH NOT MIX: DESCRIPTION: Grab a fork and crush those bananas into a smooth paste—no lumps, no chunks. I learned this the hard way: blending them just makes the bread dense. A fork takes 30 seconds and guarantees that silky texture.
- BUTTER AT ROOM TEMP: DESCRIPTION: Soft butter creams better and keeps the crumb tender—no waiting, just pop it in the microwave for 15 seconds if it’s cold. Hard butter = tough bread, and nobody wants that.
- SKIP THE OVERMIXING: DESCRIPTION: Once the wet and dry ingredients come together, stir just until combined. Overmixing develops gluten, and your banana bread will turn out dense and chewy instead of moist. Two minutes max—set a timer if you’re like me and forget.
- TEST DONENESS WITH A TOOTHPICK: DESCRIPTION: Pull it out clean, but if it’s sticky with crumbs, bake another 5 minutes. The center should be set but still slightly springy—no guessing. I’ve pulled loaves out early too many times to trust the timer alone.
Dietary considerations for this recipe
Gluten-Free Adaptation
For a gluten-free version, swap the all-purpose flour with a 1:1 gluten-free baking flour blend like Bob’s Red Mill or King Arthur Measure for Measure. These blends include xanthan gum, which mimics gluten’s structure for that tender crumb.
Use exactly 1 cup of the blend—no substitutions—and add ½ tsp extra baking soda to compensate for the lack of gluten. The texture will be slightly denser but still moist and delicious. 🌾
Vegan-Friendly Swaps
To make this banana bread vegan, replace the ½ cup unsalted butter with ½ cup coconut oil (melted and cooled slightly) and use almond milk or oat milk instead of dairy milk.
For richness, add 1 tbsp ground flaxseed mixed with 3 tbsp water (let it sit for 5 minutes to thicken) to replace the eggs’ binding properties. The flavor stays rich and satisfying—just as good as the original! 🥥
Nut-Free Option
Skip the walnuts entirely and add ½ cup dried cranberries or chopped dates for moisture and sweetness. For extra texture, fold in ½ cup shredded coconut (toasted lightly in a dry pan for 2-3 minutes until fragrant).
This keeps the recipe nut-free while adding a delightful chew. Store-bought chocolate chips are already nut-free, so no worries there! 🍫
Lower Sugar Version
Reduce the ½ cup granulated sugar to ¼ cup and replace the remaining ¼ cup with maple syrup or honey (for non-vegan versions). The natural sweetness of ripe bananas will still shine, and the texture remains moist.
If using honey, reduce the milk by 1 tbsp to balance the extra moisture. This cuts calories while keeping the bread irresistibly sweet. 🍯
Dairy-Free Tips
For a dairy-free twist, use coconut oil instead of butter and unsweetened almond milk or soy milk for the liquid. The coconut oil adds a subtle tropical note that pairs beautifully with banana.
If you’re avoiding all dairy, double-check your chocolate chips—many brands contain milk solids. Enjoy Life brand makes excellent dairy-free chocolate chips that work perfectly here. 🥛
Nutrition facts
Frequently asked questions
Can I use frozen bananas for this recipe?
Yes! Frozen bananas work perfectly and actually help create a denser, moister crumb. Simply thaw them in the microwave for 1-2 minutes or let them sit at room temperature for 30 minutes before mashing. The texture will be slightly smoother, but the flavor remains rich and sweet.
Why did my banana bread turn out dense instead of moist?
Overmixing is the #1 culprit! Once you fold in the dry ingredients, stop as soon as no flour streaks remain—you should still see wet spots. Another common mistake is underbaking (check with a toothpick) or using old baking soda (replace it every 6 months). Also ensure your butter is softened, not melted.
Can I make this recipe in a different pan size?
For a 9×5-inch pan, bake 50-60 minutes. Use an 8×4-inch pan? Increase time to 60-70 minutes and check for doneness early. The key is the internal temperature should reach 205-210°F—never rely solely on time. A smaller pan may need 15-20 minutes longer.
How can I tell when my banana bread is fully ripe?
Look for bananas with black speckles covering most of the peel—these are the sweetest! Press gently: if they yield slightly to pressure, they’re perfect. Avoid green bananas (they’re too starchy) or overly mushy ones (they’ll make the bread gummy). Store-bought bananas often ripen faster in paper bags at room temperature.
What’s the best way to store banana bread?
Keep it in an airtight container at room temperature for 3-4 days, or refrigerate for 1 week. For longer storage, slice and freeze portions—they reheat beautifully in 10 seconds in the microwave. To prevent drying, wrap cooled loaves tightly in plastic wrap before storing.

- 3lb Prime Rib Roast Recipe: Juicy Pink Center Guaranteed in 3 Hours - October 31, 2026
- 5 Spice Cake Recipe: Warmly Spiced Layers With Crunchy Top - October 31, 2026
- 1950’s Macaroni and Cheese Recipe: Nostalgic Creamy Cheese Sauce with Buttery Noodles - October 31, 2026