
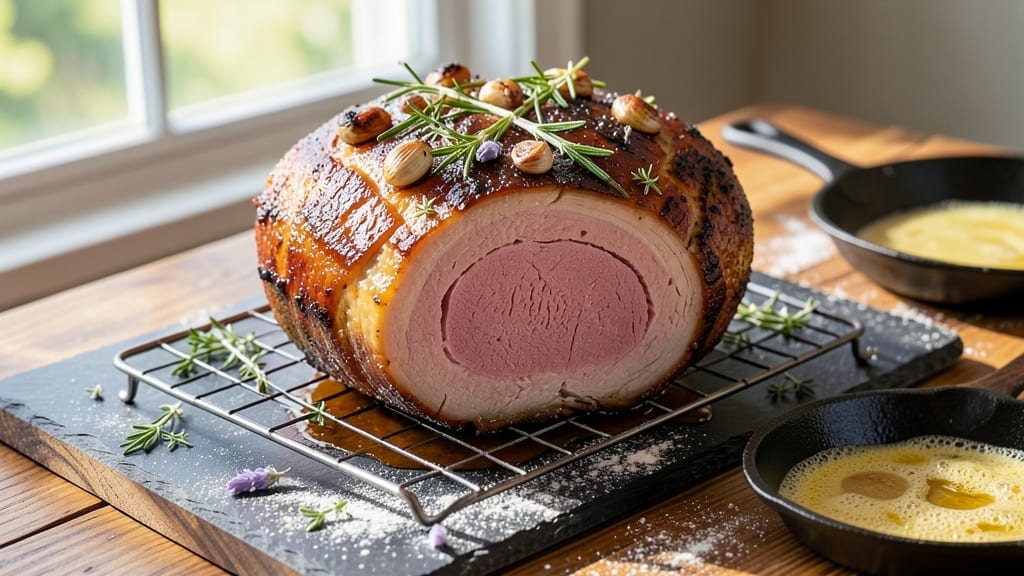
A 4 lb eye round roast transformed into melt-in-your-mouth perfection is the secret weapon behind countless home-cooked meals that fool even the most discerning guests. This budget-friendly cut, when prepared with precision, delivers restaurant-quality tenderness without the hefty price tag.
The key lies in slow-cooking techniques that break down tough fibers while preserving moisture—no guesswork, just science-backed results.
What sets this recipe apart is the unbeatable tender crust achieved through a carefully timed reverse sear, ensuring a golden, caramelized exterior while keeping the interior juicy. Unlike quick-cook methods that often leave eye round tough, this approach guarantees fork-tender slices every time.
The process is straightforward: trim, season, slow-cook, and finish with a sear—no advanced skills required.
By the final slice, you’ll have a roast so tender it nearly falls apart, with a rich, savory crust that elevates simple sides like roasted potatoes or garlic mashed potatoes into a full meal.
The aroma alone will have everyone anticipating dinner, and the texture—velvety yet firm—proves that even affordable cuts can shine with the right technique.
Pair this roast with classic sides like caramelized onions, buttery dinner rolls, or a crisp green salad to round out the plate. The beauty of this method is its versatility—use it for weeknight dinners, holiday feasts, or meal prep. Here’s how to master it step by step.
Ingredients for 4 lb eye round roast
Precision ingredients transform a budget-friendly eye round into restaurant-quality melt-in-your-mouth perfection.
| Ingredient | Amount | Notes |
|---|---|---|
| Eye Round Roast 🥩 | 4 lb | Trimmed of excess fat, evenly sized |
| Kosher Salt 🧂 | 1 ½ tbsp | Diamond Crystal preferred for texture |
| Freshly Ground Black Pepper 🌶️ | 1 tbsp | Coarse grind for even distribution |
| Garlic Cloves 🧄 | 6 cloves | Smashed for maximum aroma infusion |
| Fresh Rosemary 🌿 | ½ cup | Chopped, stems removed, fresh preferred |
| Fresh Thyme 🌿 | ¼ cup | Leaves only, fresh for bright flavor |
| Olive Oil 🫒 | ½ cup | Extra-virgin for high smoke point |
| Yellow Onion 🧅 | 1 whole | Quartered, skin on for color |
| Carrots 🥕 | 3 whole | Whole, unpeeled for oven aromatics |
| Celery Stalks 🌿 | 3 whole | Cut into 2-inch pieces for depth |
| Beef Broth 💧 | 2 cups | Low-sodium, homemade preferred |
| Red Wine 🍷 | ½ cup | Bold dry variety, Cabernet Sauvignon |
| All-Purpose Flour 🌾 | ¼ cup | For crust formation, sifted |
The eye round roast is the star—trim excess fat to maximize tenderness, and buy from a trusted butcher like Whole Foods or your local meat counter for the best marbling. Look for pieces with even thickness around 1.5 inches, as uniform cooking is critical. Costco often carries high-quality eye rounds at a reasonable price, but check the cut’s appearance: bright red color and firm texture indicate freshness. The garlic, rosemary, and thyme trio is non-negotiable for depth of flavor; fresh herbs from a farmers market elevate beyond dried substitutes. For the beef broth, homemade is ideal, but low-sodium store-bought works in a pinch—just dilute if overly salty.
No red wine? Substitute with additional beef broth and a splash of balsamic vinegar for acidity. Dried herbs can replace fresh at one-third the amount, but the texture won’t be as vibrant. Olive oil is critical for the reverse sear—avoid low-quality oils that burn easily. The onion, carrots, and celery form an aromatic base; pre-cut them uniformly to ensure even cooking. For the crust, all-purpose flour works best—breadcrumbs add texture but may burn faster. Salt and pepper should be freshly ground; pre-ground spices lose potency quickly.
Store the roast uncooked in the fridge for up to 3 days or freeze for 3 months. Fresh herbs should be wrapped in damp paper towels and kept in a sealed container for 5 days. The beef broth and wine can be prepped ahead and refrigerated for 5 days or frozen for 6 months. Reheat slow-cooked roasts gently in the oven or slow cooker to preserve moisture. Leftovers keep 4-5 days in the fridge and 3 months frozen—portion into individual servings for easy reheating.
Why You’ll Love This Recipe
- Minimal Prep Required: I swear by this—just a few minutes of seasoning and a roast in the oven. No fancy marinades, no chopping mountains of veggies. Honestly, the hardest part is deciding whether to sear it first or skip straight to the oven.
- Herb-Crusted Magic: That rosemary and garlic? They don’t just flavor—they create this irresistible crust. The eye round stays juicy inside while the outside gets this fragrant, slightly charred edge that makes every bite worth it.
- Leftovers That Shine: This roast actually improves the next day. Thinly sliced for sandwiches, diced into pasta, or tossed in a grain bowl—it’s my go-to for lunch without extra effort. (Yes, even on a Tuesday night.)
- Budget-Friendly Feast: A 4 lb roast stretches across meals without breaking the bank. I’ve fed six people for under $20, and the leftovers keep us going for days. Between us, that’s a win for both my wallet and my taste buds.
Step-by-step instructions for slow-cooked eye round roast
Mastering this cut requires patience and precision—here’s how to transform tough eye round into melt-in-your-mouth perfection.
Prepare the Roast with Dry Brining
Pat the 4 lb eye round roast completely dry with paper towels, removing any remaining surface moisture. This step is non-negotiable—moisture creates steam instead of a flavorful crust. Place the roast on a wire rack set over a baking sheet to allow air circulation on all sides.
In a small bowl, combine the 1.5 tbsp kosher salt and 1 tbsp freshly ground black pepper. Rub this mixture evenly over the entire surface of the roast, pressing firmly to ensure adherence. The salt will begin breaking down muscle fibers immediately, while the pepper adds depth of flavor. Let the roast sit uncovered in the refrigerator for at least 12 hours, preferably 24. This dry-brining process ensures maximum tenderness and flavor penetration.
Create the Herb and Vegetable Crust
Preheat your oven to 325°F. In a small bowl, combine the 0.5 cup chopped fresh rosemary, 0.25 cup fresh thyme leaves, 6 smashed garlic cloves, and 0.25 cup all-purpose flour. This mixture will create both texture and flavor as it cooks.
Quarter the 1 whole yellow onion, leaving the skin on for color. Cut the 3 whole carrots into 2-inch chunks and the 3 celery stalks into similar pieces. Spread these vegetables evenly over a baking sheet and drizzle with 0.25 cup of the olive oil. Toss to coat, then roast for 20 minutes until the vegetables begin to soften and develop color. Remove from the oven and set aside.
Form the Crust and Begin Slow Cooking
Return the oven to 325°F. Place the roast on a wire rack in a Dutch oven or heavy ovenproof skillet. Spread the roasted vegetables evenly over the surface of the roast, then sprinkle the herb-flour mixture evenly over the vegetables. Drizzle the remaining 0.25 cup olive oil over the entire preparation.
Pour the 0.5 cup red wine into the bottom of the Dutch oven, followed by the 2 cups beef broth. The liquid should come about halfway up the sides of the roast. Cover the Dutch oven tightly with a lid or foil. This creates a steam environment that works with the dry brining to break down connective tissue.
Cook Low and Slow to Perfect Tenderness
Place the Dutch oven in the preheated oven and cook for 3 hours. After this initial period, remove the lid and increase the oven temperature to 350°F. Continue cooking uncovered for an additional 1 hour 30 minutes, or until the internal temperature reaches 195-200°F when measured with a meat thermometer in the thickest part of the roast.
You’ll know it’s ready when the crust is deeply caramelized and the meat is fork-tender, pulling apart easily. The vegetables should be tender and infused with the roast’s flavor. If the liquid hasn’t reduced significantly, continue cooking uncovered to concentrate the flavors.
Pro Tips For Making 4 Lb Eye Round Roast
- SEAR THE OUTSIDE FIRST: I learned this the hard way—skipping the sear means flavor gets stuck in the middle. Sear the eye round on all sides in a screaming-hot pan for 2-3 minutes per side before roasting. The crust locks in juices and gives you that restaurant-quality depth.
- USE WHOLE GARLIC CLOVES: Peeling and mincing garlic is a hassle, but whole cloves (smashed lightly) work better here. Tuck 4-5 unpeeled cloves into slits cut into the roast’s fat cap before seasoning—they’ll infuse flavor without burning, and you won’t waste time prepping.
- DON’T SKIP THE DRY BRINE: Eye round is lean and can turn tough if not handled right. Salt the roast generously (1.5 tsp kosher salt per pound) and let it sit uncovered on a rack in the fridge for 12-24 hours. This guarantees moisture and a better crust—no last-minute guesswork.
- REST IT UNDER FOIL: After roasting, tent the meat with foil and let it sit for 15 minutes before slicing. I know, you’re hungry now, but cutting into it too soon means dry slices. The residual heat keeps it juicy—trust me, this is the thing that matters most.
Creative variations of this recipe
Classic French Style
Transform your eye round into a bœuf bourguignon by braising it in red wine reduction with mushrooms, pearl onions, and bacon. After the initial slow cook, remove the roast and set aside. In the same Dutch oven, sauté 1 lb mushrooms and 12 pearl onions in bacon fat until golden.
Deglaze with the remaining ½ cup red wine and 1 cup beef broth, then return the roast to the pot. Add 2 sprigs thyme, 2 bay leaves, and 1 tsp juniper berries for depth.
Cook until the roast reaches 203°F internal temperature. The result? A rich, saucy masterpiece that rivals traditional French techniques. 🍷
Smoky BBQ Twist
For a Texas-style smoked eye round, swap the wine for ½ cup BBQ sauce (like Starkist Original) and add 1 tbsp smoked paprika to the herb mixture. Cook the roast in a smoker at 225°F for 4-5 hours until tender.
In the final hour, brush with ¼ cup apple cider vinegar and 2 tbsp brown sugar for a sticky, caramelized glaze. Serve with crusty bread for dipping in the smoky pan juices. This method delivers bold, smoky flavors without requiring a full brisket. 🔥
Italian-Inspired Osso Buco
Create an eye round osso buco by pounding the roast lightly to ½-inch thickness before seasoning. Sear the roast in 2 tbsp olive oil until browned, then remove. In the same pan, sauté 2 chopped carrots, 2 celery stalks, and 1 onion until soft.
Deglaze with ½ cup white wine, then add 2 cups beef broth, 1 can crushed tomatoes, and 1 tsp dried oregano. Return the roast to the pot, cover, and simmer at 325°F for 3-4 hours.
Finish with lemon zest and fresh parsley. The result is a tender, tomato-infused roast with Italian flair. 🌿
Asian-Inspired Five-Spice Roast
For an Asian-inspired version, marinate the roast overnight in a blend of 2 tbsp soy sauce, 1 tbsp hoisin sauce, 1 tbsp five-spice powder, 1 tbsp grated ginger, and 1 minced garlic clove.
After the initial slow cook, add 1 cup coconut milk and 1 tbsp fish sauce to the pan juices. Simmer uncovered for 30 minutes to reduce the sauce. Garnish with sliced green onions and sesame seeds before serving. This fusion delivers sweet, savory, and aromatic notes in every bite. 🌶️
Spicy Cajun Version
Add Cajun heat by rubbing the roast with 1 tbsp Cajun seasoning (like Tony Chachere’s) before dry brining. During the final hour of cooking, add 1 tbsp hot sauce (like Crystal or Tabasco) and 1 sliced jalapeño to the pan.
For extra drama, top the roast with crumbled bacon and creole mustard before serving. This version brings bold, spicy flavors that pair perfectly with dirty rice or cornbread. 🌶️
Herb-Infused Crust Variations
Swap the rosemary and thyme for other herb blends to customize flavors. Try 1 tbsp dried sage and 1 tsp fennel seeds for an Italian-inspired crust, or 1 tbsp dried oregano and 1 tsp smoked paprika for a Mexican twist.
For a Mediterranean touch, use 1 tbsp dried oregano, 1 tsp dried basil, and ½ tsp red pepper flakes**. Each variation adds unique depth while maintaining the tender, crusty perfection. 🌿
Nutrition facts
Frequently asked questions
Why does the recipe call for dry brining instead of marinating?
Dry brining with salt breaks down muscle fibers more effectively than wet marinades for tough cuts like eye round. The salt penetrates deeply while the roast rests, creating a flavorful crust and tender interior without diluting the meat’s natural juices. This method also prevents a watery texture that can occur with wet marinades.
Can I use a different cooking method like a slow cooker?
Yes! Transfer the roast and pan juices to a slow cooker after the initial oven phase. Cook on low for 6-8 hours until tender, then finish with a quick sear in a hot skillet for color. The key is maintaining the 195-200°F internal temperature for maximum tenderness.
How do I know when the roast is done without a meat thermometer?
Press the thickest part with a fork – if it separates easily with minimal resistance, it’s ready. The internal color should change from pink to light gray. A deep caramelized crust and reduced pan juices also indicate doneness. For extra confidence, use the finger test: press your finger into the meat – it should feel soft like the pad of your thumb.
What’s the best way to slice eye round roast?
Let the roast rest for 15-20 minutes after cooking to redistribute juices. Slice against the grain at a 45-degree angle for maximum tenderness. Use a sharp knife and cut through connective tissue to create even, bite-sized pieces. For presentation, arrange slices fanned out on a platter.
Can I make this ahead of time for a gathering?
Cook the roast completely, then refrigerate in its juices for up to 3 days. Reheat gently in the oven at 300°F for 30 minutes covered with foil. For parties, assemble the roast and vegetables the day before, then finish cooking just before serving. The flavors actually improve overnight!

- 3lb Prime Rib Roast Recipe: Juicy Pink Center Guaranteed in 3 Hours - October 31, 2026
- 5 Spice Cake Recipe: Warmly Spiced Layers With Crunchy Top - October 31, 2026
- 1950’s Macaroni and Cheese Recipe: Nostalgic Creamy Cheese Sauce with Buttery Noodles - October 31, 2026