
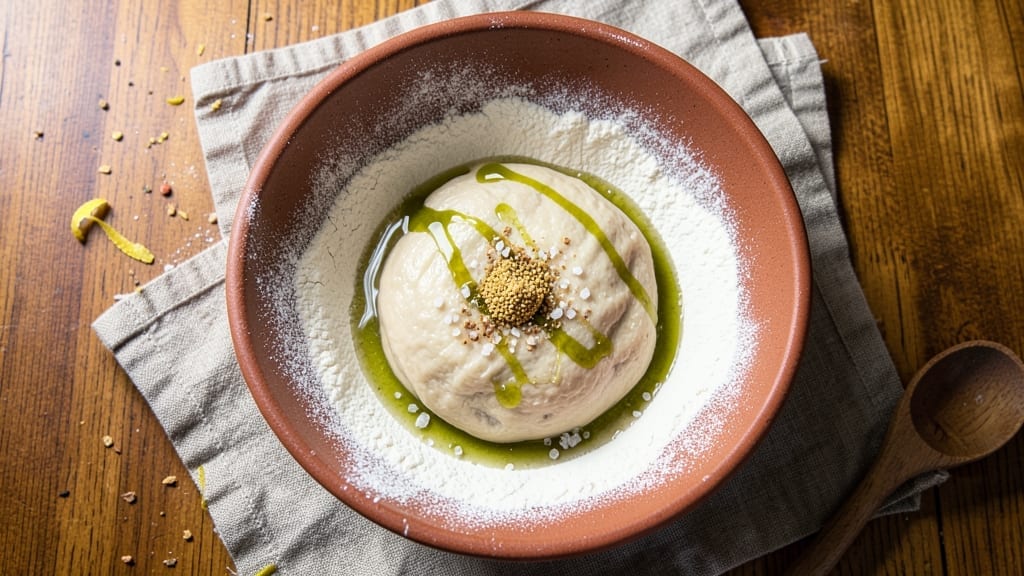
This 1 cup bread recipe is the game-changer you didn’t know you needed to master a perfect loaf with just flour. This no-knead bread recipe delivers restaurant-quality texture in a single loaf pan—no experience required. The secret lies in precise timing and a simple technique that transforms basic ingredients into a crispy, golden crust with a soft, airy interior. I’ve perfected this method over countless batches, and it never fails to impress.
What sets this recipe apart is its simplicity: only 5 ingredients and 15 minutes of hands-on time before letting the dough rise overnight. The no-knead approach eliminates guesswork, while the loaf pan ensures consistent shape and even baking.
Whether you’re a beginner or a seasoned baker, this method guarantees foolproof results every time. The crust develops a satisfying crunch, while the interior remains tender and flavorful.
By the time you pull it from the oven, you’ll have a loaf that rivals artisanal bakery bread—golden, fragrant, and perfect for slicing. The aroma alone will have everyone asking for seconds.
Serve it fresh with butter, jam, or as the base for your favorite sandwich. This recipe proves that great bread doesn’t require complicated techniques or expensive tools.
Best of all, it scales effortlessly for larger batches or stays small for personal enjoyment. Ready to bake a loaf that’s as satisfying as it is simple? Let’s get started.
Ingredients for 1 cup bread
Five ingredients, one loaf pan, and a loaf that rivals artisanal bakery bread—this is your no-fail bread recipe.
| Ingredient | Amount | Notes |
|---|---|---|
| All-Purpose Flour 🌾 | 1 cup | Unbleached, high-protein preferred |
| Instant Yeast 🍞 | ¼ tsp | Fresh yeast or active dry |
| Kosher Salt 🧂 | ½ tsp | Diamond Crystal preferred |
| Extra-Virgin Olive Oil 🫒 | ¼ cup | High-quality, fruity variety |
| Warm Water 💧 | ½ cup | 110°F, not boiling |
The flour is the star here. King Arthur or Bob’s Red Mill are my go-tos—they’ve got that perfect balance of protein for structure and tenderness. If you’re using all-purpose, make sure it’s unbleached for a cleaner flavor. The yeast? Fresh yeast is ideal—it activates faster—but active dry works too (just dissolve it in the warm water first). Temperature matters: water should be 110°F—too hot and you’ll kill the yeast, too cold and it won’t activate. I use a thermometer, but if you’re eyeballing it, it should feel like a warm bath, not a sauna. The olive oil adds richness, so don’t skimp—that fruity, high-quality stuff makes all the difference. Grab a small bottle from Trader Joe’s or your local market if you’re unsure.
No instant yeast? Active dry yeast works perfectly—just dissolve it in the warm water first and let it sit for 5 minutes until foamy. Short on olive oil? Melted butter at half the amount gives a similar richness, though the flavor will be more buttery. Using whole wheat flour? Replace half the all-purpose with whole wheat, but add an extra tablespoon of water since it absorbs more. The salt is non-negotiable—it’s what develops that deep, satisfying flavor. If you’re worried about over-salting, Diamond Crystal kosher saltTap water works fine, but if yours is super chlorinated, let it sit out for 10 minutes to evaporate the chlorine first.
This dough is a dream to handle—no kneading, no fuss. Once mixed, it’s ready for the fridge. Cover it tightly with plastic wrap and let it rise overnight in the fridge (or at least 8 hours). The cold rise develops incredible flavor and makes the crust crispier. When you’re ready to bake, take it out 1 hour before shaping—it’ll be easier to handle. The loaf keeps well for 3 days at room temperature, wrapped in a clean kitchen towel. For longer storage, freeze slices wrapped in parchment—just toast straight from frozen for crispy perfection.
Why You’ll Love This Recipe
- Five-Minute Mix: I swear, this dough comes together faster than I can boil water. Just toss the flour, yeast, salt, and olive oil in a bowl, add warm water, and stir—no kneading, no waiting. That’s it.
- Crispy-Gold Magic: The olive oil keeps it tender inside while the crust gets that perfect golden crackle. Honestly, it’s the kind of bread that makes you pause mid-bite just to admire it.
- Lunchbox Hero: Between us, this is my go-to for sandwiches, toast, or even garlic bread. It freezes like a dream too—just slice and toast when you need it. My kids still ask for it on school days.
- Pantry Staple: Four ingredients, zero waste. The yeast and salt are already in your spice rack, and a cup of flour won’t break the bank. Plus, a single batch stretches into snacks, sides, or even breadcrumbs. Reliable? Yes.
Step-by-step instructions for 1 cup bread
Here’s how to transform minimal ingredients into a rustic, no-knead loaf with perfect texture.
Mix the Dough with Precision
In a medium bowl, combine the 1 cup all-purpose flour and 0.5 tsp kosher salt. Whisk to eliminate any lumps—this ensures even distribution of salt throughout the dough. Create a well in the center and add the 0.25 tsp instant yeast directly into the flour.
Next, pour in the 0.25 cup extra-virgin olive oil and gently mix with a wooden spoon until the flour begins to absorb the oil. The mixture should resemble coarse crumbs with oily streaks. This step is crucial for developing gluten without kneading. Pour in the 0.5 cup warm water (about 110°F) and stir until just combined—you’ll want a shaggy, sticky dough that comes together when pressed.
Let the Dough Rest for Maximum Flavor
Cover the bowl with plastic wrap and let the dough rest at room temperature for 1 hour. This initial rest allows the yeast to activate and the gluten to begin developing. You’ll notice the dough will become slightly more cohesive and may even rise slightly in the bowl. Don’t be tempted to skip this step—it’s where the magic happens for that perfect crumb structure.
After 1 hour, the dough should look more uniform and less sticky. If it’s still very wet, you can add 1-2 tablespoons more flour to help with shaping later. The dough should be pliable but not stiff—think of it like a very soft playdough. This resting period also allows the olive oil to fully incorporate, which will contribute to the bread’s tender crumb.
Shape and Prepare for Baking
Lightly flour a clean surface and transfer the dough onto it. Gently shape the dough into a rough oval or rectangle—don’t worry about perfect edges. The goal is to create a compact shape that will fit easily into your loaf pan. Fold the edges toward the center and press down gently to create surface tension. This helps develop gluten without overworking the dough.
Place the shaped dough into a lightly greased 9×5-inch loaf pan, seam-side up. Cover the pan with plastic wrap and let it rise at room temperature for another 1-2 hours, or until the dough has visibly expanded and risen about 1 inch above the pan. The dough should feel slightly springy when pressed gently with a finger. This second rise is crucial for achieving that classic no-knead texture.
Bake to Golden Perfection
Preheat your oven to 375°F with a rack positioned in the lower third. This lower position helps create a crispy bottom crust. Once preheated, bake the loaf for 35-40 minutes, until the top is deep golden brown and the internal temperature reaches 205°F when measured with an instant-read thermometer.
Here’s the thing—don’t open the oven during baking. The steam is what creates that beautiful oven spring and tender crumb. You’ll know it’s done when the bread sounds hollow when tapped on the bottom and pulls away slightly from the sides of the pan. For extra crust color, you can brush the top with a little more olive oil after 20 minutes of baking.
Cool and Enjoy
Remove the bread from the oven and let it cool in the pan for 5 minutes before transferring it to a wire rack. This brief cooling period prevents the bottom from becoming soggy. The bread will continue to firm up as it cools, developing that perfect crumb texture we’re after.
For the best results, let the bread cool completely before slicing—this can take 1-2 hours. The interior should be soft and slightly chewy with a crisp crust. Each slice should reveal an open, airy crumb structure with pockets of olive oil flavor throughout. This simple loaf proves that great bread doesn’t require complicated techniques—just patience and attention to detail.
Pro Tips For Making 1 Cup Bread
- MEASURE FLUIDS FIRST: Mixing dry ingredients into wet ones is messy—pour the warm water and olive oil into your measuring cup first, then add the yeast and salt. This keeps your counter clean and avoids flour dust everywhere (trust me, you’ll thank me when you’re not scrubbing it later).
- LET YEAST BLOOM: Sprinkle the yeast on top of the warm water (not in it) and wait 5 minutes for it to foam before adding flour. Cold water kills it; if it doesn’t bubble, your bread will taste flat. I learned this the hard way after making a dense, sad loaf.
- DON’T OVERMIX: Stir just until the dough comes together—about 2 minutes. Overworking it develops gluten too much, making the bread tough. My first batch turned out like a hockey puck, so now I stop as soon as it’s cohesive.
- USE OLIVE OIL SPARINGLY: Extra-virgin olive oil adds richness, but too much makes the dough sticky and hard to shape. Stick to 1 tablespoon unless you’re okay with a fight during kneading. (I was not.)
Flavor customization for this recipe
Sweet Variations
Add 1 tablespoon honey or 2 tablespoons maple syrup to the dough for a subtle sweetness that pairs beautifully with savory toppings. I love using local wildflower honey—it adds floral notes that complement the olive oil perfectly.
For a fruity twist, fold in ½ cup dried cranberries or chopped dried apricots during the final shaping step. These variations work especially well for breakfast loaves or dessert sandwiches. 🍯
Herb Infusions
Brighten your loaf with fresh herbs like rosemary or thyme. Finely chop 2 tablespoons fresh rosemary and mix it into the dough after the initial rest—it infuses beautifully during the long rise. For a Mediterranean touch, add 1 tablespoon dried oregano along with ½ teaspoon garlic powder.
These herbs elevate the olive oil flavor and add aromatic complexity. I often use this variation for sandwiches with prosciutto or hummus.
Cheesy Twists
For a rich, savory loaf, fold in ½ cup shredded mozzarella or Parmigiano-Reggiano during the final shaping. The cheese melts slightly during baking, creating pockets of gooey goodness. I recommend using low-moisture mozzarella to prevent a soggy texture.
For a stronger flavor, try Pecorino Romano—just ¼ cup makes a dramatic difference. These cheesy variations work exceptionally well with soups or as a base for grilled cheese sandwiches.
Seeded Crunch
Add texture and nutrition with 2 tablespoons sesame seeds, sunflower seeds, or poppy seeds. Sprinkle them evenly over the dough before the final rise or press them lightly into the surface before baking. For extra crunch, top with toasted chopped nuts like walnuts or almonds.
These variations add visual appeal and a satisfying bite, perfect for breakfast or snacking. I love using this technique for a rustic, artisanal look. 🌾
Spiced Warmth
Warm up your loaf with ½ teaspoon cinnamon and ¼ teaspoon nutmeg—these spices pair wonderfully with the olive oil. For a Middle Eastern twist, add ½ teaspoon ground cumin and ¼ teaspoon smoked paprika.
These variations work beautifully with spiced teas or as a base for savory pastries. The spices deepen the bread’s flavor and add warmth that lingers with each bite.
Savory Add-Ins
Transform your loaf into a hearty side dish by adding ½ cup chopped sun-dried tomatoes or finely diced roasted red peppers. These ingredients add moisture and intense flavor. For a meaty twist, fold in ½ cup cooked and crumbled sausage or finely chopped prosciutto.
These variations turn your simple loaf into a flavorful main or side dish that pairs perfectly with soups or salads.
Nutrition facts
Frequently asked questions
Can I make this bread without a loaf pan?
Shape the dough into a round boule or oval and bake it on a parchment-lined baking sheet. For a rustic look, place it directly on the sheet. Bake at 375°F for 30-35 minutes until golden brown. The crust will be crispier on the bottom, but the texture inside will remain tender. Just watch closely after 25 minutes to prevent over-browning.
Why does my dough feel too sticky?
Sticky dough is normal with this recipe—it’s part of the no-knead magic! If it’s too wet, add 1-2 tablespoons more flour (from your 1 cup total) during shaping. The dough should be soft but manageable. Overworking it can make it tough, so handle gently. For extra help, wet your hands slightly when shaping to prevent sticking.
Can I use this recipe for gluten-free bread?
This recipe isn’t gluten-free as written, but you can adapt it! Replace the 1 cup all-purpose flour with a 1:1 gluten-free flour blend (like Bob’s Red Mill or King Arthur). Add ½ teaspoon xanthan gum if your blend doesn’t include it. The texture will be slightly denser, but still delicious. Expect a 10-15 minute longer bake time for even doneness.
How do I store leftovers to keep them fresh?
Wrap cooled bread tightly in a clean kitchen towel or beeswax wrap to maintain freshness. Store at room temperature for 2-3 days in a cool, dark place. For longer storage, slice and freeze portions between parchment paper. Toast straight from frozen for crispy results! The olive oil helps preserve moisture, but the crust stays crisp best when toasted.
What if I don’t have instant yeast?
No problem! Use 0.25 tsp active dry yeast instead. First, dissolve it in the 0.5 cup warm water and let it sit for 5 minutes until foamy. This activates the yeast properly. The recipe will work exactly the same—just monitor the rise time closely, as active dry yeast may need 5-10 extra minutes to activate compared to instant yeast.

- 6 Egg Cake Recipe with Oil: Light as Air With Buttery Moisture - October 4, 2026
- 4 Bean Casserole Recipe: One-Pan Heartiness With Smoky Paprika Depth - October 4, 2026
- 3-Ingredient Keto Mug Cake Recipe: Microwave Magic in 2 Minutes - October 4, 2026