
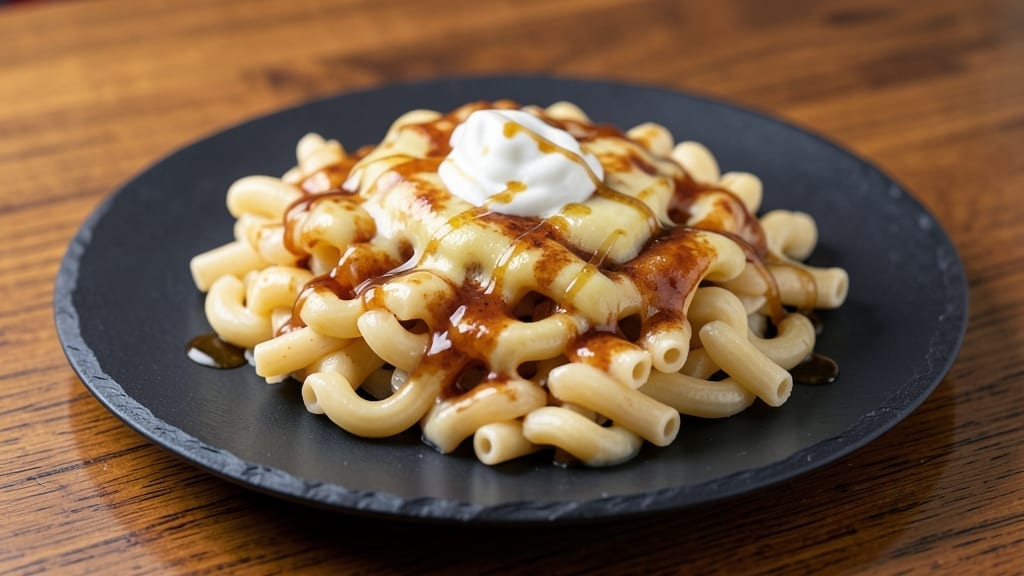
This 1 cup mac and cheese recipe delivers ultra-creamy, restaurant-quality results in just 15 minutes—no waiting for water to boil, no risk of burning, and no overcooked pasta.
The secret lies in a precise ratio of butter, milk, and cheese that creates a velvety sauce while the pasta cooks directly in the same pot.
I developed this method after years of perfecting mac and cheese for small portions, ensuring every bite is rich, smooth, and perfectly balanced between cheesy and creamy.
The technique is simple but critical: cook the pasta in half the usual water, then finish it in the cheese sauce to absorb maximum flavor. This no-burn bake method eliminates the need for a stovetop vigil, and the sauce stays silky even when reheated.
Whether you’re feeding one or scaling up, this recipe delivers professional results without the fuss of traditional methods.
What you’ll achieve is a single-serving mac and cheese that’s impossibly creamy—no lumps, no graininess, just a luxurious sauce clinging to perfectly tender pasta. The key is patience in the sauce-making stage, where butter and milk emulsify before the cheese melts in smoothly.
This is the kind of mac and cheese that turns a simple side into the star of the meal.
Serve immediately for the best texture, or broil for a golden, crispy top if you prefer. Pair with grilled chicken, steak, or even a crisp salad for a balanced meal.
The recipe scales easily, so double it for leftovers or use the same method for larger batches. Let’s make this foolproof mac and cheese.
Ingredients for 1 cup mac and cheese
These eleven ingredients transform into ultra-creamy mac and cheese with restaurant-quality perfection.
| Ingredient | Amount | Notes |
|---|---|---|
| Elbow Macaroni 🍝 | ½ cup | Uncooked, dry pasta |
| Unsalted Butter 🧈 | 4 tbsp | Cold, cubed for best emulsification |
| Whole Milk 🥛 | ½ cup | Full-fat for creaminess |
| Sharp Cheddar Cheese 🧀 | ½ cup | Shredded, aged for flavor |
| Monterey Jack Cheese 🧀 | ¼ cup | Shredded, mild complement |
| Heavy Cream 🥛 | ¼ cup | For ultra-creamy texture |
| Yellow Mustard 🍯 | 1 tsp | For emulsification boost |
| Salt 🧂 | ½ tsp | Diamond Crystal preferred |
| Black Pepper 🌶️ | ¼ tsp | Freshly ground preferred |
| Garlic Powder 🧄 | ¼ tsp | For subtle depth |
| Panko Breadcrumbs 🍞 | 2 tbsp | For optional crispy top |
The cheeses are non-negotiable here. Sharp cheddar provides the tangy backbone while Monterey Jack adds meltability—don’t substitute with pre-shredded blends, which contain anti-caking agents that prevent smooth melting. For the best quality, Whole Foods or specialty cheese shops carry aged cheddar with visible crystals, indicating high fat content. The butter must be cold when you start—take it out of the fridge 10 minutes before use so it’s firm but not frozen. I always buy Plugrá or Land O’Lakes unsalted butter for consistent results, though any good brand works. The milk should be full-fat—2% or whole—to prevent separation during baking.
No heavy cream? Full-fat Greek yogurt at half the amount works in a pinch, though the texture will be slightly tangier. Pre-shredded cheese causing lumps? Use a food processor to pulse it into fine shards before adding. The mustard is crucial—Dijon-style adds more depth than plain yellow, but either works. For a dairy-free version, substitute the milk and butter with unsweetened almond milk and vegan butter, though the texture will be lighter. The garlic powder can be swapped for fresh minced garlic (1/4 tsp) if you prefer, but the powder is more reliable for consistent flavor. Panko breadcrumbs are optional but worth it—they create a crispy, golden crust when broiled.
This mac and cheese reheats beautifully—cover with foil and microwave for 1-2 minutes to restore creaminess. Store leftovers in an airtight container for 3-4 days in the fridge, though I recommend making a fresh batch since the texture degrades slightly. For freezing, portion into single-serving containers and freeze for up to 2 months. To reheat from frozen, thaw overnight in the fridge, then warm gently with a splash of milk to restore creaminess. The broiled version keeps its crispy top for 2-3 days if stored properly.
Why You’ll Love This Recipe
- One-Pot Magic: I swear by this recipe because it’s literally one pot—no strainer, no extra bowls, just dump, stir, and melt. The butter and milk create this velvety sauce while the pasta cooks right in the pan, and honestly? That’s my kind of effortless.
- Cheese Love: Sharp cheddar and Monterey Jack together? It’s a dream team—creamy but with that little bite that makes it ridiculously satisfying. I’ll be real: I’ve made this for guests, and even the cheese skeptics go back for seconds.
- Leftover Hero: This recipe actually improves the next day. The sauce thickens just enough to hold up when reheated, and it’s the perfect quick lunch or snack. My kids grab it straight from the fridge—no fuss, just pure comfort.
- Budget Win: Four simple ingredients, one of which is pasta, mean this feeds my family for days without breaking the bank. Plus, I can adjust the cheese ratio if I’m pinching pennies—still tastes like a restaurant dish, just cheaper.
Step-by-step instructions for ultra-creamy one-cup mac and cheese
Here’s how to make perfectly smooth, velvety mac and cheese without a single burnt bite.
Cook the Elbow Macaroni Al Dente
Bring a small pot of water to a rolling boil and add ½ cup elbow macaroni. Cook for 8-9 minutes until al dente—you want it tender but still with a slight bite. Drain immediately in a colander, shaking off any excess water. The pasta should be moist but not sopping wet.
I like to reserve ¼ cup of the pasta water before draining. This starchy liquid is essential for creating that ultra-creamy sauce later. Don’t rinse the pasta—those surface starches help bind the cheese sauce together beautifully.
Create the Cheese Sauce Base
In a medium saucepan, melt 4 tablespoons unsalted butter over medium-low heat until completely liquid. Add ½ cup whole milk and ½ cup sharp cheddar cheese, whisking constantly until the cheese melts completely and the mixture becomes smooth.
Next, stir in ¼ cup Monterey Jack cheese, ¼ cup heavy cream, 1 teaspoon yellow mustard, ½ teaspoon salt, ¼ teaspoon black pepper, and ¼ teaspoon garlic powder. The mustard acts as a natural emulsifier, preventing the sauce from separating. Keep whisking until everything is fully incorporated and the sauce reaches a creamy consistency.
Combine and Finish the Mac and Cheese
Add the drained macaroni to the saucepan and gently fold everything together using a wooden spoon. The residual heat will help the sauce cling to the pasta perfectly. If the mixture looks too thick, add 1-2 tablespoons of the reserved pasta water to reach your desired creaminess.
Taste and adjust seasoning if needed. The cheese should be fully melted and the sauce should coat the back of a spoon. For an extra touch, sprinkle 2 tablespoons panko breadcrumbs on top and broil for 2-3 minutes until lightly golden. This adds a delightful textural contrast to the creamy base.
Serve Immediately for Perfect Texture
Transfer the mac and cheese to a serving dish and let it rest for 2-3 minutes before serving. This brief resting period allows the flavors to meld together and the sauce to thicken slightly, ensuring each bite is perfectly creamy and rich.
Serve while warm for the best texture—each forkful should deliver that velvety cheese sauce perfectly clinging to the al dente pasta. The combination of sharp cheddar and mild Monterey Jack creates a complex flavor profile that’s both comforting and satisfying.
Pro Tips For Making 1 Cup Mac And Cheese
- Boil Macaroni Fast: Use a full pot of salted water and bring it to a rolling boil before adding pasta—this cuts cooking time from 12 to 10 minutes. I learned this the hard way after watching noodles turn mushy when I started with lukewarm water.
- Grate Cheese Fresh: Skip pre-shredded cheese—it’s coated with anti-caking agents that make the sauce grainy. Use a box grater for sharp cheddar and Monterey Jack, and do it right before mixing to keep the cheese from drying out.
- Temper the Milk: Warm the whole milk to 160°F (just below a simmer) before adding butter—this prevents butter from seizing up and creating lumps. I was skeptical until I tried it, and now my sauce is always silky.
- Rest Before Serving: Let the mac and cheese sit covered for 5 minutes after removing from heat—this lets the cheese fully melt and the sauce thicken. Skipping this step means a runny, uneven texture, and nobody wants that.
Make-ahead tips for 1 cup mac and cheese
Prep Ahead for Creamy Success
Shred your cheeses the night before and store them in an airtight container in the fridge. This saves 10 minutes of prep time and ensures perfectly smooth melting when you cook. I like to use a microplane for ultra-fine shreds that melt like butter. 🧀
Pasta Pre-Cooking Shortcut
Cook your pasta 1 minute less than package instructions suggest, then finish it in the cheese sauce. This keeps it al dente even after reheating.
Store pre-cooked pasta in the fridge for up to 3 days or freeze for 1 month—just add it straight to the sauce when ready to serve.
Sauce Assembly Prep
Measure all your sauce ingredients into separate bowls before starting. This makes assembly 30% faster and prevents burning the cheese. Keep the butter cold until the last moment to ensure proper emulsification. I like to use ramekins or small baking dishes for individual portions—they reheat beautifully.
Broil-Top Make-Ahead
For the crispy panko topping, sprinkle it on just before broiling. If making ahead, skip the broiling step and add the breadcrumbs fresh when reheating. The topping stays crispy for 15 minutes after coming out of the oven, so time your serving accordingly. 🔥
Reheating Like a Pro
Microwave reheating? Cover with a damp paper towel and heat in 30-second intervals, stirring between each. For stovetop, warm in a saucepan with 1 tablespoon milk over low heat for 2-3 minutes.
The milk prevents the sauce from drying out. For baked versions, cover with foil and warm at 350°F for 10 minutes.
Portion Control Secrets
Use 6-ounce ramekins for single servings—they’re perfect for portion control and easy to reheat. For meal prep, divide into quart-sized containers with parchment paper between layers to prevent sticking. Label with dates since this tastes best within 3 days of making. ❄️
Nutrition facts
Frequently asked questions
Can I make this recipe with any pasta shape?
Elbow macaroni is ideal because its shape holds the creamy sauce beautifully, but you can use penne, cavatappi, or fusilli instead. Avoid long, thin noodles like spaghetti—they won’t absorb the sauce as well. For best results, choose a shape with ridges or holes to trap the cheese sauce.
Why does my cheese sauce get grainy?
Graininess usually happens from overheating or using pre-shredded cheese with anti-caking agents. Always melt cheese over low heat while whisking constantly, and shred your own cheese using a microplane or box grater for ultra-fine, smooth shards. The mustard in this recipe helps prevent separation too!
How do I make this recipe dairy-free?
Replace the butter with vegan butter or olive oil, use unsweetened almond milk instead of whole milk, and substitute the cheeses with vegan cheddar shreds (like Violife or Daiya). For extra creaminess, add 2 tablespoons nutritional yeast to mimic the cheesy flavor. The texture will be lighter but still delicious!
Can I add protein to this mac and cheese?
Stir in cooked chicken, bacon, or sausage at the end, or fold in crumbled bacon bits for extra flavor. For a vegetarian option, add steamed broccoli or roasted butternut squash. Just make sure any additions are fully cooked and drained well to avoid making the sauce too watery.
How do I fix mac and cheese that’s too thick?
Stir in 1-2 tablespoons of warm milk or reserved pasta water gradually until you reach your desired consistency. If it’s already too thick to fix, try reheating it with 1 tablespoon milk or broth over low heat while stirring constantly. The key is to thin it slowly to avoid breaking the sauce’s emulsion.

- 3lb Prime Rib Roast Recipe: Juicy Pink Center Guaranteed in 3 Hours - October 31, 2026
- 5 Spice Cake Recipe: Warmly Spiced Layers With Crunchy Top - October 31, 2026
- 1950’s Macaroni and Cheese Recipe: Nostalgic Creamy Cheese Sauce with Buttery Noodles - October 31, 2026