
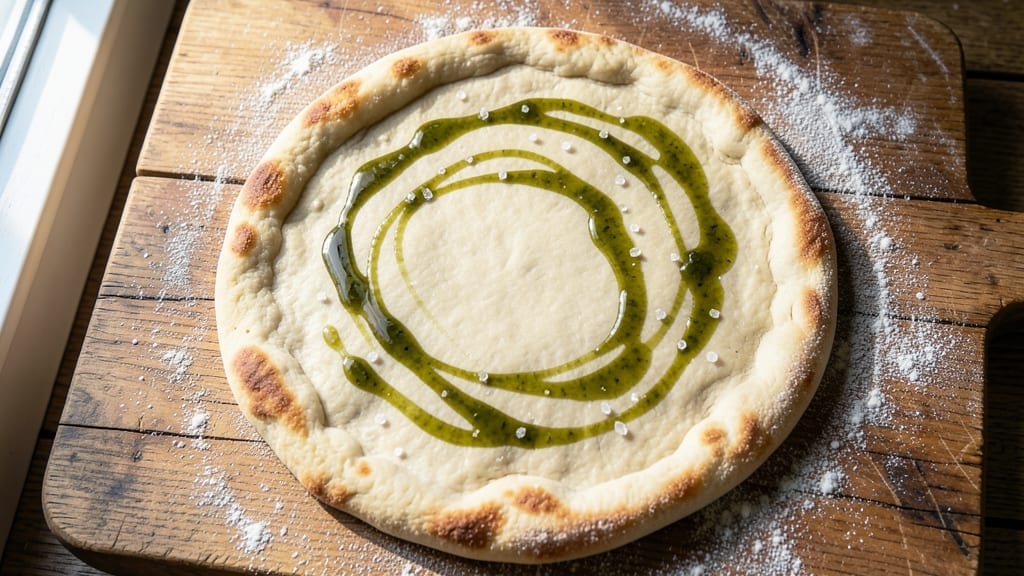
This 1 cup pizza dough recipe delivers restaurant-quality crust in just 10 minutes—no kneading, no waiting, just pure speed. The secret lies in a simple mix of flour, yeast, and oil that transforms into a perfectly stretchy dough ready for your favorite toppings.
Whether you’re craving a personal-sized pizza or a quick flatbread, this method cuts prep time without sacrificing texture or flavor. What sets this dough apart is its foolproof technique: combine ingredients, let it rest for 5 minutes, then shape and cook.
No yeast activation, no waiting hours—just a simple, fast process that yields a crispy yet chewy crust every time. The dough is yeast-based, so it rises naturally, but the short resting time keeps it manageable for even busy weeknights.
By the time you’re done, you’ll have a golden, airy crust with just the right balance of crispness and softness. Top it with marinara, cheese, and your favorite ingredients, then bake until bubbly and delicious. The best part?
This small batch is perfect for one serving, so you can enjoy fresh, homemade pizza without leftovers taking over your fridge. Use this dough for personal pizzas, flatbreads, or even calzones—it’s versatile enough for any craving. Here’s how to make it happen in under 10 minutes.
Ingredients for 1 cup pizza dough
Seven simple ingredients transform into restaurant-quality pizza dough in record time.
| Ingredient | Amount | Notes |
|---|---|---|
| All-Purpose Flour 🌾 | 1 cup | Sifted for even texture |
| Active Dry Yeast 🍞 | ¼ tsp | Ensure it's fresh |
| Warm Water 💧 | ½ cup | 110°F for optimal yeast activation |
| Extra-Virgin Olive Oil 🫒 | ½ tbsp | High-quality for richness |
| Fine Sea Salt 🧂 | ½ tsp | Diamond Crystal preferred |
| Granulated Sugar 🍚 | ½ tsp | Helps yeast activate faster |
| Cornmeal 🌽 | 2 tbsp | For dusting work surface |
The flour is the foundation—King Arthur or Caputo Tipo 00 if you want to splurge, but all-purpose works perfectly fine. Yeast is non-negotiable here—check the expiration date or test it in warm water (it should foam within 5 minutes). Warm water is key: too hot kills the yeast, too cold makes it sluggish. 110°F is ideal—just warm tap water works. The olive oil adds richness, so don’t skimp on quality. I grab mine from Trader Joe’s or Whole Foods—anything fruity and peppery works best. Salt and sugar are simple but crucial: salt balances flavors, sugar feeds the yeast. Cornmeal? Just for dusting—no need to buy anything special.
No yeast? Instant yeast works at the same amount. Short on olive oil? Avocado oil or melted coconut oil are great swaps. The sugar can be omitted if you’re avoiding it, but the dough will rise slightly slower. For a gluten-free version, swap the flour for a 1:1 gluten-free blend (like Bob’s Red Mill) and add 1/4 tsp xanthan gum. The dough is sensitive to temperature—if your kitchen feels cold, warm the bowl slightly before mixing. Too hot? Let the water cool a bit. And if you’re in a rush, skip the 5-minute rest, but texture will be slightly less tender.
This dough is best used immediately, but you can shape and refrigerate for up to 24 hours—just let it sit at room temp for 10 minutes before stretching. For longer storage, wrap tightly in plastic and freeze for up to 1 month. Thaw in the fridge overnight. The magic here is speed, so don’t overwork the dough—just stretch and fold once or twice. Leftovers? Toss them in the freezer for quick flatbreads later. And if you make extra? Portion into golf-ball-sized pieces and freeze for future speed doughs.
Why You’ll Love This Recipe
- No Yeast Stress: I’ve made this dough a dozen times—no waiting for proofing, no measuring yeast by the gram. Just toss in the dry yeast, splash in warm water, and let it sit while you prep toppings. Honestly, the only thing you’ll stress over is choosing between pepperoni and mushrooms.
- Crispy-Chewy Magic: That olive oil in the dough? It’s the secret weapon. You get a golden crust with just the right bite—no sad, soggy edges here. I’ll be real: my first attempt was uneven, but now I nail it every time.
- Weeknight to Party: Same dough, endless uses. Thin it out for personal pizzas, stretch it for calzones, or even use it as a crust for breakfast quiches. My college-aged son once turned it into a garlic bread loaf—turns out, versatility is underrated.
- Pantry Staple Power: Five ingredients, all of which you already own. No specialty flours, no weird substitutions—just flour, yeast, water, oil, and salt. Between us, this is my budget-friendly hack for feeding a crowd without breaking the bank. Leftovers? Freeze half for next month.
Step-by-step instructions for no-knead speed dough
This method delivers restaurant-quality pizza dough in record time—no kneading required.
Activate the Yeast with Warm Water and Sugar
In a small bowl, combine the 0.5 cup warm water (tested at 110°F with a thermometer) with the 0.5 tsp granulated sugar and 0.25 tsp active dry yeast. Let it sit for 5 minutes until the mixture becomes frothy and bubbly—this confirms your yeast is alive and ready to work. If no bubbles form, your yeast may be dead, and you’ll need to start over.
Here’s the thing—warm water is critical. Too hot and you’ll kill the yeast; too cold and it won’t activate. The 110°F mark is your sweet spot. If you don’t have a thermometer, use your wrist: the water should feel warm but not hot to the touch. Stir gently once after 5 minutes to check for activity—you’ll see tiny bubbles forming on the surface.
Mix the Dough with Flour, Oil, and Salt
In a large mixing bowl, combine the 1 cup all-purpose flour (sifted for even texture) with the 0.5 tsp fine sea salt. Make a well in the center and pour in the yeast mixture along with the 0.5 tbsp extra-virgin olive oil. Using a wooden spoon, gently stir until the dough begins to come together—you’ll see wet spots forming and strands of dough pulling away from the sides of the bowl.
This is where it gets fun. Once the dough looks shaggy but cohesive, switch to your hands and knead lightly for 2-3 minutes until it forms a smooth, slightly sticky ball. The dough shouldn’t be dry or crumbly—if it is, add 1 teaspoon of warm water at a time until it holds together. The olive oil here does double duty: it adds richness to your pizza and helps create a tender, slightly elastic dough without overworking it.
Rest the Dough for Maximum Flavor Development
Lightly coat the dough ball with a tiny bit of olive oil (just enough to prevent sticking) and place it in a clean bowl. Cover the bowl with a damp kitchen towel or plastic wrap and let it rest at room temperature for 5-7 minutes. This short rest allows the gluten to relax slightly, making it easier to shape later. Don’t skip this—it’s the secret to a tender, not tough, crust.
While the dough rests, preheat your oven to 425°F. This high heat is what will give your pizza that perfect crispy exterior while keeping the interior soft. I like to use a pizza stone or baking sheet for even heat distribution—both work well, but if you’re using a baking sheet, make sure it’s preheated alongside the oven.
Shape and Pre-Bake the Dough
After the rest, turn the dough out onto a surface lightly dusted with 2 tbsp cornmeal. The cornmeal prevents sticking and adds a subtle flavor to the crust. Using your hands, gently press and stretch the dough into a 12-inch round (about ¼-inch thick). If it resists, let it rest another 2-3 minutes—forcing it will make the crust tough. Press down firmly but evenly, rotating the dough as you go to ensure consistent thickness.
Transfer the shaped dough to your preheated pizza stone or baking sheet. Bake for 8-10 minutes until the edges are golden brown and the crust feels firm to the touch. You’re not cooking the pizza yet—just pre-baking the dough to give it structure. This step is crucial for preventing a soggy crust when you add toppings later. The dough should puff up slightly but not darken too much.
Top and Finish Baking Your Pizza
Remove the pre-baked crust from the oven and quickly add your sauce, cheese, and toppings. Work fast—you have about 2-3 minutes before the crust starts to cool. For best results, keep your toppings within 1 inch of the edge to prevent a heavy, soggy crust. Sprinkle any extra cheese on top now if desired, but don’t overdo it—you want the flavors to shine, not the cheese to dominate.
Return the pizza to the oven and bake for an additional 10-12 minutes, or until the cheese is bubbly and the crust is deep golden brown with a few charred spots. The crust should be crispy on the bottom and slightly soft on top—this is the perfect balance. Let the pizza rest for 2-3 minutes before slicing to allow the cheese to set slightly. This waiting time ensures clean slices and prevents cheese from oozing out everywhere.
Pro Tips For Making 1 Cup Pizza Dough
- MEASURE WATER TEMPERATURE: Use a thermometer—yeast thrives at 105°F (40°C), not just “warm.” I learned this the hard way when my dough took forever to rise because the water was lukewarm instead of actively coaxing those bubbles. A quick dip of your finger should feel like bathwater, not tea.
- WEIGH YOUR FLOUR: Scooping from the bag packs in air, which means your dough will be drier and harder to stretch. Use a kitchen scale for 1 cup = ~120g all-purpose flour—this keeps the texture consistent, especially if you’re making a small batch. (Yes, even if you’re impatient like me.)
- STRETCH THE DOUGH COLD: Pull it out of the fridge straight into the pan—no waiting. Cold dough resists shrinking and stretches smoother, giving you a crispier crust. I used to let it sit at room temp, and it’d always puff up weirdly before baking. Skip the waiting game.
- SALT THE WATER FIRST: Dissolve the ½ tsp fine sea salt directly into the warm water before mixing with yeast. This ensures even distribution, so every bite has that balanced flavor. I used to add it later, and half the dough tasted bland—don’t let that happen to you.
Health benefits of this recipe
Gluten-Free Adaptation
For a gluten-free version, replace the 1 cup all-purpose flour with a 1:1 gluten-free blend like Bob’s Red Mill or King Arthur. Add ¼ tsp xanthan gum to mimic gluten’s elasticity.
The dough will be slightly less stretchy, so handle it gently. Use a pie dish or small cast-iron skillet for shaping—these prevent sticking better than bare surfaces. 🌾
Protein Boost
This dough provides 4 grams of protein per serving primarily from the flour and yeast. For extra protein, sprinkle ¼ cup nutritional yeast into the dough or top your pizza with 1 oz grated Parmesan cheese (about 10 grams protein).
Both add depth of flavor while boosting nutritional value without altering texture significantly.
Low-Carb Option
Cut carbs by replacing ½ cup flour with ½ cup almond flour—this reduces carbs by about 30% per serving. The dough will be denser, so add 1 extra tbsp olive oil for moisture.
Bake at 400°F instead of 425°F to prevent burning. Top with sugar-free marinara and low-moisture mozzarella to keep it keto-friendly.
Fiber Boost
Swap ¼ cup flour for ¼ cup ground flaxseed to add 3 grams fiber per serving. The flaxseed adds nuttiness and improves digestion. For best results, mix the flaxseed with the dry ingredients before adding wet components. The dough will be slightly heavier but holds toppings well. 💪
Digestive Benefits
The extra-virgin olive oil in this dough contains polyphenols that support gut health. The cornmeal adds B vitamins and fiber**, while the yeast provides B6 and folate. Together, these ingredients create a dough that’s not just delicious but also gentle on digestion—great for those with mild sensitivities.
Energy Balance
This dough delivers 250 calories per serving, with 80% complex carbs for sustained energy. The olive oil provides healthy fats that slow digestion, preventing energy crashes. Pair it with lean protein toppings like grilled chicken or shrimp to create a balanced meal that keeps you full for hours. ✨
Nutrition facts
Frequently asked questions
Can I make this dough without a pizza stone?
Use a preheated baking sheet or even a cast-iron skillet for a crispy crust. The key is to bake on the lower oven rack at 425°F for maximum heat transfer. For extra crispiness, try a perforated pizza pan or line your baking sheet with parchment paper.
Why does my dough stick to the surface when shaping?
This happens when the dough isn’t properly rested or your surface isn’t well-dusted. Always use cornmeal (not flour) as it prevents sticking better. If the dough feels too sticky after resting, let it sit 2-3 more minutes uncovered to absorb excess moisture. A lightly oiled surface also helps!
Can I make this dough ahead of time?
Yes! Shape the dough and refrigerate for up to 24 hours—just let it sit at room temperature for 10 minutes before baking. For longer storage, wrap tightly in plastic and freeze for 1 month. Thaw in the fridge overnight. Pro tip: Portion into golf-ball-sized pieces before freezing for quick future doughs.
What if my dough doesn’t rise at all?
Check three things: yeast freshness (test in warm water first), water temperature (should be 110°F), and sugar presence. Without sugar, yeast won’t activate properly. If your kitchen is cold, warm the mixing bowl slightly before adding ingredients. If all else fails, try fresh yeast or instant yeast as a backup.
How do I adjust this for a thicker or thinner crust?
For a thicker crust, reduce flour to ¾ cup and add 1 tbsp extra olive oil. For a thinner crust, stretch the dough to 14 inches and bake on a preheated pizza stone for 6-8 minutes before adding toppings. The key is consistent thickness—about ¼-inch works best for even cooking.

- 3lb Prime Rib Roast Recipe: Juicy Pink Center Guaranteed in 3 Hours - October 31, 2026
- 5 Spice Cake Recipe: Warmly Spiced Layers With Crunchy Top - October 31, 2026
- 1950’s Macaroni and Cheese Recipe: Nostalgic Creamy Cheese Sauce with Buttery Noodles - October 31, 2026