
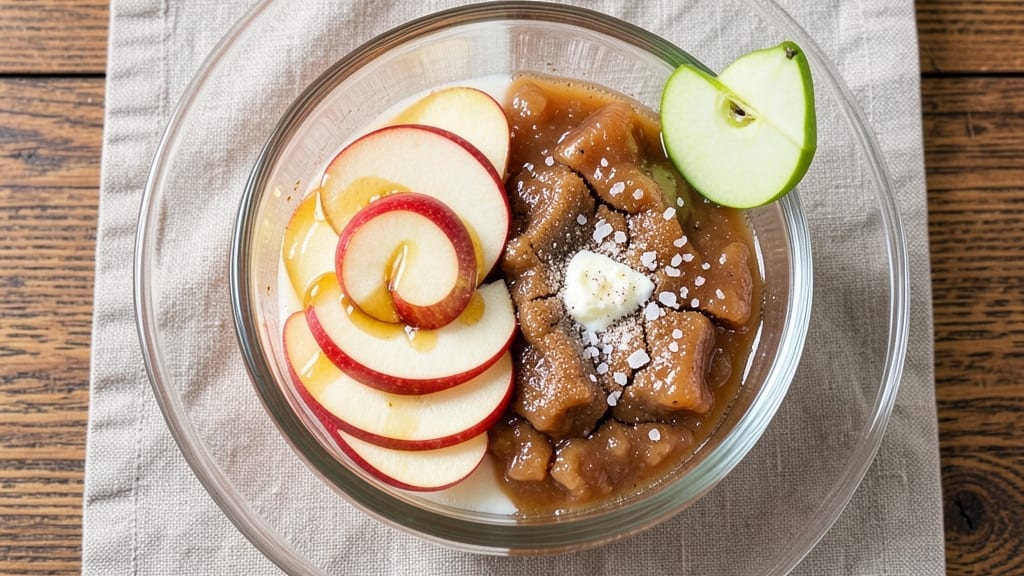
This 2 apples dessert recipe transforms two simple apples into a spiced caramelized crunch that requires just one bake. The secret lies in a buttery, cinnamon-sugar topping that creates irresistible texture while the apples soften into tender, fragrant perfection.
I developed this recipe after years of testing—it’s the one that finally convinced my kids to eat dessert first.
The beauty of this dessert is its simplicity: no pie crust, no fancy layers, just two apples, a few pantry staples, and 30 minutes in the oven. The apples caramelize beautifully, their natural sweetness enhanced by warm spices like cinnamon and nutmeg, while the topping turns golden and crispy.
It’s the kind of dessert that feels special but comes together with minimal effort.
What you’ll end up with is a warm, spiced apple dessert that’s perfect for weeknight dinners or holiday gatherings. The caramelized apples create a syrupy center, while the crunchy topping adds texture with every bite.
Serve it warm with a scoop of vanilla ice cream, or let it cool slightly for a more structured crumble.
This recipe is foolproof—no risk of soggy bottoms or undercooked apples. The apples release their juices just enough to create a natural glaze, making each bite rich and satisfying. Whether you’re feeding a family or treating yourself, this dessert delivers restaurant-quality results in half the time.
Ingredients for 2 apple dessert
Two apples, a handful of pantry staples—this dessert is all about simple ingredients with big flavor.
| Ingredient | Amount | Notes |
|---|---|---|
| Apples (Honeycrisp or Granny Smith) 🍎 | 2 whole | Peeled, cored, sliced into 1/4-inch pieces |
| Unsalted Butter 🧈 | ½ cup | Cold, cubed for even topping |
| Granulated Sugar 🍚 | ¾ cup | Light brown sugar for caramel flavor |
| Ground Cinnamon 🌿 | 2 tbsp | Freshly ground preferred |
| Ground Nutmeg 🌿 | ½ tsp | Freshly grated for warmth |
| Salt 🧂 | ¼ tsp | Fine sea salt for balance |
| All-Purpose Flour 🌾 | ¼ cup | For crispy texture |
| Vanilla Extract 🥛 | ½ tsp | Pure vanilla for depth |
| Lemon Juice 🍋 | 1 tbsp | Freshly squeezed to brighten |
| Heavy Cream 🥛 | ¼ cup | Optional for extra richness |
The apples are the star, so pick ones that hold their shape but get tender when baked—Honeycrisp or Granny Smith are my go-tos. Costco or Trader Joe’s usually have Honeycrisp in season, but any crisp apple works. Slice them evenly so they cook at the same rate. The butter needs to be cold when you mix it into the topping—pull it out of the fridge 10 minutes before you start. I always grab the European-style butter from the store—it’s higher fat and makes the topping extra crispy. Skip the salted kind unless you want to adjust later.
No brown sugar? White sugar plus an extra pinch of cinnamon works in a pinch. Fresh nutmeg is ideal, but ground works fine at double the amount. The heavy cream is optional but worth it if you’re serving this warm—it adds a silky contrast to the crunchy topping. No vanilla extract? Vanilla sugar or even a pinch of cinnamon can cover it. For the flour, all-purpose is perfect, but almond flour makes it gluten-free—just add an extra tablespoon. The lemon juice keeps the apples from browning too fast, so don’t skip it unless you’re okay with a darker dessert.
This dessert reheats beautifully—just 10 seconds in the microwave or 5 minutes at 350°F to revive the crunch. Store leftovers in an airtight container for up to 3 days, though I’ve never had any last that long. The topping stays crispy for 2 days if you keep it covered. Freeze portions for up to 3 months—just thaw at room temp before reheating. I always make a double batch because it disappears fast, especially with kids around.
Why You’ll Love This Recipe
- Same recipe, two vibes: Serve warm with vanilla ice cream for a cozy Tuesday, or dust with powdered sugar for a last-minute Thanksgiving side. The same spices and apples work for both.
- No-Core Chopping Needed: I swear by this trick—just halve the apples and scoop out the center with a spoon. No mandoline, no knife skills, just clean halves ready for baking in minutes. (Yes, even if you’re still learning to peel an orange.)
- Honeycrisp Magic: That juicy sweetness in Honeycrisp? It turns into a caramelized hug when baked with butter and sugar. Granny Smith fans get that bright tang—both versions make it impossible to stop at one slice.
- Weeknight or Holiday: Same recipe, two vibes: Serve warm with vanilla ice cream for a cozy Tuesday, or dust with powdered sugar for a last-minute Thanksgiving side. The same spices and apples work for both.
Step-by-step instructions for spiced caramelized apple dessert
Here’s how to make this warm, spiced apple dessert with a perfect crunchy top in just one bake.
Prep the Apples and Mix Dry Ingredients
Start by peeling, coring, and slicing the 2 whole apples into ¼-inch thick pieces. I like to use a mandoline for even slices, but a sharp knife works too. Toss the apple slices with the 1 tablespoon lemon juice to prevent browning while you prepare the other ingredients.
In a medium bowl, whisk together the 0.75 cup granulated sugar, 2 tablespoons ground cinnamon, 0.5 teaspoon ground nutmeg, and 0.25 teaspoon salt. This spice blend is what gives this dessert its signature warm, cozy flavor. Set this mixture aside – you’ll use it in the next step. The reason we mix these dry first is so everything gets evenly distributed throughout the dessert.
Create the Crunchy Topping
In a separate bowl, combine the 0.25 cup all-purpose flour, remaining 0.5 cup unsalted butter (cold and cubed), and 0.5 teaspoon vanilla extract. Using your fingers or a pastry cutter, work the butter into the flour until you get a coarse crumb texture with pea-sized butter pieces still visible. This creates that perfect crunchy topping we all love.
I press down gently on the mixture during the first minute – this prevents it from turning into a paste and ensures we get those satisfying crunchy bits on top. The cold butter is crucial here; if it starts to melt too quickly, pop the bowl in the fridge for 5 minutes to firm it up again.
Assemble and Bake the Dessert
Preheat your oven to 350°F. In a 9-inch pie dish or baking dish, layer half of the apple slices in an even layer. Sprinkle half of the sugar-spice mixture evenly over the apples. Repeat with the remaining apples and spice mixture, pressing down gently to help them hold their shape.
Finally, sprinkle the flour-butter mixture evenly over the top of the apples. You want to distribute it as evenly as possible – this gives you that perfect crunchy texture throughout. Bake for 45-50 minutes until the top is golden brown and the apples are tender when pierced with a fork.
Add Cream and Serve Warm
When the dessert comes out of the oven, let it cool for 5 minutes. Then, drizzle the 0.25 cup heavy cream evenly over the top. Watch as it soaks into the crunchy layer and creates a beautiful caramelized effect. The cream adds just the right amount of richness to balance the spiced apples.
Serve warm with a dollop of whipped cream or a scoop of vanilla ice cream if you like. This dessert is best enjoyed right out of the oven when the apples are warm and the crunchy topping is at its peak. The spiced caramelized apples with that perfect crunchy top make this a showstopper dessert that’s surprisingly easy to make.
Pro Tips For Making 2 Apple Dessert
- Peel Before Slicing: Honeycrisp holds its shape better peeled—skip the peel, and you’ll avoid a soggy mess in the dessert. Granny Smith? Peel it too, even if it’s tart; the texture’s worth it.
- Brown the Butter First: Nutty, caramelized butter makes this dessert sing—don’t skip it. Let it brown until it smells like a bakery, then cool slightly before mixing with sugar. (Yes, it’ll clump. That’s fine.)
- Don’t Overmix the Filling: Stir just until the sugar dissolves—overmixing turns the apples into mush. A few lumps? Good. A paste? Bad. You’re aiming for a rustic, chunky texture.
- Use a Mix of Apples: Honeycrisp for sweetness, Granny Smith for tang—trust me, the contrast is magic. If you’re short on time, toss in 1 extra Granny Smith per Honeycrisp; it holds up better when baking.
Storing and reheating your 2 apple dessert
Refrigerator Storage
Store leftovers in an airtight container at 40°F or below for up to 3 days. The crunchy topping stays crispy for the first 24 hours, but after that, it softens slightly.
I always let the dessert cool completely before storing to prevent condensation from making the topping soggy. 🍎
Freezer-Friendly
This dessert freezes beautifully for up to 3 months—just portion it into single-serving containers before freezing. Thaw overnight in the fridge, then reheat for 10 seconds in the microwave or 5 minutes at 350°F to revive the crunch.
The apples stay tender, and the topping regains its satisfying texture. I double-wrap portions in plastic wrap before freezing to lock in freshness.
Reheating for Crunch
For the best texture, reheat in the oven at 350°F for 5-7 minutes—this restores the crispy topping without drying out the apples. If using the microwave, cover with a damp paper towel and heat in 20-second bursts until warm.
The heavy cream topping adds moisture, so you may need to add a splash of milk or cream if it looks dry after reheating.
Make-Ahead Magic
This dessert actually tastes better the next day! The flavors meld overnight, and the caramelized apples develop deeper sweetness. I often prep it the night before for holiday gatherings—just bake, cool, and store.
The next morning, a quick 5-minute oven reheat brings it back to its warm, inviting best. Perfect for stress-free entertaining! ✨
Portioning Tips
Divide into individual ramekins before baking if serving at a party—this makes it easy to reheat single portions. For a single-serving reheat, cover loosely with foil and warm at 350°F for 3-4 minutes to keep the topping crisp.
The apples stay juicy and warm, while the crunchy layer stays satisfyingly firm. 🍴
Nutrition facts
Frequently asked questions
Can I use any type of apple for this dessert?
You’ll get the best results with firm, crisp apples like Honeycrisp or Granny Smith. These hold their shape during baking while developing that perfect caramelized texture. Avoid overly soft varieties like Red Delicious—they’ll turn mushy. If you only have soft apples, slice them thinner (1/8-inch) and reduce baking time by 5-10 minutes.
What if I don’t have vanilla extract?
No problem! You can substitute with 1/2 teaspoon vanilla sugar or even an extra 1/4 teaspoon cinnamon for that warm spice flavor. The vanilla adds depth, but this dessert still tastes amazing without it. For extra richness, consider adding 1/4 teaspoon almond extract—it pairs beautifully with apples.
Can I make this dessert gluten-free?
Swap the all-purpose flour for almond flour and add an extra 1 tablespoon to maintain the crunchy texture. For a lighter option, use gluten-free 1:1 baking flour. Keep in mind the topping will be slightly more delicate, so handle it gently when assembling. The apples will still caramelize perfectly.
How do I prevent the topping from turning into a paste?
Keep your butter cold when mixing it with the flour—this is key! If it starts melting too quickly, chill the mixture for 5 minutes before using. Also, work quickly and don’t overmix. The goal is pea-sized butter pieces, not a smooth dough. For extra insurance, sprinkle the topping on just before the final 10 minutes of baking.
Can I make this dessert ahead for a party?
This dessert actually improves overnight! Bake it, let it cool completely, then store in an airtight container for up to 3 days. Reheat individual portions at 350°F for 5 minutes to restore the crunch. For parties, consider baking in ramekins so guests can reheat their own servings. The flavors meld beautifully overnight, making it even more delicious.

- 3lb Prime Rib Roast Recipe: Juicy Pink Center Guaranteed in 3 Hours - October 31, 2026
- 5 Spice Cake Recipe: Warmly Spiced Layers With Crunchy Top - October 31, 2026
- 1950’s Macaroni and Cheese Recipe: Nostalgic Creamy Cheese Sauce with Buttery Noodles - October 31, 2026