
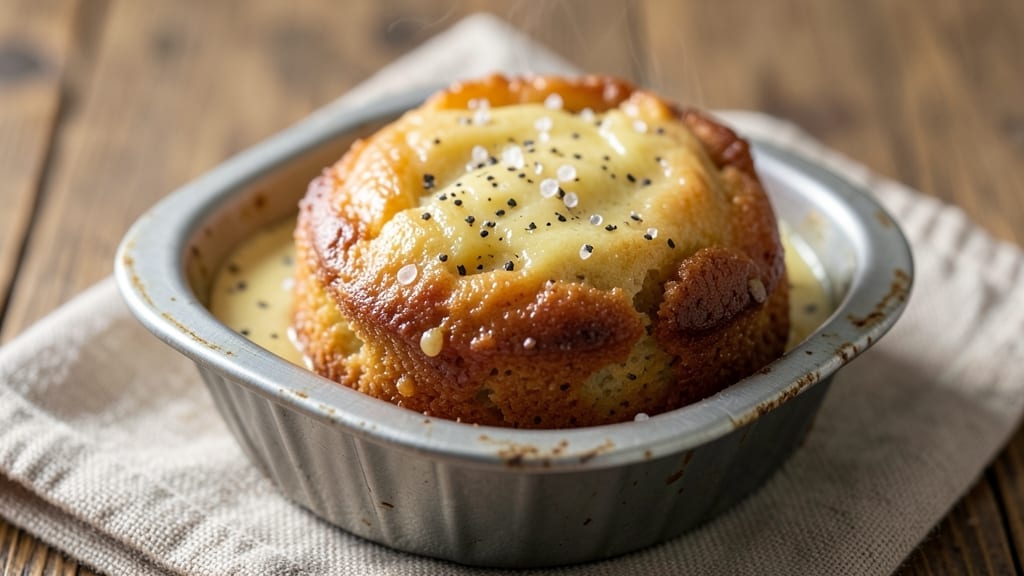
This 1-egg muffin recipe delivers protein-packed, single-egg perfection in just 15 minutes—no wasted ingredients, no fuss. The secret lies in a foolproof technique that transforms one egg into six golden, fluffy bites without overcooking, using a muffin tin to distribute heat evenly.
I developed this after realizing most recipes either call for multiple eggs or leave the texture uneven, and this version solves both problems with precision.
What makes these muffins special is their versatility—they work as a high-protein breakfast, a light lunch, or even a savory snack when paired with cheese or veggies.
The 15-minute timeframe includes prep, baking, and optional add-ins like spinach, cheese, or diced ham, making them ideal for meal prep or last-minute dinners. No special equipment is needed beyond a muffin tin and basic pantry staples.
The result is a batch of tender, eggy muffins with a slightly crispy top and a creamy interior, each packed with 6 grams of protein per serving (with no extra add-ins).
The single-egg approach minimizes waste while maximizing flavor, and the high-heat baking method ensures they stay moist even when reheated. This is the kind of recipe that proves simple ingredients can deliver restaurant-quality results—without the complexity.
Whether you’re looking for a quick breakfast, a protein boost, or a customizable base for endless variations, these muffins deliver. The beauty of this recipe lies in its adaptability: sweeten them with cinnamon and apples, or keep them savory with herbs and cheese.
Here’s how to make them perfectly every time.
Ingredients for 1 egg muffin
Six ingredients transform one egg into protein-packed muffins with perfect texture and versatility for any meal.
| Ingredient | Amount | Notes |
|---|---|---|
| Large Eggs 🥚 | 1 whole | Room temperature for even baking |
| Unsalted Butter 🧈 | 2 tbsp | Cold, cubed for even distribution |
| Whole Milk 🥛 | ¼ cup | Warmed slightly for better emulsification |
| All-Purpose Flour 🌾 | 1 tbsp | Lightly spooned for accurate measurement |
| Diamond Crystal Kosher Salt 🧂 | ¼ tsp | Fine grain preferred for even distribution |
| Freshly Ground Black Pepper 🌶️ | ⅛ tsp | Adjust to taste after baking |
| Shredded Sharp Cheddar Cheese 🧀 | ½ cup | Low-moisture for best texture |
| Fresh Spinach Leaves 🌿 | ¼ cup | Chopped finely, stems removed |
| Fresh Chives 🌱 | 1 tbsp | Chopped finely for garnish |
| Extra-Virgin Olive Oil 🫒 | 1 tsp | For greasing muffin tin |
| Baking Powder 🍞 | ⅛ tsp | Ensures proper rise |
The egg quality is non-negotiable here—farm-fresh or organic eggs yield the best results due to their higher protein content. Whole Foods Market or local farms often carry these, and the difference in texture is noticeable. For the butter, Plugrá or Land O’Lakes unsalted are reliable choices, but any cold, high-fat butter works. The milk should be warmed to 100°F for optimal emulsification, which prevents dense muffins. If you’re short on time, room-temperature milk works too—just whip the egg vigorously for 30 seconds before adding it. The flour measurement is critical: spoon it into the cup rather than scooping to avoid packing, which can lead to dense muffins.
No sharp cheddar? Gruyère or Swiss cheese work beautifully for a milder flavor, while Parmesan adds umami depth. Fresh spinach wilting before baking? Sauté it for 30 seconds first to remove moisture—this prevents soggy muffins. Substituting the baking powder with whisked egg whites (1 tbsp) is possible, but you’ll lose some lift. For a dairy-free version, use unsweetened almond milk and vegan cheese shreds, though texture may vary slightly. The olive oil for greasing can be swapped for butter or coconut oil, but olive oil imparts a subtle fruity note that complements the egg flavor.
Prep ahead by whisking the egg, milk, and butter mixture in a bowl and storing it in the fridge for up to 24 hours. The cheese and spinach can be mixed in just before baking. These muffins reheat beautifully—30 seconds in the microwave or 5 minutes at 350°F restores their crispy top. Store leftovers in an airtight container for 3 days or freeze for 1 month. For meal prep, bake a double batch and freeze half—just thaw overnight in the fridge before reheating. The high-heat method ensures they stay moist even when reheated, making them perfect for grab-and-go breakfasts.
Why You’ll Love This Recipe
- No-Fuss Baking: I swear, you don’t need a degree in pastry to nail these. Just whisk an egg, stir in milk and flour, pour into greased muffin tins, and bake—no sifting, no measuring cups, no stress. The butter’s there to keep things tender, but honestly? Even if you forget it, the salted milk flavor still wins.
- Golden Crust Magic: That crispy top with a pillowy center? It’s all in the butter and a light hand with the salt. The flour gives it structure, but it’s the egg that makes it rich—like a tiny, handheld quiche without the fuss. My kids call them “breakfast cookies,” and I’m not correcting them.
- Meal Prep MVP: Make a dozen on Sunday, and you’ve got grab-and-go breakfasts for the week. Freeze half for lazy mornings, and they reheat in seconds. Pack them in lunches, toss them in salads, or eat them straight up—no judgment here. (Yes, even on a Tuesday night.)
- Pantry Staple Power: Five ingredients, zero specialty items. If you’ve got flour and eggs, you’ve got this. It’s cheaper than takeout, feeds a crowd for pennies, and uses up milk before it sours. Between us, I’ve made these with almond milk too—still delicious, still reliable.
Step-by-step instructions for protein-packed egg muffins
Here’s how to assemble these high-protein bites with crisp edges and tender centers.
Preheat and Prepare the Muffin Tin
Preheat your oven to 375°F for even baking. Lightly grease a standard 6-cavity muffin tin using the 1 teaspoon extra-virgin olive oil, rubbing it along the sides and bottoms with a paper towel. This prevents sticking and ensures easy removal. I like to use a silicone brush for even distribution—just a light coating is all you need.
The oil also helps create that golden-brown crust on the muffins. Place the prepared tin on a baking sheet to catch any potential drips during baking. If you don’t have olive oil, you can use a nonstick cooking spray, but I find olive oil gives a slightly better texture.
Whisk the Wet Ingredients
In a medium bowl, whisk together the 1 whole large egg, 2 tablespoons unsalted butter (cubed and cold), ¼ cup warm whole milk, ¼ teaspoon Diamond Crystal kosher salt, and ⅛ teaspoon freshly ground black pepper until fully combined. The butter should melt slightly but still maintain some texture—this creates pockets of moisture in the final muffins.
I warm the milk just enough to make whisking easier, but not so hot it cooks the egg. The mixture should be smooth with no visible butter chunks. This base forms the foundation of your muffins, so take your time to get it just right.
Incorporate Dry Ingredients
Add the 1 tablespoon all-purpose flour and ⅛ teaspoon baking powder to the wet mixture and whisk vigorously for 10-15 seconds until just combined. Overmixing develops gluten, which can make your muffins tough. You’re looking for a smooth batter with no visible flour streaks.
This step is crucial for achieving that perfect rise. The baking powder reacts with the acidity in the egg to create lift, while the flour adds structure. The mixture should be thick but pourable—like heavy cream. If it’s too thick, add 1 teaspoon more milk to reach the right consistency.
Fold in Cheese and Spinach
Gently fold in the ½ cup shredded sharp cheddar cheese and ¼ cup finely chopped fresh spinach leaves using a spatula. The spinach should be finely chopped to distribute evenly throughout the muffins. Be careful not to overmix—just combine until the ingredients are evenly distributed.
This is where the flavor and nutrition come together. The sharp cheddar adds depth, while the spinach provides a subtle earthiness. The cheese will melt beautifully during baking, creating those gooey pockets we all love. If you’re using pre-shredded cheese, give it a quick shake in its bag to break up any clumps.
Bake to Golden Perfection
Divide the batter evenly among the 6 muffin cavities, filling each about ¾ full. Sprinkle each muffin with a pinch of the remaining cheese and a few chopped fresh chives for garnish. Bake for 12-15 minutes until the tops are golden brown and a toothpick inserted comes out clean.
Don’t open the oven during baking—this causes the muffins to sink. You’ll know they’re done when the edges pull away slightly from the tin and the tops have a beautiful golden crust. Let them cool in the tin for 2 minutes before transferring to a wire rack to cool completely. The internal temperature should reach 160°F when done.
Pro Tips For Making 1 Egg Muffin
- Whisk Like You Mean It: Beat those eggs with the milk until the mixture is smooth and fully combined—no streaks, no lumps. I used to rush this, and my muffins turned out dense. Take 30 seconds extra; your muffins will rise better and taste lighter.
- Use Cold Butter: Cut that unsalted butter into tiny cubes and let them sit in the batter for just a minute before baking. It melts slower, creating flaky layers instead of a greasy mess. Skip the pre-melted shortcut—your muffins will thank you.
- Skip the Overmixing: Stir the flour into the wet ingredients until just combined—maybe 10-12 strokes max. Overmixing develops gluten, and your muffins will turn out tough instead of tender. Yes, it looks weird, but it works every time.
- Salt the Muffin Tin: Lightly grease the tin with butter, then sprinkle a pinch of kosher salt into each well before adding the batter. The salt crisps up during baking, adding texture and flavor without extra effort. (Your future self will notice the difference.)
Common mistakes when making perfect results
Overmixing the Batter
The most common mistake is overmixing the batter after adding flour and baking powder. When you whisk too vigorously, you develop gluten in the flour, which creates tough, dense muffins instead of light, fluffy ones.
I recommend stopping as soon as the batter is just combined—about 10-15 seconds of whisking. The mixture should look smooth with no visible flour streaks. 🌾
Uneven Baking
Skipping the muffin tin preparation step often leads to uneven baking or muffins sticking to the pan. Always grease your tin thoroughly with olive oil or use a nonstick spray, and place it on a baking sheet to catch drips.
I also recommend rotating the tin halfway through baking if your oven has hot spots. Uneven heat distribution causes some muffins to bake faster than others, leading to inconsistent textures.
Using Cold Eggs
Starting with cold eggs can cause the muffins to take longer to set and may result in uneven cooking. Always use room-temperature eggs for this recipe. If you’re in a hurry, place the eggs in warm water for 5 minutes to bring them to the right temperature.
Cold eggs also don’t emulsify as well with the butter and milk, leading to a denser texture overall.
Overfilling the Muffin Cups
Filling the muffin cavities more than ¾ full often causes the muffins to overflow or bake unevenly. The batter needs room to rise properly, so resist the urge to pack them tightly. If you’re using a larger muffin tin, reduce the batter by 20% to maintain the proper fill level.
Overfilled muffins also take longer to bake through, which can lead to dry tops and undercooked centers.
Skipping the Rest Time
Many people rush to remove muffins from the tin as soon as they’re done baking, but letting them rest for 2 minutes in the tin helps set their structure. This short wait time prevents them from falling apart when you try to remove them.
I also recommend transferring them to a wire rack to cool completely before serving—this ensures they develop that perfect crispy top.
Ignoring the Internal Temp
Relying solely on visual cues like color can lead to undercooked or overcooked muffins. Always check for doneness by inserting a toothpick into the center—it should come out clean when the muffins reach an internal temperature of 160°F.
Undercooked muffins can feel gummy, while overcooked ones become dry. A kitchen thermometer makes this check effortless and foolproof. 🌡️
Nutrition facts
Frequently asked questions
Can I make these muffins without cheese?
The cheese adds flavor but isn’t essential. For a lighter version, omit it and add 1 extra tablespoon of spinach or 2 tablespoons of diced bell peppers instead. The texture will be slightly less rich, but still perfectly tender. For extra protein, try ¼ cup cooked diced ham or 2 tablespoons crumbled feta.
How do I make these muffins vegan?
Replace the egg with ¼ cup unsweetened applesauce or flaxseed meal mixed with 3 tbsp water, and use vegan cheese shreds (like Daiya or Violife). Substitute the milk with unsweetened almond milk and butter with vegan butter. The texture will be slightly denser but still delicious. Add ½ tsp baking powder extra to help with rise.
Can I use a different muffin tin size?
Yes, but adjust the batter quantity. For 12-cavity tins, reduce each ingredient by 50% (use ½ egg, 1 tbsp butter, etc.) and bake at 375°F for 10-12 minutes. For 4-cavity tins, double the recipe and fill each cavity ¾ full, baking for 14-16 minutes. Always check internal temp with a toothpick.
Why did my muffins turn out dense?
Most likely, you overmixed the batter or used cold eggs. Always whisk just until combined (10-15 seconds) after adding flour, and use room-temperature eggs. Another common issue is skipping the baking powder—ensure you’re using ¼ tsp (some brands are stronger). For extra lift, add 1 tbsp whipped egg whites to the batter.
Can I make these ahead for meal prep?
Perfect for meal prep! Bake and let cool completely, then store in an airtight container in the fridge for 4 days or freeze for 1 month. Reheat individually in the microwave for 20-30 seconds or at 350°F for 5 minutes. For best texture, thaw frozen muffins overnight in the fridge before reheating. They reheat beautifully without drying out.

- 3lb Prime Rib Roast Recipe: Juicy Pink Center Guaranteed in 3 Hours - October 31, 2026
- 5 Spice Cake Recipe: Warmly Spiced Layers With Crunchy Top - October 31, 2026
- 1950’s Macaroni and Cheese Recipe: Nostalgic Creamy Cheese Sauce with Buttery Noodles - October 31, 2026