
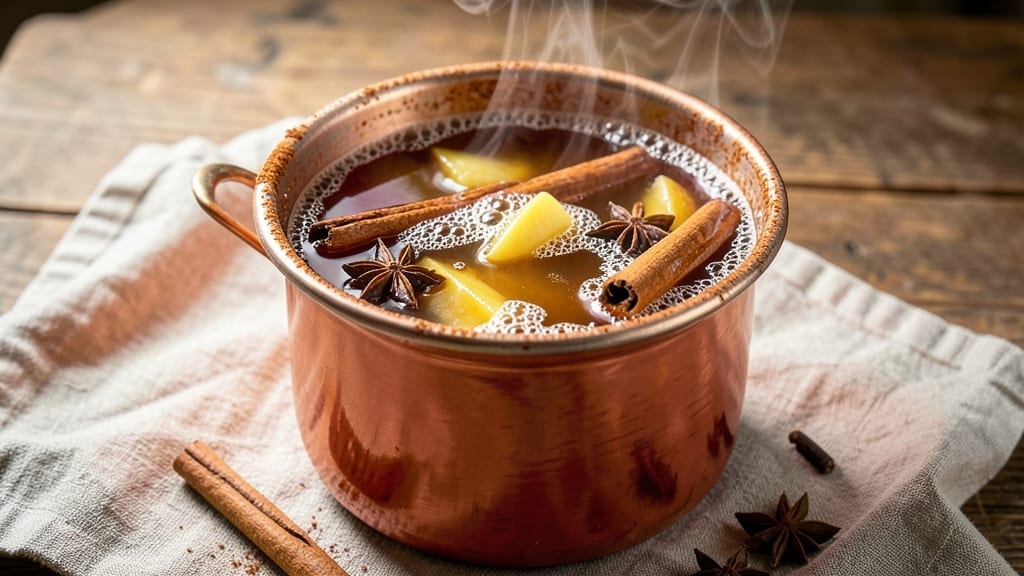
Making 1 gallon of apple cider from scratch transforms crisp autumn apples into a fragrant, spiced drink that tastes like harvest season in a mug. The process begins with selecting tart-sweet apples—like Granny Smiths and Honeycrisp—and simmering them slowly to extract rich, golden juice.
This traditional method preserves natural sweetness while infusing warm spices like cinnamon and cloves, creating a depth store-bought versions can’t match.
What sets this recipe apart is the balance of simplicity and tradition: no fancy equipment is needed, just a large pot, apples, water, and a handful of spices. The slow simmer (about 45 minutes) develops complex flavors as the apples break down, releasing natural sugars and aromatic compounds.
Straining the mixture yields a clear, vibrant cider that’s ready to serve warm or chilled, depending on your preference.
Once complete, you’ll have a 1-gallon batch of cider that’s perfect for sipping by the fireplace or sharing with neighbors. The recipe allows for customization—add honey for extra sweetness, a splash of vanilla for warmth, or even a hint of nutmeg for depth.
Store it in the refrigerator for up to a week, or can it for longer shelf life if you’re feeling ambitious.
This cider is more than just a drink—it’s a celebration of autumn’s flavors, crafted with care to deliver that cozy, nostalgic taste of fall. Whether you’re hosting a gathering or simply craving a comforting beverage, this recipe delivers restaurant-quality results at home.
Ingredients for 1 gallon apple cider
Tart-sweet apples, warm spices, and slow simmering create this rich, golden apple cider batch.
| Ingredient | Amount | Notes |
|---|---|---|
| Granny Smith Apples 🍎 | 10 whole | Peeled, cored, sliced into quarters |
| Honeycrisp Apples 🍎 | 6 whole | Peeled, cored, sliced into quarters |
| Water 💧 | 4 cups | Filtered or spring water preferred |
| Granulated Sugar 🍚 | 1 ½ cups | Adjust to taste for sweetness |
| Ground Cinnamon 🌿 | 1 ½ tbsp | High-quality for aromatic depth |
| Whole Cloves 🌶️ | 8 whole | Lightly crushed for flavor release |
| Star Anise Pods 🌟 | 2 whole | Optional for licorice undertone |
| Orange Peel 🍊 | 1 whole | From 1 organic orange, finely grated |
| Lemon Juice 🍋 | 2 tbsp | Freshly squeezed for brightness |
| Vanilla Bean 🌸 | 1 whole | Split lengthwise for seeds and pod |
| Salt 🧂 | ½ tsp | Kosher or sea salt for balance |
| Ice Cubes ❄️ | 2 cups | For chilling and serving |
The apple selection is critical—Granny Smiths provide tartness while Honeycrisp adds natural sweetness. Shop at local orchards in fall for peak flavor, or grab organic at Whole Foods when out-of-season. For best results, use apples that are firm but yield slightly when pressed. The cinnamon should be Ceylon if possible—it has a more delicate flavor than cassia. Cloves and star anise are available at spice shops or the international aisle of most supermarkets. Organic citrus peel is ideal to avoid wax residue, but conventional works in a pinch.
No Granny Smiths? Fuji or Pink Lady apples work well as substitutes, though they’ll be slightly less tart. Running low on cloves? Allspice berries at half the amount provide a similar warmth. Skip the star anise if you can’t find it—it’s purely for depth, not essential. For extra richness, add 1/4 cup apple cider vinegar to the simmering pot. The orange peel can be zested instead of grated if you prefer, though grating ensures more flavor. Always use freshly grated zest—it loses potency quickly. The vanilla bean is optional but adds a luxurious touch; imitation extract won’t deliver the same complexity.
Store the finished cider in glass jars or bottles in the refrigerator for up to 1 week. For longer storage, can the cider using a water bath canner for 10-15 minutes—this preserves it for 6-12 months. The spices can be removed after simmering and reused for up to 3 batches if stored in an airtight container. For serving, chill with ice cubes and garnish with a cinnamon stick or apple slice. The cider improves overnight as flavors meld, so make it a day ahead if possible.
Why You’ll Love This Recipe
- No Core Chopping: I just toss in whole apples—peeled, cored, and chopped into big chunks. No fancy dicing, no tiny pieces to burn. The Granny Smiths keep it tart while the Honeycrisp adds that natural sweetness without extra work.
- Warm Spice Magic: That first whiff of cinnamon simmering into the water? Pure autumn in a pot. Honestly, I could drink this just for the smell—it’s like a hug for your taste buds, especially when the sugar caramelizes just right.
- Crowd-Pleaser Base: This makes enough to share (or not, if you’re like me). Use it for cider, pair it with roasted pork, or even freeze batches for winter. My kids ask for it year-round, and it’s just as easy the second time.
- Budget-Friendly Staple: Apples stay cheap, sugar’s a pantry essential, and cinnamon lasts forever. I make this twice a month—once for sipping, once for cooking—and never stress about ingredient costs. Simple math: big pot, happy wallet.
Step-by-step instructions for crafting spiced apple cider
Transform fresh apples into aromatic, spiced cider with this precise simmering method.
Prepare the Apple Base
Peel, core, and slice the 10 whole Granny Smith Apples and 6 whole Honeycrisp Apples into quarters. The Granny Smith provides tartness while Honeycrisp adds natural sweetness—this balance is essential for depth. Transfer the apple quarters to a large stockpot and add the 4 cups of water. Bring to a gentle boil over medium-high heat for 10 minutes, stirring occasionally to prevent sticking.
Watch for the apples to soften slightly—they shouldn’t fully break down yet. You’ll know they’re ready when they release their juice freely but still retain some structure. This initial simmer extracts the natural flavors without creating a pulp. Keep the heat at medium-high to maintain an active simmer throughout.
Add Spices and Simmer
Reduce heat to medium-low and add the lightly crushed 8 whole cloves, 2 whole star anise pods, and 1 whole orange peel. Stir gently to distribute the spices evenly. The cloves and star anise will infuse warmth while the orange peel adds bright citrus notes. Let the mixture simmer uncovered for 30 minutes, stirring occasionally to prevent the spices from scorching.
After 20 minutes, add the split 1 whole vanilla bean (seeds and pod) and simmer for another 10 minutes. The vanilla will mellow out the spice intensity while adding floral complexity. You’ll notice a rich, aromatic steam rising—this is when the cider truly begins to develop its signature fall character. Keep the heat steady but gentle to avoid over-extraction of bitter compounds from the spices.
Sweeten and Balance Flavors
Remove the pot from heat and carefully ladle out 2 cups of the apple mixture into a separate container. This reserved liquid will help control sweetness later. Return the pot to medium heat and whisk in the 1.5 cups of granulated sugar until fully dissolved. Then add the 1.5 tbsp of ground cinnamon, 0.5 tsp of salt, and the 2 tbsp of lemon juice. Stir well to combine.
Return the reserved apple mixture to the pot and simmer for an additional 15 minutes over low heat. This second simmer allows the flavors to meld while the sugar caramelizes slightly, deepening the cider’s complexity. Taste frequently during this time—you may need to adjust sweetness by adding more of the reserved apple mixture (unsweetened) if the cider tastes too strong.
Strain and Chill
Line a fine-mesh strainer with cheesecloth or a clean kitchen towel and place it over a large bowl or pitcher. Pour the cider through the strainer, pressing gently on the solids to extract maximum liquid. Discard the apple pulp and spices. The strained cider should be clear with just a hint of golden hue from the spices.
Transfer the strained cider to a clean glass container and stir in the 2 cups of ice cubes. This rapid chilling helps set the flavors while preventing fermentation. Cover and refrigerate for at least 4 hours (or overnight) to fully chill. The cider will continue developing depth in the fridge, with the spices mellowing into a harmonious blend.
Pro Tips For Making 1 Gallon Apple Cider
- CHOP UNEVENLY: Granny Smiths stay firmer when cut into ½-inch chunks, but Honeycrisp bruises fast—so slice the Honeycrisp first, then the Granny Smiths. The uneven sizes release flavor at different rates, which keeps the cider from tasting one-note after 20 minutes of simmering.
- SIMMER LOW AND LONG: I used to rush this and end up with a thin, bitter cider. After burning three batches, I finally figured out: 30 minutes at a gentle boil (tiny bubbles, not rolling) breaks down the apples evenly. If it smells like burnt sugar, you went too hot—back to low heat.
- DON’T SKIP THE STARCH WASH: Dump the chopped apples into a colander, then rinse them under cold water while pressing with your hands. This removes surface starch, which would otherwise turn your cider cloudy and gluey. (Yes, it’s messy—just do it outside or over the sink.)
- SWEETEN WITH HONEYCRISP FIRST: Honeycrisp releases more natural sugar when heated, so add its chunks to the pot 5 minutes before the Granny Smiths. This lets the cider build depth without you needing to dump in extra sugar later. Taste at 20 minutes—adjust sugar then if needed.
Make-ahead tips for this recipe
Batch Prep Timeline
Plan your cider-making session for a 3-hour window to allow ample time for simmering, straining, and chilling. Start by prepping apples first—they take the longest to peel, core, and slice. I recommend setting a timer for 45 minutes just for this step to avoid rushing.
Once the apples are prepped, the simmering process requires minimal hands-on time, making it perfect for multitasking. 📅
Spice Reuse Strategy
Save your spices for up to 3 batches by storing them in an airtight container in a cool, dark place. After straining, rinse the spices gently under cold water to remove any residual apple pulp, then pat them dry with a paper towel.
I keep mine in a small glass jar labeled with the date—this ensures I can reuse them without worrying about contamination. 🌶️
Freezer Storage Hack
For long-term storage, freeze the strained cider in 1-cup portions using silicone ice cube trays or small glass jars. This makes it easy to thaw just what you need—simply pop a portion into the fridge overnight.
The cider will retain its flavor for up to 3 months when frozen. I love this method for quick, cozy drinks without the hassle of reheating. ❄️
Canning for Longevity
If you’re feeling ambitious, can your cider for 6-12 months of shelf stability. Use a water bath canner and process pint-sized jars for 10-15 minutes after sealing. Always ensure your jars are sterilized and lids are new to prevent spoilage.
I recommend labeling each jar with the date—this helps track freshness and keeps your pantry organized. 🏺
Make-Ahead Serving Ideas
Prep mini cider bottles for gifts or parties by pouring the chilled cider into small glass bottles (like 8-ounce mason jars) and adding a cinnamon stick or star anise pod as a garnish.
Seal with a parchment-lined lid and store upright in the fridge. These make thoughtful hostess gifts and keep beautifully for up to 1 week. 🎁
Flavor Boost Overnight
For even deeper flavor, let the cider sit overnight in the fridge before serving. The spices and sugars will meld more completely, creating a richer, more complex taste. I often make a double batch on Sunday so it’s ready to enjoy all week—trust me, the wait is worth it.
The first sip after chilling is pure autumn magic. ✨
Nutrition facts
Frequently asked questions
Can I use frozen apples instead of fresh?
Fresh apples are ideal for maximum flavor, but you can use frozen apples in a pinch. Thaw them first and drain any excess liquid, then proceed with the recipe. Frozen apples may yield slightly less juice, so you might need to add 1 extra cup of water to reach 1 gallon. The texture will be slightly softer, but the taste remains delicious.
How do I adjust this recipe for a smaller batch?
For a half-gallon batch, halve all ingredients and reduce simmering time by 20-25 minutes. Use 5 Granny Smiths and 3 Honeycrisp apples, 2 cups water, and 3/4 cup sugar. The same spice ratios work perfectly. This smaller batch is great for testing flavor variations or sharing with a couple friends.
Why does my cider taste too bitter?
Bitterness usually comes from over-simmering the spices or using too many tart apples. Reduce simmering time to 30 minutes total and balance with 1 extra tablespoon of sugar or 1/4 cup apple juice. For future batches, try 1 part Granny Smith to 2 parts Honeycrisp to reduce tartness. Always taste as you go!
Can I make this cider without added sugar?
Yes! Use 1/2 cup honey or maple syrup instead of sugar for natural sweetness, or skip it entirely for a tart, vinegar-style cider. Simmer the apples 10 minutes longer to extract more natural sugars. The flavor will be more complex but less sweet. Perfect for those who prefer a drier sip.
How long will homemade cider last unrefrigerated?
Unrefrigerated, this cider will last 2-3 days at room temperature in an airtight container. For longer storage, can it or freeze it immediately after making. Never leave it out longer than 24 hours—the spices and natural sugars create an environment where fermentation can begin quickly. Always use a clean spoon when serving.

- 3lb Prime Rib Roast Recipe: Juicy Pink Center Guaranteed in 3 Hours - October 31, 2026
- 5 Spice Cake Recipe: Warmly Spiced Layers With Crunchy Top - October 31, 2026
- 1950’s Macaroni and Cheese Recipe: Nostalgic Creamy Cheese Sauce with Buttery Noodles - October 31, 2026