
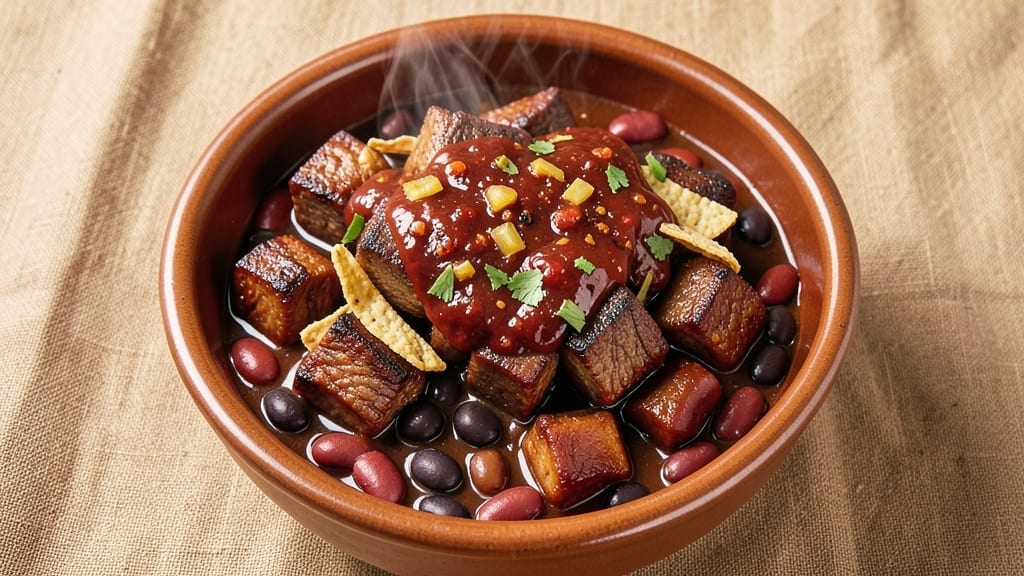
A 1 lb meat chili recipe delivers deep, smoky richness in a single pot—perfect for hearty weeknight dinners. The secret lies in slow-cooked meat, caramelized spices, and a thick, velvety texture that comes together with minimal effort.
This method ensures tender protein and beans that soak up every layer of flavor, transforming simple ingredients into something restaurant-worthy.
The beauty of this chili is its versatility—whether you use beef, pork, or chicken, the technique remains the same. A 30-minute prep followed by 1.5 hours of simmering yields a dish that’s packed with umami, warmth, and just the right balance of heat.
The spices bloom gradually, creating a complex depth that’s impossible to replicate with quick cooking.
What you’ll end up with is a thick, hearty chili with tender meat chunks, melted beans, and a sauce so rich it coats every spoonful. The aroma alone will have everyone gathering around the table, and the first bite delivers that perfect harmony of smoky, spicy, and savory.
Serve it with crusty bread or over rice for the full experience.
This recipe scales effortlessly for leftovers, too—double the batch and enjoy it for days. The flavors only deepen as it sits, making it ideal for meal prep. Here’s how to make it perfectly every time.
Ingredients for 1 lb meat chili
Simple ingredients that transform into restaurant-quality chili with deep smoky flavor.
| Ingredient | Amount | Notes |
|---|---|---|
| Chuck Roast 🥩 | 1 lb | Cut into 1-inch cubes |
| Kidney Beans 🌽 | 1 can | Drained and rinsed (15 oz) |
| Black Beans 🌽 | 1 can | Drained and rinsed (15 oz) |
| Diced Tomatoes 🍅 | 1 can | San Marzano preferred (14.5 oz) |
| Tomato Paste 🍅 | 2 tbsp | Squeeze tube works best |
| Yellow Onion 🧅 | 1 whole | Diced, medium size |
| Garlic Cloves 🧄 | 4 cloves | Minced, fresh preferred |
| Chili Powder 🌶️ | 2 tbsp | Smoked or mild variety |
| Ground Cumin 🌿 | 1 tbsp | Toasted for depth |
| Dried Oregano 🍃 | 1 tsp | Mexican preferred |
| Salt 🧂 | 1 ½ tsp | Diamond Crystal preferred |
| Black Pepper 🌶️ | ½ tsp | Freshly ground |
| Beef Broth 💧 | 1 cup | Low-sodium preferred |
| Dark Brown Sugar 🍚 | 1 tbsp | Enhances caramelization |
| Olive Oil 🫒 | 1 tbsp | Extra-virgin for richness |
The chuck roast is where the magic happens—look for well-marbled cuts at the meat counter. Costco or local butchers often have the best quality, but grocery store chuck works fine if it’s fresh. Cubing the meat evenly ensures consistent cooking; don’t worry about trimming fat, it renders down beautifully. For beans, Trader Joe’s or store brands are cost-effective and flavorful. The San Marzano tomatoes? Worth the splurge—they’re sweeter and less acidic, which balances the spices perfectly. If you can’t find them, any high-quality crushed tomatoes will do, but avoid the watery, overly sauced varieties.
No chili powder? Substitute with 1 tbsp smoked paprika plus 1 tsp cayenne for heat. Running low on cumin? Ground coriander at half the amount works in a pinch, though the flavor won’t be identical. The tomato paste can be skipped if you’re using a thicker tomato sauce, but don’t omit it entirely—it’s what deepens that rich, velvety texture. For extra umami, add 1 tbsp soy sauce or Worcestershire (if vegetarian, use vegan Worcestershire). The brown sugar might seem odd, but it caramelizes beautifully during simmering, adding a subtle sweetness that rounds out the flavors. If you’re watching sugar, reduce to 1 tsp or omit entirely.
This chili tastes even better the next day as the flavors meld together. Store in an airtight container in the fridge for up to 5 days, or freeze for 3 months in portions. I like to freeze it in single-serving containers so I can pull out exactly what I need. For meal prep, double the batch—it reheats perfectly in the microwave or on the stovetop. The beans will soften further, soaking up even more of that smoky goodness. If you make it ahead, let it come to room temperature before reheating to avoid a watery texture.
Why You’ll Love This Recipe
- One-Pot Magic: I swear by this—just brown the chuck roast, dump in the beans and tomatoes, and let it simmer. No extra pots, no fuss, and that rich meaty base builds flavor while you do anything else.
- Deep, Smoky Richness: That tomato paste? It’s the secret. It caramelizes into a thick, velvety layer that clings to every bite, while the kidney and black beans add texture. Honestly, it’s the kind of chili that makes you pause mid-bite.
- Meal Prep MVP: Make a double batch—it reheats like a dream. Pack it for lunches, freeze half for lazy nights, or serve it at a potluck. Between us, it’s the only chili I’ll bring to gatherings because it always disappears first.
- Budget-Friendly Powerhouse: A pound of chuck roast stretches forever with beans and tomatoes, and the pantry staples (like tomato paste) don’t break the bank. I’ve fed four people for under $10, and they all left happy—no takeout guilt here.
Step-by-step instructions for 1 lb meat chili
Here’s the method for developing deep, smoky flavor in every bite.
Brown the Chuck Roast for Maximum Flavor
Heat the 1 tablespoon olive oil in a heavy Dutch oven over medium-high heat until shimmering. Add the 1 lb chuck roast, cut into 1-inch cubes, in a single layer without overcrowding. Let the meat sear undisturbed for 3-4 minutes until deep golden brown on all sides.
This initial browning creates the Maillard reaction, which builds the rich, meaty foundation of your chili. Stir occasionally to ensure even browning, and don’t rush this step—patience here pays off in flavor. Once the meat is well browned, transfer it to a plate and set aside.
Sauté Aromatics Until Fragrant
In the same Dutch oven, add the diced yellow onion and cook over medium heat for 5-6 minutes until softened and translucent. Add the 4 cloves minced garlic cloves and cook for another 30 seconds until fragrant.
Here’s the thing—don’t let the garlic burn. It should smell sweet and pungent, not bitter. If it starts to darken too quickly, reduce the heat slightly. These aromatics form the flavor base for your chili, so take your time and let them develop properly.
Build the Chili Base
Add the 2 tablespoons tomato paste to the Dutch oven and stir to coat the onions and garlic. Cook for 1 minute until the tomato paste darkens slightly. Pour in the 1 can diced tomatoes, 1 cup beef broth, 1 tablespoon dark brown sugar, 2 tablespoons chili powder, 1 tablespoon ground cumin, 1 teaspoon dried oregano, 1.5 teaspoons salt, and 0.5 teaspoon black pepper.
Stir well to combine all ingredients, then return the browned chuck roast to the pot. Bring the mixture to a gentle boil, then reduce heat to low and let it simmer uncovered for 1 hour. This initial simmer allows the flavors to meld and the meat to begin breaking down.
Add Beans and Simmer to Perfection
After the initial 1 hour of simmering, add the 1 can drained and rinsed kidney beans and 1 can drained and rinsed black beans to the chili. Stir gently to combine, then continue simmering uncovered for another 1-1.5 hours until the chuck roast is fork-tender and the chili has thickened to your desired consistency.
You’ll know it’s ready when the chuck roast falls apart easily with a fork and the chili has developed a rich, thick texture. The beans should be heated through but not mushy. Taste and adjust seasoning if needed—sometimes chili needs a little more salt or a splash of water to reach the perfect consistency.
Rest and Serve
Remove the chili from heat and let it rest for 10-15 minutes before serving. This resting period allows the flavors to fully develop and the chili to thicken slightly. Serve hot with your choice of toppings—sour cream, shredded cheese, chopped cilantro, or sliced avocado all work beautifully.
Each bite should deliver a perfect balance of tender meat, smoky spices, and rich tomato flavors. The beans add texture and heartiness, while the browned chuck roast provides that deep, meaty satisfaction that makes chili so comforting. Enjoy immediately while it’s hot and the flavors are at their peak.
Pro Tips For Making 1 Lb Meat Chili
- SEAR THE ROAST FIRST: Chuck roast is forgiving, but a quick 3-4 minute sear in a hot Dutch oven—before adding anything else—builds flavor you won’t get from slow cooking alone. I used to skip this, and the chili always tasted like it needed more salt afterward.
- SALT THE BEANS BEFORE COOKING: Dump those dry kidney and black beans in a colander, sprinkle with 1/2 teaspoon salt, and toss. The salt breaks them down faster and prevents that mealy texture later. (Yes, even if you’re using canned beans, rinse them first but don’t skip the salt—it makes a real difference.)
- LOW AND SLOW AFTER 30 MINUTES: After the initial 30 minutes of simmering, crank the heat down to actual low—just above a bare simmer. I learned this the hard way when my chili boiled over twice because I kept checking the pot. Patience here means tender meat and no mushy beans.
- TOAST THE TOMATO PASTE: Stir that tomato paste into the pot dry first, let it sit for 2 minutes until it darkens slightly, then add the diced tomatoes. This caramelizes the paste and deepens the flavor—no extra steps, just 2 minutes of waiting. (Your future self will notice the difference.)
Best sauces and condiments for these flavors
Classic Toppings
Start with shredded cheddar cheese—about ¼ cup per bowl—to add a creamy, sharp contrast to the smoky chili. I love sour cream (about 2 tbsp per serving) for a cool, tangy balance.
Fresh cilantro (about 1 tbsp chopped) brightens the dish, while green onions add a crisp bite. For heat lovers, sprinkle ½ tsp crushed red pepper flakes per bowl. 🌶️
Creamy Additions
Stir in Greek yogurt (about 2 tbsp per serving) for a lighter alternative to sour cream. A drizzle of avocado crema—blend ½ avocado with 2 tbsp sour cream and 1 tbsp lime juice—elevates the dish with richness.
For extra decadence, top with crumbled queso fresco or feta cheese (about 1 tbsp each).
Crunchy Elements
Add toasted pepitas (about 1 tbsp per bowl) for a nutty crunch. Crushed tortilla chips (about ½ cup per bowl) work perfectly too. For a smoky twist, sprinkle ½ tsp smoked paprika over the top.
These toppings cut through the thickness and add texture that keeps every bite exciting. 🌟
Acidic Brighteners
Finish with a squeeze of lime juice (about ½ tsp per bowl) to cut through the richness. Pickled jalapeños (about 2 slices per bowl) add a tangy kick, while diced mango (about 2 tbsp per bowl) brings a sweet contrast.
For a zesty touch, try quick-pickled red onions—soak ¼ cup thinly sliced red onion in ¼ cup vinegar and 1 tsp sugar for 10 minutes.
Saucy Enhancements
Drizzle with hot honey (about 1 tsp per bowl) for a sweet-spicy finish. A dollop of salsa verde (about 2 tbsp per serving) adds herby freshness. For a smoky depth, try chipotle crema—mix ¼ cup sour cream with 1 tsp adobo sauce and ½ tsp lime juice**.
These sauces take your chili from simple to extraordinary. ✨
Nutrition facts
Frequently asked questions
Can I substitute ground beef for chuck roast in this recipe?
Yes, but the texture will differ. Ground beef will make the chili thicker and more traditional, while chuck roast provides tender chunks. If using ground beef, brown it thoroughly first and reduce the simmering time to 45-60 minutes since it cooks faster. For best results, use 80/20 lean-to-fat ratio ground beef to maintain moisture.
How do I adjust the spice level for kids or sensitive eaters?
Reduce the chili powder to 1 tablespoon and omit cayenne entirely. For extra mildness, add ½ teaspoon sugar to balance any remaining heat. Kids often love chili when served with their favorite toppings like shredded cheese or sour cream to cool it down.
Why did my chili turn out too thin? How can I fix it?
This usually happens from over-simmering or insufficient tomato paste. For immediate thickening, mix 1 tablespoon cornstarch with 2 tablespoons cold water, stir into the chili, and simmer for 5 minutes. To prevent it next time, reduce the beef broth to ½ cup and simmer uncovered to let excess moisture evaporate.
Can I make this chili in an Instant Pot or slow cooker?
For Instant Pot: Sauté meat and aromatics, then add all ingredients and cook on high pressure for 20 minutes. For slow cooker: Combine everything and cook on low for 6-8 hours or high for 3-4 hours. Both methods work well, but the stovetop version gives you more control over the browning process.
What’s the best way to reheat leftover chili?
Gently reheat on the stovetop over medium-low heat until steaming, stirring occasionally. Avoid microwaving directly from the fridge—it can make the chili watery. For best results, transfer to a saucepan with 1-2 tablespoons water to restore moisture. Stir in fresh toppings after reheating for maximum flavor.

- 3lb Prime Rib Roast Recipe: Juicy Pink Center Guaranteed in 3 Hours - October 31, 2026
- 5 Spice Cake Recipe: Warmly Spiced Layers With Crunchy Top - October 31, 2026
- 1950’s Macaroni and Cheese Recipe: Nostalgic Creamy Cheese Sauce with Buttery Noodles - October 31, 2026