
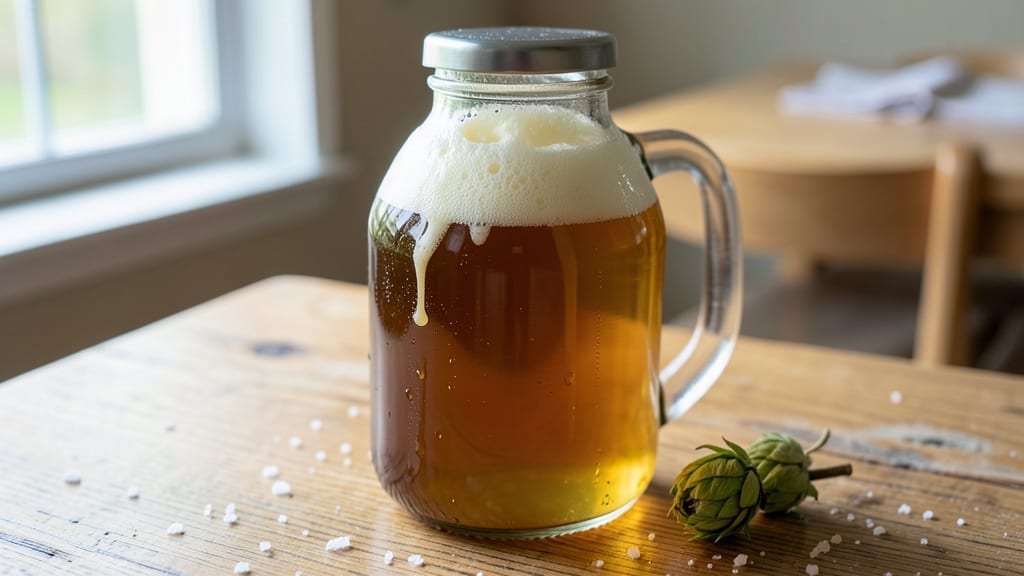
Brewing your own 1-gallon cream ale at home is easier than you think—no fancy equipment needed, just patience and a few key ingredients. 🍺 This recipe delivers a smooth, balanced ale with a creamy texture and crisp hoppy finish, perfect for sipping after a long day.
The secret lies in the fermentation process, where time and temperature work together to create that signature creaminess we all love.
You’ll start with a simple mash of malted barley and water, then boil with hops to extract bitterness and aroma. After cooling, you pitch the yeast and let it do its magic in a sanitized fermenter for about 10-14 days, ensuring those flavors develop just right.
The beauty of a small batch is that you can experiment with flavors—vanilla, cinnamon, or even a splash of orange peel—without committing to a full keg.
By the time you’re done, you’ll have a golden, effervescent ale with a creamy mouthfeel and a hoppy kick that’s hard to resist. The best part? You’ll know exactly what’s in your glass, no preservatives or shortcuts.
This isn’t just a recipe—it’s a craft, and the first sip will tell you why homebrewing is so rewarding.
Ready to dive in? We’ll walk you through every step, from mashing to bottling, so you can enjoy your very own 1-gallon cream ale in just a few weeks. Let’s get brewing!
Ingredients for 1 gallon cream ale
Pantry staples and a few specialty items for brewing your own creamy, hoppy ale at home.
| Ingredient | Amount | Notes |
|---|---|---|
| Malted Barley Extract (DME) 🌾 | 3 ½ lb | Light or pale malt for clean flavor |
| Distilled Water 💧 | 1 gallon | Filtered or spring water preferred |
| Hops (Cascade or Centennial) 🌿 | 1 ½ oz | 60-minute boil for aroma |
| White Sugar 🍚 | 1 ½ cups | For priming and carbonation |
| Ale Yeast (Wyeast 1056 or Safale US-05) 🍺 | 1 package | American ale yeast strain |
| Campden Tablets 💊 | 1 tablet | For sterilization (1 tablet per gallon) |
| Liquid Lactose 🥛 | ½ cup | For creamy mouthfeel |
| Orange Peel (Optional) 🍊 | 1 tbsp | Dried or fresh, for aroma |
| Vanilla Bean (Optional) 🌸 | 1 whole | Split and scraped for flavor |
| Cinnamon Stick (Optional) 🌿 | 1 whole | For subtle warmth |
| Sanitizer (Star San or equivalent) 🧼 | ½ oz | For equipment sterilization |
| Priming Sugar 🍬 | ½ cup | For carbonation (separate from white sugar) |
The malted barley extract is the backbone of your ale. Northern Brewer or Brewers Friend carry great options—look for pale or light malt extracts for that clean, crisp base. The water matters too; filtered or spring water avoids off-flavors from chlorine or minerals. For hops, Cascade or Centennial give that classic Pacific Northwest hoppiness, but Chinook or Amarillo work too if you want more pine or citrus. If you’re adding optional ingredients, Trader Joe’s has affordable dried orange peel and cinnamon sticks—just check for no added sugars or oils.
No Campden tablets? Potassium metabisulfite (1/4 tsp per gallon) works just as well for sterilization. Running out of lactose? Powdered milk (1/4 cup) adds creaminess in a pinch, though it’ll change the flavor slightly. The yeast package is critical—Wyeast 1056 or Safale US-05 are reliable, but White Labs WLP001 is another solid choice. For priming, if you can’t find extra sugar, corn sugar or dextrose work too. And if you’re skipping the optional ingredients, no worries—this ale still shines without them.
Store your malt extract and sugar in airtight containers away from light—they last up to a year. Hops keep best in the freezer for 6-12 months, while dried orange peel and cinnamon last 1 year in a cool, dark place. Once you’ve brewed, your fermenter should stay at 68-72°F for 10-14 days. After bottling, store your ale in a dark place for 2-4 weeks before drinking—patience pays off with smoother flavors.
Why You’ll Love This Recipe
- Fridge-Friendly Starter: I keep a gallon of this in my fridge all the time—it’s my go-to for quick batches, and the DME cuts down on mash time. Just boil, cool, pitch the yeast, and forget about it while you handle dinner.
- Creamy Hop Balance: That late addition of Cascade or Centennial hops? It’s the secret to a beer that’s smooth but still has a little zing—like a hug from your favorite brewery. The white sugar keeps it from being too heavy, so it’s crisp and refreshing.
- Batch-and-Share Brew: Make it once, split it up. I’ve given jars of this to coworkers for tailgates, neighbors for BBQs, and even my mom for her book club—everyone’s impressed I made it myself. No fancy equipment, just a pot and patience.
- Budget Brew Magic: Honestly, this costs me about $10 for a gallon, and it yields way more than store-bought. The DME and sugar are cheap, and the yeast does all the work. Plus, if you mess up, you’ve still got a decent beer to drink while troubleshooting.
Step-by-step instructions for cream ale fermentation
Let’s brew this smooth, creamy ale with confidence—every step matters for that perfect balance.
🔥 Step 1: Sanitize and Prepare Your Brewing Equipment
First things first—sanitation is everything in homebrewing. Mix the 0.5 oz Sanitizer (Star San) with 1 gallon Distilled Water in a clean bucket. Soak all equipment—fermenter, airlock, siphon, and bottle filler—for at least 15 minutes. You’ll know it’s ready when everything smells clean and chemical-free. Rinse with hot water if you’re using glass, but don’t dry it yet.
While your equipment soaks, prepare your brewing space. I like to work on a clean towel to catch any drips. This isn’t just about cleanliness—it’s about preventing infections that could ruin your entire batch. Trust me, you don’t want to taste that.
🍳 Step 2: Steep the Grains and Boil the Wort
In your sanitized pot, combine 3.5 lb Malted Barley Extract (DME) with 1 gallon Distilled Water. Heat to 155°F and hold for 30 minutes to fully dissolve the malt. This creates your wort—the foundation of your beer. Stir occasionally to prevent clumping, and keep the temperature stable.
After steeping, bring the wort to a rolling boil. Add the 1.5 oz Hops (Cascade or Centennial) and boil for 60 minutes. This timing is crucial for extracting those beautiful hop aromas without bitterness. If you’re using optional ingredients, add the 1 tbsp Orange Peel, 1 whole Vanilla Bean (split and scraped), and 1 whole Cinnamon Stick during the last 15 minutes of boiling. The flavors will infuse beautifully.
🥘 Step 3: Cool and Pitch the Yeast
After boiling, cool the wort as quickly as possible to 70°F—I use an immersion chiller or ice bath. Rapid cooling prevents off-flavors and keeps your yeast happy. Once cooled, transfer the wort to your sanitized fermenter. Add the 1 package Ale Yeast (Wyeast 1056) and stir gently to distribute it evenly.
Cover the fermenter with a clean cloth or lid (but leave room for the airlock). Attach the airlock filled with sanitized water. You’ll see bubbles within 6-12 hours—that’s your yeast waking up and starting fermentation. This is where the magic begins, so keep an eye on your fermenter in the next few days.
⏰ Step 4: Ferment and Add Lactose for Creaminess
Let the beer ferment at 68-72°F for 5-7 days until fermentation slows significantly. You’ll know it’s ready when the airlock bubbles slow to just a few per minute. This is when you add the 0.5 cup Liquid Lactose—this is what gives cream ale its signature smooth, creamy mouthfeel.
After adding lactose, give the beer a gentle swirl to mix it in. The yeast will consume the lactose, creating that velvety texture. Ferment for another 3-5 days until fermentation is completely done. You can check with a hydrometer—when it reads close to your expected final gravity, you’re good to go.
🍽️ Step 5: Prime, Bottle, and Carbonate
Once fermentation is complete, transfer your beer to a sanitized bottle filler or directly to bottles. Add the 0.5 cup Priming Sugar to each gallon of beer—this is what creates the carbonation. Stir gently to dissolve the sugar completely. If you’re using swing-top bottles, fill them to the shoulder line to leave room for carbonation.
Cap your bottles immediately and store them at 65-70°F for 2-3 weeks. This allows time for the yeast to consume the priming sugar and carbonate your beer. After conditioning, give your cream ale a gentle shake to mix any settled sediment before serving. Enjoy your homemade, creamy, hoppy ale—you’ve earned it!
Pro Tips For Making 1 Gallon Cream Ale
- STIR LIKE YOU MEAN IT: Don’t just swirl the wort—get that spoon moving in tight circles at the boil. I used to half-ass this with DME, and my hop utilization suffered. Aggressive stirring for 2-3 minutes after adding hops (especially Cascade) keeps them from clumping and extracts all the bitter goodness.
- CHILL THE WORT FAST: Skip the slow-cool method—ice bath it. Fill a sanitized bucket with 2-3 inches of ice, then pour your hot wort in. Stir gently until it hits 80°F. I learned this the hard way when my first batch sat too long in the pot, and the yeast got lazy, leading to sluggish fermentation.
- WEIGH THAT SUGAR: Don’t eyeball the white sugar for priming—use a scale. A gallon of ale needs about 3.5 oz for ~2.4 vols of carbonation. I once guessed and ended up with flat beer or a geyser when opening. Precision here means no guesswork later.
- PITCH YEAST AT NIGHT: Start fermentation before bed if you can. Yeast like Wyeast 1056 thrive in the 68-72°F range, and room temp often spikes during the day. Pitching at night guarantees consistent temps overnight, so your yeast wake up hungry and ready to work—no waiting for the house to cool down.
Troubleshooting perfect results
Cloudy or Hazy Beer
If your cream ale turns cloudy or hazy, it’s usually due to yeast or protein instability. This often happens if you didn’t cool the wort quickly enough after boiling, allowing proteins to break down.
To fix it, chill your wort to 70°F within 30 minutes using an immersion chiller or ice bath. If the haze persists, try adding 0.25 tsp gelatin (1 packet) per gallon during bottling—it’ll clarify the beer over time. 💧
Off-Flavors or Smells
If your beer tastes or smells like vinegar, rotten eggs, or something funky, you’ve got an infection. This usually means your equipment wasn’t sanitized properly or your yeast was stressed. Start over with fresh ingredients and Star San—soak everything for 15+ minutes this time.
Also, keep your fermenter at a consistent 68-72°F; temperature swings invite bad bacteria. If it’s too late, you can try blending the beer with a small batch of fresh wort (1:1 ratio) to dilute the off-flavors, but prevention is always better. 🚫
Weak or No Carbonation
Flat beer happens when you didn’t add enough priming sugar or the fermentation didn’t complete properly. Double-check your priming sugar: use 0.5 cup per gallon and stir it well.
If your beer still lacks fizz, try force-carbonating it by adding 1 tsp extra priming sugar per bottle and letting it sit for another 2-3 days. If the issue persists, your yeast might have died—next time, pitch a fresh packet and monitor fermentation closely. 🍺
Fermentation Stalls or Takes Too Long
If bubbles slow down or stop before 5-7 days, your yeast might be struggling. This can happen if the wort was too hot or cold when pitched, or if your yeast strain isn’t suited for the temperature.
Keep your fermenter between 68-72°F and use a yeast nutrient (like Wyeast Nutrient) if your wort is particularly harsh. If fermentation stalls completely, give it a few more days—sometimes yeast just needs more time. If not, repitch fresh yeast and start over. ⏳
Excessive Bitterness
If your ale tastes overly bitter, you likely boiled the hops for too long or used too much. For 1.5 oz Cascade or Centennial hops, stick to a 60-minute boil—any longer extracts harsh bitterness.
If it’s already brewed, try blending with a small batch of fresh wort (1:3 ratio) to dilute the bitterness. Next time, reduce hop boil time to 45 minutes for a smoother flavor. 🌿
Sediment in Bottles
Sediment is normal, but if it’s excessive, it might mean your yeast didn’t fully settle or your beer was over-carbonated. To reduce sediment, let your beer sit undisturbed for 24 hours before bottling. If you’re using swing-top bottles, fill them to the shoulder line to minimize headspace where sediment collects.
For extra clarity, add 1/4 tsp gelatin per gallon during bottling—it’ll help trap particles and make your beer look (and taste) smoother. 🍶
Nutrition facts
Frequently asked questions
Can I use this recipe with a different type of yeast?
You can experiment with other ale yeasts, but Wyeast 1056 or Safale US-05 are ideal for cream ale’s smooth profile. Try White Labs WLP001 for a slightly fruitier flavor, but expect more esters. Always pitch yeast at 68-72°F—too hot or cold can stress it and affect fermentation.
How do I adjust the recipe for a smaller batch?
Scale down all ingredients proportionally—reduce malt extract to 1.75 lb, hops to 0.75 oz, and sugar to 0.75 cup for a ½-gallon batch. Keep lactose at 0.25 cup to maintain creaminess. Use a 1-gallon fermenter even for smaller batches to allow headspace for fermentation.
Why is my cream ale not creamy?
Lactose is key for creaminess—ensure you added 0.5 cup liquid lactose during fermentation. If you skipped it, try adding 0.25 cup powdered milk during bottling as a substitute. Also, ferment at 68-72°F—cooler temps can slow yeast activity and reduce creaminess. Patience helps too; let it condition for 2-3 weeks before tasting.
Can I add fruit or spices after bottling?
No—adding fruit or spices after bottling risks contamination. Instead, infuse them during the last 15 minutes of boiling (like orange peel or cinnamon) or add them when pitching yeast. For post-fermentation flavors, try blending with a small batch of fresh wort after bottling, but this requires careful sanitation to avoid infections.
How long can I store unopened bottles?
Unopened bottles last 3-6 months in a cool, dark place. After opening, refrigerate and consume within 1 week to preserve carbonation and freshness. If you notice fizz fading, the beer may have gone flat—try force-carbonating with 1 tsp extra priming sugar per bottle for 2-3 days to revive it.

- 5 Lb Eye Round Roast Recipe: Slow-Braised to Melt-in-Mouth Tenderness - November 3, 2026
- 3-Hour Ciabatta Bread Recipe: Crusty Chews and Airy Holes Mastered - November 3, 2026
- 5 Fruit Salad Recipe: Vibrant Rainbow Layers With No Brown Spots - November 3, 2026