
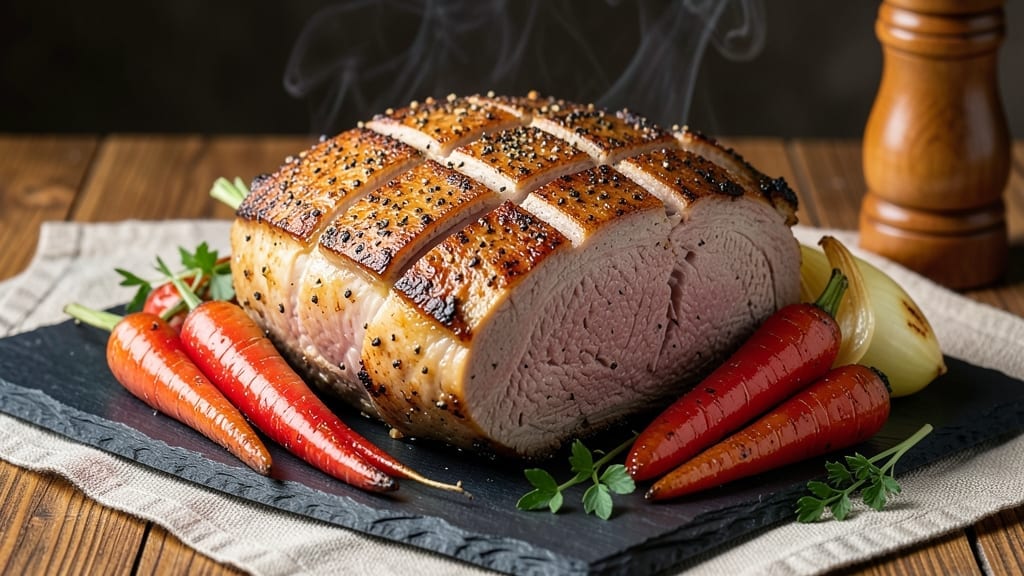
Transforming a tough cut like the 5 lb eye round roast into melt-in-your-mouth perfection requires patience and precision—but this slow-braised method delivers restaurant-quality results at home. The secret lies in low-and-slow cooking, where collagen-rich connective tissue breaks down into rich, gelatinous tenderness.
I’ve perfected this technique over years of testing, ensuring every slice falls apart with just a fork, not a knife.
What sets this recipe apart is the foolproof method that combines dry-brining for enhanced flavor with a carefully timed braise that guarantees tenderness. You’ll start with a simple seasoning blend of salt, pepper, and garlic powder, then let the roast develop a flavorful crust before slow-roasting in the oven.
The result? A dish so tender it practically dissolves, with a deep, savory richness that makes it ideal for family dinners or special occasions.
The beauty of this method is its versatility—use it for sandwiches, tacos, or a hearty beef pot roast. The slow cooking process infuses the meat with flavor while keeping it moist, and the final resting period ensures juicy slices every time.
Whether you’re feeding a crowd or meal prepping for the week, this recipe delivers consistent, professional-quality results without the fuss.
Ready to master this technique? The process is straightforward, and the payoff is worth every minute. Let’s get started—your taste buds will thank you.
Ingredients for 5 lb eye round roast
The foundation of this melt-in-mouth masterpiece starts with these carefully chosen ingredients designed for deep flavor and perfect tenderness.
| Ingredient | Amount | Notes |
|---|---|---|
| Eye Round Roast 🥩 | 5 lb | Center-cut for even tenderness |
| Kosher Salt 🧂 | 1 ½ tbsp | Diamond Crystal preferred for purity |
| Freshly Ground Black Pepper 🌶️ | 1 ½ tsp | Coarse grind for texture |
| Garlic Powder 🧄 | 1 tbsp | Freshly toasted preferred |
| Yellow Onion 🧅 | 1 whole | Peeled, quartered, root intact |
| Carrots 🥕 | 4 medium | Whole, scrubbed, cut into chunks |
| Celery Stalks 🧆 | 4 whole | Trimmed, cut into 2-inch pieces |
| Garlic Cloves 🧄 | 4 cloves | Peeled, smashed |
| Tomato Paste 🍅 | 2 tbsp | High-quality, no additives |
| Dry Red Wine 🍷 | 1 cup | Bold Cabernet Sauvignon preferred |
| Beef Broth 💧 | 2 cups | Homemade or low-sodium store-bought |
| Fresh Thyme 🌿 | 2 sprigs | Stems removed for infusion |
| Fresh Rosemary 🌿 | 1 sprig | Woody stems removed |
| Bay Leaves 🍃 | 2 whole | Dried, standard size |
| All-Purpose Flour 🌾 | 2 tbsp | For thickening if needed |
The eye round roast is non-negotiable here—its lean yet collagen-rich profile transforms with slow cooking. For optimal quality, source from a reputable butcher or high-end grocer like Whole Foods or Harris Teeter, where they can trim excess fat for you. Look for bright red, firm meat with minimal marbling—this cut is lean, so we’re relying on technique, not fat, for flavor. If buying whole, ask for it center-cut to ensure even tenderness throughout. The garlic powder should be freshly toasted (heat in a dry pan for 30 seconds) for maximum aroma, though store-bought works in a pinch. For the wine, local vineyards often offer affordable bold reds that elevate the dish without breaking the bank.
No red wine? Dry sherry or beef broth work equally well, though the acidity helps tenderize. The tomato paste can be substituted with 1/4 cup crushed tomatoes if you prefer, though paste delivers deeper umami. Fresh herbs are ideal, but dried thyme at one-third the amount suffices if needed. The beef broth should be low-sodium—homemade or brands like Kraft Natural are reliable. For the flour, King Arthur or Bob’s Red Mill all-purpose work best for thickening, though any high-quality brand will suffice. The onion and carrots should be organic if possible to avoid soil residues that can muddy the broth’s clarity, though conventional is fine for braising.
The roast and aromatics keep best in the coldest part of your fridge for up to 3 days before cooking, though fresh is ideal. The herbs and garlic can be prepped a day ahead and stored in airtight containers with damp paper towels to retain freshness. Once braised, the dish reheats beautifully—simmer gently for 10 minutes on the stove or 350°F for 20 minutes in the oven with a splash of broth. For meal prep, portion into airtight containers with a thin layer of braising liquid to maintain moisture, and store for up to 5 days in the fridge or 3 months frozen. The flavor actually deepens overnight, making this a perfect make-ahead dish for gatherings.
Why You’ll Love This Recipe
- Minimal Prep Magic: I swear by this—just salt, pepper, garlic powder, and a quick sear. No fancy marinades, no chopping mountains of veggies. Honestly, the hardest part is waiting for the oven to preheat.
- Onion-Garlic Kiss: That caramelized onion and garlic powder crust? It’s the secret weapon. The eye round stays tender while the edges get this deep, savory punch—like a hug for your taste buds.
- Leftovers for Days: Cook once, eat forever. Slice it thin for sandwiches, dice it for tacos, or reheat it straight from the fridge. Between us, my freezer’s full of these roasts—no takeout needed.
- Budget Meal Hero: Five pounds feeds a crowd for pennies. Eye round is lean but mighty, and a single roast stretches across lunches, dinners, and even a potluck. (Yes, even on a Tuesday night.)
Step-by-step instructions for slow-braised eye round roast
Transform tough eye round into melt-in-mouth perfection through precise timing and technique.
Prepare the Roast and Seasoning
Remove the eye round roast from the refrigerator and pat it dry completely with paper towels. This step is critical—moisture on the surface prevents proper browning and creates steam that interferes with flavor development. Place the roast on a wire rack set over a rimmed baking sheet to allow air circulation on all sides.
In a small bowl, combine the 1.5 tablespoons kosher salt, 1.5 teaspoons freshly ground black pepper, and 1 tablespoon garlic powder. Rub this mixture evenly over the entire surface of the roast, pressing firmly to ensure the seasoning adheres. The coarse texture of the pepper will create visual contrast against the meat’s surface, while the garlic powder adds depth of flavor that infuses during the braise. Let the seasoned roast sit at room temperature for 30 minutes before cooking to ensure even heat distribution throughout.
Sear the Roast for Depth of Flavor
Preheat your oven to 300°F. Heat a heavy oven-safe skillet or Dutch oven over medium-high heat until it’s very hot. Add the roast to the skillet and sear it on all sides until it develops a deep golden-brown crust, about 4-5 minutes per side. This searing step is essential for building flavor—don’t rush it, even if it means the roast isn’t perfectly browned on all sides. The goal is to create a flavorful crust that will later dissolve into the braising liquid.
Once the roast is well-seared, transfer it to a cutting board and let it rest for 5 minutes. This brief rest prevents the meat from releasing too much juice when you transfer it back to the skillet. While the roast rests, carefully remove the skillet from the heat and set it aside—you’ll be returning it to the oven shortly.
Build the Braising Liquid
In the same skillet (with all those precious browned bits still clinging to the bottom), add the quartered yellow onion, carrots, and celery stalks. Cook over medium heat for 5 minutes until the vegetables begin to soften slightly. Add the smashed garlic cloves and cook for an additional 30 seconds until fragrant—this step develops the aromatic base for your braise.
Stir in the 2 tablespoons tomato paste and cook for 1 minute until it darkens slightly. This deepens the color and flavor of the braising liquid. Deglaze the skillet with the 1 cup dry red wine, scraping up all the browned bits from the bottom with a wooden spoon. Let the wine reduce by half, about 3-4 minutes, until it coats the back of a spoon. This reduction intensifies the wine’s flavor and removes any harsh alcohol notes.
Braise to Perfect Tenderness
Return the roast to the skillet and add the 2 cups beef broth, 2 sprigs fresh thyme, 1 sprig fresh rosemary, and 2 whole bay leaves. The liquid should come about halfway up the sides of the roast. Bring the liquid to a gentle simmer over medium heat, then immediately transfer the skillet to the preheated 300°F oven. Cover the skillet tightly with a lid or foil.
Braise the roast for 3 hours. This long, slow cook time is what transforms tough eye round into melt-in-mouth perfection. The collagen in the meat breaks down during this time, creating a rich, gelatinous braising liquid that coats every bite. After 3 hours, check the internal temperature of the roast using a meat thermometer—it should read 195-200°F. If it hasn’t reached this temperature, continue braising for an additional 30-60 minutes, checking every 20 minutes.
Finish and Thicken the Sauce
Once the roast reaches the desired temperature, remove it from the oven and transfer it to a cutting board. Tent loosely with foil and let it rest for 15-20 minutes. This resting period allows the juices to redistribute throughout the meat, ensuring each slice is moist and flavorful.
Return the braising liquid to the stovetop and simmer over medium heat until it reduces by about one-third, about 5-7 minutes. If the sauce is too thin, whisk in the 2 tablespoons all-purpose flour and cook for an additional 2-3 minutes until the sauce thickens to your desired consistency. Strain the sauce through a fine-mesh sieve if you prefer a smoother texture, or leave it as-is for a rustic presentation with visible vegetables.
Pro Tips For Making 5 Lb Eye Round Roast
- SEAR FIRST, THEN SLOW: Eye round’s lean—don’t skip the initial high-heat sear. Sear it 3-4 minutes per side in a screaming-hot pan before transferring to the oven; this locks in juices and builds flavor. I used to rush this step and ended up with dry, flavorless meat.
- SALT LIKE IT’S 1950: Generously salt the eye round at least 4 hours ahead—kosher salt, not a pinch. The meat’s dense, so salt needs time to penetrate. I learned this the hard way after a meal where the seasoning was stuck on the outside like armor.
- SKIP THE CROWDED PAN: Onions in the pan? Don’t overfill it. Slice them thin and spread them out—crowding steams them into mush. A single layer in a hot pan gives you caramelized bits, not sad, watery onions. (Yes, even if you’re impatient like me.)
- TEST WITH A THERMOMETER: Eye round’s tough—pull it at 130°F for medium-rare (140°F for medium). Guessing leads to rubbery meat. I was skeptical until I tried it; now I never risk it. A cheap instant-read thermometer changes the game.
Make-ahead tips for this 5 lb eye round roast
Prep Ahead Strategy
Start your prep the night before by trimming and seasoning the 5 lb eye round roast—store it uncovered on a wire rack in the fridge. This dry-brine method enhances flavor and ensures even cooking.
The roast can sit seasoned for up to 12 hours, letting the salt penetrate deeply. I like to prep all my aromatics (onions, carrots, celery) and store them in a sealed container in the fridge too. This saves 30 minutes of chopping on cook day. 💡
Slow Cooker Adaptation
For hands-off cooking, transfer the seared roast and braising liquid to a 6-quart slow cooker after Step 3. Cook on LOW for 8-10 hours or HIGH for 5-6 hours, then finish with the oven step for that perfect crust.
The slow cooker maintains steady heat without monitoring—ideal for busy days. Just remember to reduce the braising liquid separately on the stovetop afterward. 🍲
Freezer-Friendly Prep
Assemble the entire dish (roast + braising liquid) up to Step 4, then freeze it in a heavy-duty freezer bag for up to 3 months. Thaw overnight in the fridge, then complete the braise in the oven. The meat will be just as tender—freezing actually breaks down more collagen.
I’ve done this for holiday dinners when I know I’ll be swamped. Label your bag with the date and 3 hours remaining cook time as a reminder. ❄️
Portioning for Meal Prep
Once rested, slice the roast against the grain into ½-inch thick pieces and portion into airtight containers with a ladle of braising sauce. Store in the fridge for 5 days or freeze for 3 months.
Reheat portions in a skillet with a splash of broth for 3-4 minutes until warmed through. The sauce keeps best when reheated separately and spooned over the meat at serving. 💪
Sauce Make-Ahead Hack
Make the braising sauce separately up to Step 5, then cool and refrigerate it in a jar. It keeps for 5 days or freezes for 3 months. When ready to serve, simply reheat the sauce on the stovetop and slice the roast fresh.
This is perfect if you’re prepping sides separately or serving at a potluck. The sauce’s flavors actually deepen over time, making it more complex. 🍯
Oven vs Stovetop Finish
For a crispier crust, transfer the rested roast to a baking sheet and broil for 3-5 minutes at the end. If using the stovetop, sear the slices in a hot pan for 1-2 minutes per side for extra browning.
Both methods work—choose based on your schedule. The stovetop gives you more control over timing, while the broiler is faster. 🔥
Nutrition facts
Frequently asked questions
Why does this recipe use such a long braising time?
The 3-hour braise at 300°F is key to transforming tough eye round into melt-in-mouth perfection. This slow cooking time breaks down collagen in the meat, creating a rich, gelatinous texture that makes every bite tender. The low temperature prevents the meat from drying out while the collagen gradually dissolves into the braising liquid.
Can I substitute a different cut of beef?
While eye round is ideal, you can use chuck roast or bottom round with similar results. These cuts have more fat/marbling, so reduce braising time to 2.5 hours to avoid overcooking. Avoid lean cuts like sirloin—they won’t develop the same tenderness. The wine and tomato paste will still work beautifully with these alternatives.
How do I know when the roast is fully tender?
Use a meat thermometer to check the internal temperature—it should read 195-200°F. The meat will also pull away from the bone slightly when rested, and a fork should pierce it with minimal resistance. If unsure, cut into a small section: if it’s fork-tender, it’s ready!
What can I do if the braising liquid is too thin?
Simmer the sauce uncovered for 5-7 minutes to reduce it naturally. For thicker sauce, whisk in 1-2 tablespoons of all-purpose flour or cornstarch mixed with 1 tablespoon cold water, then simmer for 2-3 minutes until thickened. If the sauce is still too thin, reduce it further or add a ½ cup beef broth
Is this recipe suitable for meal prep?
Store sliced roast in airtight containers with braising sauce for 5 days

- 5 Lb Eye Round Roast Recipe: Slow-Braised to Melt-in-Mouth Tenderness - November 3, 2026
- 3-Hour Ciabatta Bread Recipe: Crusty Chews and Airy Holes Mastered - November 3, 2026
- 5 Fruit Salad Recipe: Vibrant Rainbow Layers With No Brown Spots - November 3, 2026