
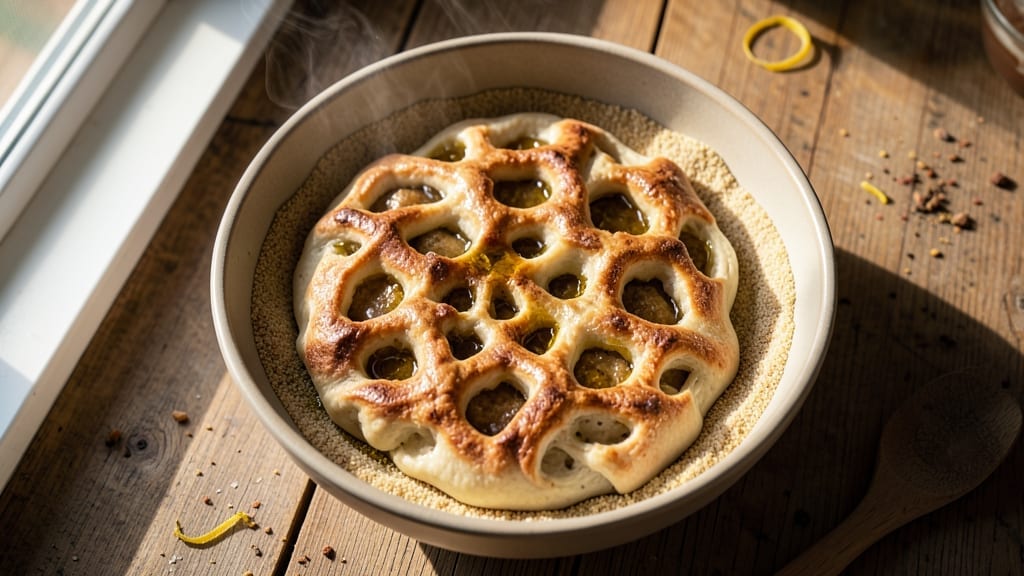
This 3-hour ciabatta bread recipe delivers the perfect balance of crispy crust and airy, chewy holes—no advanced baking skills required. The secret lies in a relaxed 3-hour process that develops deep flavor while keeping the texture light and open.
I’ve refined this method over years of testing, and it consistently produces bread that rivals artisanal bakery quality at home.
What sets this recipe apart is the two-stage proofing—an initial bulk fermentation that builds structure and flavor, followed by shaping and a final rise that creates those signature holes. With just five simple ingredients (flour, water, yeast, olive oil, and salt), you’ll achieve restaurant-worthy results without the complexity.
The dough is forgiving, and the 3-hour timeline makes it perfect for busy schedules.
By the time you pull it from the oven, you’ll have golden-brown crusts that shatter at the touch and an interior filled with those coveted air pockets. The bread stays fresh for days, making it ideal for sandwiches, dipping in olive oil, or simply enjoying with butter.
This is the kind of bread that transforms ordinary meals into something special.
Whether you’re a beginner or an experienced baker, this recipe delivers foolproof results. The key techniques are simple to follow, and I’ll walk you through every step—from mixing to baking—to ensure success. Let’s get started on making your own perfect ciabatta.
Ingredients for 3 hour ciabatta bread
Five ingredients transform into restaurant-quality ciabatta with crispy crusts and airy holes.
| Ingredient | Amount | Notes |
|---|---|---|
| All-Purpose Flour 🌾 | 5 cups | King Arthur or similar high-protein flour preferred |
| Active Dry Yeast 🍞 | ¼ oz | Or 2.5g packet, ensure it's fresh |
| Extra-Virgin Olive Oil 🫒 | ¼ cup | Fruity, not bitter variety |
| Warm Water 💧 | 1 ½ cups | 110°F/43°C ideal temperature |
| Fine Sea Salt 🧂 | 1 ½ tsp | Diamond Crystal preferred |
| Cornmeal or Semolina 🌽 | ¼ cup | For dusting baking sheets |
| Coarse Kosher Salt 🧂 | 1 tsp | For sprinkling on top |
| Ice Water ❄️ | 1 tbsp | For adjusting dough consistency |
The flour makes all the difference here. King Arthur or Caputo Tipo 00 are my go-tos—the high protein gives that perfect chewy texture. If you’re using all-purpose, add 1 extra tablespoon to compensate. Yeast is non-negotiable—check the expiration date (it’s good for 3-4 months in the fridge). The olive oil should be fruity, not bitter—California extra-virgin brands work best. For the water, 110°F is ideal—too hot kills the yeast, too cold slows fermentation. If your kitchen isn’t warm enough, microwave the water for 30 seconds to hit the perfect temp.
No yeast? Instant yeast works 1:1, but active dry is better for this recipe. Olive oil substitute? Avocado oil or melted butter (though butter adds richness that changes the flavor). Short on flour? Add 1 tbsp vital wheat gluten per cup to improve elasticity. The cornmeal/semolina is crucial—it prevents sticking and adds texture to the bottom crust. Can’t find semolina? Toasted cornmeal works too. For the salt, Diamond Crystal is less salty than Morton, so adjust to taste if using a different brand. The ice water is your secret weapon—it helps control the dough’s stickiness during shaping.
This dough is a beast when it comes to storage. Freshly baked loaves stay perfect for 3-4 days wrapped in a clean kitchen towel. For longer storage, freeze fully cooled loaves wrapped in plastic—thaw at room temp for 1-2 hours before toasting. The yeast packet? Store in the freezer for up to 6 months if you won’t use it soon. Pro tip: Make extra dough—it freezes beautifully for up to 3 months before shaping. Just thaw overnight in the fridge before your next bake. And that cornmeal? Keep it in a sealed container to prevent bugs—trust me, you don’t want to find weevils in your pantry.
Why You’ll Love This Recipe
- Pantry Staples Only: I swear by this recipe because it uses exactly what’s already in my cupboard—no weird ingredients or last-minute grocery runs. Just flour, yeast, olive oil, water, and salt. That’s it. No excuses for skipping it when you’re craving fresh bread.
- Crispy-Creamy Magic: The secret’s in the olive oil—generously brushed into the dough and baked until those pockets puff into golden, shatteringly crisp edges while staying soft inside. Honestly, it’s the kind of texture that makes you pause mid-bite just to appreciate it.
- Weeknight Hero: Between us, this is my go-to when I need dinner ready in a flash. Tear it into chunks, toss with olive oil and garlic, and you’ve got a 10-minute side for pasta or soup. (Yes, even on a Tuesday night.)
- Budget-Friendly Luxury: A loaf costs me pennies but tastes like I spent hours slaving over it. The dough’s forgiving—no need for fancy tools, just a bowl and your hands—and it keeps well for days. Freeze extras for when you’re too tired to bake.
Step-by-step instructions for 3-Hour ciabatta bread
Here’s how to create that signature open crumb and crispy crust in just three hours—no fancy equipment needed.
Activate the Yeast and Mix the Dough
In a large bowl, combine the 5 cups all-purpose flour and 1.5 teaspoons fine sea salt. Make a well in the center and add the 0.25 oz active dry yeast and 0.25 cup extra-virgin olive oil. Pour in the 1.5 cups warm water (test temperature with your wrist—it should feel warm but not hot).
Mix with a wooden spoon until a shaggy dough forms, then turn it out onto a lightly floured surface. Knead for 5 minutes by folding and pressing the dough, adding a splash of ice water if it’s too dry. The dough should be soft but slightly tacky—this high hydration is key for those signature air pockets. Let it rest for 10 minutes while you prep the next step.
First Rise and Shape the Dough
Lightly oil a large bowl, place the dough inside, and cover with a damp towel. Let it rise in a warm spot for 1 hour, or until it’s puffy and nearly doubled in size. You’ll see bubbles forming on the surface—this means the yeast is working beautifully.
After rising, punch down the dough to release air, then divide it into 4 equal portions. Shape each into a rough oval by stretching and folding the dough gently. Place them on a parchment-lined baking sheet, cover again, and let them rise for 30 minutes. They should expand noticeably but not double again—this keeps the structure intact for shaping.
Shape and Final Proof
Here’s where the magic happens. Dust your work surface with cornmeal or semolina and place each dough portion on it. Stretch the dough into a rough rectangle, then fold the sides toward the center like an envelope. Repeat this process 3-4 times—each fold creates those signature air pockets. Space the shaped loaves 2 inches apart on a baking sheet.
Cover with a towel and let them proof for 30 minutes at room temperature. The dough should feel springy when pressed gently, and you’ll see it expand slightly. Preheat your oven to 425°F with a baking stone or inverted baking sheet inside while the dough proofs—this ensures even heat distribution for that perfect crust.
Bake to Golden Perfection
Just before baking, sprinkle each loaf generously with coarse kosher salt—this enhances flavor and creates those beautiful crusty pockets. Bake for 20-25 minutes until the bread is deep golden brown and sounds hollow when tapped on the bottom. For extra crispiness, transfer to a wire rack and let cool for 10 minutes before slicing.
Resist the urge to slice immediately—the steam inside needs time to escape for that perfect crumb. The interior should be soft and airy with those signature holes, while the exterior should be crisp enough to stand up to a knife. Serve warm with olive oil for dipping, or toast slices for a rustic breakfast.
Pro Tips For Making 3 Hour Ciabatta Bread
- Use a Kitchen Scale: I learned this the hard way—measuring flour by scooping just doesn’t cut it for ciabatta. The recipe’s texture depends on precise ratios, and even a cup can vary wildly by volume. Weigh your all-purpose flour (350g for most 3-hour recipes) for consistent, airy results every time.
- Stretch, Don’t Fold: After the first rise, resist the urge to punch down the dough like you would for pizza. Ciabatta’s signature holes come from stretching the gluten strands—not kneading. Use wet hands to gently pull the dough apart, then let it relax for 10 minutes before shaping. (Yes, it’ll look messy. That’s the point.)
- Skip the Overproofing: I used to let the dough rise until it looked way too puffy, thinking more time = better flavor. Wrong. Overproofed ciabatta collapses in the oven, leaving you with a dense brick instead of that light, shatterable crumb. Aim for the dough to double in size—no more, no less—before baking.
- Brush with Olive Oil Twice: Most recipes call for one oil brush before baking, but ciabatta deserves two. After the initial brush, let the dough proof uncovered for 15 minutes, then brush again right before baking. The second coat locks in moisture and gives that golden, crisp exterior we all crave. (Pro tip: Use the good stuff—extra-virgin olive oil makes a real difference here.)
Flavor customization for this dish
Herb-Infused Variations
Add 1 tbsp fresh rosemary or thyme leaves to the dough during the initial mix for an aromatic twist. I like using Penzeys’ dried herbs—just reduce to 1 tsp—since fresh can make the dough too wet.
For a Mediterranean touch, mix in 2 tbsp finely chopped Kalamata olives with the salt before shaping. The olives add bursts of briny flavor that pair perfectly with the bread’s chewiness. 🌿
Cheesy Ciabatta Twist
Fold ½ cup shredded Parmesan into the dough after the first rise for a savory, umami-rich version. For a melty surprise, add ¼ cup mozzarella pearls during shaping—just press them into the folds so they melt into the bread during baking.
I recommend Shredded Babybel for even melting. This works especially well when serving with soups or as a pizza base.
Sweet Drizzle Options
After baking, drizzle warm loaves with honey or maple syrup while still on the baking sheet. For a gourmet touch, mix 2 tbsp honey with 1 tsp cinnamon and brush it on before baking.
The caramelization enhances the crust’s sweetness without overpowering the bread’s natural flavor. This version makes an incredible breakfast toast or dessert with whipped cream.
Spicy Kick Version
Add ½ tsp red pepper flakes to the dough for subtle heat, or fold in 1 tbsp chopped jalapeños during shaping for a spicy surprise. For extra depth, sprinkle smoked paprika over the dough before the final proof.
This version pairs beautifully with creamy dips like garlic aioli or cool yogurt sauces. Just be mindful—the heat intensifies as the bread cools. 🌶️
Nutty Crunch Additions
Press ¼ cup chopped walnuts or pecans into the dough folds during shaping for added texture. Toast the nuts first at 350°F for 5-7 minutes to enhance their flavor. For a Mediterranean twist, use pine nuts—they add a luxurious crunch that elevates the bread’s sophistication.
These additions work especially well when serving with antipasto platters or as a side for charcuterie boards.
Seasonal Flavor Swaps
In summer, swap the olive oil for avocado oil and add 1 tbsp lemon zest to the dough for a bright, citrusy flavor. For fall, incorporate 1 tsp pumpkin pie spice and fold in ¼ cup dried cranberries during shaping.
Winter calls for orange zest and a pinch of cardamom**—the warm spices complement the bread’s richness beautifully. These seasonal variations keep your ciabatta exciting year-round. 🍂
Nutrition facts
Frequently asked questions
Why does this ciabatta recipe use a 3-hour timeline instead of overnight?
This 3-hour schedule balances convenience with authentic flavor development. The 1-hour bulk fermentation builds structure while the 30-minute shaping rests create those signature air pockets. Unlike overnight methods, this approach delivers restaurant-quality texture without requiring you to plan ahead. The key is the two-stage proofing—short but effective for home bakers.
Can I make ciabatta without a baking stone?
Use a preheated inverted baking sheet or place the dough directly on the oven rack for 10 minutes before transferring to a sheet. For extra crispiness, try baking on a cast-iron skillet lined with parchment. The goal is to create steam for that open crumb—just ensure your oven is fully preheated.
What if my ciabatta turns out dense instead of airy?
Dense bread usually means the dough didn’t get enough folds during shaping or didn’t proof long enough. Try folding the dough 4-5 times instead of 3, and extend the final proof by 10 minutes if your kitchen is cool. Also check your yeast—it should be fresh (test it in warm water with sugar first). Over-kneading or using cold water can also compact the structure.
How do I store ciabatta to keep it fresh?
Wrap cooled loaves in a clean kitchen towel and store at room temperature for 3-4 days. For longer storage, freeze fully cooled bread in a ziplock bag for up to 3 months. To revive, thaw at room temperature for 1-2 hours before toasting. Avoid plastic wrap—it traps moisture and makes the bread gummy.
Can I make this recipe with whole wheat flour?
Yes, but replace 2 cups of all-purpose flour with whole wheat and add 1 extra tablespoon olive oil to maintain moisture. Whole wheat absorbs more liquid, so your dough will be stickier. Also reduce the water by 2 tablespoons to prevent a gummy texture. The result will be denser but still delicious—perfect for heartier sandwiches.

- 5 Lb Eye Round Roast Recipe: Slow-Braised to Melt-in-Mouth Tenderness - November 3, 2026
- 3-Hour Ciabatta Bread Recipe: Crusty Chews and Airy Holes Mastered - November 3, 2026
- 5 Fruit Salad Recipe: Vibrant Rainbow Layers With No Brown Spots - November 3, 2026