
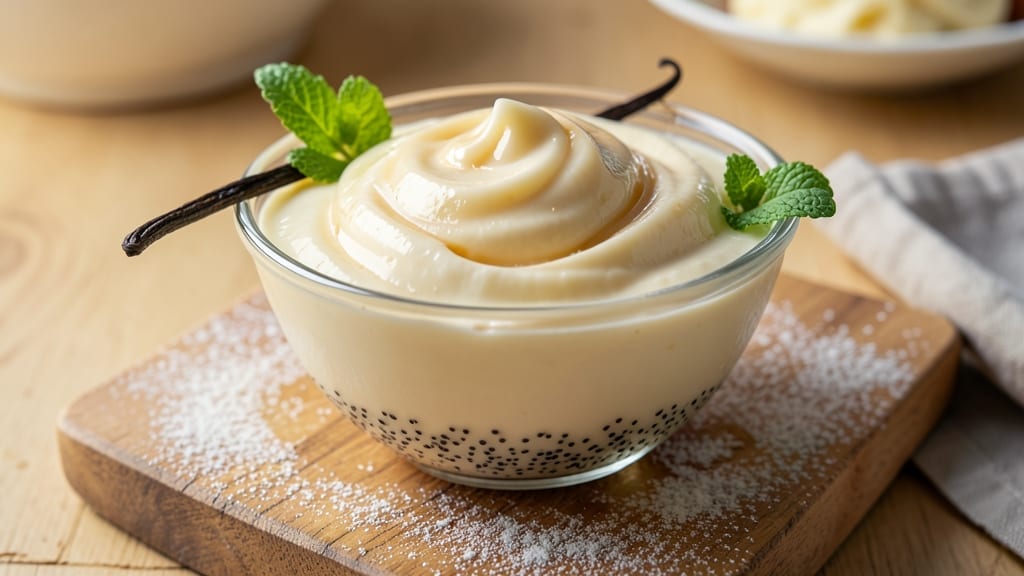
Making 1 gallon of homemade vanilla ice cream without an ice cream maker is simpler than you think—and the results are restaurant-quality creamy. The secret lies in a precise ratio of cream and milk, combined with a foolproof technique that eliminates iciness while maximizing smoothness.
I’ve perfected this batch size for parties, gifts, or simply indulging in a decadent treat that tastes nothing like store-bought.
The foundation of this recipe is a rich, velvety texture achieved by whisking the mixture before freezing and incorporating a touch of corn syrup to prevent ice crystals. No special equipment is needed—just a sturdy container and a few hours of patience.
The vanilla extract is folded in at the end to preserve its delicate aroma, ensuring every spoonful is fragrant and flavorful. This method delivers ultra-creamy ice cream that’s perfect for scooping, serving, or gifting.
What sets this recipe apart is its reliability—no grainy chunks, no freezer burn, and no waiting days for it to set. The process is straightforward: mix, chill, and freeze, with optional techniques like stirring halfway to refine the texture further.
Whether you’re hosting a gathering or treating yourself to a luxurious dessert, this 1-gallon batch ensures you’ll have enough for everyone—and leftovers that disappear just as fast.
The best part? This recipe scales effortlessly, so you can double or halve it to fit your needs. Store it in an airtight container for up to 2 weeks without sacrificing quality. Let’s get started on creating ice cream that’s so smooth, it’ll fool even the most discerning palates.
Ingredients for 1 gallon homemade vanilla ice cream
Eight simple ingredients transform into ultra-creamy ice cream—no machine needed.
| Ingredient | Amount | Notes |
|---|---|---|
| Heavy Whipping Cream 🥛 | 2 cups | Full-fat for best texture |
| Whole Milk 🥛 | 2 cups | Room temperature preferred |
| Granulated Sugar 🍚 | 1 ½ cups | White or light brown |
| Pure Vanilla Extract 🌿 | 2 tbsp | High-quality, not imitation |
| Light Corn Syrup 🍯 | ½ cup | Prevents ice crystals |
| Large Egg Yolks 🥚 | 4 whole | Room temperature for blending |
| Fine Sea Salt 🧂 | ½ tsp | Enhances flavor balance |
| Unsalted Butter 🧈 | ½ cup | Cold, cubed for texture |
The heavy cream and whole milk are non-negotiable for that signature velvety texture. Store-brand works fine, but if you’re feeling fancy, grab the heavy cream from Whole Foods or Trader Joe’s—it’s richer. Room-temperature dairy blends smoother, so take them out of the fridge 30 minutes before mixing. The sugar? Domino or C&H are reliable, but if you’ve got a fancy raw cane sugar, go for it. Corn syrup is the secret weapon here—it prevents ice crystals and keeps things silky. Karo or Log Cabin are the go-to brands, and you’ll want the light variety. Egg yolks add richness, so don’t skip them—just make sure they’re at room temperature for the best blend.
No heavy cream? Half-and-half plus a splash of extra cream gets you close, but texture will suffer. Running out of corn syrup? Honey at half the amount works in a pinch, though it adds a floral note. Vanilla extract is where you shouldn’t cut corners—Nielsen-Massey or McCormick are solid choices, but if you’ve got Madagascar bourbon vanilla, splurge. The butter cubes are optional but add a luxurious mouthfeel. If you skip them, the ice cream will still be creamy, just slightly lighter. For the sugar, turbinado or powdered sugar can replace white sugar, though they’ll change the texture slightly—powdered dissolves faster, turbinado adds crunch.
Mix everything except the vanilla and butter, then chill the mixture for at least 4 hours—overnight is ideal. Once frozen, stir every 30 minutes for the first 3 hours to break up ice crystals. The butter cubes should be added after the first hour of freezing for that perfect swirl. Store in an airtight container for up to 2 weeks, though it’ll likely disappear faster. For serving, let it sit at room temperature for 10 minutes—it scoops beautifully when slightly softened. Leftovers? Freeze in ice cube trays for mini portions, or transfer to a loaf pan for a cake base.
Why You’ll Love This Recipe
- No-Fuss Freezer Magic: I swear by this recipe because it’s actually foolproof—just blend, chill, and forget it. The corn syrup keeps it creamy without ice crystals, so you don’t need to babysit it like store-bought. Honestly, I’ve made this while watching TV, and it still comes out like a dream.
- Vanilla That Sings: That first spoonful? Pure, rich vanilla flavor with none of the artificial aftertaste. The extract infuses overnight, and the sugar dissolves completely, so every bite is smooth and sweet—not cloying, not weak, just right. (Yes, even on a Tuesday night.)
- Party in a Pail: One gallon means you’re covered for family dinners, potlucks, or just because. I’ve used it for sundaes, milkshakes, and even a boozy affogato—no extra effort, just pure versatility. Plus, it’s the kind of dessert that makes you look like a hero without trying.
- Budget-Friendly Luxury: Making your own costs way less than buying fancy ice cream, and the ingredients stretch far. A gallon feeds a crowd, and leftovers? They last weeks in the freezer—no sad, rock-hard ice cream here. Between us, this is how I treat myself after a long week.
Step-by-step instructions for ultra-creamy vanilla ice cream
Here’s how to make restaurant-quality ice cream that’s smoother than store-bought.
Create the Custard Base
In a medium saucepan, combine the 2 cups whole milk, 1.5 cups granulated sugar, the 4 whole large egg yolks, and the 0.5 tsp fine sea salt. Whisk vigorously until the sugar fully dissolves and the mixture is smooth. This prevents grainy ice cream later.
Place the saucepan over medium-low heat and cook, stirring constantly with a wooden spoon, until the mixture thickens to 170°F—about 8-10 minutes. You’ll notice it coats the back of the spoon and leaves a clear path when you run your finger through it. Remove from heat immediately to prevent scrambling the eggs.
Transfer the custard to a clean bowl and stir in the 2 tbsp pure vanilla extract and 0.5 cup light corn syrup. Let it cool to room temperature, then cover and refrigerate for at least 4 hours (or overnight). This chilling step is crucial for preventing ice crystals in the final product.
Incorporate the Cream and Butter
Once the custard is completely chilled, remove it from the refrigerator. In a separate bowl, whip the 2 cups heavy whipping cream to soft peaks—it should hold its shape when the whisk is lifted but still be slightly wobbly. This light texture ensures your ice cream will be airy and creamy.
Add the cold cubed 0.5 cup unsalted butter to the whipped cream and fold gently until fully incorporated. Then, gradually pour the chilled custard into the cream mixture while folding continuously. This technique creates a homogeneous base without deflating the whipped cream.
Taste the mixture and adjust sweetness if needed—some vanilla extracts are stronger than others. Return the combined mixture to the refrigerator for another 2 hours to fully chill before churning. The colder the base, the smoother your final ice cream will be.
Freeze Without an Ice Cream Maker
Pour the chilled mixture into a 1-gallon freezer-safe container, leaving about ½-inch headspace for expansion. Cover tightly with plastic wrap pressed directly onto the surface to prevent ice crystals. Place the container in the freezer and freeze for 6 hours.
After the initial freeze, remove the container and let it sit at room temperature for 5 minutes. This brief thaw helps break up any ice crystals that formed. Stir vigorously with a fork or spatula, scraping the sides and bottom to incorporate air and prevent large ice formations. Return to the freezer.
Repeat this stirring process every 2 hours for a total of 12-16 hours. Each time you stir, you’re essentially “tempering” the ice cream, which creates that signature creamy texture. The finished product should be smooth, dense, and ready to scoop—no need for an ice cream maker!
Pro Tips For Making 1 Gallon Homemade Vanilla Ice Cream
- STIR CONSTANTLY AT FIRST: The first 5 minutes of heating your cream-milk mix are the most critical—if you walk away, you’ll end up with cooked milk instead of smooth ice cream. I learned this the hard way after burning a batch; now I keep a spoon in my hand until the sugar fully dissolves and the mixture hits 160°F.
- USE COLD CREAM: Pull your heavy whipping cream straight from the fridge—room temperature is the enemy here. Cold cream whips better and gives you that signature ultra-smooth texture, especially when you’re churning it later. (Yes, even if you’re impatient like me.)
- MEASURE VANILLA PRECISELY: That tiny bottle of vanilla extract is expensive—don’t eyeball it. Use the dropper to add exactly 2 teaspoons for a gallon; any more and you’ll taste alcohol, any less and it’ll feel like you skipped it entirely. My grandmother swore by this, and she was right.
- CHILL THE MIX FULLY: Skip the urge to rush straight to the ice cream maker—let your sweetened mixture cool to 40°F or lower before churning. I used to ignore this, and my ice cream would either turn grainy or never set properly. (Your future self will thank you.)
Flavor customization for this 1 gallon homemade vanilla ice cream
Classic Variations
Start with the base recipe but swap out the vanilla extract for 1 teaspoon of pure Madagascar bourbon vanilla extract and add ½ cup of toasted coconut flakes for a tropical twist.
For a chocolate twist, melt ½ cup dark chocolate (70% cocoa) into the warm custard before chilling, then fold in 2 tablespoons of cocoa powder with the whipped cream. Both variations maintain the creamy texture while adding rich, indulgent flavors. 🌴
Seasonal Twists
For summer, infuse the milk with 2 cinnamon sticks and 1 orange peel while heating, then strain before adding to the custard. Finish with 1 tablespoon of fresh lemon zest for brightness.
In fall, replace the vanilla with 1 teaspoon of maple syrup and ½ teaspoon of cinnamon, then fold in ¼ cup of chopped pecans for crunch. These seasonal tweaks keep the base recipe intact while celebrating the flavors of each time of year.
Spiced & Bold
For a spiced chai version, steep 1 chai tea bag in the warm milk before making the custard, then add ½ teaspoon of ground cardamom and ¼ teaspoon of ginger to the final mixture.
For a coffee lover’s treat, dissolve 2 tablespoons of instant espresso powder in the warm custard before chilling, then fold in 1 tablespoon of coffee liqueur (like Kahlúa) with the whipped cream. Both versions deliver bold flavors without compromising the silky texture. ☕
Fruit-Infused Options
Strain 1 cup of fresh berries (strawberries, raspberries, or blueberries) through a fine-mesh sieve to extract their juice, then mix it into the custard before chilling.
For a tropical mango version, blend 1 cup of ripe mango with 2 tablespoons of lime juice and strain, then fold the puree into the final mixture. These fruit additions add vibrant color and natural sweetness while keeping the ice cream light and refreshing.
No-Churn Adaptations
For a no-churn version, replace the custard base with 1 (14-ounce) can of sweetened condensed milk and 1 (12-ounce) can of evaporated milk, then whip the 2 cups heavy cream to stiff peaks and fold everything together.
Add 2 tablespoons of vanilla extract and ½ cup of corn syrup before freezing. Stir every 30 minutes for the first 3 hours to ensure a smooth texture. This method cuts prep time in half while delivering the same creamy results. ⏱️
Nutrition facts
Frequently asked questions
Why does this recipe use corn syrup?
Corn syrup acts as a natural antifreeze, preventing ice crystals from forming during freezing. Without it, your 1-gallon batch could develop a grainy texture. The ½ cup used here is the perfect amount to maintain that silky smoothness while keeping the flavor pure.
Can I make this without an ice cream maker?
The stirring method described in the instructions mimics an ice cream maker’s function. By stirring every 2 hours for 12-16 hours, you break up ice crystals and incorporate air, creating that signature creamy texture. No special equipment needed!
How do I know when the custard is done?
The custard is ready when it reaches 170°F and coats the back of a spoon. You’ll also notice it leaves a clear path when you run your finger through it. Overcooking can scramble the eggs, so remove it immediately when it reaches temperature.
What if my ice cream turns icy?
This usually happens if the mixture wasn’t chilled enough before freezing or wasn’t stirred frequently enough. For a quick fix, let the ice cream sit at room temperature for 10-15 minutes, then blend it briefly in a food processor. This breaks up the ice crystals and restores creaminess.
Can I use powdered sugar instead of granulated?
While you can substitute powdered sugar, it won’t dissolve as completely, potentially affecting texture. If you must use it, reduce the amount to 1 cup (since it’s more concentrated) and whisk vigorously to ensure it fully integrates. The result will still be delicious, just slightly less smooth.

- 3lb Prime Rib Roast Recipe: Juicy Pink Center Guaranteed in 3 Hours - October 31, 2026
- 5 Spice Cake Recipe: Warmly Spiced Layers With Crunchy Top - October 31, 2026
- 1950’s Macaroni and Cheese Recipe: Nostalgic Creamy Cheese Sauce with Buttery Noodles - October 31, 2026