
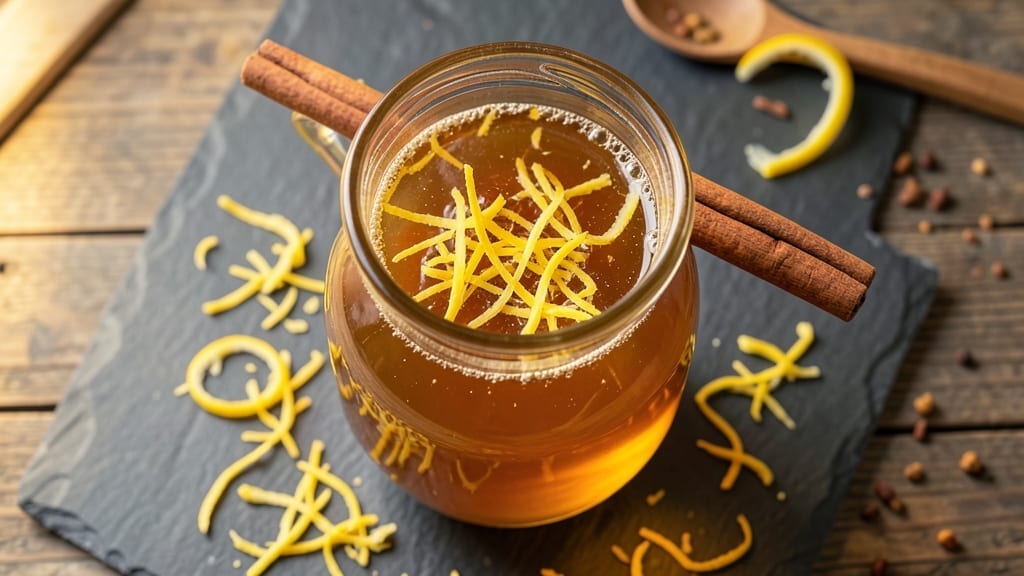
Fermenting a 1-gallon lemon ginger mead transforms simple honey, water, and spices into a vibrant, honey-infused elixir with bright citrus and warming ginger notes.
This recipe delivers a balanced, aromatic mead that’s perfect for sipping chilled or spiced with cinnamon—ideal for those who love crafting their own beverages with precision and patience.
The process begins with a honey-water solution that feeds active dry yeast, creating a gentle fermentation over 7-10 days before aging for flavor development. Lemon zest and fresh ginger add complexity, while proper sanitation ensures a smooth, reliable batch every time. No prior experience is needed—just follow the steps carefully.
By the time fermentation completes, you’ll have a golden, effervescent mead with a crisp finish and lingering spice. The lemon brightens the honey’s natural sweetness, while ginger adds a subtle kick that lingers on the palate.
Serve it chilled for a refreshing drink or warm it with a cinnamon stick for a cozy twist.
This recipe scales perfectly for gifting or enjoying at home—just adjust the aging time to suit your taste preferences. Whether you’re a beginner or an experienced fermenter, the result is a homemade mead that rivals store-bought options. Let’s get started on your first batch!
Ingredients for 1 gallon lemon ginger mead
Four pounds of honey and a splash of citrus kickstart this vibrant fermentation.
| Ingredient | Amount | Notes |
|---|---|---|
| Raw Honey 🍯 | 3 ½ lb | Light amber preferred for balance |
| Filtered Water 💧 | 12 cups | Chlorine-free preferred for fermentation |
| Active Dry Yeast 🍺 | ¼ oz | Lalvin EC-1118 or similar |
| Lemon Zest 🍋 | 2 tbsp | From 2 large organic lemons |
| Fresh Ginger 🌿 | 1 oz | Peeled, grated, organic preferred |
| Cinnamon Sticks 🍃 | 2 whole | Ceylon preferred for subtle flavor |
| Campden Tablets 💊 | 1 tablet | For sanitation, crushed |
| White Grape Juice 🍇 | ½ cup | For nutrient boost, optional |
| Diamond Crystal Kosher Salt 🧂 | ¼ tsp | For fermentation control |
| Star Anise Pods 🌶️ | 2 whole | For subtle aromatic depth |
| Plastic Food-Grade Fermentation Bucket 🧺 | 1 whole | 5-gallon with airlock |
| Airlock Fermentation Lock 🔒 | 1 whole | With rubber stopper |
| Plastic Siphon Tube 🔄 | 1 whole | For racking |
| Glass Bottles 🥛 | 4 whole | 16-oz swing-top preferred |
The honey is the soul of this mead—light amber gives that perfect balance of sweetness and complexity. Local honey from a farmers market adds unique floral notes, but store-bought works fine if it’s raw and unprocessed. Look for honey labeled ‘unfiltered’ or ‘raw’—those little bits of pollen make all the difference. The yeast? Lalvin EC-1118 is my go-to for mead, but Lalvin 71B-1122 works too if you’re using white grape juice. Both are available online or at homebrew stores—just avoid the cheap stuff from the grocery store spice aisle. The Campden tablets are non-negotiable for sanitation—crush them in a little water first, then stir into your honey-water mix.
No organic lemons? Regular lemons work fine, just wash them well. The zest is what matters—skip the juice unless you want extra tartness. Fresh ginger is ideal, but powdered ginger at half the amount gets you close in a pinch. Running short on time? Pre-grate the ginger and store it in the freezer—it keeps for months. The grape juice is optional but recommended for beginners—it feeds the yeast and prevents stuck fermentation. If you skip it, add an extra 0.25 oz of yeast. The cinnamon sticks and star anise? Buy them whole—they’re cheaper and you can reuse them in future batches. Just remember to remove them before bottling.
This mead tastes better with age, but it’s drinkable after 2 weeks of aging. Store bottles in a cool, dark place—basement or pantry works great. If you’re gifting, carbonate it first by adding a little sugar and yeast, then bottle. The fermentation bucket? Clean it with Star San before and after use—no soap residue. The ginger zest and lemon peel can be composted, but save the cinnamon sticks for your next batch. This recipe makes enough for sharing—4 bottles that’ll impress anyone who tries it.
Why You’ll Love This Recipe
- No-Fuss Fermentation: I’ll be real—this takes less effort than making coffee. Just steep ginger and lemon zest in hot water, stir in honey, pitch the yeast, and let it do its thing. No fancy equipment, no constant stirring—just a gallon jar and patience.
- Zesty-Spicy Magic: That first sip? Bright and warm all at once. The lemon zest cuts through the honey’s sweetness while the ginger adds a slow-burning kick—like a hug for your taste buds. Honestly, it’s the kind of drink that makes you want to pour another glass without thinking.
- Year-Round Crowd-Pleaser: Hot or cold, it works. Serve it chilled with dinner to cut through rich dishes, or warm it up with a cinnamon stick for cozy nights in. My in-laws thought it was “fancy” (it’s not), and my kid drinks it straight from the jar.
- Honey’s Secret Savings: A gallon costs less than three fancy sodas but lasts months in the fridge. Plus, raw honey’s natural enzymes mean no preservatives—just pure, probiotic-rich goodness. Between us? This is my go-to for parties, sick days, or when I just don’t feel like shopping.
Step-by-step instructions for fermenting lemon ginger mead
Transform simple ingredients into a vibrant, citrusy mead with this precise fermentation process.
Sanitize Equipment and Prepare the Must
Begin by crushing the 1 tablet Campden Tablets between two clean spoons to create a fine powder. Dissolve this in ½ cup of the 12 cups filtered water in a clean bowl. This solution will sanitize your fermentation bucket—critical for preventing contamination. Meanwhile, combine the 3.5 lb raw honey with the remaining 11½ cups filtered water in the plastic food-grade fermentation bucket, stirring until the honey fully dissolves. The mixture should be completely clear with no graininess.
Add the 2 tbsp lemon zest, 1 oz fresh ginger (finely grated), 2 whole cinnamon sticks, 2 whole star anise pods, and 0.25 tsp diamond crystal kosher salt to the honey-water solution. Stir gently to distribute all spices evenly. The aroma should be bright and complex—citrusy with ginger’s sharp bite and warm cinnamon undertones. Let this mixture sit at room temperature for 1 hour to allow the flavors to meld before proceeding. This initial infusion creates the aromatic foundation of your mead.
Add Nutrients and Yeast for Optimal Fermentation
After the hour-long infusion, stir in the 0.5 cup white grape juice and the Campden tablet solution. The grape juice provides essential nutrients that help the yeast thrive during fermentation. Let the must cool to 70-75°F—ideal yeast activation temperature—before adding the 0.25 oz active dry yeast. Sprinkle the yeast directly onto the surface of the liquid and stir gently to distribute it evenly. The yeast should dissolve completely within 10-15 minutes, creating a frothy foam on top.
Cover the bucket loosely with a clean kitchen towel or fermentation lid (without sealing it completely) and let it sit for 24 hours at room temperature. You’ll notice bubbles forming on the surface and along the sides of the bucket—this indicates active fermentation has begun. The aroma will become more pronounced, with a slight yeasty tang developing alongside the citrus and spice notes. This step ensures your yeast is healthy and ready for the main fermentation phase.
Primary Fermentation with Airlock
After 24 hours, attach the airlock fermentation lock to the bucket and seal it tightly. Place the bucket in a dark, temperature-stable location (between 68-72°F is ideal) for 7-10 days. During this period, the mead will ferment vigorously, producing visible bubbles in the airlock with each bubble release. Check the airlock daily—if it stops bubbling for more than 12 hours, your fermentation may have stalled. If this happens, stir the must gently to redistribute yeast and nutrients, then reseal.
The fermentation process will create a noticeable drop in volume as yeast consumes sugars and produces alcohol. After 7-10 days, taste the mead through the airlock opening (using a sanitized spoon) to check for sweetness. It should taste dry with no residual honey sweetness—this indicates most fermentable sugars have been converted to alcohol. If it still tastes sweet, allow fermentation to continue for 2-3 more days. Once dry, proceed to the next step to stabilize your mead.
Rack and Secondary Fermentation
Using the plastic siphon tube, carefully transfer the mead from the fermentation bucket into one of the 4 whole glass bottles, leaving behind any sediment that has settled at the bottom. This process, called racking, clarifies your mead by separating it from spent yeast and other particulates. Seal the bottle with its swing-top cap and return it to a dark, stable location for 30-60 days of secondary fermentation. During this time, the mead will continue to mellow and develop complex flavors.
After 30 days, open the bottle and taste the mead again. The flavors should have softened and deepened, with the lemon and ginger notes integrating harmoniously. If you prefer a drier finish, you can continue fermenting for another 30 days, but most mead drinkers find this initial period sufficient for a balanced flavor profile. The mead is now ready for bottling and aging, though it will continue to improve over time.
Bottle and Age for Maximum Flavor Development
Using the plastic siphon tube again, transfer the clarified mead into the remaining 3 glass bottles, filling each to within 1 inch of the top. Seal each bottle tightly with its swing-top cap and store them in a cool, dark place (around 55-60°F is ideal) for at least 3 months before consuming. This aging period allows the mead to mature, with flavors becoming more nuanced and the alcohol mellowing slightly.
After 3 months, your lemon ginger mead will be ready to enjoy. The color should be a beautiful golden amber, with a bright citrus aroma and a smooth, balanced flavor profile. Each bottle will yield approximately 16 ounces, with a total yield of about 48 ounces—plenty to share with friends or enjoy over time. The mead will continue to improve for up to 1 year, so don’t rush to drink it all at once. Cheers to your homemade fermentation magic!
Pro Tips For Making 1 Gallon Lemon Ginger Mead
- Sterilize Your Gear First: I learned this the hard way—skipping sanitization leads to cloudy, funky mead. Boil your fermenter, airlock, and tools in hot water for 10 minutes before use, even if it feels overkill. Trust me, that extra 15 minutes now saves weeks of troubleshooting later.
- Grate Ginger Finely: Too much ginger chunks = uneven flavor. Use a microplane or fine grater for the ginger, then strain it out after steeping in the honey-water mix. This gives you bright, consistent ginger notes without bitterness creeping in over time.
- Don’t Rush the Yeast: Active dry yeast needs patience—mix it with a bit of honey and warm water first, then let it sit for 10 minutes until foamy. Dumping it dry into your gallon of honey-water is like throwing a cold engine into gear: it’ll sputter and fail to start properly.
- Use Cold Water for Pitching: After the honey-water mix cools to room temp, chill it in the fridge for 2 hours before adding yeast. The shock slows fermentation just enough to give the yeast time to activate fully, preventing a violent kick that can overflow your fermenter in the first 24 hours.
Pro cooking tips for this dish
Temperature Control
Fermenting mead requires precise temperature management—ideal range is 68-72°F during primary fermentation. I use a fermentation chamber (a small cooler with a heating pad) to maintain consistency, especially in summer. If your kitchen fluctuates, move the bucket to a closet or basement.
Too hot (80°F+) speeds fermentation but risks off-flavors; too cold (60°F) slows yeast activity. A digital thermometer (like the Thermoworks TH5) is worth the investment for accuracy. 🌡️
Yeast Activation Tricks
Before adding yeast, ensure your must is between 70-75°F—this is non-negotiable for optimal yeast performance. I pre-warm the honey-water mixture by placing the bucket in a sink of warm (not hot) water for 10-15 minutes.
For stubbornly cold environments, use a 100W incandescent bulb (not LED) to gently warm the bucket. Sprinkle yeast directly onto the surface—never mix it into cold liquid. Stir gently after 10 minutes to confirm it’s dissolved; if it sinks, your yeast is dead or the temperature’s off. 🍺
Flavor Infusion Hacks
For deeper lemon and ginger notes, I steep the zest and grated ginger in ½ cup hot water for 10 minutes before adding to the must. This extracts more oils and volatiles.
To prevent bitterness, remove cinnamon sticks and star anise after 3 days of fermentation—longer steeping can make them overpowering. For extra brightness, add 1 tsp lemon juice during bottling (after aging). The key is balance: ginger should warm, lemon should lift, and spices should harmonize—not compete. 🍋
Stuck Fermentation Fix
If bubbles in your airlock stop for 12+ hours, your fermentation may have stalled. First, check the temperature—yeast needs 68-72°F to work. If temps are correct, stir the must gently to redistribute yeast and nutrients.
For stubborn cases, add ½ tsp yeast nutrient (like Fermaid O) or 1 tbsp honey to feed the yeast. If all else fails, pitch a ½ packet fresh yeast (like Lalvin EC-1118) to kickstart fermentation. Patience is key—some batches take 14 days to fully ferment. ⚡
Clarifying Your Mead
For crystal-clear mead, rack it twice: first after 7-10 days of primary fermentation, then again after 30 days of aging. Use a fine mesh strainer or clarifying agent like PVPP (polyvinylpolypyrrolidone) for stubborn haze. Chill the mead to 35°F before racking—cold temperatures help sediment settle faster.
If you’re short on time, bentonite clay (used sparingly) can speed up clarification, but taste test first to avoid off-flavors. A little haze doesn’t ruin the drink, but clarity makes it look (and taste) professional. 💫
Nutrition facts
Frequently asked questions
Why does this recipe use raw honey instead of processed honey?
Raw honey contains natural enzymes, pollen, and trace minerals that enhance flavor complexity and fermentation. Processed honey is filtered too much, losing these beneficial components. For this lemon ginger mead, raw honey’s floral notes complement the citrus and ginger beautifully while supporting healthier yeast activity.
Can I substitute fresh ginger with powdered ginger?
Yes, but at half the amount—0.5 oz powdered ginger instead of 1 oz fresh. Fresh ginger provides more aromatic oils, but powdered works in a pinch. For best results, steep powdered ginger in ½ cup hot water for 10 minutes before adding to the must to extract maximum flavor.
How do I know when primary fermentation is complete?
Fermentation is done when the airlock stops bubbling for 12+ hours and the mead tastes dry (no residual honey sweetness). Test by tasting through the airlock opening with a sanitized spoon. If it’s still sweet, let it ferment another 2-3 days. The temperature should stay between 68-72°F—colder temps slow fermentation.
What should I do if my mead develops a vinegar smell?
This usually means contamination by acetic acid bacteria. If detected early (within 3 days), remove the airlock, cover loosely with a cloth, and add ½ oz potassium sorbate to stop fermentation. If the smell is strong, discard the batch. To prevent this, always sanitize equipment and use chlorine-free water. Future batches should use a fermentation chamber to maintain 68-72°F consistently.
How long can I store unopened bottles of lemon ginger mead?
Properly sealed bottles will keep for 1-2 years in a cool, dark place. The mead continues to age and improve over time, developing deeper flavors. After opening, refrigerate and consume within 1 month. For longer shelf life, use sterilized swing-top bottles and store them horizontally to minimize oxygen exposure.

- 3lb Prime Rib Roast Recipe: Juicy Pink Center Guaranteed in 3 Hours - October 31, 2026
- 5 Spice Cake Recipe: Warmly Spiced Layers With Crunchy Top - October 31, 2026
- 1950’s Macaroni and Cheese Recipe: Nostalgic Creamy Cheese Sauce with Buttery Noodles - October 31, 2026