
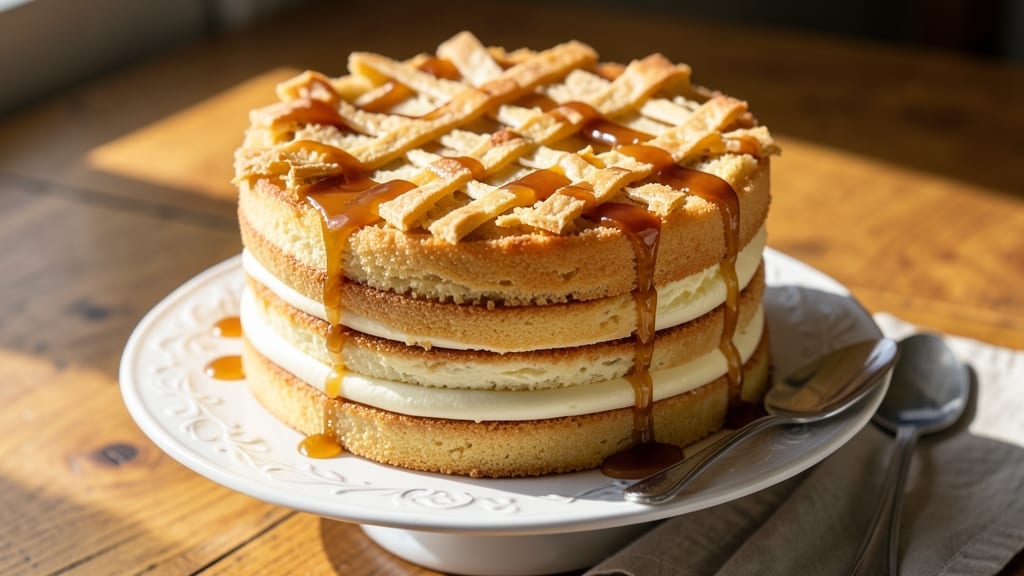
This 12 spoon cake recipe delivers delicate, layered dessert perfection with minimal fuss—each bite is a tender, melt-in-your-mouth surprise. 💛 The traditional Scandinavian technique transforms simple ingredients into a showstopping dessert that feels effortless yet impressive.
What makes it special is the layering method: alternating creamy custard and buttery cake batter baked in a single pan, creating bite-sized gems with just the right balance of richness and lightness.
The beauty of this recipe lies in its simplicity: no fancy equipment, no complicated steps, just a few key techniques. You’ll mix a smooth custard base and a tender cake batter, then layer them in a greased pan before baking until golden.
The secret to success? Patience during cooling—allowing the layers to set properly ensures clean slices and that signature tender crumb.
What you’ll end up with is a tray of mini dessert bites that look elegant enough for a holiday table but are easy enough for a weeknight treat. The custard layers stay velvety, the cake batter holds its shape, and each spoonful delivers a perfect harmony of flavors.
Serve chilled with a dusting of powdered sugar or fresh berries for a touch of brightness.
This recipe scales beautifully, making it ideal for parties, potlucks, or satisfying your own sweet tooth. The traditional method has been passed down through generations, proving that sometimes the simplest recipes create the most memorable desserts. Let’s get baking!
Ingredients for 12 spoon cake
Twelve delicate layers of custard and cake batter—simple ingredients, Scandinavian magic.
| Ingredient | Amount | Notes |
|---|---|---|
| Unsalted Butter 🧈 | 1 cup | Cold, cubed for custard |
| Granulated Sugar 🍚 | 1 ½ cups | Superfine preferred for smoothness |
| Large Egg Yolks 🥚 | 4 whole | Room temperature for blending |
| All-Purpose Flour 🌾 | ¾ cup | Sifted for light texture |
| Milk 🥛 | 1 cup | Whole milk for richness |
| Vanilla Extract 🌿 | 1 tbsp | Pure Madagascar preferred |
| Pinch of Salt 🧂 | ⅛ tsp | Fine sea salt |
| Powdered Sugar 🍚 | 1 cup | For dusting finished cakes |
| Large Egg Whites 🥚 | 4 whole | Room temperature, beaten stiff |
| Baking Powder 🍞 | 1 tsp | Aluminum-free preferred |
| Lemon Zest 🍋 | 1 tsp | Freshly grated for brightness |
| Fresh Raspberries 🍓 | ½ cup | Optional, for garnish |
The butter and sugar form the custard’s golden foundation. Use European-style butter (like Plugrá) for higher fat content—it creates a silkier texture. The egg yolks should be at room temperature to blend smoothly; cold yolks create lumps. For the flour, King Arthur brand is my go-to—its protein level ensures tender layers. If you can’t find superfine sugar, pulse regular granulated sugar in a food processor for 30 seconds. The vanilla extract should be pure, not imitation—Madagascar Bourbon adds depth that artificial extracts can’t replicate.
No vanilla extract? A 1 tsp vanilla bean paste works beautifully, or even a scraped vanilla pod. Substitute milk with heavy cream for extra richness, but reduce by 2 tbsp to maintain balance. For a citrus twist, swap lemon zest for orange zest at double the amount. The egg whites require patience—beat them until stiff peaks form, but don’t overmix or they’ll turn grainy. If you’re baking in a high-altitude area, add 1 tbsp extra sugar to the custard mixture. The baking powder is crucial for the cake layers—use fresh baking powder, not baking soda, or your cakes will be dense.
The custard mixture can be prepared a day ahead and stored in the fridge, covered with plastic wrap. The cake batter should be folded into the custard just before baking. Once baked, let the tray cool completely on a wire rack—at least 2 hours—before chilling in the fridge. Serve at room temperature or chilled, dusted with powdered sugar. The cakes keep well in an airtight container for 5 days in the fridge or 2 months frozen. For presentation, arrange on a tiered stand with fresh berries between layers.
Why You’ll Love This Recipe
- No Fuss, Foolproof: I swear by this recipe—just melt butter, mix yolks and sugar, fold in flour, and steam. No rolling, no shaping, no stress. The only tool you need is a spoon (and maybe a timer).
- Buttery-Golden Magic: That moment when the cake pulls away from the pan, crisp on the outside with a tender crumb inside? It’s the butter and sugar doing all the work. Honestly, the first bite makes you question why you ever bought store-bought pastries.
- Breakfast or Dessert: Serve them warm with a drizzle of honey for breakfast, or dust with powdered sugar for an after-dinner treat. My kids grab them straight from the fridge for snacks—no judgment here.
- Pantry Staples Only: Five ingredients, minimal effort, and you’ll have a batch ready in under an hour. Between us, I’ve made these with expired flour and still ended up with something delicious. Budget-friendly? More like pocket-friendly.
Step-by-step instructions for mini spoon cakes
Master the delicate art of spoon cake baking with these precise, foolproof steps.
👨🍳 Step 1: Prepare the Custard Base
In a medium saucepan, melt the 1 cup unsalted butter over low heat until fully liquid but not browned. Remove from heat and let cool slightly. In a separate bowl, whisk together the 1.5 cups granulated sugar and 4 whole large egg yolks until pale and slightly thickened—this should take about 3-4 minutes with a hand mixer.
Gradually whisk in the melted butter, then add the 1 cup milk, 1 tablespoon vanilla extract, and 1 teaspoon lemon zest. Stir in the 0.75 cup all-purpose flour and 1 teaspoon baking powder until smooth. Place the mixture over medium-low heat and cook, stirring constantly with a wooden spoon, until it thickens enough to coat the back of the spoon—this should take about 5-7 minutes. The custard should be thick but still pourable, not scrambled.
🍳 Step 2: Whip the Egg Whites to Stiff Peaks
While the custard cooks, beat the 4 whole large egg whites in a clean, grease-free bowl using an electric mixer. Add the pinch of salt and beat on medium speed until soft peaks form. Increase the speed to high and continue beating until the egg whites form stiff, glossy peaks that hold their shape when the whisk is lifted—this typically takes about 3-5 minutes.
Real talk: Don’t rush this step. Overmixing can make the egg whites grainy, and undermixing won’t provide enough structure for those perfect domes. The meringue should be thick enough to hold its shape when you lift the bowl upside down. If it’s not quite there, keep beating for another 30 seconds.
🥘 Step 3: Fold Custard into Meringue Gently
Once both the custard and egg whites are ready, immediately fold one-third of the meringue into the custard using a spatula, cutting down through the center and gently folding from the bottom. This step is critical—don’t overmix or you’ll deflate the meringue. After the first fold, add the remaining meringue in two more additions, again cutting through the center and folding gently from the bottom.
The mixture should be smooth with no streaks of white or yellow. If you see any unincorporated custard, do one final gentle fold. The batter should be thick and hold its shape when spooned—this ensures those perfect mini cakes. Transfer the batter to a piping bag fitted with a ½-inch round tip for even dispensing.
🔥 Step 4: Bake the Spoon Cakes
Preheat your oven to 350°F and line two baking sheets with parchment paper. Pipe 12 even dollops of batter onto the prepared sheets, spacing them about 2 inches apart. The dollops should be about 1 inch in diameter—use a spoon to gently shape them if needed. Bake for 12-14 minutes until the tops are golden brown and the edges are set but still slightly soft.
Here’s the thing—don’t overbake. You want them to hold their shape but still be tender inside. They’ll continue cooking slightly after you remove them from the oven. The centers should look slightly underdone when you take them out, but they’ll firm up as they cool. Rotate the pans halfway through baking for even browning.
🍽️ Step 5: Dust and Garnish
Remove the spoon cakes from the oven and let them cool on the baking sheets for 5 minutes. Then transfer them to a wire rack to cool completely. Once cooled, dust the tops generously with the 1 cup powdered sugar using a fine-mesh sieve. For garnish, halve the 0.5 cup fresh raspberries and place a half on top of each cake.
The powdered sugar should create a delicate, snowy finish that contrasts beautifully with the golden-brown cakes. The raspberries add a pop of color and a bright, tart contrast to the rich custard. Serve immediately for the best texture—these delicate treats are best enjoyed fresh from the oven.
Pro Tips For Making 12 Spoon Cake
- Whisk Butter & Sugar Foamy: Beat the butter and sugar until it’s pale, thick, and almost fluffy—like a cloud that could float away. I used to stop when it looked light, but this recipe rewards extra time; the yolks will blend in smoother and the texture stays tender.
- Measure Yolks Precisely: Use a kitchen scale for yolks—12 large yolks should weigh about 180g. I learned this the hard way after making a batch that turned dense; too few yolks = dry cake, too many = greasy mess.
- Sift Flour Twice: Don’t skip the second sift—especially if your flour’s been sitting in the pantry. The first sift removes lumps, but the second ensures no hidden grit ruins the silky finish. (Yes, it’s tedious, but your future self will notice.)
- Bake Until Springy: Test doneness by pressing the center—it should bounce back immediately like a trampoline. Overbaking turns these delicate cakes into hockey pucks, and no one wants that. Pull them when the edges are set but the middle still jiggles.
Common mistakes when making this dish
Overmixing the Batter
This is the #1 mistake that ruins spoon cakes—overmixing the meringue or folding too aggressively. When you fold the custard into the egg whites, be gentle! Use a spatula to cut through the center and lift from the bottom.
If you see streaks of yellow custard after folding, do one final light fold. Overmixing deflates the meringue, causing flat, dense cakes instead of light, domed treats. 🥄
Skipping Room Temp Ingredients
Cold egg yolks or whites create lumps in the custard or prevent proper meringue formation. Let your eggs sit in warm water for 10 minutes before using. I always test by pressing a yolk—if it springs back, it’s ready.
Cold butter can also cause uneven textures, so let it soften slightly before melting. Trust me, this small step makes a huge difference in texture.
Incorrect Baking Time
Underbaking leaves them too soft, while overbaking makes them dry. The cakes should be golden brown with slightly soft edges when done—12-14 minutes at 350°F. They’ll firm up as they cool.
A toothpick inserted should come out with a few moist crumbs, not wet batter. Look for the edges pulling away from the parchment slightly—this is your cue they’re ready. 🕒
Poor Layering Technique
If you’re making the traditional layered version (not mini cakes), pour the custard into the pan first, then carefully layer the cake batter on top. Don’t mix them together!
The layers should stay distinct. For mini cakes, use a piping bag with a ½-inch tip for even dollops. Uneven layers create inconsistent textures—practice makes perfect here.
Rushing the Cooling Process
These cakes need time to set properly. After baking, let them cool on the sheet for 5 minutes, then transfer to a wire rack for at least 2 hours before chilling. Rushing this step causes them to crumble when you try to slice or serve.
The longer they cool, the cleaner your slices will be. I’ve learned this the hard way—patience pays off with perfect layers! ⏳
Using Old Ingredients
Baking powder loses potency over time, causing flat cakes. Check your baking powder’s freshness—it should be within 6 months of purchase. Old vanilla extract can also affect flavor.
For the custard, use European-style butter (like Plugrá) for better fat content. Fresh ingredients make all the difference in achieving that signature tender crumb and rich custard flavor.
Nutrition facts
Frequently asked questions about 12 spoon cake
Why are they called “12 spoon cakes”?
The name comes from the traditional Scandinavian method where you use exactly 12 spoonfuls of batter to create the perfect mini cakes! Each spoonful makes one delicate dome, and the number 12 holds cultural significance as a lucky number in many European traditions. The technique dates back centuries, originally made in individual ramekins.
Can I make these without a piping bag?
If you don’t have a piping bag, use a ziplock bag with a tiny corner snipped off. Or simply spoon the batter directly onto the baking sheet, gently tapping to create even mounds. The key is to keep the dollops about 1 inch in diameter for consistent baking. Just be patient—they’ll spread slightly during baking.
How do I store them for maximum freshness?
Keep them in an airtight container at room temperature for up to 2 days, or refrigerate for 5 days. For longer storage, freeze the baked cakes (without powdered sugar) for up to 2 months. Thaw overnight in the fridge before serving. The powdered sugar should always be added fresh before eating.
What’s the secret to getting clean layers?
Patience is key! Let the cakes cool completely on a wire rack for at least 2 hours before refrigerating. Chill in the fridge for 4+ hours to set the layers perfectly. When ready to slice, use a serrated knife and dip it in hot water between cuts. This ensures clean slices with no crumbling.
Can I make these gluten-free?
Yes, but with adjustments. Replace the all-purpose flour with a 1:1 gluten-free baking flour blend (like Bob’s Red Mill) and add ½ teaspoon xanthan gum. The custard layer will remain the same. Note that gluten-free versions may be slightly denser. Also, use a gluten-free baking powder to ensure proper rise.

- 3lb Prime Rib Roast Recipe: Juicy Pink Center Guaranteed in 3 Hours - October 31, 2026
- 5 Spice Cake Recipe: Warmly Spiced Layers With Crunchy Top - October 31, 2026
- 1950’s Macaroni and Cheese Recipe: Nostalgic Creamy Cheese Sauce with Buttery Noodles - October 31, 2026