
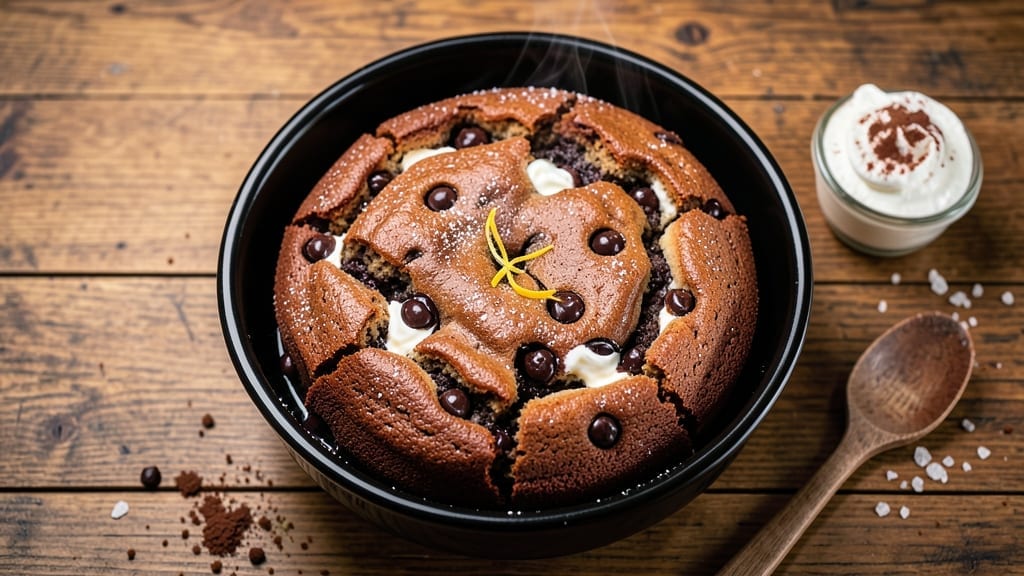
Mastering a 1 kg chocolate cake with dense layers and fudgy centers transforms any celebration into a showstopper. This recipe delivers professional-level results using precise techniques that balance moisture and structure—critical for a cake this size.
The secret lies in proper ingredient ratios and baking times, ensuring every slice meets expectations without crumbling or drying out.
What sets this recipe apart is its foolproof method for achieving uniform density throughout the entire cake. We use a combination of melted butter and sour cream to create a tender crumb, while a precise egg-to-flour ratio prevents cracking.
The baking process involves two stages—an initial low-temperature bake followed by a higher-heat finish—to develop that signature fudgy texture in the center.
By the time you pull this cake from the oven, you’ll have perfectly golden layers with a crackly top and a moist, velvety interior that melts in your mouth.
The rich chocolate flavor shines through without being overpowering, thanks to a balanced sweetness level that works for both casual gatherings and formal occasions. This is the kind of cake that earns second helpings and compliments.
Ready to impress? This recipe scales beautifully for special occasions while remaining approachable for home bakers. We’ll cover everything from ingredient prep to baking techniques, plus troubleshooting tips to ensure success. Let’s create a showstopping chocolate masterpiece that stands out at any table.
Ingredients for 1 kg chocolate cake
Precision meets indulgence: twelve ingredients for a 1 kg showstopping chocolate cake.
| Ingredient | Amount | Notes |
|---|---|---|
| Unsalted Butter 🧈 | 1 ¼ cups | Melted and cooled to room temperature |
| Granulated Sugar 🍚 | 2 ¼ cups | Superfine preferred for even texture |
| Dark Chocolate Chips 🍫 | 1 ¾ cups | 70% cocoa, high-quality brand |
| All-Purpose Flour 🌾 | 2 ½ cups | Sifted, spooned lightly |
| Cocoa Powder 🍫 | ¾ cup | Dutch-processed, unsweetened |
| Sour Cream 🥛 | 1 cup | Full-fat for moisture retention |
| Large Eggs 🥚 | 6 whole | Room temperature, separated |
| Baking Powder 🧂 | 2 tsp | Aluminum-free for stability |
| Salt 🧂 | ½ tsp | Fine sea salt preferred |
| Vanilla Extract 🥛 | 2 tsp | Pure Madagascar bourbon |
| Instant Espresso Powder ☕ | 2 tsp | Enhances chocolate depth |
| Milk 🥛 | ¾ cup | Whole milk for richness |
| Vegetable Oil 🫒 | ½ cup | Light, neutral flavor |
The butter and chocolate form the cake’s soul—European-style butter (like Plugrá) and Valrhona or Callebaut chocolate elevate flavor dramatically. For the flour, King Arthur or Gold Medal brands yield consistent results, but sift it thoroughly to avoid dense layers. The sour cream is non-negotiable; full-fat La Choy or Breyers prevent dryness. If using supermarket chocolate chips, opt for Ghirardelli or Guittard—avoid generic brands that melt unevenly. Pre-measure all dry ingredients using a digital kitchen scale for accuracy, especially the cocoa powder which can vary in density.
No sour cream? Greek yogurt at double the amount works in a pinch, though texture may differ slightly. Substitute milk with evaporated milk for extra richness or almond milk for a lighter option—though expect a denser crumb. For chocolate alternatives, chopped dark chocolate bars (70-72% cocoa) replace chips 1:1. The espresso powder enhances chocolate flavor without bitterness—Starbucks Via or Nescafé work well. If unavailable, 1 tsp instant coffee suffices. For gluten-free adaptation, replace flour with a 1:1 baking blend** (like Bob’s Red Mill) and reduce baking powder to 1.5 tsp.
Store butter and chocolate at room temperature for 30 minutes before measuring to ensure smooth incorporation. Pre-sift dry ingredients into a large mixing bowl and keep them covered until ready to use. The cake batter should rest for 20-30 minutes before baking to develop flavor. For long-term storage, wrap cooled layers tightly in plastic wrap then aluminum foil, keeping them in the fridge for up to 5 days or freezer for 3 months. To assemble, use chocolate ganache** between layers for professional results—scale the ganache recipe to match your cake’s size.
Why You’ll Love This Recipe
- Here’s what sold me: the dark chocolate chips melt into pockets of gooey heaven, while the cocoa powder keeps it from being too heavy. That first bite? Crumbly yet moist, with just enough sweetness to satisfy without cloying. (Honestly, my coffee tastes better after this.)
- No Mixer Needed: I swear by this—just a bowl and a whisk. The butter and sugar get creamed by hand (yes, it’s a workout, but worth it), and the cocoa powder dissolves like a dream. No electric gadgets, no fuss, just pure chocolate magic with minimal elbow grease.
- Rich but Balanced: Here’s what sold me: the dark chocolate chips melt into pockets of gooey heaven, while the cocoa powder keeps it from being too heavy. That first bite? Crumbly yet moist, with just enough sweetness to satisfy without cloying. (Honestly, my coffee tastes better after this.)
- Party-Proof Portion: This recipe feeds 10-12 easily—perfect for birthdays, book clubs, or when your friend finally invites you over for dinner. Slice it thick, and you’ve got instant dessert credibility. (Between us, it’s also my go-to for “I’ll just make a little” that somehow disappears in 24 hours.)
Step-by-step instructions for 1 kg chocolate cake
Mastering this dense, fudgy chocolate cake requires precision and patience—every step builds toward that signature moist crumb and rich flavor.
Prepare the Dry Ingredients
In a medium bowl, sift together the 2.5 cups all-purpose flour, 0.75 cup cocoa powder, 2 tsp baking powder, and 0.5 tsp salt. Whisk gently to combine, breaking up any lumps in the cocoa powder. This ensures even distribution throughout the batter and prevents dry pockets in the cake.
Set aside the dry mixture. The reason for sifting is twofold: it aerates the flour slightly for a lighter texture, and it prevents the cocoa from settling unevenly. I like to whisk the dry ingredients over the bowl to catch any stray particles that might fall through the sift.
Cream Butter and Sugars
In a stand mixer fitted with the paddle attachment, beat the 1.25 cups unsalted butter and 2.25 cups granulated sugar on medium speed for 4-5 minutes. The mixture should become light and fluffy, nearly doubling in volume. Scrape down the sides of the bowl with a rubber spatula to ensure even mixing.
This creaming process incorporates air into the batter, which is crucial for achieving that tender, moist crumb. If you’re using a hand mixer, increase the time to 6-7 minutes—electric mixers work faster but require less effort. The sugar should dissolve completely, and the texture should resemble thick pudding.
Add Wet Ingredients Gradually
Add the 6 whole large eggs, one at a time, mixing well after each addition. Then stir in the 2 tsp vanilla extract, 2 tsp instant espresso powder, 1 cup sour cream, 0.75 cup milk, and 0.5 cup vegetable oil. Mix on low speed until just combined—about 1-2 minutes. Avoid overmixing, which can develop gluten and make the cake dense.
The espresso powder might seem unusual, but it enhances the chocolate flavor without adding bitterness. The sour cream adds moisture and richness, while the oil ensures a tender crumb. Mix until the batter is smooth but still slightly thick—it should hold its shape when spooned.
Fold in Chocolate and Dry Ingredients
Gently fold in the 1.75 cups dark chocolate chips using a silicone spatula, reserving a few for the top. Then, gradually add the dry ingredients in three parts, mixing just until incorporated after each addition. The batter will be thick and fudgy—this is exactly what we want for that dense, moist texture.
Don’t overmix at this stage. The goal is to combine everything without activating the gluten in the flour. The batter should be thick enough to hold its shape when dropped from a spoon, but still smooth. If it looks too stiff, add 1-2 tablespoons of milk to loosen it slightly.
Bake in Layers for Even Cooking
Preheat your oven to 350°F. Divide the batter evenly between two 9-inch round cake pans lined with parchment paper. Sprinkle the reserved chocolate chips evenly over the top of each layer. Bake for 30-35 minutes, or until a toothpick inserted into the center comes out with moist crumbs but no wet batter.
The key here is patience. The cake should be set but still slightly underbaked—it will continue cooking as it cools. Rotate the pans halfway through baking for even browning. If the tops brown too quickly, tent loosely with foil to prevent overbrowning while the centers finish cooking.
Pro Tips For Making 1 Kg Chocolate Cake
- MELT THE CHOCOLATE RIGHT: Mix the cocoa powder and sugar first, then pour in the melted butter—this prevents clumping. I learned this the hard way when my first batch turned into a lumpy mess.
- WEIGH YOUR FLOUR: Scooping flour from the bag packs too much air, making your cake dense. Use a kitchen scale and spoon it in lightly, leveling off with a knife—your cake’s texture will be lighter and more consistent.
- DON’T OVERMIX THE BATTER: After adding the eggs, mix just until combined—overworking it develops gluten, which turns your rich chocolate cake into a chewy brick. Stop when there are a few dry spots left.
- BAKE UNTIL SET, NOT DONE: A toothpick with moist crumbs is fine—chocolate cake should be slightly underbaked for fudginess. If it’s bone dry, you’ve gone too far, and the texture will be dry and crumbly.
Storing and reheating your 1 kg chocolate cake
Room-Temp Storage
Let your cake cool completely on a wire rack before storing. Once fully cooled, wrap each layer tightly in plastic wrap to prevent drying, then place them in an airtight container with a parchment-lined lid.
Store at room temperature for up to 3 days—the cake will actually improve as the flavors meld. I like using Wilton cake carriers for easy transport and display. 🧁
Refrigerator Refresh
For longer storage, refrigerate the cake in the same airtight container for up to 5 days. The cold temperature helps preserve moisture, but the texture may become slightly denser.
To revive, let it sit at room temperature for 30 minutes before serving. I often reheat slices in the microwave for 10-15 seconds to restore that warm, gooey texture. 💫
Freezer Preservation
For maximum shelf life, freeze the cake layers wrapped in plastic wrap and then in aluminum foil. Place them in a freezer-safe bag with all air removed to prevent freezer burn.
This method keeps the cake fresh for up to 3 months. Thaw overnight in the fridge before assembling—never microwave frozen cake directly, as it can create uneven textures. 🥶
Reheating Secrets
For the best results, reheat individual slices in a 350°F oven for 5-7 minutes—this restores moisture without drying out the edges. If using a microwave, cover the slice with a damp paper towel and heat for 10-12 seconds on medium power.
For a restaurant-style finish, brush the warm cake with warmed chocolate ganache before serving. 🔥
Layer Assembly Tips
When reassembling, use chocolate buttercream or ganache as a glue—about ½ cup per layer. Spread evenly with an offset spatula to avoid overfilling. Let each layer sit for 5 minutes between additions to prevent collapsing.
For extra stability, chill the cake in the fridge for 1 hour before decorating. 💪
Serving Suggestions
Serve slices at room temperature for the best texture. Pair with vanilla ice cream or whipped cream for contrast. For a decadent touch, dust with powdered sugar or drizzle with melted chocolate. Store leftovers in the fridge for up to 2 days after serving. 🍫
Nutrition facts
Frequently asked questions
Why does this recipe use both melted butter and vegetable oil?
This combination creates the perfect balance of moisture and structure. The melted butter adds rich flavor while the vegetable oil keeps the cake tender and prevents dryness. Together, they ensure a dense yet moist texture that stays fresh for days.
Can I bake this cake in a single 9-inch pan instead of two?
Not recommended! This recipe is designed for two 9-inch pans to achieve the proper layer density. A single pan would result in a thick, uneven cake that may not bake through properly. For a single-layer version, reduce the batter by half and bake in one pan for 45-50 minutes.
What’s the best way to test if the cake is fully baked?
Use the toothpick test: insert it into the center of the cake. If it comes out with moist crumbs but no wet batter, it’s done. The cake should also spring back slightly when gently pressed. Overbaking leads to dryness, so err on the side of slightly underdone—it’ll firm up as it cools.
How can I prevent cracks on the top of my chocolate cake?
Cracks usually happen from overmixing or baking too long. To avoid them: use room-temperature ingredients, don’t overfill the pans, and bake until just set (not golden brown). For extra insurance, sprinkle the reserved chocolate chips on top before baking—they create a barrier that helps the cake set evenly.
What’s the secret to keeping this cake moist for days?
The sour cream and vegetable oil are key moisture retainers, but proper storage matters too. Wrap cooled layers tightly in plastic wrap and store in an airtight container at room temperature for up to 3 days. For longer storage, refrigerate and bring to room temp before serving. Reheating slices in the oven for 5 minutes revives texture beautifully.

- 3lb Prime Rib Roast Recipe: Juicy Pink Center Guaranteed in 3 Hours - October 31, 2026
- 5 Spice Cake Recipe: Warmly Spiced Layers With Crunchy Top - October 31, 2026
- 1950’s Macaroni and Cheese Recipe: Nostalgic Creamy Cheese Sauce with Buttery Noodles - October 31, 2026