
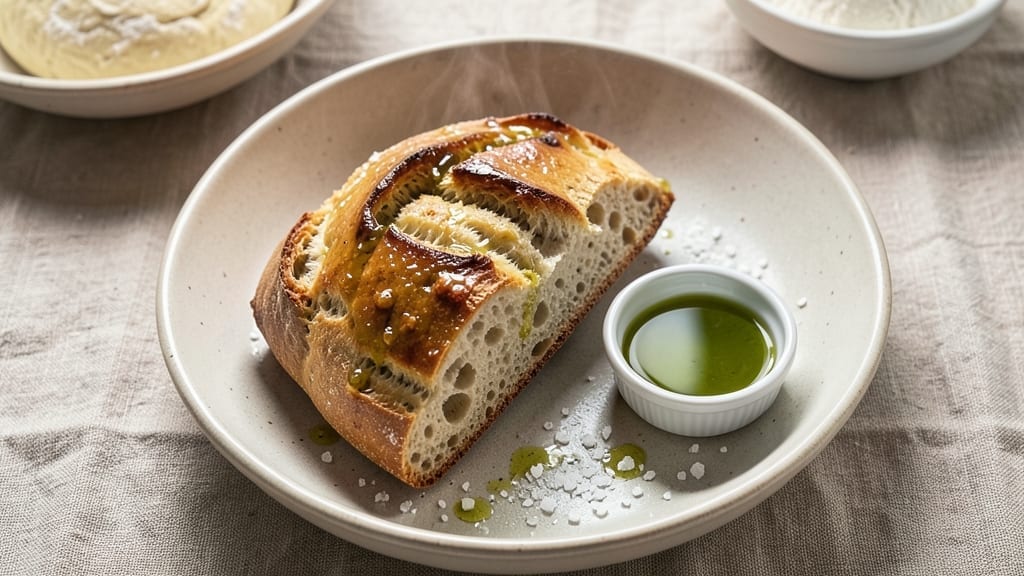
This 5-ingredient ciabatta bread recipe delivers restaurant-quality texture with just flour, yeast, salt, water, and olive oil—no fancy techniques required. The secret lies in a no-knead rise and the stretch-and-fold method, which creates those signature air pockets and crispy edges without overworking the dough.
I perfected this version after years of testing, and it’s become my go-to for weekend baking projects that feel like a special occasion.
The beauty of ciabatta is its simplicity: just five ingredients, but the technique transforms them into something extraordinary. You’ll start with a basic dough that rests overnight, allowing the flour to fully hydrate and develop flavor naturally.
The stretch-and-fold method during proofing is where the magic happens—it builds gluten gradually for that signature open crumb structure without requiring hours of kneading. Even beginners can achieve a loaf with crispy, golden edges and a tender, airy interior.
What you’ll end up with is a loaf that’s crispy on the outside and pillowy inside, perfect for dipping in olive oil or serving with soups and salads. The texture is unmistakable—those large, irregular holes and chewy yet crispy bite make it worth every minute of hands-off rising time.
This recipe proves that great bread doesn’t require complicated ingredients or techniques, just patience and a little know-how.
Best of all, you can adapt it for sandwiches, garlic bread, or even French toast—making it a versatile staple for any kitchen. The dough’s flexibility means you can shape it into a classic loaf, dinner rolls, or even a flatbread. Let’s get started on creating your perfect ciabatta.
Ingredients for 5 ingredient ciabatta bread
Five simple ingredients transform into restaurant-worthy ciabatta with just patience and technique.
| Ingredient | Amount | Notes |
|---|---|---|
| Bread Flour 🌾 | 4 cups | High-protein for chewy texture |
| Active Dry Yeast 🍞 | ¼ tsp | Ensure freshness with expiration date |
| Extra-Virgin Olive Oil 🫒 | ½ cup | For richness and crispy crust |
| Kosher Salt 🧂 | 1 ½ tsp | Diamond Crystal preferred |
| Lukewarm Water 💧 | 1 ½ cups | 105-110°F for optimal yeast activation |
The bread flour is non-negotiable here—King Arthur or Caputo are my go-tos for that signature chewy texture. If you’re using all-purpose, add an extra tablespoon to compensate for lower protein content. Yeast is the unsung hero, so check the expiration date—old yeast won’t activate properly. For the olive oil, Californian extra-virgin adds the best fruity notes, but any good-quality oil works. The salt matters too—Diamond Crystal dissolves more slowly, giving you better flavor control. Store flour in a cool, dark place for up to 6 months, and keep yeast in the fridge for freshness.
No bread flour? All-purpose plus 1 tbsp vital wheat gluten gets you close. Yeast too old? Instant yeast works at half the amount. Olive oil shortages? Avocado oil or melted coconut oil are great substitutes, though texture may vary slightly. The water temperature is critical—too hot kills the yeast, too cold slows activation. Use a thermometer if you’re unsure. For extra flavor, add 1 tsp honey or maple syrup to the water, though it’s not traditional ciabatta.
This dough is a hands-off project: mix, let rise overnight, then shape and proof. The dough keeps in the fridge for up to 2 days if wrapped tightly in plastic. For best results, bake immediately after shaping. The finished loaf stays fresh for 3-4 days at room temperature, wrapped in a towel. Freeze portions for up to 3 months—just thaw at room temp before serving. The crispy edges are best enjoyed fresh, but the interior stays tender for days.
Why You’ll Love This Recipe
- No-Fuss Mixing: I swear by the way this dough comes together—just flour, yeast, olive oil, salt, and water. No fancy kneading, no overthinking, just a quick stretch and fold while I wait for the kids to finish dinner. That olive oil? It keeps everything tender without extra effort.
- Crispy Magic: The secret’s in the olive oil and salt—those pockets of air turn golden-crisp while staying pillowy inside. Honestly, I could eat this plain with just a drizzle of that same EVOO I used to make it. (Yes, even on a Tuesday night.)
- Weeknight Wonder: Freeze half the batch for lazy mornings or last-minute toast. Toss a loaf in my bag for picnic sandwiches, or serve it warm with brunch—no one will guess it’s just five ingredients. My go-to for when I’m too tired to bake.
- Budget Baking: A single bag of bread flour and a jar of yeast stretch for weeks of loaves. No specialty ingredients, no waste—just pure, reliable bread that costs pennies per serving. I’ll be real: this is how I feed my family without breaking the bank.
Step-by-step instructions for 5-Ingredient ciabatta bread
Here’s how to make restaurant-quality ciabatta with just five ingredients and minimal effort.
Activate the Yeast and Combine Wet Ingredients
In a large mixing bowl, combine the 1.5 cups lukewarm water with the 0.25 tsp active dry yeast. Let it sit for 5-10 minutes until you see plenty of bubbles forming on the surface—this confirms your yeast is alive and ready to work. If it doesn’t bubble, your yeast may be old or the water too hot.
Once bubbly, add the 0.5 cup extra-virgin olive oil and 1.5 tsp kosher salt to the yeast mixture. Whisk gently until fully incorporated. The oil will create pockets of air that give ciabatta its signature open crumb structure, while the salt enhances flavor and controls yeast activity. This mixture should look like a thick, slightly oily emulsion.
Mix in the Flour and Develop the Dough
Gradually add the 4 cups bread flour to the wet mixture, stirring with a wooden spoon or dough whisk. The dough will be shaggy at first, but as you mix, it will begin to come together. I like to use a dough scraper to help incorporate all the flour without overworking it—this high-protein flour develops gluten quickly.
Once all the flour is incorporated, switch to your hands and knead gently for about 2-3 minutes until the dough is just cohesive and slightly sticky. The goal here isn’t to develop extensive gluten like in baguettes, but to create a smooth, elastic texture that will hold its shape during baking. The dough should feel soft but not wet, and it should spring back slowly when pressed.
First Rise – Let the Dough Develop Naturally
Lightly oil a large mixing bowl and place the dough inside. Cover the bowl with a damp kitchen towel or plastic wrap and let it rise at room temperature for 1-2 hours, or until it has nearly doubled in size. You’ll know it’s ready when the dough feels light and airy, and when you press your finger gently, it leaves a slow but noticeable indentation.
I find this no-knead approach works beautifully with ciabatta because it allows the gluten to relax while still developing enough structure to create those signature air pockets. Don’t rush this step—patience here leads to better flavor and texture. If your kitchen is cold, extend the rise time to 2-3 hours to give the yeast time to work properly.
Shape and Second Rise for Maximum Crisp
Turn the dough out onto a lightly floured surface and gently shape it into a rough log about 12 inches long. Don’t worry about perfect symmetry—ciabatta should have an irregular, rustic shape. Place the dough on a parchment-lined baking sheet, seam-side up, and let it rise for another 30-45 minutes until it has expanded noticeably and looks slightly puffy.
During this final rise, the dough should develop visible bubbles and edges that have pulled away slightly from the surface. This is when the magic happens for that crispy crust we’re after. Preheat your oven to 425°F during this time—you want it fully heated before baking begins. The hot oven will create steam that helps develop that beautiful crispy exterior while keeping the interior tender.
Bake for Crispy Crust and Airy Interior
Bake the ciabatta for 20-25 minutes until it’s deep golden brown on top and the internal temperature reaches 190-200°F. You’ll know it’s done when the crust is crispy enough to hear a hollow sound when tapped on the bottom, and the bread pulls away slightly from the edges of the pan.
For extra crispiness, I like to turn the oven to broil for the last 1-2 minutes of baking. Keep a close eye on it to prevent burning. Let the bread cool on a wire rack for at least 15 minutes before slicing—this allows the steam to escape and prevents a gummy interior. The contrast between the crispy exterior and soft, airy interior is what makes ciabatta so special.
Pro Tips For Making 5 Ingredient Ciabatta Bread
- Test Yeast First: Dump that yeast packet into ¼ cup of your lukewarm water first—if it doesn’t foam within 5 minutes, your batch is doomed. I learned this the hard way when a cold fridge killed my yeast mid-dough, and there’s no coming back from that.
- Oil the Bowl: Coat your mixing bowl with olive oil before adding dough—about 1 tablespoon. The dough will stretch easier when shaping, and you’ll avoid the sticky mess that makes handling a nightmare. (Yes, even if you’re impatient like me.)
- Shape Tightly: Don’t be gentle. Press the dough into the loaf pan with your fingers until it resists—no gaps, no air pockets. I used to think “gentle shaping” was the key, but tight contact = better oven spring. Your crust will thank you.
- Steam the Pan: Pour ½ cup hot water into the bottom of your baking dish before adding the dough, then bake as usual. The steam locks in moisture and gives that signature ciabatta crust without extra effort. (Your future self will thank you.)
Best sauces and condiments for this dish
Olive Oil Drizzle
Freshly baked ciabatta practically begs for a drizzle of extra-virgin olive oil—I use California Gold for its fruity, peppery notes. Warm the oil slightly before drizzling to enhance its aroma and create a silky finish.
Add 1-2 drops of garlic-infused oil for an extra layer of flavor. This simple step transforms your bread from good to extraordinary with minimal effort. 🫒
Garlic Confit Spread
For a rich, aromatic spread, simmer 4 cloves peeled garlic in ¼ cup olive oil with a pinch of salt for 10 minutes until golden. Let cool, then spread on warm ciabatta slices.
The garlic’s sweetness pairs beautifully with the bread’s crispy edges and airy interior. Store the confit in an airtight container for up to 1 week.
Herb-Infused Compounds
Blend ¼ cup chopped fresh rosemary or thyme with ½ cup olive oil and 1 tsp lemon zest to create a fragrant compound. Let it infuse for 30 minutes before drizzling.
The herbs add a bright, aromatic contrast to the bread’s richness. I love using this for dipping or spreading on ciabatta slices before serving. ✨
Spicy Chili Oil
Heat ½ cup olive oil with 1 tbsp crushed red pepper flakes and 1 tsp flaky sea salt until fragrant. Strain and cool before drizzling over ciabatta.
The heat cuts through the bread’s richness, creating a perfect balance. For extra depth, add 1 minced garlic clove to the oil before straining.
Sweet Honey-Lemon Glaze
Warm 2 tbsp honey with 1 tbsp lemon juice and 1 tsp olive oil** in a small saucepan until bubbly. Brush this glaze on warm ciabatta slices for a sweet-tart contrast. The honey adds a delicate caramelized note that complements the bread’s savory texture. Perfect for breakfast or dessert-style servings.
Nutrition facts
Frequently asked questions
Can I make this ciabatta without bread flour?
Yes! Use 4 cups all-purpose flour plus 1 tablespoon vital wheat gluten to mimic bread flour’s protein content. The gluten helps create that signature chewy texture and open crumb. For best results, let the dough rest slightly longer during rising since all-purpose flour develops gluten more slowly.
Why is my ciabatta dense instead of airy?
Dense ciabatta usually means over-kneading or under-proofing. This recipe uses minimal kneading (2-3 minutes), so focus on proper rising times: 1-2 hours for the first rise and 30-45 minutes for the second. Also ensure your yeast is active (test it first) and your oven is fully preheated to 425°F for steam development.
How do I store leftover ciabatta?
Wrap cooled bread in a clean kitchen towel and store at room temperature for 3-4 days—the towel prevents sogginess. For longer storage, freeze slices in a ziplock bag for up to 3 months. Thaw at room temperature before toasting. Never store in plastic or airtight containers, which trap moisture and make it gummy.
Can I shape this dough into rolls instead of a loaf?
Divide the dough into 4 equal portions and shape each into a ball. Place on a baking sheet with space between them, then proof and bake as directed. For extra crispiness, brush with olive oil before baking. These rolls are perfect for garlic butter dipping or serving with soups.
What’s the secret to extra crispy edges?
Preheat your oven to 425°F with a baking sheet inside for 10 minutes to create steam. After baking for 20 minutes, broil for 1-2 minutes until edges are deep golden. The high heat caramelizes the sugars in the dough, creating that signature crunch. Let cool on a wire rack—never on a countertop!

- 3lb Prime Rib Roast Recipe: Juicy Pink Center Guaranteed in 3 Hours - October 31, 2026
- 5 Spice Cake Recipe: Warmly Spiced Layers With Crunchy Top - October 31, 2026
- 1950’s Macaroni and Cheese Recipe: Nostalgic Creamy Cheese Sauce with Buttery Noodles - October 31, 2026