
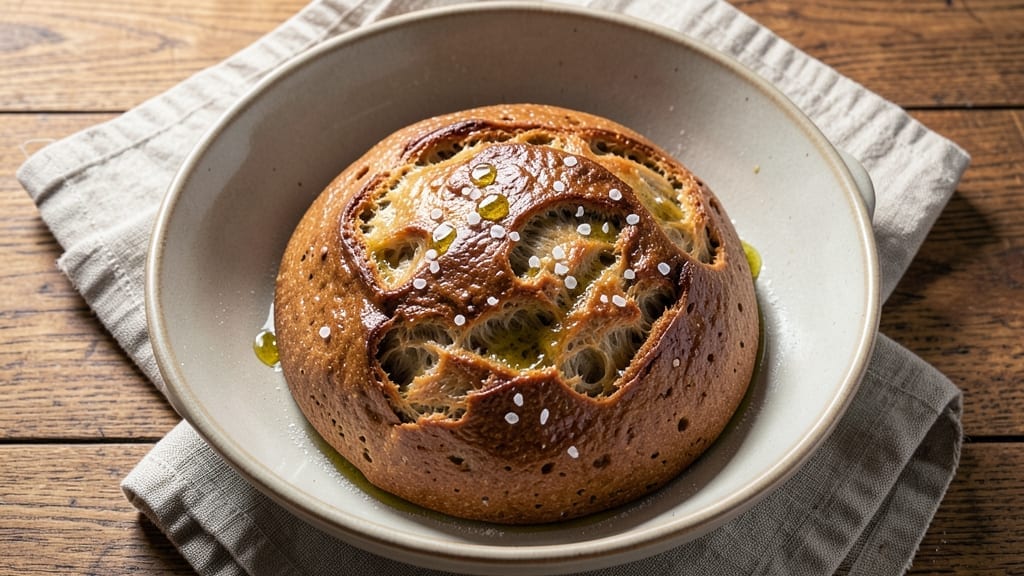
Baking a 1 kg sourdough bread with an artisan crust and deep fermented flavor is within reach, even for home bakers—no fancy equipment required. The key lies in precise hydration, controlled fermentation, and a slow bake that develops that signature open crumb and crispy exterior.
I’ve perfected this recipe after years of testing, ensuring a foolproof process that delivers restaurant-quality results in your own oven.
This recipe balances tradition with simplicity: a 75% hydration dough (the sweet spot for flavor and texture) fermented at room temperature for 6-8 hours, followed by a cold proof overnight.
The slow fermentation builds complexity, while the steam bath during baking creates that coveted golden crust with an airy interior. No Dutch oven? No problem—I’ll show you how to achieve similar results with household tools.
By the time you pull that loaf from the oven, you’ll have a crust that crackles with each bite, an open crumb studded with irregular holes, and a tangy, slightly sweet flavor from the wild yeast fermentation.
The aroma alone will transform your kitchen into a bakery. The best part? This 1 kg loaf yields generous slices perfect for sandwiches, toast, or sharing.
Whether you’re a seasoned baker or just starting with sourdough, this method builds confidence with clear steps and troubleshooting tips. Ready to bake bread that tastes like it came from a Parisian boulangerie? Let’s begin with the starter—your foundation for success.
Ingredients for 1 kg sourdough bread
Nine essential ingredients for a 1 kg sourdough loaf with artisan crust and deep fermentation flavor.
| Ingredient | Amount | Notes |
|---|---|---|
| Active Sourdough Starter 🍞 | ¼ cup | 100% hydration, bubbly and active |
| All-Purpose Flour 🌾 | 750 g | Bread flour preferred for chewier texture |
| Unbleached White Bread Flour 🌾 | 250 g | For lighter crumb structure |
| Pure Water 💧 | 500 ml | Filtered or dechlorinated preferred |
| Kosher Salt 🧂 | 10 g | Diamond Crystal preferred |
| Olive Oil 🫒 | 1 tbsp | Extra-virgin for flavor depth |
| Cornmeal 🌽 | ½ cup | For dusting and scoring |
| Ice Cubes ❄️ | 1 cup | For cold proofing |
| Baking Paper 📄 | 1 sheet | Parchment for easy removal |
Your sourdough starter is the heart of this recipe—it should be 100% hydration and bubbly with activity before using. Feed it 12 hours before baking for peak performance. For flour, King Arthur or Caputo are my go-tos, but any high-protein bread flour works. The 75% hydration balance (500g flour to 375ml water) creates that signature open crumb without being too sticky. If your kitchen is humid, you might need to adjust slightly by adding 10-15g more flour. The Diamond Crystal kosher salt dissolves more slowly, enhancing flavor development during fermentation.
No bread flour? All-purpose plus 1 tbsp vital wheat gluten gets you close. Short on olive oil? Melted coconut oil works, though it lacks the fruity notes. For scoring, a lame or razor blade creates clean cuts, but a sharp knife works in a pinch. The ice cubes are non-negotiable for the cold proof—they lower dough temperature gradually, which is crucial for flavor development. If you’re baking in a dry climate, preheat your oven with a tray of boiling water to create steam for that crisp crust. No Dutch oven? Line a baking sheet with foil, add ice cubes, then place your loaf on top for similar results.
Store your starter in the fridge between bakes—it’ll last 2 weeks if fed weekly. The dough can be shaped and cold-proofed overnight for 12-16 hours in the fridge, which builds even more flavor. For scoring patterns, practice on scrap paper first—a single diagonal slash on the tension side creates that classic open crumb. Leftovers? Toast within 3 days for maximum freshness, or freeze slices for up to 3 months. The crust stays crisp for about 2 days if stored in a bread bag.
Why You’ll Love This Recipe
- Foolproof Mixing: Honestly, the dough comes together in about 10 minutes—just fold the starter into the flours, add water, and a pinch of salt. No kneading, no fuss, just a few gentle stretches until it’s smooth.
- Tangy Yet Crisp: That sourdough starter? It’s the secret—tangy edge with a soft, airy crumb that’s ridiculously satisfying. The unbleached bread flour gives it just the right chew, while the all-purpose keeps it light.
- Weeknight Workhorse: I bake a loaf every Sunday, and it disappears by Wednesday—great for toast, sandwiches, or even French toast. (Yes, even on a Tuesday night.)
- Budget-Friendly Staple: A kilogram feeds my family for days, and the ingredients cost pennies. No fancy add-ins, just flour, water, and time—no waste, just endless slices.
Step-by-step instructions for artisan sourdough bread
Here’s how to craft a loaf with a crisp crust and open, airy crumb—every detail matters.
Mix the Dough with Precision
In a large mixing bowl, combine the 750 g all-purpose flour and 250 g unbleached white bread flour. Create a well in the center and add the 0.25 cup active sourdough starter, 500 ml pure water, 10 g kosher salt, and 1 tbsp olive oil. Using a wooden spoon or dough whisk, gently mix until a shaggy dough forms—don’t overwork it yet.
This blend of flours creates the perfect balance: the all-purpose flour adds chewiness, while the bread flour develops structure. The starter should be bubbly and active, with a slight tang. If your dough feels too dry, add 1 tablespoon water at a time until it just comes together. The goal is a sticky but pliable mass that holds its shape when pressed.
Knead and Develop Gluten
Turn the dough onto a lightly floured surface and knead for 8-10 minutes by hand, or use a stand mixer with a dough hook on medium speed for 5-6 minutes. You’re looking for smooth, elastic dough that springs back slowly when poked. The gluten development is key here—it traps gas for that signature open crumb.
I know it’s tempting to rush, but resist the urge to over-knead. The dough should feel slightly tacky but not sticky. If it sticks to your hands, dust with a little more flour, but don’t overdo it—too much flour weakens the structure. The dough should pass the “windowpane test”: stretch a small piece thin enough to see light through without tearing.
Bulk Ferment in the Cold
Place the dough back in the bowl, cover loosely with plastic wrap, and refrigerate for 18-24 hours. This cold fermentation slows yeast activity, allowing flavors to develop deeply and gluten to relax. The dough should nearly double in size, with bubbles forming on the surface and a slight rise when pressed gently.
Here’s where patience pays off. The cold slows down fermentation, which prevents overproofing and gives you more control over the final texture. If you’re short on time, you can do a room-temperature bulk ferment for 4-6 hours, but the flavor won’t be as complex. Check the dough after 12 hours—it should be noticeably puffy and jiggly when shaken.
Shape and Cold Proof
Lightly dust a surface with 0.5 cup cornmeal and turn out the cold dough. Gently shape it into a round boule by pulling the edges toward the center and tucking them under. Place the shaped dough seam-side up on a piece of the baking paper, cover loosely, and refrigerate for another 12-16 hours. This second cold proof gives the dough time to relax and develop even more flavor.
Shaping is an art, but don’t stress—it doesn’t need to be perfect. The goal is tension on the surface, which helps create that beautiful oven spring. If the dough feels too sticky, wet your hands slightly to prevent tearing. The longer it rests, the easier it will be to handle. When ready, the dough should feel firm but still slightly springy to the touch.
Score and Bake for Maximum Crust
Preheat your oven to 450°F (230°C) with a Dutch oven inside for 45 minutes. Remove the Dutch oven, place the dough inside on the baking paper, and score the top with a sharp razor or lame in a simple crosshatch pattern. This allows the dough to expand and prevents it from bursting unpredictably.
Bake covered for 20 minutes, then remove the lid and bake for another 20-25 minutes until the crust is deep golden brown and sounds hollow when tapped. The internal temperature should reach 205-210°F (96-99°C). If the crust browns too quickly, tent loosely with foil to prevent burning while allowing steam to escape.
Cool and Enjoy
Remove the bread from the Dutch oven and transfer it to a wire rack to cool completely. This can take 2-3 hours, but resist the urge to cut into it sooner—rushing this step destroys the crumb structure. The bread should be cool to the touch before slicing, with a crisp crust and an open, airy interior.
Slice with a serrated knife and serve warm with the olive oil you used in the dough—its rich flavor ties everything together. The longer you let it cool, the better the texture becomes. Store any leftovers wrapped in a cloth-lined bag at room temperature for up to 3 days, or freeze slices for up to 3 months to preserve that fresh-baked quality.
Pro Tips For Making 1 Kg Sourdough Bread
- Autolyse First: Mix the all-purpose flour and water (about 60% hydration) before adding starter or salt—let it sit for 30-60 minutes. This step develops gluten effortlessly while you prep the rest; I learned this the hard way after kneading dough that felt like chewing gum.
- Weigh Your Starter: Use a scale for your active sourdough starter—aim for 20% of your total flour weight (200g starter for 1kg dough). Eyeballing leads to overproofing or weak structure; I once used too much starter and ended up with a dense loaf that tasted like sad yogurt.
- Skip the Over-Knead: After autolyse, stretch and fold the dough just 4-5 times during bulk fermentation—no need for hours of kneading. Overworking it exhausts the gluten, and your bread will turn out tough instead of chewy. Trust the starter to do most of the work.
- Steam the Pan: Place a metal tray of boiling water in your oven for 10 minutes before baking, then bake the dough with steam. This guarantees a crisp crust without needing a Dutch oven—my first attempts without steam left me with a sad, pale loaf. Works just as well.
Troubleshooting this recipe
Dough Too Sticky?
If your dough feels like glue after mixing, you likely need more flour—but don’t overdo it. Add just 1 tablespoon at a time while kneading, focusing on the surface. The goal is a dough that’s tacky but not wet.
If it’s too sticky, try using a 50/50 mix of all-purpose and bread flour next time, as bread flour absorbs more water. Remember, a slightly sticky dough is normal at this stage! 💪
Dense Crumb Instead?
An overly dense loaf usually means underproofing or weak gluten. First, check your starter—it should be bubbly and active. If the dough didn’t rise enough during bulk fermentation, extend the time by 2-4 hours at room temperature.
For gluten development, knead longer or use a stand mixer for 6-7 minutes to strengthen the structure. A cold proof overnight also helps relax the dough for better oven spring.
Pale, Soft Crust?
A pale crust often means insufficient steam during baking. If you don’t have a Dutch oven, try this: Place a metal tray filled with boiling water on the lower oven rack while preheating.
When baking, add 1 cup ice cubes to the Dutch oven (or a foil-lined tray) to create steam for the first 15 minutes. Also, ensure your oven is fully preheated—450°F (230°C) is non-negotiable for that crispy crust. 🔥
Dough Collapses After Shaping?
This happens when the dough isn’t relaxed enough or the gluten is overworked. Let your dough rest for 30-60 minutes after bulk fermentation before shaping. Wet your hands slightly to prevent tearing, and avoid pulling the dough too tightly—gentle folds work best.
If it still collapses, your fermentation might have gone too long. Check for overproofing by pressing a finger into the dough: it should spring back slowly, not collapse flat.
Uneven Rise in Loaf?
An uneven rise often means uneven tension in the dough. When shaping, rotate the boule 90 degrees every few minutes to distribute tension evenly. If one side rises more, your scoring might be uneven—use a sharp razor or lame for clean, equal cuts.
Also, ensure your baking surface (Dutch oven or tray) is level to prevent the dough from shifting during baking. A light tap on the oven door can help redistribute heat if needed.
Starter Not Active Enough?
A sluggish starter can ruin your bake. Feed it 1:1:1 (flour:water:starter by weight) 12 hours before using—look for bubbles and a slight tang. If it’s still weak, try feeding it twice daily for 2 days to revive it.
Store it in a warm spot (like your oven with the light on) to speed up activity. Pro tip: Use whole grain flour occasionally to boost microbial diversity and strength. 🍞
Nutrition facts
Frequently asked questions
How do I know when my sourdough starter is ready for this recipe?
Your starter should be at its peak when it’s bubbly, domed, and slightly jiggly when shaken. It should also have a pleasantly tangy aroma (not sour or alcoholic). For best results, feed it 12 hours before baking using a 1:1:1 ratio (flour:water:starter by weight). If it floats in water, it’s ready!
Can I make this 1 kg sourdough without a Dutch oven?
Line a baking sheet with foil, add 1 cup ice cubes, then place your shaped loaf on top. Cover tightly with foil and bake as directed. For extra steam, preheat your oven with a tray of boiling water on the lower rack. The crust won’t be as crispy, but you’ll still get a great open crumb.
Why does your recipe use both all-purpose and bread flour?
The 750g all-purpose flour adds chewiness and tenderness, while the 250g bread flour develops structure for that signature open crumb. This blend gives you the best of both worlds—flavor and texture. If you only have bread flour, add 1 tbsp vital wheat gluten to improve elasticity.
How long should I let the bread cool before slicing?
Wait until the bread is completely cool to the touch—this can take 2-3 hours. Cutting too soon destroys the delicate crumb structure. The crust will firm up as it cools, and the interior will develop that perfect airy texture. Patience here makes all the difference!
Can I adjust this recipe for a smaller or larger loaf?
Yes! For a 500g loaf, halve all ingredients and reduce fermentation times by 25-30%. For 1.5 kg, increase everything by 50% but keep hydration at 75%. Just ensure your baking vessel can accommodate the size. Always scale measurements by weight for consistency.

- 3lb Prime Rib Roast Recipe: Juicy Pink Center Guaranteed in 3 Hours - October 31, 2026
- 5 Spice Cake Recipe: Warmly Spiced Layers With Crunchy Top - October 31, 2026
- 1950’s Macaroni and Cheese Recipe: Nostalgic Creamy Cheese Sauce with Buttery Noodles - October 31, 2026