
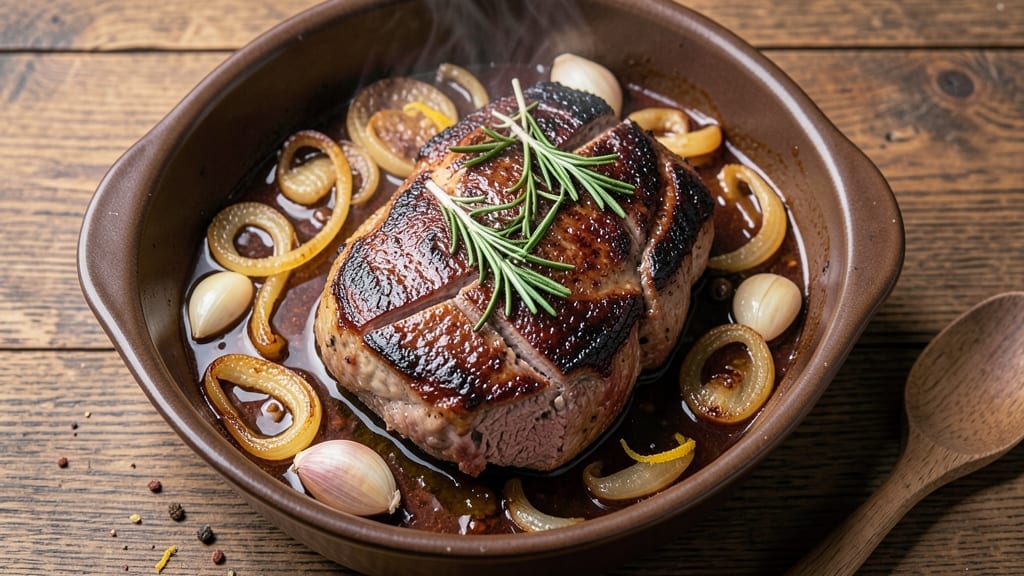
A 1-pound beef chuck roast transforms into melt-in-your-mouth perfection when slow-cooked to tender, caramelized richness—no fancy equipment required. The key lies in patience and technique: searing first for flavor, then braising until the meat practically falls apart.
This method delivers restaurant-quality results with minimal effort, making it ideal for weeknight dinners or meal prep. What sets this recipe apart is the balance of simplicity and depth.
A simple marinade of soy sauce, garlic, and herbs builds flavor, while slow cooking in a Dutch oven or slow cooker ensures the meat stays juicy and develops that coveted caramelized crust. The 3-hour cook time (plus 30 minutes for searing) guarantees tender meat without drying it out.
By the time you pull it from the oven, you’ll have perfectly juicy, fork-tender beef with a rich, concentrated sauce that clings to every bite. The aroma alone will have everyone gathering at the table—this is comfort food at its finest.
Serve with mashed potatoes, crusty bread, or roasted vegetables for a complete meal. The best part? This recipe scales effortlessly. Double the ingredients for a crowd, or stick with the original for a satisfying single-serving dinner. Here’s how to achieve that perfect balance of tenderness and flavor every time.
Ingredients for 1 lb beef chuck roast
One pound of beef chuck roast becomes restaurant-quality comfort when slow-cooked with aromatic vegetables and bold flavors.
| Ingredient | Amount | Notes |
|---|---|---|
| Beef Chuck Roast 🥩 | 1 lb | Well-marbled, bone-in preferred |
| Yellow Onion 🧅 | 1 whole | Chopped into 1/2-inch pieces |
| Garlic Cloves 🧄 | 6 cloves | Minced for marinade and sear |
| Soy Sauce 🥢 | ¼ cup | Low-sodium preferred for balance |
| Olive Oil 🫒 | 2 tbsp | Extra-virgin for high smoke point |
| Fresh Rosemary 🌿 | ½ tsp | Chopped, or 0.25 tsp dried |
| Fresh Thyme 🌿 | ½ tsp | Chopped, or 0.25 tsp dried |
| Black Peppercorns 🌶️ | 1 tsp | Freshly cracked for intensity |
| Beef Broth 💧 | 1 ½ cups | Low-sodium, homemade or quality store-bought |
| Tomato Paste 🍅 | 2 tbsp | Squeeze tube preferred for convenience |
| Red Wine 🍷 | ¼ cup | Bold dry variety like Cabernet Sauvignon |
| Salt 🧂 | 1 ½ tsp | Diamond Crystal preferred for accuracy |
| Carrots 🥕 | 2 whole | Baby carrots or chopped into chunks |
| Celery Stalks 🥬 | 2 whole | Chopped into 1/2-inch pieces |
The quality of your beef chuck roast makes all the difference here. Look for cuts with visible marbling—that white fat within the meat is what renders down during cooking, creating juicy, tender results. Costco or local butcher shops often carry chuck roasts at better prices than grocery stores, and they’re typically fresher. If you’re buying a whole roast, ask for it to be trimmed of excess fat, but leave the natural cap intact for flavor. The bone-in version adds richness and helps retain moisture during the long cook time. For best results, use the roast within 3-5 days of purchase and let it sit at room temperature for 30 minutes before searing—this ensures even cooking.
No red wine? Substitute with an extra 0.25 cup of beef broth, though the depth of flavor will be slightly less complex. The aromatics—onion, garlic, carrots, and celery—are non-negotiable for building flavor, but if you’re short on time, pre-chopped mirepoix mixes from Trader Joe’s work perfectly. Fresh herbs are ideal, but dried thyme and rosemary at one-third the amount will suffice in a pinch. For the tomato paste, if you’re using a can, measure carefully—squeeze tubes eliminate waste and keep for months in the pantry. The soy sauce adds umami depth, but if you’re avoiding sodium, coconut aminos provide a similar profile without the salt overload.
This recipe reheats beautifully—the flavors meld even more overnight, so leftovers are a bonus. Store in an airtight container in the fridge for 4-5 days, or freeze for up to 3 months by portioning into individual servings. For meal prep, double the recipe and freeze half immediately—thaw overnight in the fridge before reheating. The caramelized crust forms during the final 30 minutes of cooking, so if reheating, cover with foil to prevent drying out. Serve with mashed potatoes or crusty bread to soak up the rich, concentrated sauce—this is comfort food at its finest.
Why You’ll Love This Recipe
- Pan-Only Magic: I swear by this—just sear the roast in the same pan where the onions caramelize, then add garlic and soy. No extra pots, no extra cleanup. That rich, sticky fond? Pure flavor gold.
- Soy-Garlic Umami Bomb: Between us, the soy sauce and garlic transform tough chuck into something tender and ridiculously flavorful. The edges get this perfect crust, while the inside stays juicy—like a beefy hug in every bite.
- Weeknight Workhorse: I make this when I’m swamped because it’s exactly what you need: hearty enough for dinner, but simple enough to throw together after a long day. (Yes, even on a Tuesday night.)
- Budget-Friendly Feast: A pound of chuck roast stretches further than you’d think—especially when you turn leftovers into sandwiches or stir-fries. Honestly, it’s my go-to for feeding the family without breaking the bank.
Step-by-step instructions for slow-cooked beef chuck roast
Master this technique and you’ll transform tough chuck into melt-in-your-mouth perfection.
Prepare the Roast and Aromatics
Pat the 1 lb beef chuck roast dry with paper towels, removing any excess moisture from the surface. This step is critical—wet surfaces prevent proper browning and flavor development. Place the roast in a large bowl and combine the 0.25 cup soy sauce, 0.25 cup red wine, 2 tbsp olive oil, 0.5 tsp chopped fresh rosemary, 0.5 tsp chopped fresh thyme, 1 tsp freshly cracked black peppercorns, and 1.5 tsp salt. The marinade should coat the roast completely.
Cover the bowl and refrigerate for at least 4 hours or overnight. This extended marinating time breaks down the tough muscle fibers, ensuring tender results. I always marinate overnight when possible—it makes a world of difference in texture. While the roast marinates, chop the 1 whole yellow onion into ½-inch pieces and mince the 6 cloves garlic. Peel and chop the 2 whole carrots and 2 whole celery stalks into ½-inch chunks as well.
Sear the Roast for Depth of Flavor
Remove the roast from the marinade (reserve the marinade) and heat a heavy Dutch oven over medium-high heat. Add the 2 tbsp olive oil and let it get very hot—you should see gentle smoke begin to rise. Place the roast in the pot, fat-side down, and sear for 4-5 minutes until a deep golden-brown crust forms. Flip the roast and sear the other side for another 3-4 minutes.
Remove the roast and set it aside. The goal here is to develop a rich, caramelized crust that will form the flavor base for your dish. Don’t rush this step—proper searing creates the Maillard reaction that gives your roast its complex flavor. While the roast sears, add the chopped onion, carrots, and celery to the pot and cook for 5 minutes until softened. Add the minced garlic and cook for another 30 seconds until fragrant.
Build the Rich Braising Liquid
Return the seared roast to the pot and pour in the reserved marinade. Add the 1.5 cups beef broth and 2 tbsp tomato paste, stirring to combine. The liquid should come about halfway up the sides of the roast. Bring the mixture to a simmer over medium heat, then reduce heat to low. Cover the pot and transfer it to a preheated 325°F oven.
Braise the roast for 3 hours. This slow cooking time is essential—it allows the connective tissue to break down completely, transforming tough meat into tender, juicy slices. After 3 hours, check the internal temperature with a meat thermometer. The roast should register 195-200°F—this is the perfect range for maximum tenderness. If it’s not quite there, continue cooking for another 30-60 minutes.
Rest and Slice for Maximum Juiciness
Once the roast reaches the proper temperature, remove it from the oven and transfer it to a cutting board. Tent loosely with aluminum foil and let it rest for 15-20 minutes. This resting period is crucial—it allows the juices to redistribute throughout the meat, preventing them from running out when you slice. The roast should be fork-tender, with the meat pulling apart easily.
Discard any excess fat from the braising liquid, then skim off any foam that has risen to the surface. The remaining sauce should be rich and flavorful. Slice the roast against the grain into ¼-inch thick slices. Serve the meat with the braising sauce spooned over the top, accompanied by the tender vegetables from the pot. The result should be incredibly juicy, with each bite offering perfect balance of tender meat and deeply flavorful sauce.
Pro Tips For Making 1 Lb Beef Chuck Roast
- SEAR THE ONIONS FIRST: I used to toss everything in the pan at once, and the onions would steam instead of caramelize. Start by heating the olive oil over medium-high heat, then cook the sliced onions for 8-10 minutes until they’re golden and sweet-smelling—only then add the garlic and beef. The flavor difference is night and day.
- USE COLD SOY SAUCE: Dumping warm soy sauce into the pan right away makes the beef sweat instead of sear. Keep your soy sauce refrigerated until the very end, then add it in the last 5 minutes of cooking. The cold liquid will help tenderize the chuck without turning it into a sad, gray slab.
- SALT THE MEAT TWICE: I learned this the hard way—salting beef chuck once isn’t enough. Generously season it with salt before searing, then add another layer of salt halfway through cooking. The first coat helps with crust formation, while the second ensures flavor penetrates that tough exterior.
- LOW AND SLOW IS NON-NEGOTIABLE: Chuck roast needs patience—no rushing. After searing, drop the heat to 275°F (135°C) and cook it uncovered for at least 2.5 hours, checking internal temp every 30 minutes. The meat will hit 195°F (90°C) and practically fall apart when sliced. Skimp on time, and you’ll regret it.
Essential equipment for great 1 lb beef chuck roast
Dutch Oven
A heavy-duty Dutch oven is non-negotiable for this recipe—it distributes heat evenly and retains moisture during the long braise. I swear by the Le Creuset 5.5-quart for its durability and even heat conduction, but the Lodge 6-quart is a fantastic budget-friendly alternative.
The deep sides help prevent spills when adding liquid, and the tight-fitting lid traps steam for perfect tenderness. If you don’t own one, a deep, heavy pot with a lid (like All-Clad) works in a pinch. 🔥
Meat Thermometer
Never guess the doneness of your roast—an instant-read meat thermometer is essential for achieving perfect tenderness. I use the ThermoWorks Smoke for its accuracy and durability, but even a basic OXO Good Grips model works well. Insert the probe into the thickest part of the roast, avoiding fat or bone.
The ideal internal temperature for chuck roast is 195-200°F, where connective tissue fully breaks down. Without a thermometer, you risk overcooking or undercooking the meat. 🌡️
Cutting Board
A sharp chef’s knife and a large, stable cutting board are must-haves for slicing your roast against the grain. I prefer a wooden board (like the John Boos 12×18-inch) for grip, but a plastic or bamboo board works too.
The board should be at least 12×18 inches to accommodate the roast comfortably. A slicing guide (like the Victorinox 12-inch) ensures even, professional-looking slices every time. Never rush this step—patience here makes all the difference in texture. ✨
Slow Cooker
For hands-off cooking, a 6-quart slow cooker (like the Hamilton Beach Programmable) is a game-changer. After searing the roast, transfer it to the slow cooker with the aromatics and braising liquid, then cook on Low for 8 hours or High for 5 hours.
The slow cooker maintains consistent heat, eliminating the need to monitor the oven. Just be sure to use a meat thermometer to check doneness—slow cookers can’t control temperature as precisely as an oven. 💫
Tongs and Ladle
Kitchen tongs (like the OXO Good Grips) help safely turn the roast during searing, while a heat-resistant ladle (like the Mercer Culinary) makes it easy to skim excess fat from the braising liquid. Avoid metal spoons—they can scratch your Dutch oven’s enamel. A slotted spoon is also useful for removing vegetables from the pot without overcrowding. These tools might seem minor, but they make the process smoother and safer. 💡
Nutrition facts
Frequently asked questions
Can I use a smaller cut of beef chuck roast?
This recipe works perfectly with a 1 lb roast, but you can also use a 1.5 lb or 2 lb cut by adjusting cook times. For every additional pound, add 30-60 minutes to the braising time. Just ensure your Dutch oven is large enough to accommodate the bigger roast without overcrowding.
What if I don’t have red wine?
No problem! Substitute with an extra 0.25 cup of beef broth or a splash of apple cider vinegar (1 tbsp) for acidity. The dish will still be flavorful, though red wine adds depth that’s hard to replicate. For a non-alcoholic option, try grape juice or even more tomato paste.
How do I know when the roast is fully tender?
Use a meat thermometer to check the internal temperature—it should reach 195-200°F for maximum tenderness. If you don’t have a thermometer, cut into the thickest part: the meat should pull apart easily with a fork, and the juices should run clear. Overcooking can make it dry, so don’t exceed 3.5 hours for a 1 lb roast.
Can I make this in a slow cooker?
Yes! Sear the roast first, then transfer it to a 6-quart slow cooker with all the aromatics and braising liquid. Cook on Low for 8 hours or High for 5 hours. The slow cooker’s gentle heat ensures tender results, though you’ll still need a meat thermometer to confirm doneness—slow cookers can’t control temperature as precisely as an oven.
What’s the best way to reheat leftovers?
Reheat leftovers in a skillet over medium-low heat with a splash of beef broth to keep them moist. Alternatively, cover and warm in a 350°F oven for 15-20 minutes. Avoid microwaving—it can make the meat tough. Leftovers keep well in the fridge for 4-5 days or freeze for up to 3 months.

- 3lb Prime Rib Roast Recipe: Juicy Pink Center Guaranteed in 3 Hours - October 31, 2026
- 5 Spice Cake Recipe: Warmly Spiced Layers With Crunchy Top - October 31, 2026
- 1950’s Macaroni and Cheese Recipe: Nostalgic Creamy Cheese Sauce with Buttery Noodles - October 31, 2026