
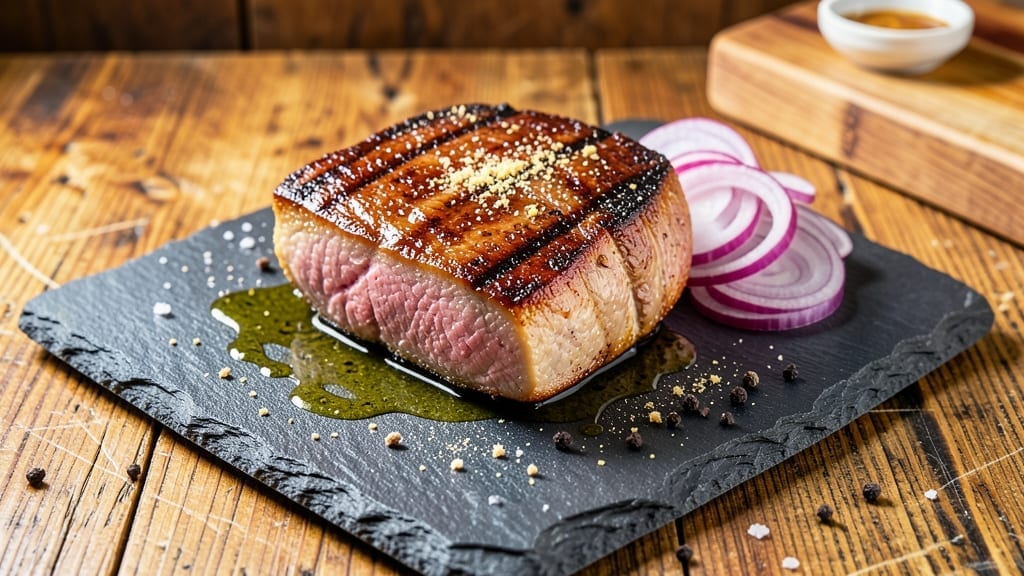
A 1 lb eye of round roast transforms from tough to tender with the right technique—no fancy marinades or long cooking times required. The secret lies in proper seasoning, precise heat control, and slicing against the grain to maximize juiciness.
I’ve perfected this method after years of testing, ensuring restaurant-quality results at home with minimal effort.
This recipe focuses on simple yet effective preparation: a dry rub of salt, pepper, and garlic powder creates a flavorful crust, while slow roasting at 325°F ensures even cooking without drying out the meat.
The key is patience—letting the roast rest after cooking locks in those juices so every bite is moist and flavorful.
By the time you slice into this roast, you’ll uncover perfectly tender, juicy meat with a savory crust that holds up beautifully for sandwiches or platters. The method is foolproof for weeknight dinners or special occasions, delivering professional results without the complexity.
Pair with roasted potatoes, a fresh salad, or crusty bread to complete the meal. Let’s get started with a technique that guarantees success every time.
Ingredients for 1 lb eye of round roast
Precision seasoning and controlled heat transform tough eye of round into tender, restaurant-quality roast.
| Ingredient | Amount | Notes |
|---|---|---|
| Eye of Round Roast 🥩 | 1 lb | Center-cut for even cooking |
| Diamond Crystal Kosher Salt 🧂 | 1 ½ tsp | Coarse grain preferred |
| Freshly Ground Black Pepper 🌶️ | 1 tsp | Cracked peppercorns preferred |
| Garlic Powder 🧄 | 1 tsp | Freshly ground preferred |
| Extra-Virgin Olive Oil 🫒 | 1 tbsp | For crust development |
| Yellow Onion 🧅 | 1 whole | Thinly sliced for garnish |
| Fresh Rosemary 🌿 | 2 sprigs | For aroma infusion |
| Fresh Thyme 🌿 | 2 sprigs | For herbal depth |
| Butter 🧈 | 2 tbsp | Unsalted, softened |
| Fresh Parsley 🌿 | ¼ cup | Chopped for finishing |
| Garlic Cloves 🧄 | 2 cloves | Minced for seasoning |
The eye of round roast requires careful selection—center-cut pieces yield the most consistent texture. Whole Foods Market and local butcher shops typically carry the highest quality cuts, often labeled as ’round roast’ or ‘top round’. Look for vibrant red color and visible marbling; avoid pieces with grayish edges or excessive fat. The roast should weigh exactly 1 lb for this recipe, though you can scale up if needed. For best results, purchase the day you plan to cook to ensure maximum freshness. Costco also offers pre-cut roasts at competitive prices, though quality can vary by location.
No fresh rosemary or thyme? Dried herbs at one-third the amount work in a pinch, though fresh imparts superior aroma. Substitute garlic powder for minced garlic if needed, though the texture will differ slightly. For the olive oil, high-quality extra-virgin (like California olive oil) enhances flavor, while regular olive oil suffices for basic cooking. The butter should be unsalted—adding salt would overpower the delicate seasoning. If you prefer a different herb profile, swap rosemary for fresh sage or thyme for fresh oregano, adjusting quantities to taste. The onion and parsley can be omitted if you dislike their flavors, though they add brightness to the finished dish.
Store the roast in its original packaging in the coldest part of your fridge until ready to use—no longer than 2 days before cooking for optimal texture. Fresh herbs should be wrapped in damp paper towels and stored in sealed containers for up to 5 days. The seasoned roast can be prepped 4 hours ahead and refrigerated, bringing it to room temperature before roasting. Leftovers reheat beautifully—slice against the grain and warm in a 350°F oven for 10-15 minutes with a splash of water or broth to maintain moisture. This method yields 4 generous servings, perfect for meal prep or entertaining.
Why You’ll Love This Recipe
- Minimal Prep Required: I swear, this roast only needs four ingredients—plus a little time. No fancy marinades, no chopping vegetables, just season and sear. Honestly, I’ve made it while scrolling through emails, and it still turns out perfect.
- Crispy-Garlic Magic: That seared crust? Chef’s kiss. The garlic powder and olive oil caramelize into something addictive, while the kosher salt keeps it from drying out. Between us, it’s the kind of flavor that makes people ask for seconds before dessert.
- Weeknight or Potluck Hero: Serve it sliced thin for sandwiches on a busy Tuesday, or bring the whole roast to a picnic—it’s equally at home. My daughter even sneaks bites when she thinks I’m not looking. (Yes, even on a Tuesday night.)
- Budget-Friendly Leftovers: Eye of round is cheap, but this recipe feels like a splurge. I’ve stretched one roast into four meals: tacos, salads, and even a quick hash. The leftovers taste just as good reheated as they do fresh. Solid win for my wallet.
Step-by-step instructions for perfectly cooked 1 lb eye of round roast
Transform this lean cut into a juicy, flavorful centerpiece with precise timing and technique.
Prep the Roast for Even Cooking
Remove the 1 lb Eye of Round Roast from the refrigerator and pat it dry completely with paper towels. This step is crucial—any moisture on the surface will prevent proper browning. I use two layers of paper towels to ensure maximum dryness, especially around the edges where the crust forms.
Place the roast on a cutting board and make a crosshatch pattern of shallow cuts about ¼ inch deep using a sharp knife. This scoring helps the meat cook more evenly and prevents curling during roasting. Don’t cut too deeply or you’ll lose juices. Season immediately with the 1.5 tsp Diamond Crystal Kosher Salt and 1 tsp Freshly Ground Black Pepper, pressing the seasoning into the cuts for maximum penetration.
Create the Herb Butter Rub
In a small bowl, combine the 2 tbsp Butter with 1 tsp Garlic Powder, finely minced 2 cloves Garlic Cloves, and the 2 sprigs Fresh Rosemary and 2 sprigs Fresh Thyme. I like to strip the leaves from the herbs and chop them finely so they distribute evenly. Mix well until the butter is fully incorporated and the herbs are distributed throughout.
Spread this herb butter mixture evenly over the entire surface of the roast, including the scored areas. The butter will help create a flavorful crust while keeping the lean meat moist. Let the roast sit at room temperature for 30 minutes before cooking—this ensures even heat distribution throughout the meat.
Sear the Roast for Maximum Flavor
Preheat your oven to 375°F. Heat a heavy oven-safe skillet over medium-high heat and add the 1 tbsp Extra-Virgin Olive Oil. Once the oil is shimmering, carefully place the roast in the skillet and sear on all sides for 2-3 minutes per side until golden brown. You want to develop that deep, caramelized crust that locks in juices.
After searing, transfer the skillet to the preheated oven. The residual heat will help carry the roast to the perfect internal temperature. Roast for 25-30 minutes, checking the internal temperature with a meat thermometer after 20 minutes. The roast is done when it reaches 135°F for medium-rare—this temperature ensures tender, juicy results without drying out the lean cut.
Rest and Slice for Optimal Texture
Remove the roast from the oven and transfer it to a cutting board. Let it rest for 10-15 minutes before slicing—this crucial step allows the juices to redistribute throughout the meat. I know it’s tempting to cut into it immediately, but patience here makes all the difference in texture.
While the roast rests, thinly slice the 1 whole Yellow Onion and finely chop the 0.25 cup Fresh Parsley. Slice the roast against the grain into ¼-inch thick pieces. Arrange the sliced roast on a platter, garnish with the sliced onions and parsley, and serve immediately. The finished roast should be moist and tender with a flavorful crust, proving that even lean cuts can deliver exceptional results.
Pro Tips For Making 1 Lb Eye Of Round Roast
- Sear First, Roast Slow: Get that pan screaming hot—eye of round needs a crust, not a sad, limp exterior. Sear on all sides for 2-3 minutes per side before transferring to the oven, or you’ll end up with a meal that tastes more like boiled beef than roast.
- Salt Like a Pro: Diamond Crystal is lighter than table salt—use twice what you’d normally think. Pat the roast dry first, then hit it with 1.5 teaspoons of kosher salt and a generous crack of black pepper before searing. Wet salt sticks, and stuck salt burns.
- Skip the Crowding: If you’re cooking this in a skillet, resist the urge to toss in garlic powder and oil right away. Sear the meat first, then remove it to the oven—adding spices to a cold pan just makes them clump. Sprinkle garlic powder after searing for even coating.
- Use Olive Oil—But Not Too Much: Extra-virgin olive oil has a low smoke point. Use just enough (1 tablespoon) to coat the pan—any more and you’ll get bitter flavors before the meat even hits 145°F. If you’re worried, grab a neutral oil for searing and finish with a drizzle of EVOO after cooking.
Essential equipment for this dish
Essential Skillet
A heavy oven-safe skillet is your secret weapon for this roast—it sears beautifully on the stovetop and transitions straight to the oven without losing heat. I recommend a 10-inch cast iron skillet like the Lodge Pre-Seasoned for even heat distribution and superior crust development.
If you don’t have cast iron, a stainless steel skillet from All-Clad works well too. Avoid non-stick—it won’t create the same flavorful crust. 🔥
Meat Thermometer
Don’t skip this—accuracy is everything with lean cuts like eye of round. A digital instant-read thermometer like the ThermoWorks Smoke gives precise readings in seconds. Insert the probe into the thickest part of the roast (avoiding fat) until it reaches 135°F for medium-rare.
No thermometer? Use the finger test: press your finger on the meat—if it feels like your palm, it’s medium-rare. 🌡️
Cutting Board & Knife
A sharp chef’s knife (like the Wüsthof Classic) and a sturdy cutting board (I love maple or bamboo) are non-negotiable. The knife should glide through the roast with minimal force—dull blades crush fibers, leading to dry meat.
For slicing against the grain, a long, thin blade (like a slicing knife) ensures clean cuts. Never force it; let the knife do the work. ✨
Resting Tools
After roasting, transfer the meat to a wire rack placed over a baking sheet to allow air circulation—this prevents soggy slices. I use a collapsible cooling rack from OXO for easy storage.
For the resting period, a large cutting board (like John Boos Walnut) provides stability. Avoid plastic or glass—metal or wood conducts heat better and keeps the meat warm. 💪
Optional Garnish Tools
For the final touch, a mandoline slicer (like Benedict) makes quick work of thin onion slices, while a microplane (for garlic) ensures fine texture. A small offset spatula helps arrange garnishes neatly.
Skip these if you’re short on tools—hand-slicing onions and mincing garlic with a knife works just fine. The focus here is on the roast, not perfection! 🌟
Nutrition facts
Frequently asked questions
Why does eye of round need special treatment to stay tender?
The eye of round is a lean, tough cut with minimal fat marbling, making it prone to drying out. The scoring technique and herb butter rub create a moisture barrier while the 135°F internal temperature ensures maximum tenderness. Slicing against the grain further breaks down the muscle fibers for a melt-in-your-mouth result.
Can I cook this roast at a lower temperature for more even cooking?
Yes! For a gentler approach, reduce oven temp to 300°F and increase cooking time to 40-45 minutes while still aiming for 135°F internal temp. The lower heat prevents moisture loss, though the crust will be less pronounced. This works especially well for larger roasts or if you prefer medium doneness.
What if I don’t have fresh herbs?
No problem! Use ½ tsp dried rosemary and ½ tsp dried thyme instead of fresh, and increase the garlic powder to 1.5 tsp for extra flavor. The herb butter will still develop great aroma—just mix the dried herbs directly into the softened butter for even distribution.
How should I store leftovers?
Slice the roast and store in an airtight container with parchment paper between layers. It keeps for 3-4 days in the fridge. For longer storage, freeze slices wrapped tightly in plastic wrap for up to 3 months. Reheat in a 350°F oven with a splash of water or broth for 10-15 minutes to restore moisture.
What’s the best way to use up the remaining herb butter?
Spread it on warm crusty bread or use it to baste roasted vegetables like potatoes or carrots. The flavorful butter adds richness to any dish—just store it in the fridge for up to 3 days or freeze for 1 month. For extra versatility, mix it with 1 tsp lemon juice before using to brighten flavors.

- 3lb Prime Rib Roast Recipe: Juicy Pink Center Guaranteed in 3 Hours - October 31, 2026
- 5 Spice Cake Recipe: Warmly Spiced Layers With Crunchy Top - October 31, 2026
- 1950’s Macaroni and Cheese Recipe: Nostalgic Creamy Cheese Sauce with Buttery Noodles - October 31, 2026