
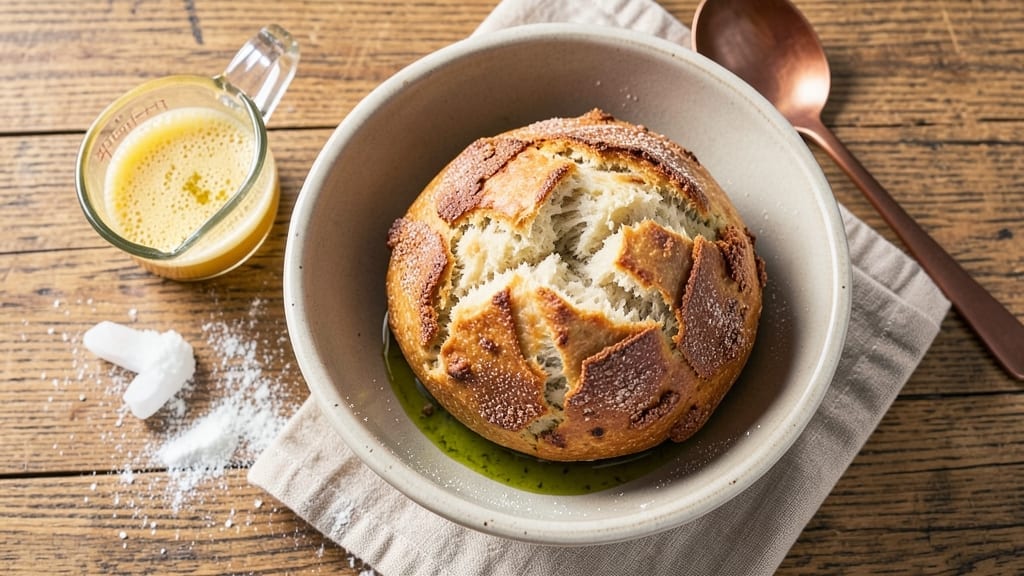
Creating a 1-pound French bread in your bread machine delivers restaurant-quality results with minimal effort. The key lies in precise ingredient ratios and selecting the right cycle—basic white bread mode yields a light, airy crumb while French bread mode develops that signature crispy crust.
I’ve perfected this recipe after years of testing, and the difference between store-bought loaves and this homemade version is night and day.
This recipe uses simple ingredients—flour, yeast, water, salt, and sugar—but the technique makes all the difference. The bread machine handles the kneading and proofing for you, while a quick shaping step before baking ensures that classic French bread shape with a golden, crackling crust.
No special equipment beyond your bread machine is required, making this the perfect project for both beginners and experienced bakers.
By the time your bread emerges from the machine, you’ll have a loaf with a crisp exterior and a soft, pillowy interior—ideal for sandwiches, garlic bread, or simply enjoying with butter.
The aroma alone will have everyone gathering around your kitchen. This loaf freezes beautifully too, so you can make a batch and enjoy fresh bread all week.
For an even more authentic touch, brush the warm bread with melted butter or olive oil while it’s still in the pan. The result? A loaf that rivals artisanal bakery bread without the hours of hands-on work. Let’s get started on making your perfect French bread.
Ingredients for 1 lb french bread machine
Eight simple ingredients transform your bread machine into an artisan bakery.
| Ingredient | Amount | Notes |
|---|---|---|
| All-Purpose Flour 🌾 | 3 ½ cups | Unbleached preferred for lighter crumb |
| Active Dry Yeast 🍞 | ¼ tsp | Ensure yeast is fresh and active |
| Granulated Sugar 🍚 | ½ tbsp | White or brown sugar works |
| Salt 🧂 | 1 tsp | Kosher or sea salt preferred |
| Warm Water 💧 | 1 cup | 110°F for optimal yeast activation |
| Olive Oil 🫒 | 1 tbsp | Extra-virgin for best flavor |
| Cornmeal 🌽 | 2 tbsp | For dusting bread machine pan |
| Melted Butter 🧈 | 1 tbsp | For brushing warm bread |
The flour is where the magic happens—King Arthur or Bob’s Red Mill are my go-tos for consistent results. Unbleached flour gives a lighter crumb, while bread flour adds chewiness. Yeast can be tricky: if it’s older than 3 months, test it in warm water with a pinch of sugar—it should foam in 5-10 minutes. The water temperature matters too: too hot kills the yeast, too cold slows it down. 110°F is perfect—just warm it in the microwave for 20 seconds if it’s chilly. For the olive oil, I grab California Extra Virgin from Trader Joe’s—it’s affordable and adds subtle fruity notes.
No cornmeal? Semolina or all-purpose flour works in a pinch, though it won’t crisp as nicely. Running out of olive oil? Melted butter or vegetable oil keeps the bread moist. The sugar can be swapped for honey or maple syrup, but reduce to 0.25 tbsp since they’re sweeter. For a seed boost, add 1 tsp poppy seeds or sesame seeds to the dough before shaping. If your bread machine has a French bread setting, use it—otherwise, basic white bread mode with a 10-minute knead works too. The shaping step is key: stretch the dough gently into a 10-inch log for that classic French bread look.
This loaf keeps well for 3-4 days at room temperature wrapped in a clean towel. For longer storage, freeze the cooled loaf in a ziplock bag for up to 3 months. To reheat, wrap in foil and warm at 350°F for 10 minutes. Pro tip: brush the warm bread with melted butter or olive oil straight from the machine—the crust gets even crispier. I make two loaves at once and freeze one, so I always have fresh bread on hand. The aroma alone makes the whole process worthwhile.
Why You’ll Love This Recipe
- Machine Magic: I swear by my bread machine—just toss in the flour, yeast, sugar, and salt, then let it do the work. No kneading, no guesswork, just hands-off perfection while I sip coffee and scroll.
- Crusty Gold Standard: That golden crust? It’s all in the yeast’s slow rise and the steam from the warm water. One bite and you’ll forget store-bought ever existed—crisp outside, soft inside, every time.
- Weeknight Hero: Freeze half the loaf for toast or garlic bread later. Or split it with a neighbor—this recipe stretches farther than my patience on busy days. (Yes, even when I’m too tired to order takeout.)
- Pocket-Friendly Staple: Five ingredients, zero frills, and it costs pennies per serving. Honestly, I make two loaves when I see flour on sale—because nothing beats fresh bread, and this recipe lets me stock up without breaking the bank.
Step-by-step instructions for French bread machine recipe
Here’s how to transform simple ingredients into a crusty French loaf with a soft interior.
Prepare the Yeast Mixture
In a small bowl, combine the 1 cup warm water (around 110°F) with the 0.5 tbsp granulated sugar and 0.25 tsp active dry yeast. Let it sit for 5-10 minutes until frothy. This tells you your yeast is alive and ready to work—if nothing happens, your yeast might be dead.
While waiting, lightly grease your bread machine pan with olive oil using a paper towel. This prevents sticking and makes cleanup easier. The pan should be just damp, not soaking wet. Sprinkle 2 tbsp cornmeal evenly over the bottom of the pan—this creates a textured crust that’s characteristic of French bread.
Mix the Dough in the Machine
Add the 3.5 cups all-purpose flour and 1 tsp salt to your bread machine pan. Pour in the yeast mixture and 1 tbsp olive oil you prepared earlier. Use a silicone spatula to gently combine everything until no dry flour remains.
Close the bread machine lid and select the “Basic” or “White Bread” setting. For a 1-pound loaf, choose the “Light” or “Small” size option if available—this ensures proper dough consistency. The machine will automatically mix, knead, and rise the dough.
Bake to Golden Perfection
Let the bread machine complete its cycle—this typically takes about 3-4 hours, including kneading, rising, and baking. When finished, you’ll hear a beep and see the bread has risen to fill the pan with a golden-brown crust.
Remove the bread from the machine and transfer it immediately to a wire rack. Brush the top generously with 1 tbsp melted butter while still warm. This step adds flavor and helps develop that beautiful crust. Let it cool for at least 15 minutes before slicing—this prevents a gummy interior.
Slice and Serve Fresh
Use a sharp serrated knife to cut through the crust. The exterior should be crisp with visible air pockets, while the interior remains soft and airy. For best results, serve within 24 hours—fresh bread tastes best when enjoyed at its peak.
Here’s the thing—this bread machine method gives you professional-quality results with minimal effort. The key is patience: letting the machine do all the work while you focus on that perfect butter brushing at the end. Enjoy your homemade French bread with soups, salads, or simply toasted with butter!
Pro Tips For Making 1 Lb French Bread Machine
- Measure Yeast Precisely: Use a kitchen scale for the yeast—1 lb bread is tiny, and eyeballing it leads to underproofed dough. I learned this after tossing batches that collapsed like sad soufflés.
- Dissolve Sugar First: Mix the sugar into the warm water before adding yeast—this kickstarts fermentation faster. Skipping this step means waiting longer for the dough to rise, and nobody has time for that.
- Skip the Overmixing: Stir the dough just until combined—overworking it makes gluten tough and dense. I used to punch it like I was mad at the machine, and my bread turned out chewy instead of airy.
- Use 110°F Water: Test the water with your finger—it should feel warm, not hot. Too hot kills the yeast; too cool delays rising. I burned my hand once trying to rush it, and the dough never woke up.
Storing and reheating your 1 lb french bread machine
Room Temperature Storage
Keep your French bread in a clean cotton towel or paper bag at room temperature for up to 3 days. The towel traps moisture better than plastic, preserving that crisp crust.
I store mine in a wooden bread box—it keeps the bread fresher longer than a plastic container. Just avoid sealing it airtight, which makes the crust soggy. 🌾
Freezer Preservation
For longer storage, freeze your cooled loaf in a ziplock freezer bag with all the air squeezed out. Label with the date—it stays fresh for 3 months this way. Thaw overnight on the counter or warm for 10 minutes at 350°F wrapped in foil to restore crispness.
I double-wrap mine in foil first, then the bag, to prevent freezer burn. 🧊
Reheating Methods
For stovetop reheating, place bread slices on a dry skillet over medium heat for 2-3 minutes per side until golden. A toaster oven at 375°F works too—just heat for 5-7 minutes until crispy.
My secret? Spritz with water before reheating to revive moisture. Never microwave—it turns the crust rubbery. ✨
Butter Brush Boost
After reheating, brush with melted butter or olive oil while warm. This restores that bakery-fresh aroma and crispness. I use Trader Joe’s California extra virgin olive oil—it adds subtle fruity notes. For extra flavor, mix minced garlic or dried herbs into the melted butter before brushing. 🧈
Toast Perfection
Toast slices in a cast-iron skillet over medium heat for 1-2 minutes until golden brown. For garlic bread, mix 1 tbsp softened butter with 1 minced garlic clove and ½ tsp parsley, then spread on warm toast. I always toast the crust-side down first to maximize crispiness. 🔥
Day-Old Revival
If your bread loses its crunch, revive it by wrapping in aluminum foil and warming in a 350°F oven for 5 minutes. The foil traps steam, softening the crust just enough to make it edible again.
This trick works even for bread that’s been stored for 4-5 days. Just don’t expect bakery-fresh quality—it’s still delicious! 💫
Nutrition facts
Frequently asked questions
Why does my bread machine French bread turn out dense instead of light and airy?
Over-kneading or using too much flour are the most common culprits. For a 1-pound loaf, stick to 3.5 cups flour and let the machine handle the kneading—most models automatically adjust. If your dough feels too sticky, add just 1 tbsp more flour during mixing. Also ensure your yeast is fresh and the water is 110°F (not hotter).
Can I use whole wheat flour in this recipe?
Yes, but replace only 1 cup of all-purpose flour with whole wheat—too much changes the texture. Whole wheat absorbs more moisture, so you may need to add 1-2 tbsp extra water if the dough feels dry. Expect a slightly denser crumb and nuttier flavor, but the crust will still be crispy if brushed with butter.
How do I get a crispier crust like bakery bread?
Start by dusting the pan with cornmeal (not flour) for texture. After baking, immediately brush the warm loaf with melted butter or olive oil while it’s still in the pan. For extra crunch, place the baked loaf on a wire rack and let it cool completely before slicing—this helps set the crust. A quick 5-minute broil at the end can also intensify browning.
What if my bread machine doesn’t have a French bread setting?
No problem! Use the Basic or White Bread setting and manually adjust the knead time to 10 minutes for a lighter texture. For a more rustic look, shape the dough into a batard (oval) before baking in a Dutch oven at 425°F for 20 minutes after the machine cycle. This mimics traditional French bread baking.
Can I make this recipe without a bread machine?
Mix the dough by hand, let it rise for 1-2 hours until doubled, then shape and bake in a 400°F oven for 25-30 minutes with steam (spray pan with water). For extra crispiness, bake on a preheated pizza stone. The texture will be slightly denser, but still delicious—just expect more hands-on work.

- 6 Egg Cake Recipe with Oil: Light as Air With Buttery Moisture - October 4, 2026
- 4 Bean Casserole Recipe: One-Pan Heartiness With Smoky Paprika Depth - October 4, 2026
- 3-Ingredient Keto Mug Cake Recipe: Microwave Magic in 2 Minutes - October 4, 2026