
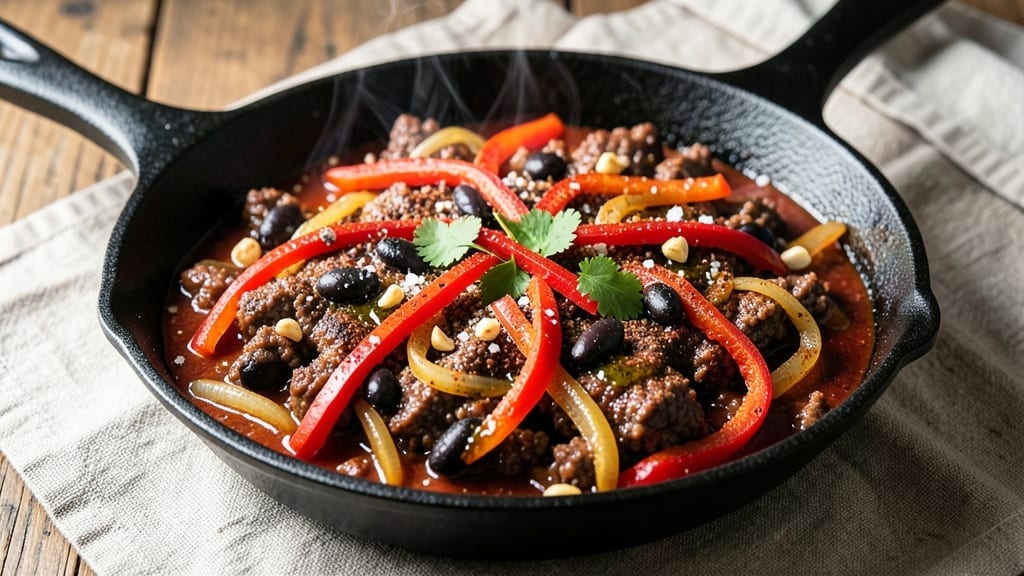
This 1 lb hamburger chili recipe delivers deep, smoky flavor in a single pot—no complicated steps, just hearty satisfaction. The secret lies in browning the meat first, locking in rich, caramelized depth that transforms ground beef into tender, flavorful chunks.
I developed this version after burning through three batches that tasted more like stew than chili, and now it’s the one my family begs for on cold evenings.
What sets this chili apart is the balance: one-pot simplicity meets restaurant-quality taste. We’re talking perfectly seasoned meat, a thick yet tender sauce, and just the right amount of spice to warm you from the inside out.
The recipe builds flavor gradually—starting with a deep, aromatic base of onions and garlic, then letting everything simmer until the edges are just beginning to caramelize. No shortcuts, just a method that works every time.
By the time you’re done, you’ll have a pot of chili that’s rich, smoky, and packed with texture—where each bite delivers tender beef, melted beans, and a sauce that clings perfectly.
The best part? It’s ready in under an hour, with minimal cleanup. Serve it with crusty bread, a dollop of sour cream, or exactly as is, straight from the pot.
This isn’t just chili—it’s a foolproof weeknight solution that feels like a hug in a bowl. Whether you’re feeding a crowd or prepping leftovers for the week, this recipe delivers without the fuss. Let’s get cooking.
Ingredients for 1 lb hamburger chili
Nine spices, one pound of beef, and a pot that’ll feed four hungry people.
| Ingredient | Amount | Notes |
|---|---|---|
| Ground Beef (80/20 Lean-to-Fat Ratio) 🥩 | 1 lb | Chuck or ground beef preferred |
| Yellow Onion 🧅 | 1 whole | Medium, diced small |
| Garlic Cloves 🧄 | 3 cloves | Minced or finely chopped |
| Chili Powder 🌶️ | 1 ½ tbsp | Medium heat preferred |
| Ground Cumin 🌿 | 1 tbsp | Freshly toasted for depth |
| Smoked Paprika 🌶️ | 1 tbsp | For authentic smoky flavor |
| Dried Oregano 🍃 | 1 tsp | Mexican oregano if available |
| Salt 🧂 | 1 tsp | Kosher or sea salt |
| Black Pepper 🌶️ | ½ tsp | Freshly ground preferred |
| Cayenne Pepper 🔥 | ¼ tsp | Adjust for heat preference |
| Tomato Paste 🍅 | 2 tbsp | Squeeze tube or canned |
| Beef Broth 💧 | 1 ½ cups | Low-sodium preferred |
| Black Beans 🫘 | 1 can | Drained and rinsed |
| Kidney Beans 🫘 | 1 can | Drained and rinsed |
| Extra-Virgin Olive Oil 🫒 | 1 tbsp | For browning meat |
The beef is non-negotiable here—80/20 ground chuck gives you that perfect balance of tenderness and fat for rich flavor. Costco or any supermarket butcher section has it pre-ground, but if you’re buying a whole chuck roast, ask for it to be trimmed and ground fresh. The fat is what makes this chili sing, so don’t skimp on the 20% fat ratio. For the spices, Penzeys or the bulk section at Whole Foods have the best quality, but honestly, the regular grocery store stuff works if it’s fresh. Smoked paprika is what gives this chili its signature depth—don’t swap it for regular paprika unless you’re okay with less smokiness.
No smoked paprika? Substitute with half the amount of regular paprika plus a pinch of liquid smoke—it’s a game-changer. Fresh garlic and onion are ideal, but if you’re in a pinch, frozen diced onions work just fine (just thaw and drain them first). The tomato paste can be from a squeeze tube—Trader Joe’s has great ones that last forever. For the beans, no-soak varieties are a must unless you’re prepping ahead. And if you’re watching sodium, low-sodium broth plus an extra pinch of salt at the end balances it out perfectly.
This chili tastes even better the next day—make a double batch and freeze half for lazy nights. Store leftovers in the fridge for 4-5 days, or freeze for up to 3 months. I always portion mine into containers so I can grab a bowl straight from the freezer and have dinner in 10 minutes. The key to reheating? Low and slow on the stove with a splash of broth to keep it from drying out.
Why You’ll Love This Recipe
- One-Pot Magic: I swear by this—just brown the beef, toss in the onions and garlic, then dump in the spices. That’s it. No fancy steps, no extra pots. The fat from the 80/20 beef even helps build flavor while you stir.
- Spice Bomb Flavor: Between the toasted cumin and chili powder, this chili has depth. The onions caramelize just enough to balance the heat, and that garlic? Oh, it lingers in the best way. Not too sweet, not too smoky—just right.
- Game for Any Day: Need a quick lunch? Double the batch and freeze half. Hosting a tailgate? This feeds 4 easily. Even my picky teen eats it straight from the pot—no complaints, just seconds.
- Budget Hero: A pound of beef stretches far when paired with beans (if you add them), and the spices cost pennies. Honestly, I make this when I’m broke or when I’m not. Same result, zero guilt.
Step-by-step instructions for smoky, spiced one-pot chili
This hearty chili comes together in a single pot with deep, smoky flavors.
Brown the Ground Beef Perfectly
Heat the 1 tablespoon extra-virgin olive oil in a large Dutch oven or heavy pot over medium-high heat. Add the 1 pound ground beef (80/20 lean-to-fat ratio) and break it up with a wooden spoon, letting it brown in batches if needed to avoid steaming. Cook for 8-10 minutes until the beef is deep brown and mostly cooked through.
Here’s the thing—don’t drain the fat. That rendered beef fat carries incredible flavor and helps build the chili’s rich base. Once the beef is browned, use a slotted spoon to transfer it to a plate, leaving all that delicious fat behind in the pot.
Sauté the Aromatics and Spices
In the same pot, add the 1 whole yellow onion (diced small) and cook for 5 minutes until softened and translucent. Add the 3 cloves garlic (minced) and cook for another 30 seconds until fragrant—don’t let it burn, or you’ll get bitter flavors.
Now add the spices: 1.5 tablespoons chili powder, 1 tablespoon ground cumin, 1 tablespoon smoked paprika, 1 teaspoon dried oregano, 1 teaspoon salt, 0.5 teaspoon black pepper, and 0.25 teaspoon cayenne pepper. Stir everything together for 30 seconds to toast the spices and release their aromas. This step builds the chili’s complex flavor foundation.
Build the Chili Base
Reduce the heat to medium and stir in the 2 tablespoons tomato paste, cooking for 2 minutes until it darkens slightly. Pour in the 1.5 cups beef broth and scrape up any browned bits from the bottom of the pot—those bits are packed with flavor. Return the browned beef to the pot and add the 1 can black beans (drained and rinsed) and 1 can kidney beans (drained and rinsed).
Bring the mixture to a gentle boil, then reduce the heat to low and let it simmer uncovered for 30 minutes. Stir occasionally to prevent sticking, and taste the chili after 20 minutes—this is when you can adjust the seasoning if needed. The beans will soften and absorb all those rich flavors.
Simmer to Perfection
Continue simmering the chili for another 15-20 minutes until it thickens slightly and the flavors meld together. You’ll know it’s ready when it reaches a thick, stew-like consistency—the broth should mostly be absorbed, leaving a hearty, flavorful chili.
Real talk: The longer you simmer this chili, the deeper the flavors become. If you have time, let it cook for up to 45 minutes total for maximum flavor development. The beans should be tender, and the chili should coat the back of a spoon when you stir it.
Rest and Serve
Remove the chili from heat and let it rest for 5-10 minutes before serving. This resting period allows the flavors to settle and the chili to thicken slightly. Taste again and adjust the seasoning if needed—sometimes chili tastes better after it’s had a chance to rest.
Serve your chili hot with your favorite toppings: shredded cheese, sour cream, chopped green onions, or a dollop of Greek yogurt. This one-pot chili delivers bold, smoky flavors that taste even better the next day—so make extra if you can!
Pro Tips For Making 1 Lb Hamburger Chili
- Brown the Beef: DESCRIPTION: Don’t just crumble and cook—sear the beef in batches first. After breaking it up, press small handfuls into ¼-inch patties and let them brown on high heat for 2-3 minutes per side. That crust locks in flavor and prevents a greasy chili later.
- Sauté Onions Low and Slow: DESCRIPTION: Skip the high-heat rush—cook the onions on medium-low for 8-10 minutes until soft and translucent. I used to burn them, but now they melt into the chili instead of turning bitter.
- Toast the Spices: DESCRIPTION: Bloom the chili powder and cumin in the pot for 30 seconds after the onions. The heat wakes up their flavor—no need to add extra. (Yes, even if it smells like nothing’s happening.)
- Simmer, Don’t Boil: DESCRIPTION: After adding liquid, keep the chili at a gentle simmer—tiny bubbles, not rolling. Boiling toughens the beef and makes it rubbery. Cover and let it work for 20 minutes.
Essential equipment for perfect results
Dutch Oven Essentials
A heavy-bottomed Dutch oven is my go-to pot for chili because it distributes heat evenly and handles long simmering without hot spots. I swear by the Lodge 5.5-quart Dutch oven—it’s affordable, durable, and retains heat like a dream.
If you don’t have one, a stainless steel stockpot with a lid works in a pinch, but the Dutch oven’s thick walls prevent scorching during those long simmering sessions. 🔥
Wooden Spoon Must-Have
Never use metal utensils when browning the beef or stirring the chili—it scratches the pot and can react with acidic ingredients. A long-handled wooden spoon (like the OXO Good Grips) is perfect for breaking up the meat and scraping up flavorful browned bits.
I keep one dedicated to chili-making so it’s always on hand when I need it.
Measuring Spoons Set
Precision matters when it comes to spices in chili. A stainless steel measuring spoon set (I use the West Bend 12-piece set) ensures you get the exact amounts of chili powder, cumin, and cayenne for that perfect balance of heat and depth.
Don’t eyeball it—those tiny differences add up, and you’ll taste the result in every spoonful.
Slotted Spoon for Draining
A slotted spoon (like the OXO Good Grips) is crucial for transferring the browned beef to a plate while leaving the rendered fat behind. This fat is the secret to rich, flavorful chili—it’s what carries all those caramelized notes into the sauce.
I also use it to fish out any stray bean skins or impurities before serving.
Instant-Read Thermometer
While not strictly necessary, an instant-read thermometer (I recommend the Thermoworks ThermoPop) helps ensure your chili reaches the ideal internal temperature of 165°F if you’re adding any raw ingredients like ground meat.
It’s also handy for checking the temperature of your broth or beans if you’re worried about overcooking. 🌡️
Optional: Immersion Blender
If you prefer your chili ultra-smooth, an immersion blender (like the Ninja Professional) lets you blend directly in the pot without transferring everything to a blender.
I use mine to blend about half the chili for a creamy texture while leaving the rest chunky—it’s a great way to customize the consistency without extra cleanup.
Nutrition facts
Frequently asked questions
Can I use lean ground beef instead of 80/20 for this chili?
While you can, I don’t recommend it for this recipe. The 20% fat ratio in 80/20 ground beef creates a richer, more flavorful chili that simmers beautifully. Lean ground beef (90/10 or higher) will make the chili less tender and less rich in flavor. If you must use lean, add 1 tablespoon of beef fat or olive oil at the end to compensate for the lost richness.
How can I make this chili spicier?
For extra heat, add 0.5 teaspoon more cayenne pepper or 1 teaspoon of crushed red pepper flakes when you toast the spices. You can also stir in 1-2 chopped jalapeños (seeds removed for mild heat) with the onions. For a smoky kick, add 0.5 teaspoon of chipotle powder or a dash of hot sauce at the end.
Can I make this chili in a slow cooker?
Brown the beef as directed, then transfer everything to a 6-quart slow cooker. Cook on low for 6-7 hours or high for 3-4 hours, stirring occasionally. The slow cooker method develops even deeper flavors, but keep an eye on the liquid level—add 1/4 cup of broth if it gets too thick. The texture will be slightly softer but equally delicious.
What if my chili is too thin or watery?
Simmer uncovered for 10-15 more minutes to reduce the liquid naturally. If it’s still too thin, mix 1 tablespoon of cornstarch with 2 tablespoons of cold water, stir it into the chili, and cook for another 5 minutes until it thickens. Alternatively, mash half the beans with a fork to release their starch and help thicken the sauce.
Can I freeze this chili?
Yes, this chili freezes beautifully! Let it cool completely, then portion into airtight containers or freezer bags, leaving 1-inch headspace for expansion. It keeps for up to 3 months. To reheat, thaw overnight in the fridge, then warm on the stove over medium-low heat, stirring occasionally and adding 1-2 tablespoons of broth if needed to restore moisture.

- 3lb Prime Rib Roast Recipe: Juicy Pink Center Guaranteed in 3 Hours - October 31, 2026
- 5 Spice Cake Recipe: Warmly Spiced Layers With Crunchy Top - October 31, 2026
- 1950’s Macaroni and Cheese Recipe: Nostalgic Creamy Cheese Sauce with Buttery Noodles - October 31, 2026