
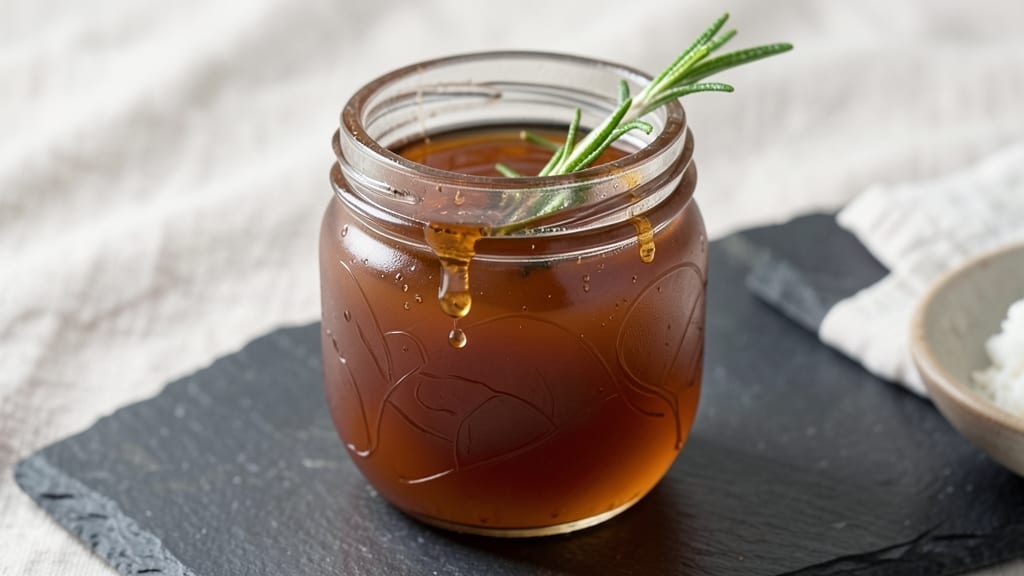
A 1-liter simple syrup recipe is the foundation of balanced cocktails and perfectly sweetened desserts—where precision meets versatility. This foolproof method delivers a smooth, 1:1 sugar-to-water ratio that dissolves completely for a crystal-clear syrup, ready to elevate everything from espresso martinis to fruit salads.
The beauty lies in its simplicity: just sugar and water, heated just enough to dissolve without caramelizing, then cooled to room temperature for stability.
What sets this recipe apart is its professional-grade consistency, achieved through exact measurements and controlled heating. Unlike store-bought syrups, this version lets you adjust sweetness to taste—whether you need a subtle glaze for pastries or a bold sweetener for cocktails.
The 1-liter batch is ideal for batch cocktails or dessert prep, with enough leftovers to keep your pantry stocked for weeks.
By the time you’re done, you’ll have a clear, flavor-neutral syrup that enhances rather than overpowers. The key is patience during the cooling phase—letting it sit undisturbed prevents crystallization and ensures a smooth pour every time.
This isn’t just a sweetener; it’s a versatile tool that transforms ordinary recipes into something extraordinary.
Store it in a clean glass jar in the fridge for up to 3 months, or extend its shelf life with a splash of vodka for preservation.
Use it to sweeten iced teas, drizzle over pancakes, or balance the acidity in cocktails like margaritas and mojitos. The possibilities are endless—let’s get precise.
Ingredients for 1 liter simple syrup
Two ingredients, one liter of magic—this is your cocktail and dessert game-changer.
| Ingredient | Amount | Notes |
|---|---|---|
| Granulated White Sugar 🍚 | 16 oz | Superfine sugar dissolves faster |
| Distilled Water 💧 | 16 oz | Filtered preferred for clarity |
| Vodka (optional) 🍸 | 2 tbsp | For preservation, 151-proof preferred |
| Clean Glass Jar 🥫 | 1 jar | 1-liter capacity, sterilized |
| Medium Saucepan 🍳 | 1 piece | Stainless steel preferred |
| Whisk 🔄 | 1 piece | For even dissolution |
Sugar quality makes all the difference here. Domino or C&H are my go-tos for consistent results—they dissolve smoothly without graininess. If you’re using raw sugar or turbinado, expect a slightly coarser texture, though it works fine for non-clear applications like fruit salads. For water, reverse osmosis filtered is ideal, but tap water in most cities is perfectly fine. The vodka, if using, should be 151-proof or higher—cheap vodka can add unwanted flavors. Grab a 1-liter glass jar with a tight seal from any kitchen store; mason jars work beautifully.
No superfine sugar? Regular granulated works just fine—it’ll dissolve completely with a little extra whisking. Running short on water? Use 15 oz and adjust to 16 oz with ice water to avoid overheating. Skipping the vodka? No problem—just store it in the fridge for 3 months max. For a stronger syrup, use a 1:1.5 sugar-to-water ratio (24 oz sugar to 16 oz water). If you’re making this for cocktails, consider adding a pinch of citric acid to prevent crystallization over time.
The syrup will be hot after heating—let it cool completely before sealing to prevent condensation. Store in a cool, dark place for up to 3 months without vodka, or 6 months if you’ve added it. For long-term storage, freeze in ice cube trays and transfer to a bag; thaw in the fridge. This syrup keeps indefinitely frozen. If you notice any cloudiness or graininess, simply reheat gently and whisk until clear again.
Why You’ll Love This Recipe
- Pantry Staple Magic: I swear by this recipe because it uses two ingredients—sugar and water—and takes less time than boiling a pot of coffee. No fancy tools, no measuring cups that disappear mid-recipe, just a saucepan and a jar.
- Smooth Every Time: That clear, perfectly dissolved syrup? It’s the kind that doesn’t grain out or clump, even when you’re pouring it over hot tea or into a cocktail at the last second. Honestly, the vodka (if you use it) keeps it shelf-stable for months—no wasted effort.
- Cocktail Game Changer: I’ve drizzled this into iced tea, glaze for pancakes, and even my grandma’s famous lemonade. The beauty? It’s neutral enough to play well with anything but rich enough to make even plain water feel like a treat.
- Budget-Friendly Flex: A liter lasts me weeks—I keep it in the fridge for dressings, desserts, or a quick energy boost. And at under $2 to make? It’s cheaper than buying pre-made syrups, plus I control the sweetness. (Yes, even on a Tuesday night.)
Step-by-step instructions for homemade simple syrup
Here’s how to craft a perfectly balanced sweetener that elevates drinks and desserts.
Combine Sugar and Water in the Saucepan
Place the medium saucepan over medium heat and add both 16 oz granulated white sugar and 16 oz distilled water. I like to add the sugar first, then pour in the water while stirring gently with the whisk—this prevents clumping and helps the sugar dissolve more evenly from the start.
Watch closely as the mixture begins to bubble. Once it reaches a gentle simmer—you’ll see small bubbles forming around the edges but not a full rolling boil—reduce the heat to low. This controlled heat prevents scorching while ensuring complete dissolution. Let it simmer for 5-7 minutes until all sugar crystals disappear and the liquid becomes completely clear.
Stir Constantly for Even Dissolution
Keep whisking gently but continuously throughout the process. This is where precision matters most—uneven stirring can leave undissolved sugar at the bottom of the pan. I stir in slow, figure-eight motions to create gentle currents that pull all the sugar into the solution.
The syrup should become completely transparent with no visible sugar particles. If you notice any graininess after a few minutes, increase the heat slightly to medium-low and continue whisking until fully dissolved. This step ensures your syrup won’t crystallize later when you use it in cocktails or desserts.
Add Vodka (If Using) for Preservation
Once the syrup is fully dissolved and clear, remove the saucepan from heat. If you’re using the 2 tbsp vodka (optional), add it now while the mixture is still warm. The alcohol will help preserve the syrup longer by preventing bacterial growth. Stir well to distribute the vodka evenly throughout the syrup.
Here’s the thing—vodka doesn’t just preserve, it also adds subtle depth to the flavor profile. The high-proof vodka (151-proof preferred) ensures maximum preservation benefits without altering the syrup’s sweetness significantly. If you skip the vodka, your syrup will still be excellent but may need refrigeration after opening.
Cool and Transfer to Sterilized Jar
Let the syrup cool to room temperature—this takes about 15-20 minutes. I place the saucepan on a wire rack to allow air circulation on all sides, which speeds up the cooling process. While it cools, prepare the clean glass jar by ensuring it’s completely dry and sterile.
Once cooled, carefully pour the syrup into the jar. I use a funnel to prevent spills and ensure no syrup gets on the jar’s exterior. Leave about ½ inch of headspace at the top—this prevents overflow when the syrup expands during temperature changes. Seal the jar tightly with its lid.
Store Properly for Maximum Freshness
For best results, store the sealed jar in the refrigerator. The cold temperature helps preserve the syrup’s quality and prevents any potential bacterial growth. When ready to use, simply remove the amount needed and return the jar to refrigeration immediately. This syrup will keep for up to 2 weeks in the fridge.
If you’ve added vodka, you can actually store it at room temperature for up to 3 months—the alcohol acts as a natural preservative. But even without vodka, refrigerated syrup maintains its quality perfectly for cocktail applications. Remember, this simple syrup is your secret weapon for perfectly balanced drinks and desserts.
Pro Tips For Making 1 Liter Simple Syrup
- STIR CONSTANTLY ON HEAT: The second your sugar hits the water, grab that spoon and keep it moving—no breaks. I learned this the hard way when my syrup crystallized into a grainy mess. A full 3-5 minutes of steady stirring until it’s fully dissolved and clear is non-negotiable.
- USE COLD WATER FIRST: Skip the tap at room temperature—cold water dissolves sugar faster and prevents clumping. Measure it out in the jar first, then pour it into the saucepan. This also keeps your kitchen from getting sticky while you’re waiting.
- DON’T BOIL DRY: Once the syrup reaches a rolling boil, turn the heat down to medium-low and let it simmer uncovered. I used to crank it up high and end up with a burnt, caramelized disaster. A gentle simmer for 5 minutes is all you need—no need to babysit it.
- ADD VODKA LAST: If you’re using vodka (for shelf stability), mix it in after the syrup has cooled slightly—around 160°F (70°C). Pouring it into boiling syrup can cause it to evaporate faster, wasting your effort. Stir well and let it cool before sealing.
Make-ahead tips for leftovers
Batch Prep Strategy
Make this syrup in double batches when hosting—simmer 32 oz sugar and 32 oz water for 2 liters at once. Use a heavy-bottomed saucepan (like All-Clad) to prevent scorching during extended simmering. I keep a 1-liter and 2-liter jar dedicated to syrup storage for easy scaling. 💡
Flavor Infusions
Add 1 cinnamon stick or 3-4 fresh basil leaves while heating for infused syrups. Remove herbs after 5 minutes of simmering to prevent bitterness. For citrus syrups, use zest from 1 lemon (no pith) and 2 tbsp juice—simmer for 3 minutes only to preserve bright flavors.
Strain through a fine-mesh sieve before cooling.
Freezer Cubes
Portion cooled syrup into ice cube trays for cocktail prep. Each cube equals 1 oz—perfect for measuring in drinks. Freeze flat for easy stacking, then transfer to a ziplock bag.
Thaw overnight in the fridge before using. This method prevents waste and keeps syrup fresh for 6 months in the freezer.
Preservation Hacks
For longer shelf life, add 1 tsp citric acid (food-grade) per 16 oz syrup—it inhibits mold growth. Store in amber glass bottles to block light, which can degrade flavor. I label jars with dates using masking tape and a Sharpie for easy tracking. 📅
Cocktail Prep
Pre-mix 1:1 syrup-to-liquid ratios in pitchers for batch cocktails. For example, combine 8 oz syrup with 8 oz vodka and 16 oz tonic water for a ready-to-pour gin and tonic base.
Keep mixtures refrigerated in sealed pitchers for up to 1 week. This cuts drink prep time by 75% during parties.
Dessert Applications
Reduce syrup by half on the stovetop to create a glaze for donuts or pastries. Simmer 16 oz syrup uncovered at medium-high heat until it reaches 235°F (soft-ball stage).
Cool slightly before using—it’ll thicken as it cools. I drizzle this over warm churros or panna cotta for a restaurant-quality finish. ✨
Nutrition facts
Frequently asked questions
Can I use brown sugar instead of white sugar for simple syrup?
Yes, but expect a slightly different texture and flavor. Brown sugar will create a thicker, amber-colored syrup with caramel notes—perfect for glazes or spiced cocktails. Use the same 1:1 ratio, but whisk more vigorously to dissolve the molasses completely. For clear syrups (like for cocktails), stick with white sugar.
Why did my simple syrup crystallize after making it?
Crystallization happens when sugar doesn’t fully dissolve or when the syrup cools too quickly. To fix it, gently reheat the syrup until just warm, whisk until smooth, then cool slowly. Prevent future issues by using superfine sugar, whisking constantly during heating, and letting it cool at room temperature before sealing.
How do I adjust the sweetness level for different recipes?
This 1:1 ratio creates a moderately sweet syrup—ideal for most cocktails and desserts. For stronger sweetness, use a 1:0.8 ratio (e.g., 16 oz sugar to 12.8 oz water). For milder sweetness, try a 1:1.2 ratio (e.g., 16 oz sugar to 19.2 oz water). Always taste and adjust as needed!
Can I make this syrup without a stove?
For a no-heat method, mix 16 oz sugar with 16 oz hot water (from a kettle) in a heatproof container. Stir vigorously for 5-10 minutes until fully dissolved. This works best with superfine sugar or by pulverizing regular sugar into a fine powder first. The result is slightly less stable but still usable for 1-2 weeks refrigerated.
What’s the best way to measure syrup for cocktails?
Use a jigger or shot glass for precision—1 oz equals about 2 tablespoons. For batch cocktails, pre-mix syrup with other liquids in pitchers (e.g., 8 oz syrup + 8 oz vodka + 16 oz tonic for gin tonics). Store mixtures in the fridge for up to 1 week to save time during parties.

- 3lb Prime Rib Roast Recipe: Juicy Pink Center Guaranteed in 3 Hours - October 31, 2026
- 5 Spice Cake Recipe: Warmly Spiced Layers With Crunchy Top - October 31, 2026
- 1950’s Macaroni and Cheese Recipe: Nostalgic Creamy Cheese Sauce with Buttery Noodles - October 31, 2026