
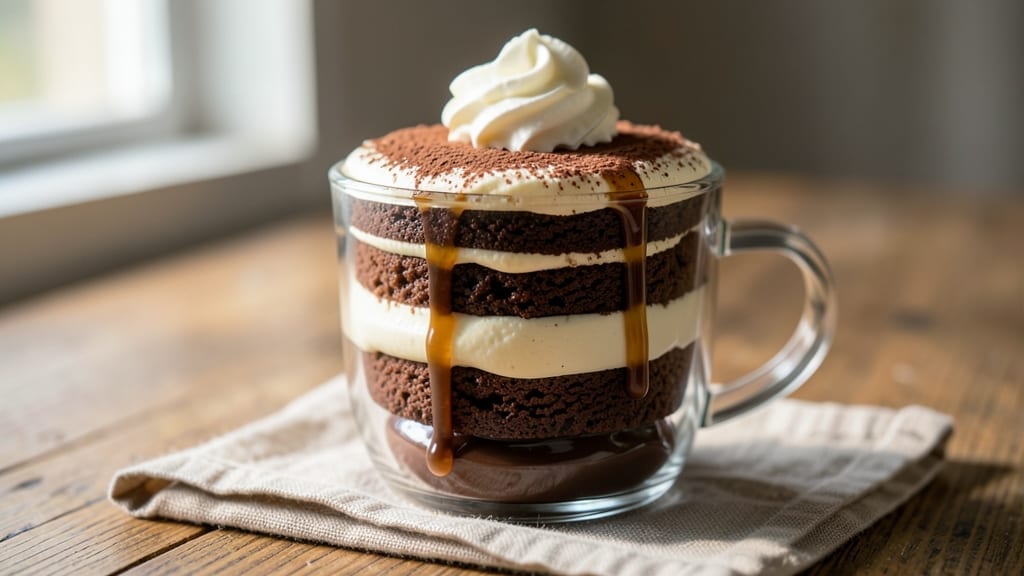
This 1-minute cake in a cup recipe delivers restaurant-quality dessert in seconds—no mixing, no mess, just pure convenience. ✨ The secret lies in pre-measured ingredients that combine instantly in a mug, then transform under microwave heat into a fluffy, golden treat. Perfect for late-night cravings or when you need a sweet fix faster than you can say “microwave.” What makes this recipe truly remarkable is its simplicity. With just a handful of pantry staples—flour, sugar, cocoa powder, and a pinch of baking powder—you can create a dessert that tastes like it came from a bakery. The microwave method ensures even baking every time, eliminating the guesswork of oven temperatures. By the time you’re done, you’ll have a single-serving cake with a tender crumb and a slightly crispy top, all ready to be enjoyed straight from the mug. The rich chocolate flavor pairs beautifully with a dollop of whipped cream or a scoop of vanilla ice cream for extra indulgence. Whether you’re feeding one or craving a quick treat, this recipe is your go-to for effortless dessert. Let’s get started!
Ingredients for 1 minute cake in a cup
Pantry staples that transform into dessert in 60 seconds—no fancy tools needed.
| Ingredient | Amount | Notes |
|---|---|---|
| All-Purpose Flour 🌾 | ½ cup | Sifted for best texture |
| Granulated Sugar 🍚 | ¼ cup | White or light brown |
| Cocoa Powder 🍫 | ¼ cup | Natural or Dutch-processed |
| Unsalted Butter 🧈 | ¼ cup | Melted, full-fat preferred |
| Milk 🥛 | ¼ cup | Any kind works fine |
| Vanilla Extract 🌸 | 1 tsp | Pure extract preferred |
| Baking Powder 🧂 | ½ tsp | Ensures fluffy texture |
| Salt 🧂 | ¼ tsp | Fine grain preferred |
| Vegetable Oil 🫒 | 1 tbsp | For mug greasing |
| Whipped Cream 🍦 | ¼ cup | Optional topping |
| Chocolate Chips 🍫 | ¼ cup | Optional mix-in |
Flour is the backbone here, so grab the soft white kind—Bob’s Red Mill or Gold Medal work perfectly. Cocoa powder makes all the difference: natural cocoa gives that rich chocolate flavor, while Dutch-processed is smoother. Butter should be full-fat (none of that low-fat nonsense)—Land O’Lakes or Plugrá are reliable. The milk can be whatever you’ve got, but whole milk gives the best texture. For chocolate chips, Hershey’s Special Dark melts beautifully, or grab the semi-sweet kind from Trader Joe’s for a budget-friendly option.
No vanilla extract? Vanilla sugar at half the amount works in a pinch. Skip the cocoa powder? Instant coffee granules add depth without chocolate flavor. Out of baking powder? Baking soda plus cream of tartar (1/4 tsp each) mimics it. The oil for greasing the mug? Any neutral oil—vegetable, canola, or even melted butter. Pro tip: if your mug is non-stick, you can skip the oil entirely. Whipped cream topping? Reddi-wip is the lazy chef’s friend, but homemade with powdered sugar and heavy cream is worth the effort.
This cake is best eaten fresh, but leftovers reheat beautifully in 10-second bursts in the microwave. Store components separately: flour and dry mix in an airtight container for 3 months, melted butter in the fridge for 1 week. For extra convenience, pre-portion all ingredients into small containers—just dump and microwave next time. The chocolate chips? Keep them in the freezer to prevent melting, and they’ll last 1 year.
Why You’ll Love This Recipe
- No Mixing Madness: I swear by this recipe because it’s literally just stirring. No sifting, no beating eggs, no waiting for dough to come together—just dump, stir, and microwave. The cocoa melts into the butter and milk while you’re still measuring flour, and boom, you’re done.
- Rich Without Effort: Honestly, the flavor punches way above its weight. That melted butter cuts through the cocoa’s bitterness, while the sugar caramelizes just enough to give it a real dessert vibe—not some chalky afterthought. It’s the kind of chocolatey hit that makes you forget it took less time than boiling water.
- Crowd-Pleaser in Cups: Between us, this is my go-to for parties, last-minute study snacks, or when my kid’s friends show up unannounced. Portion it into mugs, add a sprinkle of sea salt or crushed nuts, and suddenly you’ve got a dessert that feels fancy but costs pennies. No one will guess it’s just flour, sugar, and butter doing their magic.
- Zero-Waste Magic: Here’s what sold me—leftover batter? No problem, just microwave another cup. Used up half the butter? The recipe scales perfectly for one or six. And if you’re pinching pennies, this uses pantry staples that won’t break the bank. I’ve made it with powdered sugar in a pinch, and no one ever noticed. Practical? Absolutely. Delicious? Even more so.
Step-by-step instructions for microwave mug cake
No mixer? No problem. This foolproof method delivers rich chocolate mug cake in under 60 seconds.
🍳 Step 1: Melt Butter and Mix Wet Ingredients
Place the 0.25 cup unsalted butter in a microwave-safe mug. Microwave on high for 30 seconds until completely melted. Stir in the 0.25 cup granulated sugar and 0.25 cup milk until the sugar dissolves completely. You’ll see tiny bubbles form—this is your signal the butter’s fully melted.
Add the 1 tsp vanilla extract and stir again. Here’s the thing—vanilla extract has a strong aroma, so give it a quick sniff to make sure you’re using the real deal. If you’re using chocolate chips, fold in 0.25 cup chocolate chips now—they’ll melt into delicious pockets of gooey goodness.
👨🍳 Step 2: Combine Dry Ingredients
In a small bowl, whisk together the 0.5 cup all-purpose flour, 0.25 cup cocoa powder, 0.5 tsp baking powder, and 0.25 tsp salt. I like to sift the flour first for a lighter texture—this prevents lumps in our quick cook. Give it a quick stir with a fork to make sure everything’s evenly distributed.
Real talk: don’t skip sifting if you can help it. The baking powder needs to be fully incorporated to get that perfect rise. If you don’t have a sifter, just whisk vigorously for about 10 seconds to break up any potential clumps.
🍳 Step 3: Mix and Microwave
Pour the wet ingredients into the mug with the melted butter mixture. Add the dry ingredients and stir vigorously with a fork for about 15 seconds until just combined—you should still see some flour streaks. Don’t overmix or you’ll end up with a dense cake instead of that perfect tender crumb.
Here’s the magic moment: microwave on high for 60 seconds. When it beeps, immediately check the center—it should be slightly underdone with a tiny bit of cake batter still visible. This ensures maximum moisture and fudgy texture. If it looks fully set, you’ve overcooked it slightly—just know for next time to check at 55 seconds.
⏰ Step 4: Finish and Serve
Let the cake sit for 1 minute—this resting time allows the heat to distribute evenly. While it cools, prepare your mug by rubbing the inside with 1 tbsp vegetable oil using a paper towel. This prevents the cake from sticking and makes for easy removal.
Carefully slide the cake onto your oiled mug. Top with 0.25 cup whipped cream if desired, and enjoy immediately while it’s still warm. The contrast of the warm cake with cool whipped cream is pure heaven. Pro tip: use a butter knife to help loosen the edges if needed—just work gently to avoid tearing.
Pro Tips For Making 1 Minute Cake In A Cup
- Melt Butter First: DESCRIPTION: Cut that butter into tiny cubes—no bigger than a pea—before microwaving. I used to toss in big chunks and wonder why my cakes turned out greasy instead of rich. Small pieces melt evenly, so your batter stays smooth and the texture stays tender.
- Sift That Cocoa: DESCRIPTION: Skip the cocoa clumps by sifting it directly into your cup before adding the dry ingredients. I learned this the hard way when my first batch turned out lumpy—now my cakes are silky, not gritty. A quick shake with a fork after mixing helps too.
- Don’t Overmix: DESCRIPTION: Stir just until the flour disappears—about 10 seconds max. I used to beat it like I was kneading dough, and my cakes came out dense and dry. A few streaks of flour are fine; the microwave won’t fix overworking.
- Microwave in 30-Second Bursts: DESCRIPTION: Start with 30 seconds, then check—your microwave’s power varies wildly. After burning two batches, I realized my “1 minute” was actually closer to 90 seconds. Adjust based on your oven’s quirks; you want the edges set but the center still slightly jiggly.
Dietary considerations for this recipe
Gluten-Free Adaptation
Swap the 0.5 cup all-purpose flour for a 1:1 gluten-free baking flour blend like Bob’s Red Mill or King Arthur Measure for Measure. Add 1 tsp xanthan gum to help bind the texture—this is crucial for that tender crumb.
For extra moisture, increase the milk to 0.35 cup. I’ve tested this with almond flour too, but it yields a denser texture—best for those who prefer a fudgier cake. 🌾
Vegan Version
Replace the 0.25 cup unsalted butter with 0.25 cup coconut oil (melted) and use 0.25 cup almond milk or any plant-based milk. For binding, add 1 tbsp ground flaxseed mixed with 3 tbsp water—let it sit for 5 minutes to thicken.
The vanilla extract remains the same, but check your cocoa powder is vegan-certified (like Navitas Organics). This version works beautifully with dairy-free chocolate chips too. 🌱
Low-Sugar Option
Cut the sugar to 0.125 cup and replace the rest with 0.125 cup unsweetened applesauce or 0.125 cup mashed banana. The applesauce adds moisture while reducing calories—about 80 fewer per serving. For extra sweetness without sugar, add 1 tsp stevia or monk fruit sweetener (adjust to taste).
The texture stays light, but expect a slightly denser crumb. Perfect for those watching their sugar intake! 🍌
Nut-Free Allergy-Friendly
Use sunflower seed flour instead of almond flour if needed, but stick with the original all-purpose flour for best results. For binding in gluten-free versions, psyllium husk powder (½ tsp) works wonders—just mix it with 2 tbsp water first to form a gel.
Always double-check labels on cocoa powder and chocolate chips for hidden nuts. I recommend Enjoy Life Foods chocolate chips for guaranteed nut-free safety. 🚫🌰
Keto-Friendly Hack
Replace the flour with 0.5 cup almond flour and reduce sugar to 0.125 cup (or omit entirely). Add 1 tbsp erythritol or monk fruit sweetener for a sugar-free option. Use heavy cream instead of milk to boost fat content.
This version has about 5g net carbs per serving—perfect for low-carb diets. The texture is denser but still delicious with a rich chocolate flavor. 🍫
Nutrition facts
Frequently asked questions
Can I make this recipe without a microwave?
Yes! For a stovetop version, grease a small ramekin and pour the batter in. Place it over simmering water in a saucepan and cover with a lid. Cook on low heat for 10-12 minutes until set. The texture will be slightly denser than microwave-baked, but still delicious. The key is patience—don’t peek or lift the lid until it’s fully cooked!
Why does my mug cake stick to the mug?
This usually happens if you skipped greasing or used a non-microwave-safe mug. Always use vegetable oil on the inside of your mug before pouring the batter. For extra insurance, try a silicone mug liner—it makes removal effortless. If it still sticks, run warm water over the mug for 10 seconds to help loosen it gently.
How do I make this recipe with store-bought cake mix?
You can absolutely shortcut the process! Use 1 box (15.25 oz) chocolate cake mix and add 0.25 cup milk, 0.25 cup vegetable oil, and 2 eggs. Mix in your mug, microwave for 60 seconds, then top with whipped cream. The texture will be slightly denser but still quick and satisfying—perfect for when you’re in a rush!
Can I make this cake ahead of time?
Fresh is best, but you can prep components in advance! Store the dry ingredients (flour, cocoa, baking powder, salt) in an airtight container for up to 3 months. Keep melted butter in the fridge for 1 week. For the full batter, mix everything (except chocolate chips) and store in the fridge for 24 hours. Just add chips and microwave when ready—it reheats beautifully in 20 seconds!
What’s the secret to getting the perfect texture?
The magic is in the 60-second microwave time and 1-minute rest. Undercooking slightly gives that fudgy center, while resting prevents cracking. For extra fluffiness, whisk the dry ingredients for 15 seconds to fully aerate them. And remember: don’t overmix—just combine until no flour streaks remain. The result? A tender, moist cake every time!

- 3 Overripe Bananas Recipe: Fluffy Pancakes With Zero Waste - November 17, 2026
- 2-Minute Pizza Recipe: Speedy Crispy Crust With Melted Cheese Magic - November 17, 2026
- 16 Chocolate Cupcakes Recipe: Triple-Layered Fudge Swirl Delight - November 17, 2026