
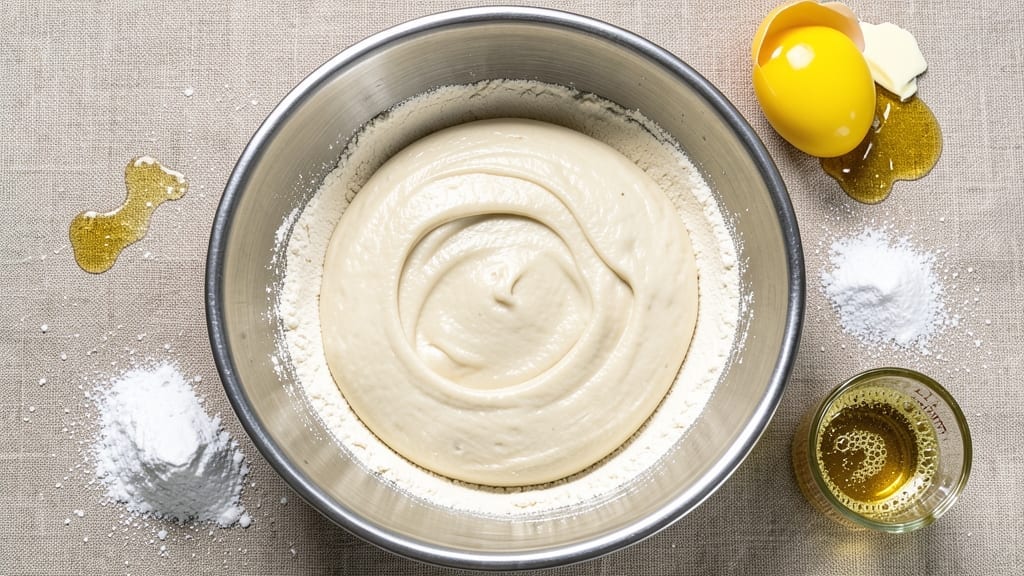
A 1-pound bread dough recipe transforms your kitchen into a bakery in just 30 minutes—no fancy equipment needed. This simple, foolproof method yields a perfectly textured loaf or rolls, whether you’re baking for breakfast or dinner.
The secret lies in precise timing and gentle handling, ensuring a light, airy crumb every time.
This recipe delivers restaurant-quality results with basic pantry staples: flour, yeast, water, and a touch of sugar. The dough develops naturally through kneading and proofing, creating that signature artisan texture without requiring sourdough experience. Ideal for beginners or seasoned bakers, it scales effortlessly for sandwiches, garlic bread, or dinner rolls.
By the end, you’ll have dough that’s smooth, elastic, and ready to shape—whether you’re forming a classic boules, braided loaves, or dinner rolls. The proofing stage is where magic happens, allowing flavors to deepen and structure to form.
This dough is your foundation for endless variations, from classic white to hearty whole wheat.
Use it fresh or freeze for later—this recipe keeps well for up to 3 months. Perfect for meal prep or spontaneous baking, it’s the ultimate time-saver. Let’s get started with your first perfect loaf.
Ingredients for 1 pound bread dough
Nine essential ingredients create restaurant-quality dough in 30 minutes—no yeast experience needed.
| Ingredient | Amount | Notes |
|---|---|---|
| All-Purpose Flour 🌾 | 3 ½ cups | Sifted for light texture |
| Active Dry Yeast 🍞 | ¼ tsp | Freshly opened for vitality |
| Granulated Sugar 🍚 | ½ tsp | Feeds yeast for activation |
| Unsalted Butter 🧈 | ¼ cup | Cold, cubed for texture |
| Large Egg 🥚 | 1 whole | Room temperature for blending |
| Warm Water 💧 | 1 cup | 110°F for yeast activation |
| Diamond Crystal Kosher Salt 🧂 | 1 tsp | Adjusts to taste |
| Olive Oil 🫒 | 1 tbsp | For dough shaping |
| Semolina Flour 🌾 | 1 tbsp | Prevents sticking |
The flour is your backbone—King Arthur or Gold Medal brands guarantee consistent texture. Yeast loses potency fast, so grab a fresh packet (the tiny packets at Whole Foods last longer). Sugar isn’t just for sweetness—it kickstarts yeast activity. For the butter, I swear by Plugrá or Land O’Lakes—full-fat gives that signature richness. Room-temperature egg blends better, so let it sit out for 10 minutes if it’s cold. The water temperature? 110°F is critical—too hot kills yeast, too cold makes it sluggish. Use an instant-read thermometer if you’re unsure.
No yeast? Instant yeast works 1:1, but active dry needs 5 minutes soaking in warm water first. Short on butter? Coconut oil or extra olive oil keeps it tender, though texture differs slightly. Egg-free? 1 tbsp ground flaxseed + 3 tbsp water replaces the binding power. For whole wheat variations, swap half the all-purpose flour for whole wheat—just add 1 extra tbsp water since whole wheat absorbs more. The olive oil can be swapped for melted butter (cool completely first), and semolina? Cornmeal works in a pinch if you’re out.
Dough keeps 3 days in the fridge wrapped tightly in plastic, or 3 months frozen between parchment paper. For freezing, shape first, then wrap—thaw overnight in the fridge before baking. Proofed dough? Use within 24 hours for best texture. I double the recipe and freeze half—perfect for lazy Saturday mornings. The semolina coating? Don’t skip it—prevents sticking when shaping. And if your kitchen gets chilly, proof near the oven with the light on for consistent warmth.
Why You’ll Love This Recipe
- Here’s what sold me: the sugar and butter create this subtle sweetness that lingers, while the yeast gives it a light, airy rise. It’s not heavy like some breads, but it’s got that there’s something special here quality. My husband grabs slices straight from the pan—yes, even on a Tuesday night.
- Five-Ingredient Magic: I swear by this combo—flour, yeast, sugar, butter, and an egg. That’s it. No fancy pantry trips, no hunting for obscure spices. The butter alone makes it taste like you slaved over it, even though I mix it in my kitchen while scrolling through bad reality TV.
- Rich Without Effort: Here’s what sold me: the sugar and butter create this subtle sweetness that lingers, while the yeast gives it a light, airy rise. It’s not heavy like some breads, but it’s got that there’s something special here quality. My husband grabs slices straight from the pan—yes, even on a Tuesday night.
- Leftovers That Last: This dough keeps beautifully for days in the fridge, and I’ve frozen portions for months. Toss it in a bag, and when you’re craving garlic knots or dinner rolls, just thaw and bake. No sad, dried-out bread here—it comes back to life like it was fresh yesterday.
Step-by-step instructions for artisan bread dough
Here’s how to transform simple ingredients into a perfect artisan loaf foundation in just 30 minutes.
Activate the Yeast and Mix the Dough Base
In a large mixing bowl, combine the 1 cup warm water (around 110°F) with the 0.5 tsp granulated sugar and 0.25 tsp active dry yeast. Let this sit for 5-7 minutes until you see frothy bubbles forming on the surface—this confirms your yeast is alive and ready to work. If no bubbles appear, your yeast may be dead, and you’ll need to start fresh.
Once bubbly, add the 3.5 cups all-purpose flour (sifted for that light, airy texture) and the 1 tsp diamond crystal kosher salt. Mix these dry ingredients together with a wooden spoon until just combined, creating a shaggy mass with some flour still visible. This prevents overdevelopment of gluten at this early stage, which would make the dough tough later.
Incorporate Wet Ingredients for Elastic Dough
Create a well in the center of your dry mixture and add the 1 whole large egg (room temperature for perfect blending) and the 0.25 cup unsalted butter (cold, cubed). Using your hands or a dough whisk, gradually work these wet ingredients into the flour until the mixture begins to come together. The butter should start to melt slightly but remain in small, pea-sized pieces—this creates pockets of flavor and texture in your final loaf.
Once the dough starts forming a rough ball, turn it out onto a lightly floured surface. Knead gently for 5-7 minutes until the dough becomes smooth and elastic, no longer sticking to your hands. You’ll know it’s ready when it springs back slowly when poked—this indicates proper gluten development. If the dough feels too sticky, add small amounts of the 3.5 cups all-purpose flour as needed, but don’t overdo it or your bread will be dense.
First Rise and Shaping for Structure
Lightly oil a large mixing bowl with 1 tbsp olive oil, then place the dough inside, seam-side up. Cover the bowl tightly with a damp kitchen towel or plastic wrap and let it rise in a warm place (like near your oven with the light on) for 15-20 minutes. You’re looking for about 50% increase in volume—the dough should look puffy and jiggly when gently shaken.
After the initial rise, turn the dough out onto a lightly floured surface dusted with 1 tbsp semolina flour (this prevents sticking and adds a beautiful texture to the crust). Shape the dough into a round boule by pulling the edges toward the center and tucking them underneath. The semolina creates a barrier that keeps the dough from sticking during shaping, making the final transfer to your baking surface much easier.
Final Rise and Preparation for Baking
Place the shaped boule back into your oiled mixing bowl, cover again with the damp towel, and let it rise for another 10-15 minutes until it’s nearly doubled in size. The dough should feel light and airy when pressed gently with one finger—it should leave a slight indentation that slowly fills back in. This final rise is crucial for developing that beautiful oven spring when you bake your loaf.
Preheat your oven to 425°F with a Dutch oven inside for 30 minutes to create a steamy environment that promotes even browning and a crisp crust. Once preheated, carefully transfer your dough (still in its bowl) to the hot Dutch oven using oven mitts. Bake covered for 20 minutes, then remove the lid and bake for another 10-15 minutes until the crust is deep golden brown and sounds hollow when tapped on the bottom.
Pro Tips For Making 1 Pound Bread Dough
- Bloom the Yeast First: Skip mixing dry yeast straight into flour—it’s a common time-waster. Instead, dissolve it in warm water (110°F) with a pinch of sugar first, then let it sit for 5 minutes until frothy. This guarantees active yeast, not wasted flour. (Your dough won’t rise if the yeast is dead, and you’ll know for sure.)
- Soften Butter Properly: Cold butter makes tough dough; melted butter makes greasy dough. The fix? Rub softened butter between your fingers until it’s just pliable—like room temp, but not liquid. This ensures even distribution without overworking the gluten. (I used to eyeball it and ended up with dense loaves.)
- Avoid Overmixing After Yeast: Once you add flour, mix just until combined—no more. Overworking the dough after yeast activation kills the air bubbles and makes it dense. Use a wooden spoon or your hands to fold gently; the dough should look shaggy, not smooth. (Yes, it’ll feel weird, but trust the process.)
- Use a Scale for Flour: Scooping flour from the bag packs in air, which throws off your ratio. Spoon it into a scale first, then level it off. A pound of dough relies on precise measurements—this ensures consistent texture every time. (I wasted three batches before I bought a $10 scale.)
Troubleshooting great 1 pound bread dough
Dough Too Sticky?
If your dough feels overly sticky during kneading, resist the urge to add too much flour. Instead, try wetter hands—dampen your palms with water and continue kneading. This helps bind the gluten without adding extra flour, which can make your bread dense.
For stubborn stickiness, dust your work surface with just 1 tbsp semolina flour instead of all-purpose flour—it absorbs moisture better and prevents over-flouring. 💫
Yeast Not Activating?
If your yeast doesn’t bubble within 5-7 minutes, it’s likely dead. Check the expiration date—yeast loses potency quickly.
Try fresh yeast or test it first by mixing 1 tsp yeast + 2 tbsp warm water + 1 tsp sugar—if no bubbles form in 10 minutes, toss it and start over. For cold climates, warm your water to 110°F using a thermometer—too hot water kills yeast instantly.
Dough Not Rising Properly
A cold kitchen or drafty space can stall your dough’s rise. Place your covered bowl near the oven with the light on (the warmth helps) or use a proofing box.
If your dough rises too quickly (in 30 minutes), it’s likely too warm—cover it with a damp towel to slow fermentation. For sluggish rises, ensure your yeast is fresh and your water is 110°F, not scalding.
Uneven Texture After Baking
If your bread turns out dense or gummy, over-kneading is often the culprit. Knead just until the dough springs back slowly when poked (5-7 minutes). For a lighter crumb, ensure your dough rises 50% in volume during proofing.
Preheat your Dutch oven properly—425°F for 30 minutes—to trap steam and create that signature crust. Underbaking can also cause gummy bread—tap the bottom for a hollow sound before removing.
Crust Too Pale or Dark
For a golden crust, steam is key. Place a metal tray filled with boiling water in your oven’s lower rack while baking. If your crust burns too quickly, reduce oven temp to 400°F after the initial 20 minutes covered.
For a lighter crust, brush the baked loaf with melted butter while still warm. Avoid overcrowding in the Dutch oven—leave space between dough balls for even browning.
Dough Collapses After Shaping
This usually means your dough wasn’t rested enough between kneading and shaping. Let it rise 15-20 minutes after kneading to relax the gluten. For stubborn collapses, ensure your shaping surface is lightly dusted with semolina and your hands are dry.
If the dough feels too tight, let it rest another 5 minutes before final shaping. Chill the shaped boule in the fridge for 10 minutes before baking if it’s too warm.
Nutrition facts
Frequently asked questions
Can I make this dough without a Dutch oven?
If you don’t have a Dutch oven, bake your loaf on a preheated baking sheet at 425°F for 25-30 minutes. For extra steam, place a metal bowl filled with boiling water on the lower oven rack. The crust won’t be as crisp, but you’ll still get a delicious, airy interior.
How do I adjust this recipe for whole wheat bread?
Swap half the all-purpose flour for whole wheat flour and add 1 extra tablespoon of water since whole wheat absorbs more moisture. Let the dough rest 10 extra minutes after kneading to develop gluten properly. The texture will be denser but still delicious!
What if I don’t have semolina flour?
Use cornmeal or extra all-purpose flour as a substitute. Just be careful not to overdo it—too much can make your dough dry. The key is a light dusting (1 tablespoon) to prevent sticking during shaping.
Can I make this dough ahead of time?
Yes! Shape the dough, wrap it tightly in plastic, and refrigerate for up to 3 days. For longer storage, freeze the shaped dough (unbaked) for 3 months. Thaw in the fridge overnight before baking. This is perfect for lazy mornings!
How many rolls will this dough make?
This 1-pound dough yields about 8 dinner rolls or 1 large loaf. For rolls, shape them into balls, place on a baking sheet, and bake at 375°F for 15-18 minutes until golden. Brush with melted butter while warm for extra flavor!

- 3lb Prime Rib Roast Recipe: Juicy Pink Center Guaranteed in 3 Hours - October 31, 2026
- 5 Spice Cake Recipe: Warmly Spiced Layers With Crunchy Top - October 31, 2026
- 1950’s Macaroni and Cheese Recipe: Nostalgic Creamy Cheese Sauce with Buttery Noodles - October 31, 2026