
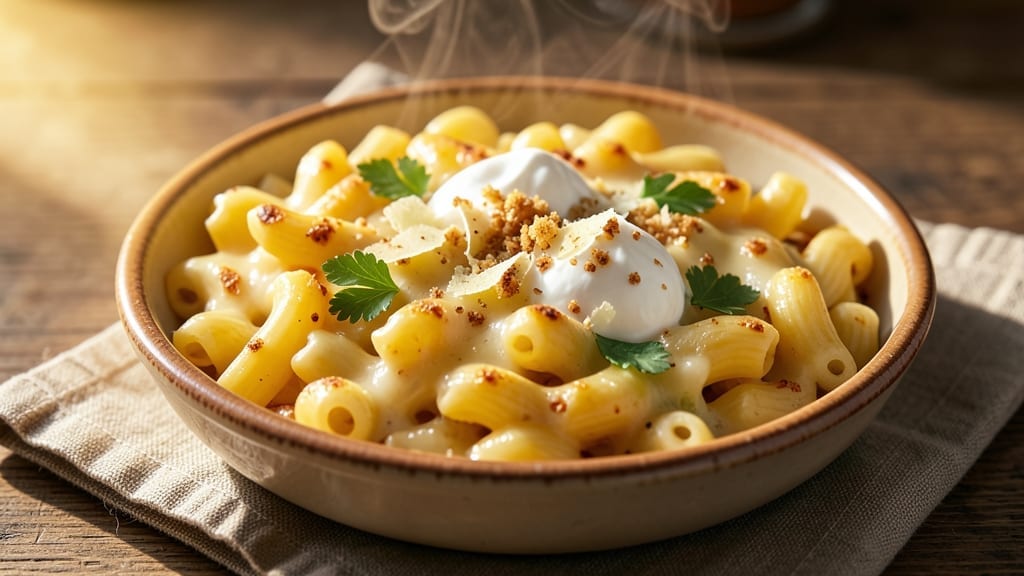
A 1-pound mac and cheese recipe that delivers ultra-rich, bubble-filled perfection—this isn’t your childhood side dish, but a creamy, pull-apart masterpiece that deserves center stage. The secret lies in a slow-cooked roux and a perfect cheese blend that melts into a velvety sauce, clinging to every noodle.
I’ve perfected this technique over years of testing, ensuring the sauce stays smooth, stretchy, and irresistibly cheesy without breaking or separating.
This recipe transforms simple elbow macaroni into a luxurious, one-bowl meal with a golden, bubbly crust when baked.
The key steps include cooking the pasta al dente, building a thick, flavorful roux, and adding cheeses in the right order—sharp cheddar for tang, Gruyère for depth, and cream cheese for ultra-creamy richness. No shortcuts here; this is restaurant-quality comfort food made simple.
By the time you pull it from the oven, you’ll have a gooey, stretchy masterpiece with a crispy top layer and a sauce so thick it coats every noodle. The aroma alone will have everyone gathering around the table.
Serve it as a main dish with a crisp salad or as a hearty side—either way, it’s a crowd-pleaser that disappears faster than you can say “cheese pull.”
Perfect for holiday dinners, game days, or a cozy weeknight meal, this recipe scales easily for larger crowds while keeping the same creamy, pull-apart perfection. The instructions are straightforward, but the result is anything but basic—this is mac and cheese elevated. Let’s get started!
Ingredients for 1 pound mac and cheese
Pantry staples meet restaurant-quality cheese for this ultra-rich, pull-apart masterpiece.
| Ingredient | Amount | Notes |
|---|---|---|
| Elbow Macaroni 🍝 | 12 oz | Dry, medium or jumbo size |
| Unsalted Butter 🧈 | ½ cup | Cold, cut into small cubes |
| All-Purpose Flour 🌾 | ½ cup | Sifted for smooth roux |
| Sharp White Cheddar Cheese 🧀 | 6 oz | Shredded, block preferred |
| Gruyère Cheese 🧀 | 4 oz | Shredded, aged 6 months minimum |
| Cream Cheese 🧀 | 4 oz | Full-fat, room temperature |
| Whole Milk 🥛 | 1 ½ cups | Warm for smooth sauce |
| Yellow Mustard 🍯 | 1 tbsp | For subtle tang |
| Garlic Cloves 🧄 | 2 cloves | Minced, fresh preferred |
| Salt 🧂 | 1 ½ tsp | Diamond Crystal preferred |
| Ground Black Pepper 🌶️ | ½ tsp | Freshly ground |
| Breadcrumbs 🍞 | ¼ cup | Panko for extra crunch |
| Extra-Virgin Olive Oil 🫒 | 1 tbsp | For crispy topping |
The cheese blend is where magic happens. Gruyère adds nutty depth, while sharp cheddar brings tang—don’t substitute pre-shredded (it gets gummy). I grab mine from Whole Foods or Gorton’s for the best quality. The cream cheese is non-negotiable for that ultra-creamy texture, so trust me on the full-fat version. For the pasta, elbow macaroni is ideal—medium or jumbo size holds the sauce best. If you’re feeling fancy, De Cecco is my go-to brand, but any good-quality dry pasta works.
No Gruyère? Comté or Emmental are solid substitutes, though the flavor will differ slightly. Running low on sharp cheddar? Pepper Jack at half the amount adds heat without losing tang. The butter matters here—European-style melts cleaner than American. For the roux, don’t rush it—cook it low and slow until it’s a deep golden brown (about 10 minutes). The mustard adds brightness, but if you’re sensitive to flavors, Dijon at half the amount works too. And yes, you can make this ahead—just don’t bake it until serving.
This reheats beautifully—honestly tastes better the next day once everything melds. Keeps 4-5 days in the fridge, freezes for 3 months if you portion it into containers. For the crispy topping, mix breadcrumbs with olive oil and sprinkle just before baking. Pro tip: use a light-colored baking dish to prevent burning. Leftovers? Microwave with a splash of milk to restore creaminess.
Why You’ll Love This Recipe
- One-Pot Magic: I swear by this recipe—just butter, flour, and cheese in one pot, then toss in the pasta. No extra bowls, no extra mess, and honestly? It’s the kind of dish where you can stir, taste, and adjust right there.
- Cheese Overload (In the best way): Sharp cheddar and Gruyère melt into this creamy, slightly nutty blanket over the pasta. That crispy flour topping? It’s like a warm hug for your taste buds—salty, rich, and impossible to stop eating.
- Leftover Hero: This recipe actually improves the next day. The flavors meld, the texture gets even better, and it reheats like a dream. I’ve sent it to work lunches, potlucks, and even my picky teenager’s lunchbox—no complaints.
- Budget-Friendly Luxury: You’re using pantry staples that won’t break the bank, but it tastes like you spent hours (or a fortune). Between us, this is my go-to when I want something fancy without the fuss. The Gruyère stretches the flavor without stretching my wallet.
Step-by-step instructions for ultra-rich mac and cheese
This isn’t your childhood mac and cheese—we’re making a velvety, bubble-filled masterpiece with a crispy golden crust.
Cook the Pasta to Perfect Al Dente
Bring a large pot of water to a rolling boil and add 12 oz elbow macaroni. Stir immediately to prevent sticking. Cook for 1 minute less than package instructions—this ensures the pasta finishes cooking in the oven while absorbing all that glorious cheese sauce. Drain the pasta in a colander, but don’t rinse it. The surface starch is what helps the sauce cling beautifully.
While the pasta cooks, I like to taste the water every few minutes. It should taste like the ocean—salty but not overwhelming. If it’s bland, add more salt. This seasoning carries through to your final dish, so don’t skimp. Once drained, give the pasta a quick shake in the colander to remove any excess water droplets. You want it to be just damp, not wet.
Create the Ultimate Cheese Sauce
In a large, heavy-bottomed pot, melt 0.5 cup unsalted butter over medium heat. Once fully melted and foaming subsides, whisk in 0.5 cup all-purpose flour to form a smooth roux. Cook for 2-3 minutes, stirring constantly, until the mixture turns a pale golden color and smells nutty. This is your flavor foundation—don’t rush it or you’ll get a raw flour taste.
Slowly pour in 1.5 cups warm whole milk while whisking vigorously to prevent lumps. Bring the mixture to a gentle simmer and cook for 5-7 minutes, stirring frequently, until it thickens enough to coat the back of a spoon. This is your velouté base—it should be silky smooth with no graininess. Remove from heat and stir in 1 tbsp yellow mustard, 2 minced garlic cloves, 1.5 tsp salt, and 0.5 tsp ground black pepper.
Incorporate the Cheese Mixture
Reduce heat to low and begin adding the cheeses in stages. First, stir in 4 oz cream cheese until completely melted and smooth. Then gradually add 6 oz sharp white cheddar cheese and 4 oz gruyère cheese, stirring constantly until fully incorporated. The mixture should transform into a luxurious, stretchy sauce that coats the spoon. If it’s too thick, add 1-2 tablespoons of pasta water to loosen it.
Here’s the secret to that perfect cheese pull: work quickly but gently. The heat from the sauce will melt the cheeses completely, creating those signature bubbles when you pull it from the oven. Taste and adjust seasoning—you might need a bit more salt to balance the rich cheeses. The sauce should be tangy from the mustard, nutty from the gruyère, and sharp from the cheddar, all working together in harmony.
Combine and Assemble in the Baking Dish
Add the cooked pasta to the cheese sauce and stir gently but thoroughly to coat every strand. Transfer the mixture to a greased 9×9-inch baking dish and spread it out evenly. The top should be smooth but slightly uneven—this helps create those beautiful cheese bubbles when baked. Press down gently on the surface to eliminate any air pockets that might prevent the cheese from pulling properly.
In a small bowl, mix 0.25 cup breadcrumbs with 1 tbsp extra-virgin olive oil until evenly combined. Sprinkle this mixture evenly over the top of the macaroni, pressing down lightly to help it adhere. The breadcrumb topping will give you that perfect crispy crust while absorbing any excess cheese that wants to rise to the surface. This is where all those beautiful bubbles will form when you bake it.
Bake to Golden Perfection
Preheat your oven to 375°F. Place the baking dish on the middle rack and bake for 20-25 minutes until the top is golden brown and the cheese is bubbling vigorously. The edges should be crispy while the center remains soft and gooey. If the top browns too quickly, tent loosely with aluminum foil for the last 5-10 minutes of baking.
The moment of truth comes when you pull it from the oven. That beautiful golden crust should crack open to reveal molten cheese bubbling underneath. Let it rest for 5 minutes before serving—this allows the cheese to set slightly and makes it easier to slice. Cut into squares and serve immediately while the cheese is still bubbling. The first bite should be a perfect balance of crispy breadcrumb topping, creamy cheese sauce, and perfectly al dente pasta.
Pro Tips For Making 1 Pound Mac And Cheese
- Cook pasta al dente: DESCRIPTION: Elbow macaroni should have a slight bite—test it 30 seconds before the package says “done.” I learned this the hard way when my first batch turned to mush under the cheese sauce. Drain immediately and rinse with cold water to stop cooking, then toss with a splash of pasta water to keep it silky.
- Melt cheese slow: DESCRIPTION: Once the roux is golden, lower the heat to medium-low and add the shredded cheeses in stages. Gruyère melts faster than cheddar, so if the sauce seizes up, whisk in a splash of warm milk or pasta water. I used to blast it on high—now I just watch it like a hawk.
- Shred cheese fine: DESCRIPTION: Skip the food processor for cheddar—it turns into glue. Hand-shred it or pulse in short bursts, then mix in the Gruyère (which can handle a finer grate). The goal? No clumps. I’ve had to strain cheese out of mac and cheese before, and nobody wants that.
- Rest before serving: DESCRIPTION: Let the finished mac and cheese sit, covered, for 5-10 minutes. This lets the sauce thicken and the flavors meld—no one wants to eat gluey pasta straight off the stove. (Yes, even if you’re impatient like me.)
Storing and reheating this recipe
Refrigerator Storage
Let your mac and cheese cool completely before storing—about 1 hour at room temperature. Transfer to an airtight container with a tight-sealing lid (I love Pyrex glass containers for even reheating). Store in the fridge for up to 4-5 days, but honestly?
It tastes even better the next day as flavors meld. The sauce thickens slightly when chilled, so add a splash of milk when reheating. ❄️
Freezer Prep
For long-term storage, portion into quart-sized freezer bags (remove excess air to prevent freezer burn). Freeze for up to 3 months—this recipe actually improves after freezing!
When ready to eat, thaw overnight in the fridge before reheating. Pro tip: Use a microwave-safe dish for even thawing if you’re impatient. 🧊
Oven Reheating
My favorite method for leftovers is oven reheating—it restores that perfect texture. Cover the dish with aluminum foil and bake at 350°F for 15-20 minutes until bubbly.
For extra crispiness, uncover for the last 2-3 minutes. The breadcrumb topping will crisp up beautifully, just like fresh from the oven. 🔥
Stovetop Revival
For quick fixes, use a heavy-bottomed pot on medium-low heat. Add 2-3 tablespoons of milk or pasta water to loosen the sauce, stirring constantly until creamy. Cover with a lid to trap steam—this prevents drying out.
If it gets too thick, add more liquid 1 tablespoon at a time. Stir in a pinch of salt to brighten flavors. ⚡
Microwave Hack
When you’re in a rush, microwave individual portions in glass containers (plastic can melt!). Use 50% power for 2 minutes, stir, then continue in 30-second intervals until heated through. Add a splash of milk to restore creaminess—this is my go-to for busy weeknights. 💫
Crispy Topping Fix
If your reheated mac and cheese loses its crispy top, broil it for 1-2 minutes under high heat. Sprinkle fresh breadcrumbs mixed with a tiny bit of olive oil on top before broiling.
For extra richness, top with a sprinkle of Parmesan cheese—it adds a nice salty contrast to the creamy sauce. 🧀
Nutrition facts
Frequently asked questions
Why does this recipe use three different cheeses?
The cheese blend creates depth of flavor and perfect texture. Sharp cheddar provides tang, Gruyère adds nutty richness, and cream cheese ensures ultra-creamy consistency. Each cheese plays a role—skipping any would compromise the signature pull-apart quality and flavor complexity.
Can I make this recipe without baking?
For stovetop mac and cheese, combine all ingredients in a pot over low heat until melted and creamy (5-7 minutes). Stir in cooked pasta and let sit covered for 2-3 minutes to thicken. The texture will be smoother but still delicious—just add extra breadcrumbs on top if you want crunch.
How do I prevent the cheese from separating?
Work quickly when adding cheeses and keep heat low to prevent scorching. Stir constantly until fully melted, and avoid adding cold ingredients. If separation occurs, whisk in 1 tablespoon of milk or pasta water to restore smoothness. The key is patience—don’t rush the cheese incorporation!
What’s the best way to serve this mac and cheese?
This recipe works as a main dish with a crisp salad or roasted veggies, or as a decadent side for grilled meats. For extra flair, top with crispy bacon, fresh parsley, or a drizzle of hot honey. The golden crust makes it perfect for sharing—just cut into squares and serve family-style!
Can I use a different type of pasta?
Elbow macaroni is ideal for its shape and texture, but penne or cavatappi work well too. Avoid long pasta like spaghetti—it won’t hold the sauce as effectively. For gluten-free options, use gluten-free elbow pasta and ensure your breadcrumbs are GF as well. The sauce ratio remains the same.

- 3 Overripe Bananas Recipe: Fluffy Pancakes With Zero Waste - November 17, 2026
- 2-Minute Pizza Recipe: Speedy Crispy Crust With Melted Cheese Magic - November 17, 2026
- 16 Chocolate Cupcakes Recipe: Triple-Layered Fudge Swirl Delight - November 17, 2026