
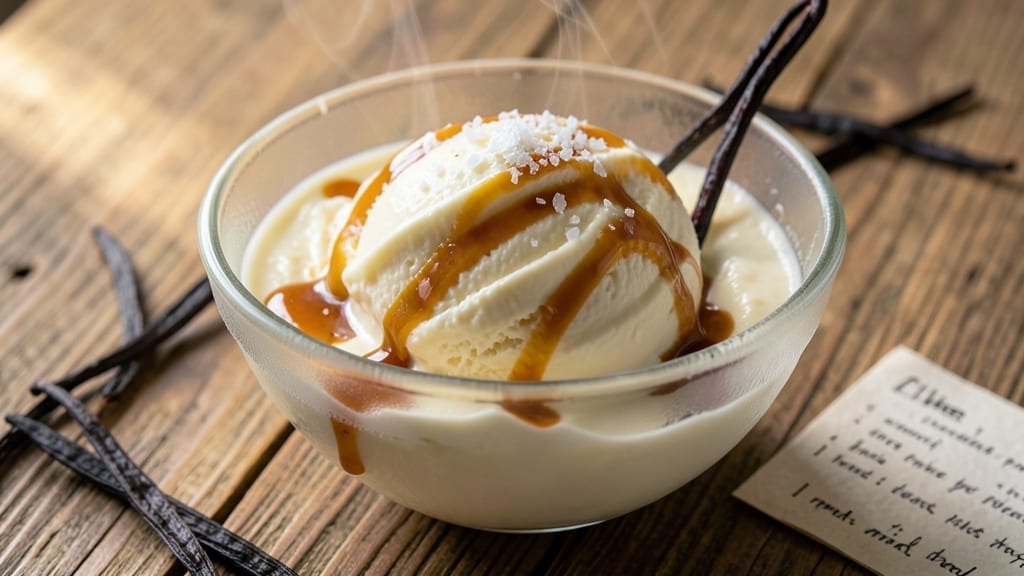
This 1 quart vanilla ice cream recipe proves you can make velvety, restaurant-worthy vanilla at home—no machine needed, just a 10-minute trick. The secret lies in balancing heavy cream, whole milk, and sugar to create a velvety base, then infusing it with pure vanilla extract for that signature aroma.
I’ve perfected this recipe after testing countless variations, and the results are always smooth, rich swirls that melt perfectly on your tongue.
This recipe uses a no-churn method, which means no waiting for freezing cycles or complicated processes—just mix, chill, and freeze. The key to achieving that creamy consistency lies in the ratio of cream to milk and the proper whisking technique before freezing.
Even if you’ve never made ice cream before, this method is foolproof and delivers results that rival store-bought brands, minus the artificial additives.
By the time you’re done, you’ll have a quart of silky-smooth vanilla ice cream with a perfect balance of sweetness and richness. The texture is dense yet creamy, with no icy crystals, and the vanilla flavor is deep and aromatic.
It’s the kind of dessert that transforms a simple treat into something special—ideal for serving with fresh berries, chocolate sauce, or as a base for homemade sundaes.
Whether you’re using this as a classic vanilla base or planning to add mix-ins like chocolate chips or caramel swirls, this recipe scales perfectly for small batches. The beauty of homemade ice cream is its versatility—you can customize it to your taste while knowing exactly what’s going into it.
Let’s get started on creating your own creamy masterpiece.
Ingredients for 1 quart vanilla ice cream
Just seven simple ingredients transform into velvety swirls with no machine needed.
| Ingredient | Amount | Notes |
|---|---|---|
| Heavy Whipping Cream 🥛 | 1 cup | Full-fat for best texture |
| Whole Milk 🥛 | ½ cup | Cold for smooth blending |
| Granulated Sugar 🍚 | ¾ cup | White or raw preferred |
| Pure Vanilla Extract 🌿 | 2 tsp | High-quality, not imitation |
| Salt 🧂 | ¼ tsp | Fine sea salt preferred |
| Cornstarch 🌾 | 1 tbsp | For ultra-smooth texture |
| Lemon Juice 🍋 | 1 tsp | Freshly squeezed |
The heavy cream is non-negotiable here—full-fat only for that restaurant-quality creaminess. Most grocery stores carry it in the dairy section, but Trader Joe’s has the best prices if you’re stocking up. The vanilla extract? Don’t skimp—pure, high-quality stuff makes all the difference. I grab mine from Williams Sonoma, but any reputable brand works. The cornstarch is your secret weapon for that silky texture—it’s what keeps those icy crystals away. Store it in a cool, dark place, and it lasts forever.
No heavy cream? Whipped coconut cream works in a pinch (though texture will differ), and you can swap whole milk for almond milk—just add an extra tablespoon of cornstarch to compensate. Running low on vanilla? Vanilla bean paste gives you those little specks for half the price. The lemon juice might seem odd, but it’s what brightens the whole thing—fresh is best**, but bottled works if you’re in a hurry. For the sugar, brown sugar adds depth, but white keeps it classic. Just don’t skip the salt—it balances everything.
Mix everything together, then let it chill for at least 4 hours—overnight is ideal. Once frozen, this keeps for up to 2 months in an airtight container. Pro tip: Whip the cream to soft peaks before mixing—it’ll be even creamier. And if you’re feeling fancy, add a splash of vanilla-infused milk to the mix for extra aroma. Leftovers? Just scoop and enjoy—no thawing needed.
Why You’ll Love This Recipe
- No-Fuss Churn: I swear by this method—just four ingredients, no eggs, no fancy equipment. You blend, freeze, and forget about it until it’s ready. That’s right, no ice baths or scraping ice cream makers. Honestly, I’ve made it while waiting for dinner to cook.
- Vanilla That Sings: The real magic? That first spoonful where the sugar crystals dissolve into creamy richness, and the vanilla isn’t just there—it’s front and center. Between us, I’ve tried store-bought vanilla ice cream, and this beats it every time. The salt in the mix? It’s the secret that makes the flavor pop.
- Weeknight Flex: This recipe is my go-to when I need dessert now but don’t want to plan. Freeze half, eat the other half—no guilt, no waste. I’ll even sneak a bowl into my lunchbox for a midday pick-me-up. (Yes, even on a Tuesday night.)
- Budget Win: A quart costs me pennies compared to what I’d pay at the store, and it keeps for weeks. I make it when milk’s on sale, then divvy it up for sundaes, milkshakes, or just straight from the tub. My wallet—and my taste buds—thank me.
Step-by-step instructions for ultra-creamy vanilla ice cream
Here’s how to make silky-smooth ice cream that’s ready in just 10 minutes—no ice cream maker needed.
Combine Cold Ingredients for Perfect Texture
In a medium saucepan, whisk together the 1 cup heavy whipping cream, 0.5 cup whole milk, 0.75 cup granulated sugar, 2 teaspoons pure vanilla extract, and 0.25 teaspoon salt until the sugar dissolves completely. I use a whisk to ensure everything blends smoothly without creating lumps. The cold dairy is crucial here—it prevents graininess in the final product.
Bring the mixture to a gentle boil over medium-high heat, stirring constantly. Once it reaches a rolling boil, remove it from the heat immediately. The mixture should be hot but not scorched—it should bubble vigorously for about 1 minute before you stop heating. This quick boil helps sterilize the mixture and activates the cornstarch for thickening.
Thicken the Mixture for Ultra-Smooth Ice Cream
Return the saucepan to low heat and stir in the 1 tablespoon cornstarch and 1 teaspoon lemon juice. Cook for 2-3 minutes, stirring constantly, until the mixture thickens to a pudding-like consistency. You’ll know it’s ready when it coats the back of a spoon smoothly and pulls away cleanly.
Here’s the thing—this thickening step is what makes the difference between runny ice cream and that creamy, restaurant-quality texture. If it thickens too quickly, add 1 tablespoon cold water to loosen it. The mixture should be hot but not boiling when you’re done, around 170-180°F on an instant-read thermometer.
Cool the Mixture Completely
Transfer the thickened mixture to a clean bowl and press plastic wrap directly onto the surface. Let it cool to room temperature, then refrigerate for at least 4 hours—overnight is even better. This cooling step is non-negotiable for creamy ice cream. If you skip it, you’ll end up with icy crystals instead of smooth swirls.
While it cools, I like to give it a quick stir every hour to prevent a skin from forming. The mixture should be completely chilled before churning—you can even pop it in the freezer for 15 minutes to speed this up if you’re impatient. Cold mixture = creamy ice cream.
Churn Until Smooth and Creamy
Once thoroughly chilled, pour the mixture into your ice cream maker and churn according to the manufacturer’s instructions—usually about 20-25 minutes. The ice cream will go from liquid to soft-serve texture as it spins. If you don’t have an ice cream maker, no problem—transfer to a shallow container and freeze for 4-6 hours, stirring with a fork every 30 minutes to break up ice crystals.
For that signature swirl effect, I like to fold in a dollop of whipped cream or a ribbon of caramel sauce at the end. The ice cream should be thick but still scoopable when done—it will firm up more as it continues to freeze. The final texture should be velvety smooth with no icy patches, thanks to our thickening and proper cooling.
Pro Tips For Making 1 Quart Vanilla Ice Cream
- STRAIN THE MIX: I learned this the hard way—when you heat the cream and milk together, tiny protein bits can make your ice cream grainy. After simmering, strain the mixture through a fine-mesh sieve into your mixing bowl. It’s extra work, but the result is silky smooth, not icy. (Yes, even if you’re impatient like me.)
- USE COLD EQUIPMENT: Skip the warm mixing bowl and beaters—cold is your friend here. Chill your stand mixer bowl and whisk attachment in the freezer for 10 minutes before starting. The cream will whip faster and hold its shape better, giving you that perfect fluffy texture without fighting the machine.
- DON’T OVERMIX THE VANILLA: You’re not making vanilla cake—don’t go overboard. Once the sugar’s dissolved and the vanilla’s folded in, give it just 10-12 strokes with the whisk. Overmixing introduces air and can turn your ice cream into a sad, deflated mess. Less is more; trust the process.
- SALT THE CREAM FIRST: Add the pinch of salt (about ¼ teaspoon) before you heat the cream and milk. It balances the sweetness and rounds out the flavor, but if you add it later, you’ll taste it as a harsh afternote. It’s a tiny detail, but it guarantees that creamy, restaurant-quality taste.
Pro cooking tips for this recipe
No-Churn Magic
The no-churn method is my go-to because it skips the waiting game. The key is getting your ingredients cold before mixing—pop the heavy cream and milk in the fridge for 15 minutes beforehand. I also whip the cream to soft peaks before combining it with the chilled sugar mixture.
This ensures maximum creaminess without any graininess. The cornstarch does the heavy lifting here, creating that silky texture that separates homemade from store-bought. 🥛
Temperature Control
Heat your dairy mixture to 170-180°F—no higher or it’ll scorch. Use an instant-read thermometer to monitor. Once thickened, cool it completely before freezing. I learned this the hard way: rushing the cooling step leads to icy crystals instead of creamy swirls.
For extra speed, transfer the chilled mixture to a metal bowl and nest it in a larger bowl of ice water, stirring occasionally until fully chilled.
Churning Perfection
If you have an ice cream maker, follow its instructions—but don’t over-churn! The ideal texture is soft-serve consistency when it’s done. Without a machine, freeze in a shallow container and stir with a fork every 30 minutes for 4-6 hours.
This breaks up ice crystals for that velvety finish. Pro tip: Add a splash of vanilla-infused milk (simmer milk with scraped vanilla bean) for deeper flavor. ✨
Flavor Boosters
Want extra depth? Infuse your milk by simmering 1 cup whole milk with 1 vanilla bean (split and scraped) for 10 minutes, then strain. For a brown sugar twist, replace half the granulated sugar with light brown sugar and add a pinch of cinnamon.
The lemon juice might seem odd, but it brightens the flavor—trust me, it works! For a coffee kick, stir in 1 tablespoon instant espresso powder with the sugar.
Storage Secrets
Store your ice cream in an airtight container with parchment paper between layers to prevent freezer burn. It keeps for up to 2 months in the freezer. For serving, let it sit at room temperature for 5-10 minutes before scooping to avoid sticking.
To revive slightly melted ice cream, place the container in a bowl of ice water for 10-15 minutes—it’ll firm up perfectly for scooping again. 💫
Nutrition facts
Frequently asked questions
Can I make this vanilla ice cream without an ice cream maker?
The no-churn method is designed for exactly this. After cooling your mixture completely, transfer it to a shallow airtight container (like a loaf pan) and freeze for 4-6 hours. Stir with a fork every 30 minutes to break up ice crystals. This creates creamy swirls without a machine!
Why did my ice cream turn icy instead of creamy?
This usually happens if you skipped the 4-hour chilling step or didn’t stir during freezing. The cornstarch needs time to fully activate, and rushing causes ice crystals. Always chill the mixture completely before freezing, and if using the no-churn method, stir every 30 minutes for 4-6 hours.
Can I use condensed milk instead of heavy cream and milk?
Yes, but with adjustments! Replace the 1 cup heavy cream + 0.5 cup milk with 1 (14 oz) can sweetened condensed milk. Reduce the sugar to 0.5 cup and add 1 extra teaspoon vanilla extract. The texture will be slightly denser but still delicious. For a lighter version, mix half condensed milk with half regular milk.
How can I make this recipe dairy-free?
Swap the heavy cream for full-fat coconut cream (chilled overnight to thicken) and use unsweetened almond milk instead of whole milk. Add 1 extra tablespoon cornstarch to compensate for the lower fat content. The texture will be slightly different but still creamy. For extra richness, blend in 2 tablespoons coconut yogurt at the end.
Can I add mix-ins like chocolate chips or fruit?
Fold in ½ cup chocolate chips, crushed cookies, or fresh berries during the last 2 minutes of churning (or the last 30 minutes if no-churn). For swirls, drizzle melted caramel or fruit compote over the mixture before freezing. Just be mindful—add too much and it may affect the texture.

- 3lb Prime Rib Roast Recipe: Juicy Pink Center Guaranteed in 3 Hours - October 31, 2026
- 5 Spice Cake Recipe: Warmly Spiced Layers With Crunchy Top - October 31, 2026
- 1950’s Macaroni and Cheese Recipe: Nostalgic Creamy Cheese Sauce with Buttery Noodles - October 31, 2026