
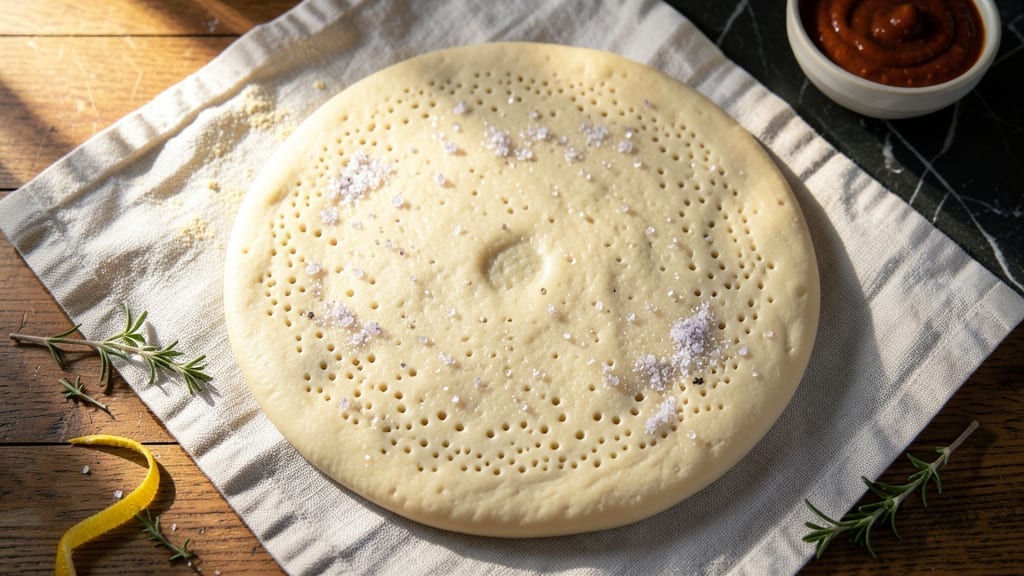
This 4-ingredient pizza dough recipe transforms your kitchen into a pizzeria with just flour, yeast, water, and a pinch of salt—no kneading, no fuss, and 15 minutes of active time.
The secret lies in a high-hydration dough that develops flavor during a quick rise, creating a crispy yet chewy crust perfect for any pizza style. I perfected this method after years of testing, and it never fails to impress, even with picky eaters.
The beauty of this recipe is its simplicity: no yeast activators, no oil, and no complicated steps. You’ll mix, let it rest for 30 minutes, then shape and bake—foolproof for beginners and pros alike.
The dough’s versatility means it works for classic Margherita, loaded veggie pies, or even flatbreads. No special tools required, just patience and a hot oven.
What you’ll end up with is a golden, bubbly crust with a satisfying snap and tender interior—restaurant-quality at home. The dough stays fresh for 3 days in the fridge or freezes beautifully for future pizzas.
Whether you’re feeding a crowd or craving a solo slice, this recipe delivers consistent results every time.
Ready to bake? Here’s everything you need to make dough that’s easier than store-bought but tastes infinitely better. Let’s get started!
Ingredients for 4 ingredients pizza dough
Four simple ingredients—flour, yeast, water, and salt—create restaurant-quality pizza dough in record time.
| Ingredient | Amount | Notes |
|---|---|---|
| All-Purpose Flour 🌾 | 3 ½ cups | High-protein preferred for chewiness |
| Active Dry Yeast 🍞 | ¼ tsp | Ensure it's fresh and active |
| Warm Water 💧 | 1 ½ cups | 110°F (43°C) for optimal activation |
| Fine Sea Salt 🧂 | 1 ½ tsp | Diamond Crystal preferred |
The flour is your foundation—King Arthur or Caputo Tipo 00 elevate texture, but all-purpose works in a pinch. Yeast is non-negotiable here; check expiration dates and test freshness by dissolving in warm water (should foam within 5 minutes). The water temperature matters: too hot kills yeast, too cold slows activation. 110°F is perfect—microwave for 30 seconds if unsure. Salt is the flavor anchor; Diamond Crystal dissolves better than table salt, but kosher works too. Store flour in a cool, dark place to preserve freshness.
No yeast? Instant yeast works 1:1, but active dry requires 5 minutes to dissolve first. Short on flour? Add 1 tbsp vital wheat gluten per cup for extra chewiness. Salt-free dough? Use half the amount, but taste before shaping—you may need more. The dough’s high hydration makes it sticky; wet hands or a dough scraper are essential for handling. For a tangy twist, replace 1 tbsp water with lemon juice—trust me, it’s worth it.
This dough stays fresh for 3 days wrapped in plastic in the fridge or 3 months frozen in portions. For freezing, shape into balls, place on a tray, freeze solid, then transfer to bags. Thaw overnight in the fridge before shaping. The dough doubles in size during its 30-minute rise, so don’t overcrowd the bowl. Shape and bake immediately after rising for best texture—no waiting!
Why You’ll Love This Recipe
- No-Pantry Needed: I’ll never stress over forgotten yeast packets again. Just flour, water, salt—stuff I always have—and a pinch of yeast. That’s it. No running to the store when hunger strikes.
- Crispy-Chewy Magic: The secret’s in the kneading (or lack of it). A quick stretch-and-fold gives you that perfect crust—crispy edges, pillowy center—every time. No fancy techniques, just results.
- Weeknight to Party Fix: Same dough, endless possibilities. Weeknights? Quick marinara and mozzarella. Game day? Load it up with buffalo chicken. Even my picky teen begs for seconds when I make this.
- Pantry Stash Gold: A pound of flour and a packet of yeast stretch to four pizzas—leftovers freeze like a dream. Half the cost of store-bought dough, and it tastes like I actually put in effort. (Between us, it’s the best kept secret.)
Step-by-step instructions for no-knead pizza dough
This dough comes together faster than you can say “pizza night” with just four ingredients.
Activate the Yeast in Warm Water
In a medium bowl, combine the 1.5 cups Warm Water with the 0.25 tsp Active Dry Yeast. Let it sit for 5 minutes until you see plenty of bubbles forming at the surface. This tells you the yeast is alive and ready to work its magic in your dough. If no bubbles appear, your yeast might be old—start over with fresh yeast.
I always check the water temperature first—it should feel warm to the touch but not hot. If it’s too hot, you’ll kill the yeast before it even gets started. The 110°F (43°C) target is perfect for gentle activation without shocking the yeast cells.
Mix in Flour and Salt
Add the 3.5 cups All-Purpose Flour and 1.5 tsp Fine Sea Salt to the yeast mixture. Using a wooden spoon or your hands, stir vigorously until a shaggy dough begins to form. You’ll notice the dough will be sticky and wet at first—that’s completely normal with this no-knead method.
I like to use a silicone spatula to scrape up any flour stuck to the bowl, ensuring every bit gets incorporated. The dough should pull away from the sides of the bowl but still feel tacky to the touch. If it’s too dry, add 1 teaspoon of warm water at a time until it reaches the right consistency.
Let the Dough Rest and Develop
Cover the bowl with a damp kitchen towel or plastic wrap and let the dough rest at room temperature for 1 hour. This is where the magic happens—the yeast slowly ferments, breaking down the gluten and creating that perfect pizza dough texture without any kneading.
During this time, I like to set a timer and check on it once. You’ll see the dough gradually rise and become less sticky as the gluten relaxes. The surface might develop small bubbles, which is a great sign. Don’t be tempted to peek too often—each time you lift the cover, you release heat and moisture that can slow down the process.
Shape and Prep the Dough
After the 1-hour rest, the dough should be noticeably puffier and easier to handle. Turn it out onto a lightly floured surface and gently press it down with your fingertips to remove any large air bubbles. The dough will still be quite soft and sticky, so don’t worry if it doesn’t look like traditional pizza dough.
Divide the dough into 4 equal portions (about 8 ounces each) and roll each piece into a ball. Place them on a parchment-lined baking sheet, cover with a damp towel, and let them rest for another 15 minutes. This final rest helps the gluten relax even more, making the dough easier to stretch later. The dough is now ready to be topped and baked!
Pro Tips For Making 4 Ingredients Pizza Dough
- Measure water precisely: Use a kitchen scale or measuring cup for the water—yeast needs exact hydration. I learned this after two doughs that were either gummy or dry; the yeast can’t handle guesswork, especially in a four-ingredient recipe where balance matters.
- Dissolve yeast first: Mix the yeast and warm water (105–110°F) in a small bowl before adding flour—this guarantees it activates fully. I used to sprinkle it dry and wondered why my dough never rose right. A quick stir here saves you from waiting for a second rise.
- Don’t rush the knead: Let the dough rest 20 minutes after mixing before handling—this relaxes the gluten so it stretches easier. I used to fight the dough, and it’d either tear or spring back like a rubber band. Patience here makes shaping effortless.
- Salt the water: Dissolve the sea salt in the warm water with the yeast—it distributes evenly and prevents bland spots. I skipped this once and ended up with a dough that tasted like flour. The salt also helps control yeast activity, so it doesn’t overproof.
Regional styles of this 4 ingredients pizza dough
New York Style
For that iconic thin, foldable crust, shape your dough balls into 12-inch rounds using a rolling pin or your hands. I press them gently from the center outward, rotating as I go, until they’re about ⅛-inch thick.
The key is to keep them loose—don’t overwork the dough. Bake at 550°F for 8-10 minutes on a preheated pizza stone or steel until the edges are golden and crisp. 🍕
Neapolitan Classic
Neapolitan pizza demands a high, puffy crust with charred edges. Shape your dough into 10-12-inch balls and let them rest uncovered for 10 minutes before stretching. I use a well-floured surface and my fingertips to stretch gently, focusing on the center.
Bake in a 900°F wood-fired oven (or your home oven’s highest setting) for 60-90 seconds—watch closely for that perfect blistering effect.
Chicago Deep Dish
This isn’t your typical pizza dough—it needs to be sturdy for layers. Roll your dough into a 12-inch circle and press it into a 1-inch-thick crust in a deep-dish pan. Let it rise for 20 minutes before adding your filling.
Bake at 425°F for 20-25 minutes until the crust is golden and the cheese is bubbly. The dough should hold its shape under all those toppings!
California Flatbread
For a thin, crispy base perfect for gourmet toppings, roll your dough into ¼-inch-thick circles and bake on a preheated stone at 500°F for 5-7 minutes. I love adding a brush of garlic-infused olive oil before baking for extra flavor.
This style works beautifully with fresh, light toppings like arugula, goat cheese, and prosciutto.
Roman Pizza al Taglio
Roman-style pizza is rectangular and baked in a rectangular pan. Divide your dough into 4 equal pieces and roll each into a 10×14-inch rectangle. Press gently to create ridges along the edges for that classic look.
Bake at 500°F for 10-12 minutes until the crust is crispy and golden. Serve in squares for easy sharing!
Sicilian Sfincione
This thick, focaccia-like pizza is baked in a round pan. Press your dough into a 1-inch-thick crust in a 12-inch cast-iron skillet and let it rise for 30 minutes. Bake at 400°F for 25-30 minutes until the top is golden and crispy.
The high hydration of this dough makes it perfect for soaking up rich tomato sauces and olive oil.
Nutrition facts
Frequently asked questions
Why does this dough recipe only need 4 ingredients?
This recipe uses a high-hydration dough (more water relative to flour) that develops flavor and texture through a 1-hour rest rather than kneading. The yeast activates fully, and the salt enhances flavor without needing extra fats or sweeteners. This minimalist approach still creates a crispy-chewy crust with restaurant-quality results!
Can I make this dough without a kitchen scale?
The recipe uses cups for easy measuring. For the 8-ounce dough balls, use your hands: a standard baseball-sized ball weighs about 8 ounces. If you don’t have measuring cups, 1 cup flour ≈ 120 grams (about the weight of a standard soda can).
What if my dough doesn’t rise after 1 hour?
Check your yeast first—it may be old. Try dissolving ½ tsp yeast in ¼ cup warm water for 5 minutes; if no bubbles form, replace it. Also, ensure your kitchen is 70-75°F (yeast works best in warm environments). If it’s cold, place the dough in a slightly warmer spot (like near the oven with the light on).
How do I store leftover dough?
Wrap the dough tightly in plastic wrap and store it in the fridge for up to 3 days or freeze for 3 months. To thaw, place the frozen dough in the fridge overnight. For best texture, let it sit at room temperature for 30 minutes before shaping. Refrigerated dough may need a 10-minute rise before baking.
Can I use whole wheat flour instead?
Yes, but replace half the all-purpose flour with whole wheat for a nuttier flavor. Add 1 extra tablespoon of water since whole wheat absorbs more moisture. The dough will be denser, so bake it 2-3 minutes longer at 500°F for a crispier crust. For a lighter texture, use white whole wheat flour.

- 3lb Prime Rib Roast Recipe: Juicy Pink Center Guaranteed in 3 Hours - October 31, 2026
- 5 Spice Cake Recipe: Warmly Spiced Layers With Crunchy Top - October 31, 2026
- 1950’s Macaroni and Cheese Recipe: Nostalgic Creamy Cheese Sauce with Buttery Noodles - October 31, 2026