
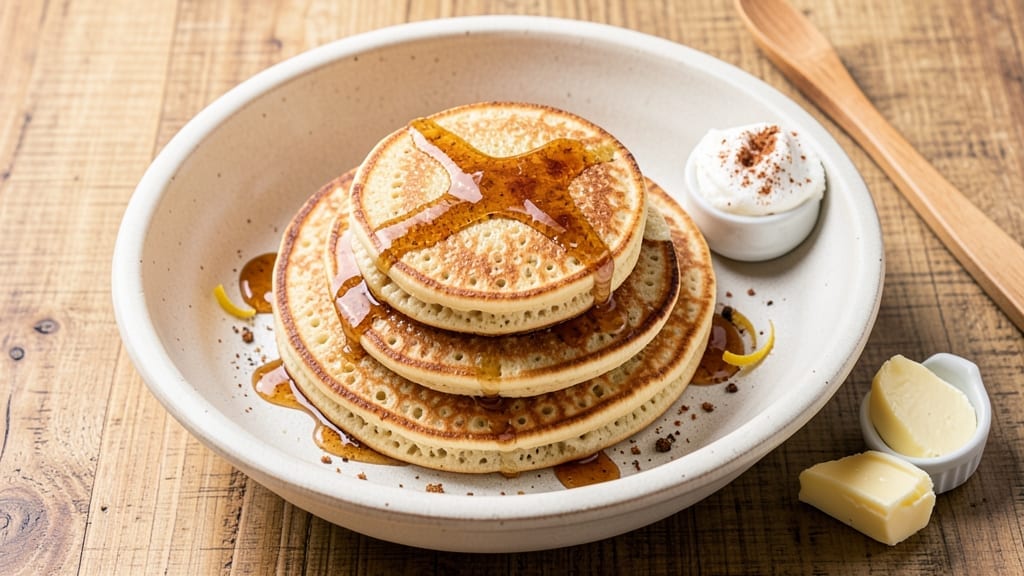
A 1-to-1 gluten-free flour pancake recipe that delivers fluffy, golden stacks without compromise—no weird aftertastes or dense crumb. This isn’t a compromise; it’s the same light-as-air texture you crave, just adapted for gluten-free diets.
The secret lies in a carefully balanced blend that mimics traditional flour while keeping every pancake tender and crisp at the edges.
What sets this recipe apart is the 10-minute timeline from mixing to serving, using only 5 simple ingredients you likely already have. No special equipment, no waiting hours for the batter to rest—just a quick whisk, a hot pan, and perfectly cooked pancakes every time.
The batter stays stable, so you won’t end up with a gloppy mess or burnt edges if you flip too soon.
By the time you’re done, you’ll have a stack of golden, fluffy pancakes with that classic buttermilk tang, ready to be topped with maple syrup, fresh berries, or whipped cream.
The best part? These taste just like the original—no one will guess they’re gluten-free. They’re foolproof, restaurant-quality, and perfect for breakfast or brunch.
This recipe works for any gluten-free flour blend (almond, oat, or store-bought mixes), so you can customize it to your dietary needs. Whether you’re avoiding gluten or just curious to try something new, these pancakes are the answer. Let’s get cooking—your first stack will be ready before you know it.
Ingredients for 1 to 1 gluten free flour pancake
Five simple ingredients transform into golden, fluffy pancakes—light as air and foolproof every time.
| Ingredient | Amount | Notes |
|---|---|---|
| Gluten-Free All-Purpose Flour Blend 🌾 | 1 ½ cups | Almond or oat-based preferred for texture |
| Large Eggs 🥚 | 2 whole | Room temperature for even mixing |
| Unsalted Butter 🧈 | ½ cup | Melted and cooled to room temperature |
| Buttermilk 🥛 | 1 ¼ cups | Substitute with 1 cup milk + 1 tbsp vinegar |
| Pure Maple Syrup 🍁 | 1 tbsp | For natural sweetness and moisture |
| Baking Powder 🍞 | 1 ½ tsp | Ensures light, airy texture |
| Vanilla Extract 🌿 | 1 tsp | Pure extract for authentic flavor |
| Salt 🧂 | ½ tsp | Diamond Crystal preferred for balance |
| Coconut Oil 🥥 | 1 tbsp | For nonstick cooking surface |
The gluten-free flour blend is the foundation here. King Arthur or Bob’s Red Mill are my go-tos—they’re finely milled and designed for baking. If you’re using almond flour, add an extra 0.25 cup of oat flour to mimic the protein structure of wheat. Freshness matters: check your flour’s date—older blends can taste bitter. For the eggs, grab the large size from the coldest part of the fridge, but let them sit out for 10 minutes before cracking. Room-temperature eggs blend smoother and create a more stable batter. The butter? European-style if you can find it—it has a higher fat content, which gives those pancakes that perfect crisp edge.
No buttermilk? Mix 1 cup milk with 1 tbsp vinegar or lemon juice, let it sit for 5 minutes, and you’re good to go. The vanilla extract should be pure—Nestlé or McCormick are solid choices, but avoid imitation flavors. For the maple syrup, Grade A dark amber adds depth, but any pure syrup will work. Swapping in agave nectar? Use half the amount—it’s sweeter. The baking powder is non-negotiable for that light texture, but if you’re out, baking soda plus 1 tsp cream of tartar works in a pinch. And if you’re cooking on a nonstick pan, skip the coconut oil—just a light spray of avocado oil will do.
This batter stays stable for up to 24 hours in the fridge, so double it if you’re feeding a crowd. To reheat, pop pancakes in a 350°F oven for 5 minutes—they’ll taste fresh. The coconut oil? Store it in a cool, dark place—it’s sensitive to heat. If you’ve got leftover batter, freeze it in ice cube trays for single-serving pancakes later. Pro tip: keep a small container of powdered sugar and extra maple syrup on hand—they’re your best friends for quick toppings.
Why You’ll Love This Recipe
- Five-Ingredient Magic: I swear by this ratio—just flour, eggs, butter, buttermilk, and a drizzle of maple syrup. No fussing with xanthan gum or weird substitutions; it’s the closest thing to classic pancakes without the gluten.
- Maple-Butter Bliss: That first golden flip? The butter pools on top, then the syrup ties it all together—rich, caramelized, and just sweet enough. Honestly, I’ve never missed regular flour in a stack this good.
- Breakfast or Brunch Fix: Make a double batch on Sunday, reheat in the toaster, or serve with fruit for a brunch crowd. The buttermilk keeps them tender even after sitting overnight—my kids’ go-to for lazy mornings.
- Zero-Waste Leftovers: Pancakes dry out fast, but these? I’ll freeze them in a single layer, then toast straight from frozen. No soggy bottoms, no wasted ingredients—just pure convenience with every bite.
Step-by-step instructions for light-as-air gluten-free pancakes
Here’s how to transform your gluten-free flour blend into fluffy, golden stacks with minimal effort.
Whisk Wet Ingredients Until Smooth
In a large mixing bowl, combine the 1.25 cups buttermilk, 1 tbsp pure maple syrup, and 1 tsp vanilla extract. Let it sit for 2 minutes while you prepare the remaining ingredients—this allows the vanilla to fully infuse. Then add the 2 whole large eggs and whisk vigorously for 30 seconds until fully incorporated. The mixture should look uniform with no visible streaks of egg.
Next, melt the 0.5 cup unsalted butter in a microwave-safe bowl for 30 seconds, then let it cool to room temperature. This prevents the batter from becoming too warm, which can cause the pancakes to spread excessively. Once cooled, stir it into the wet mixture until completely smooth. The batter should be slightly thicker than heavy cream but still pourable.
Gently Fold in Dry Ingredients
In a separate bowl, sift together the 1.5 cups gluten-free all-purpose flour blend, 1.5 tsp baking powder, and 0.5 tsp salt. This ensures even distribution of the baking powder, which is crucial for achieving that light, airy texture. Make a well in the center of the dry ingredients and pour in the wet mixture. Using a rubber spatula, gently fold everything together just until combined—you should still see some flour streaks. Overmixing develops gluten and can make your pancakes dense.
Here’s the thing—gluten-free batters can be tricky. To help with binding, I like to let the batter rest for 5 minutes before cooking. This gives the flour blend time to hydrate fully and creates a more stable structure. Cover the bowl with plastic wrap and let it sit while you heat your pan.
Heat the Pan and Cook Perfect Pancakes
Place a nonstick skillet over medium heat and add the 1 tbsp coconut oil. Swirl it around to coat the entire surface evenly—this prevents sticking and creates a nonstick barrier. When the oil is shimmering (about 30 seconds), pour ¼ cup batter into the center of the pan. Immediately reduce heat to medium-low—this gentle heat ensures even cooking without burning the outside before the inside is done.
Cook the pancake until bubbles form on the surface and the edges look set (2-3 minutes). Here’s where it gets fun—flip carefully using a thin spatula. You’ll know it’s ready when the edges lift easily and the center looks mostly cooked. Return to the pan and cook for another 1-2 minutes until golden brown. Repeat with the remaining batter, keeping cooked pancakes warm in a 200°F oven while you finish the batch.
Serve Warm with Your Favorite Toppings
Transfer the pancakes to a plate and serve immediately while they’re still warm and tender. The secret to perfect gluten-free pancakes is serving them right away—they firm up quickly as they cool. Top with fresh berries, a drizzle of maple syrup, or a dollop of whipped cream. For extra decadence, sprinkle with chopped nuts or a dusting of powdered sugar.
Real talk: these pancakes hold their shape beautifully without being dry or crumbly. The coconut oil gives them a subtle richness, while the buttermilk keeps them moist. And because we used a high-quality gluten-free flour blend, they have that satisfying chew without being gummy. Enjoy your stack while it’s hot!
Pro Tips For Making 1 To 1 Gluten Free Flour Pancake
- Rest the Batter: Let the gluten-free mix sit for 10-15 minutes after mixing—yes, even if you’re eager to cook. I used to skip this and ended up with pancakes that spread like thin, sad crepes instead of holding their shape. The flour blend needs time to hydrate properly, and the batter will actually thicken just enough to behave.
- Melt Butter Slowly: Warm your butter in the pan until it’s foamy but not browned—gluten-free pancakes burn faster than wheat-based ones. I learned this the hard way after walking away for two minutes and coming back to crispy, bitter edges. Keep the heat medium-low and add more butter if needed; these pancakes deserve it.
- Measure Buttermilk Precisely: Use a scale or liquid measuring cup for the buttermilk—gluten-free flour is finicky about ratios. I once eyeballed it and ended up with a batter so thin it turned into pancake soup. For 1 cup of flour, stick to ¾ cup buttermilk (or the recipe’s exact measurement) to avoid gummy or dry results.
- Test Doneness with a Fork: Skip the flip test—gluten-free pancakes don’t always bubble like wheat ones. Instead, slide a fork into the center; if it comes out clean (no wet batter), it’s done. I used to flip too early and got raw centers, or too late and ended up with dry pancakes. Medium-golden is the sweet spot.
Best sauces and condiments for this 1 to 1 gluten free flour pancake
Classic Maple Syrup
Nothing beats the pure, rich flavor of Grade A dark amber maple syrup drizzled warm over your pancakes. I recommend Wyman’s or Citadelle for that authentic Vermont taste—both have a perfect balance of sweetness and depth.
For a lighter option, try Grade B (it’s smokier and less sweet). Start with 2 tablespoons per pancake, then adjust to taste. 🍁
Whipped Cream Magic
Freshly whipped heavy cream with a pinch of vanilla sugar takes these pancakes to the next level. For extra flair, fold in 1 teaspoon of powdered sugar and a splash of vanilla extract before whipping.
Store-bought is fine, but homemade is worth the effort—just chill your bowl and beaters beforehand. A dollop on top adds a cloud-like texture that contrasts beautifully with the pancakes’ crisp edges.
Berries and Bramble
Fresh or thawed mixed berries (strawberries, blueberries, raspberries) add a burst of color and tartness that cuts through the richness. I like to toss them in 1 teaspoon of honey and a pinch of salt before serving.
For a summer twist, try peaches or plums, lightly grilled and sliced. If using frozen berries, microwave them for 20 seconds to soften before serving—they’ll release juices that make every bite juicier.
Nutty Crunch Toppings
Toasted pecans or walnuts add a satisfying crunch. Pulse ½ cup nuts in a food processor until finely chopped, then toast in a dry pan over medium heat for 3-4 minutes until fragrant. Sprinkle over pancakes just before serving so they stay crisp.
For a savory-sweet combo, try candied bacon bits—simmer 4 slices bacon with 1 tablespoon maple syrup and 1 teaspoon brown sugar for 10 minutes until caramelized. 🌟
Chocolate Lover’s Twist
Melt 2 ounces of dark chocolate (70% cocoa) with 1 tablespoon coconut oil over a double boiler, then drizzle over pancakes. For a chocolate-hazelnut version, mix in 1 teaspoon Nutella and let it warm slightly.
Top with crushed hazelnuts for extra texture. If you’re feeling fancy, add a dash of sea salt to enhance the chocolate’s flavor—trust me, it’s a game-changer.
Cream Cheese Swirl
For a decadent brunch treat, mix 2 ounces cream cheese with 1 tablespoon powdered sugar and ½ teaspoon vanilla extract until smooth. Drop spoonfuls onto pancakes before serving, then swirl with a knife.
The cream cheese adds a tangy richness that pairs perfectly with the buttery pancakes. Serve with a raspberry compote on the side to balance the flavors.
Nutrition facts
Frequently asked questions
Can I make these gluten-free pancakes with almond flour only?
Almond flour works but needs a helper! Use 1.25 cups almond flour plus 0.25 cup oat flour to mimic wheat’s protein structure. The oat flour adds moisture and prevents dryness. If you skip it, expect slightly denser pancakes—great for texture lovers but not as fluffy.
Why do my gluten-free pancakes turn out gummy?
Overmixing or old flour are the usual culprits. Whisk just until combined (5-6 strokes) and use fresh flour blends (check dates!). Also, let the batter rest 5 minutes before cooking—this hydrates the flour properly and prevents a gummy texture.
Can I substitute dairy-free butter or milk?
Use dairy-free butter (like Earth Balance) and unsweetened almond milk with 1 tbsp vinegar to mimic buttermilk. For extra richness, add 1 tbsp coconut cream to the batter. The texture stays light, but flavor may be slightly less tangy—adjust sweetness if needed.
How do I keep these pancakes warm for a brunch crowd?
Preheat your oven to 200°F and place finished pancakes on a wire rack over a baking sheet. They’ll stay warm for 20-30 minutes without drying out. For extra insurance, wrap them in a clean kitchen towel—it traps steam and keeps them soft.
What’s the best gluten-free flour blend for this recipe?
King Arthur or Bob’s Red Mill 1:1 baking flour are my top picks—they’re finely milled and designed for baking. For nut-free options, try oat flour-based blends*. If using almond flour, reduce other liquids by 2 tablespoons to prevent stickiness.

- 3lb Prime Rib Roast Recipe: Juicy Pink Center Guaranteed in 3 Hours - October 31, 2026
- 5 Spice Cake Recipe: Warmly Spiced Layers With Crunchy Top - October 31, 2026
- 1950’s Macaroni and Cheese Recipe: Nostalgic Creamy Cheese Sauce with Buttery Noodles - October 31, 2026